User Manual
Page 5
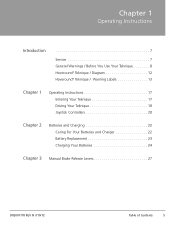
Chapter 1 Operating Instructions Introduction 7 Service 7 General Warnings / Before You Use Your Teknique 8 Hoveround® Teknique / Diagram 12 Hoveround® Teknique / Warning Labels 13 Chapter 1 Operating Instructions 17 Entering Your Teknique 17 Driving Your Teknique 18 Joystick Controllers 20 Chapter 2 Batteries and Charging 22 Caring For Your Batteries and Charger 22 Battery Replacement 23 Charging Your Batteries 24 Chapter 3 Manual Brake Release Levers 27 D82007778 REV N 7/10/12 Table of Contents 5
Chapter 1 Operating Instructions Introduction 7 Service 7 General Warnings / Before You Use Your Teknique 8 Hoveround® Teknique / Diagram 12 Hoveround® Teknique / Warning Labels 13 Chapter 1 Operating Instructions 17 Entering Your Teknique 17 Driving Your Teknique 18 Joystick Controllers 20 Chapter 2 Batteries and Charging 22 Caring For Your Batteries and Charger 22 Battery Replacement 23 Charging Your Batteries 24 Chapter 3 Manual Brake Release Levers 27 D82007778 REV N 7/10/12 Table of Contents 5
User Manual
Page 23
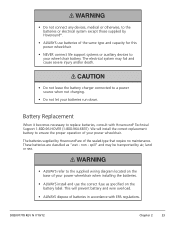
...and may fail and cause severe injury and/or death. • Do not leave the battery charger connected to a power source when not charging. • Do not let your power wheelchair. These batteries are of the same type and capacity for this power wheelchair. • NEVER connect ...23 • Do not connect any devices, medical or otherwise, to the batteries or electrical system except those supplied by Hoveround®. • ALWAYS use the correct fuse as "wet - The batteries supplied by Hoveround® are classified as specified on the base of your power wheelchair when ...
...and may fail and cause severe injury and/or death. • Do not leave the battery charger connected to a power source when not charging. • Do not let your power wheelchair. These batteries are of the same type and capacity for this power wheelchair. • NEVER connect ...23 • Do not connect any devices, medical or otherwise, to the batteries or electrical system except those supplied by Hoveround®. • ALWAYS use the correct fuse as "wet - The batteries supplied by Hoveround® are classified as specified on the base of your power wheelchair when ...
User Manual
Page 24
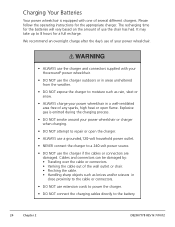
... based on the amount of any sparks, high heat or open the charger. • ALWAYS use a grounded,120-volt household power outlet. • NEVER connect the charger to 8 hours for the appropriate charger. Charging Your Batteries Your power wheelchair is emitted during the charging process. • DO... power source. • DO NOT use the chair has had. Explosive gas is equipped with your Hoveround® power wheelchair. • DO NOT use extension cords to power the charger. • DO NOT connect the charging cables directly to the battery. 24 Chapter 2 D82007778 REV N 7/10/12
... based on the amount of any sparks, high heat or open the charger. • ALWAYS use a grounded,120-volt household power outlet. • NEVER connect the charger to 8 hours for the appropriate charger. Charging Your Batteries Your power wheelchair is emitted during the charging process. • DO... power source. • DO NOT use the chair has had. Explosive gas is equipped with your Hoveround® power wheelchair. • DO NOT use extension cords to power the charger. • DO NOT connect the charging cables directly to the battery. 24 Chapter 2 D82007778 REV N 7/10/12

User Manual
Page 25
... along with the three holes on the front of battery. • DO NOT attempt to charge any other type of battery or any electrical or other equipment. • DO NOT attempt to charge a frozen battery. 1. Make sure the plug is in the charger port. Select a clean, dry, cool, well ...the joystick controller in place. Figure 2A - Charger Port, Typical Location D82007778 REV N 7/10/12 Chapter 2 25 Do not attempt to use the charger. 2. Refer to charge AGM sealed lead acid batteries. If it is not pushed all the way, the batteries will not charge or the plug may become ...
... along with the three holes on the front of battery. • DO NOT attempt to charge any other type of battery or any electrical or other equipment. • DO NOT attempt to charge a frozen battery. 1. Make sure the plug is in the charger port. Select a clean, dry, cool, well ...the joystick controller in place. Figure 2A - Charger Port, Typical Location D82007778 REV N 7/10/12 Chapter 2 25 Do not attempt to use the charger. 2. Refer to charge AGM sealed lead acid batteries. If it is not pushed all the way, the batteries will not charge or the plug may become ...

User Manual
Page 26
...plugged into a 120-volt grounded household power outlet. 6. Switch the power on . When the batteries are charged, and/or you have a: Flying Power FY-4101 Charger 1. A light will illuminate on the output side of the charger, indicating power is equipped with an on/off button, turn OFF the power switch on , ...the charger is in the charge mode and the cable is red, the batteries are charged. 26 Chapter 2 D82007778 REV N 7/10/12 If your charger is available. If the light does not go on , please check to make ...
...plugged into a 120-volt grounded household power outlet. 6. Switch the power on . When the batteries are charged, and/or you have a: Flying Power FY-4101 Charger 1. A light will illuminate on the output side of the charger, indicating power is equipped with an on/off button, turn OFF the power switch on , ...the charger is in the charge mode and the cable is red, the batteries are charged. 26 Chapter 2 D82007778 REV N 7/10/12 If your charger is available. If the light does not go on , please check to make ...

User Manual
Page 44
... the drive when released. • Check that chair cannot be 45-50 psi.). • Check that casters are tight. • Check charger cords and connectors for loose connections, damaged cables or signs of electrical damage. • Check that the seat swivel lock engages and holds (... pivot. • Check that caster wheels rotate freely. • Check manual brake releases. Owner Maintenance Daily • Check drive tires. • Charge batteries (or as required). • Check that the seat belt latches and does not show signs of wear or improper latching. 44 Chapter 8 D82007778 REV ...
... the drive when released. • Check that chair cannot be 45-50 psi.). • Check that casters are tight. • Check charger cords and connectors for loose connections, damaged cables or signs of electrical damage. • Check that the seat swivel lock engages and holds (... pivot. • Check that caster wheels rotate freely. • Check manual brake releases. Owner Maintenance Daily • Check drive tires. • Charge batteries (or as required). • Check that the seat belt latches and does not show signs of wear or improper latching. 44 Chapter 8 D82007778 REV ...
User Manual
Page 54
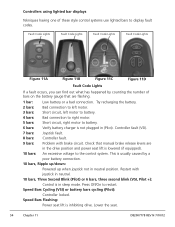
... Bars Flashing: Power seat lift is usually caused by counting the number of these style control systems use lighted bars to battery. 6 bars: Verify battery charger is not plugged in the drive position and power seat lift is in neutral position. Lower the seat. 54 Chapter 11...Restart with brake circuit. Check that are in (Pilot). Controllers using lighted bar displays Tekniques having one of bars on the battery gauge that manual brake release levers are flashing. 1 bar: Low battery or a bad connection. This is inhibiting drive. Fault Code Lights Fault Code Lights ...
... Bars Flashing: Power seat lift is usually caused by counting the number of these style control systems use lighted bars to battery. 6 bars: Verify battery charger is not plugged in the drive position and power seat lift is in neutral position. Lower the seat. 54 Chapter 11...Restart with brake circuit. Check that are in (Pilot). Controllers using lighted bar displays Tekniques having one of bars on the battery gauge that manual brake release levers are flashing. 1 bar: Low battery or a bad connection. This is inhibiting drive. Fault Code Lights Fault Code Lights ...


