
User Manual
Page 1
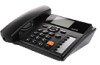
HUAWEI B160 Fixed Wireless Terminal USER GUIDE
HUAWEI B160 Fixed Wireless Terminal USER GUIDE
User Manual
Page 2
... CONTENTS OF THIS MANUAL ARE PROVIDED "AS IS". No part of Huawei Technologies Co., Ltd. Notice Some features of the product and its accessories described herein rely on the software installed, capacities and settings of their respective owners. Copyright © Huawei Technologies Co., Ltd. 2009. are trademarks or registered trademarks of Huawei Technologies Co., Other trademarks, product, service and company names...
... CONTENTS OF THIS MANUAL ARE PROVIDED "AS IS". No part of Huawei Technologies Co., Ltd. Notice Some features of the product and its accessories described herein rely on the software installed, capacities and settings of their respective owners. Copyright © Huawei Technologies Co., Ltd. 2009. are trademarks or registered trademarks of Huawei Technologies Co., Other trademarks, product, service and company names...
User Manual
Page 3
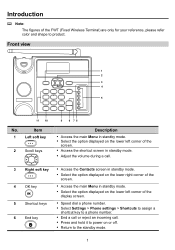
... reference, please refer color and shape to power on the lower left corner of the screen. y Select Settings > Phone settings > Shortcuts to assign a shortcut key to the standby mode. 1 y Select the option displayed on or off. y Return to a phone number. 6 End key y End a call or reject an incoming call . 3 Right soft key y Access the Contacts screen in standby mode. Introduction Note: The figures of the screen. 4 OK key y Access the main Menu in standby mode. y Adjust the volume...
... reference, please refer color and shape to power on the lower left corner of the screen. y Select Settings > Phone settings > Shortcuts to assign a shortcut key to the standby mode. 1 y Select the option displayed on or off. y Return to a phone number. 6 End key y End a call or reject an incoming call . 3 Right soft key y Access the Contacts screen in standby mode. Introduction Note: The figures of the screen. 4 OK key y Access the main Menu in standby mode. y Adjust the volume...
User Manual
Page 4
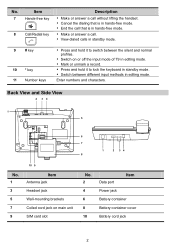
... Description 7 Hands-free key y Make or answer a call . y Switch on main unit SIM card slot No. 2 4 6 8 10 Data port Item Power jack Battery container Battery container cover Battery cord jack 2 Back View and Side View 2 34 1 5 6 7 1 2 34 8 No. 1 3 5 7 9 10 9 Item Antenna jack Headset jack Wall-mounting brackets Coiled cord jack on or off the input mode of T9 in standby mode. y End the call that is in...
... Description 7 Hands-free key y Make or answer a call . y Switch on main unit SIM card slot No. 2 4 6 8 10 Data port Item Power jack Battery container Battery container cover Battery cord jack 2 Back View and Side View 2 34 1 5 6 7 1 2 34 8 No. 1 3 5 7 9 10 9 Item Antenna jack Headset jack Wall-mounting brackets Coiled cord jack on or off the input mode of T9 in standby mode. y End the call that is in...
User Manual
Page 5
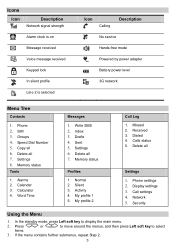
... silent profile Line 2 is selected Icon Calling Description No service Hands-free mode Powered by power adapter Battery power level 3G network Menu Tree Contacts 1. Phone 2. My profile 1 5. Press or to move around the menus, and then press Left soft key to display the main menu. 2. If the menu contains further submenus, repeat Step 2. 3 Delete all 6. Write SMS 2. Copy all 7. Missed 2. Delete all 7. Delete all Settings 1. Silent 3. Settings 8. Calculator 4. Inbox 3. Groups 4. Drafts 4. Security Using the Menu 1. Word Time Messages 1.
... silent profile Line 2 is selected Icon Calling Description No service Hands-free mode Powered by power adapter Battery power level 3G network Menu Tree Contacts 1. Phone 2. My profile 1 5. Press or to move around the menus, and then press Left soft key to display the main menu. 2. If the menu contains further submenus, repeat Step 2. 3 Delete all 6. Write SMS 2. Copy all 7. Missed 2. Delete all 7. Delete all Settings 1. Silent 3. Settings 8. Calculator 4. Inbox 3. Groups 4. Drafts 4. Security Using the Menu 1. Word Time Messages 1.
User Manual
Page 6
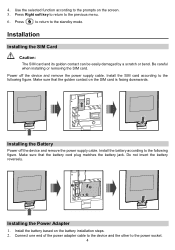
... card and its golden contact can be easily damaged by a scratch or bend. Be careful when installing or removing the SIM card. Installing the Battery Power off the device and remove the power supply cable. Install the battery based on the screen. 5. Make sure that the battery cord plug matches the battery jack. Do not insert the battery reversely. 4. Use the selected function according to the standby mode.
... card and its golden contact can be easily damaged by a scratch or bend. Be careful when installing or removing the SIM card. Installing the Battery Power off the device and remove the power supply cable. Install the battery based on the screen. 5. Make sure that the battery cord plug matches the battery jack. Do not insert the battery reversely. 4. Use the selected function according to the standby mode.
User Manual
Page 7
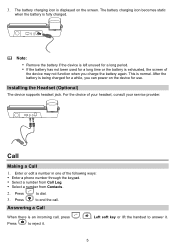
... the battery is normal. Call Making a Call 1. y Select a number from Call Log. Installing the Headset (Optional) The device supports headset jack. Enter or edit a number in one of your headset, consult your service provider. This is fully charged. For the choice of the following ways: y Enter a phone number through the keypad. Press to answer it . 5 After the battery is an incoming call . Answering a Call When there is being charged for use. 3. Note: y Remove the battery if...
... the battery is normal. Call Making a Call 1. y Select a number from Call Log. Installing the Headset (Optional) The device supports headset jack. Enter or edit a number in one of your headset, consult your service provider. This is fully charged. For the choice of the following ways: y Enter a phone number through the keypad. Press to answer it . 5 After the battery is an incoming call . Answering a Call When there is being charged for use. 3. Note: y Remove the battery if...

User Manual
Page 8
... editing the message, press key to enable or disable T9 method. Press Left soft key to reply, delete, or forward a short message, or call or save the phone number of English letters in a single text message is off, you have entered in the drop-down list. y Press # key to add a recipient's number. 4. In the message editing screen, select Options to send the message. Press key to perform operations in front of...
... editing the message, press key to enable or disable T9 method. Press Left soft key to reply, delete, or forward a short message, or call or save the phone number of English letters in a single text message is off, you have entered in the drop-down list. y Press # key to add a recipient's number. 4. In the message editing screen, select Options to send the message. Press key to perform operations in front of...
User Manual
Page 9
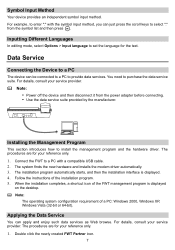
... details, consult your reference only. 1. For example, to enter ":" with a compatible USB cable. 2. Applying the Data Service You can just press the scroll keys to set the language for your service provider. When the installation completes, a shortcut icon of the FWT management program is displayed. 4. Inputting Different Languages In editing mode, select Options > Input language to select ":" from the power adapter before connecting.
... details, consult your reference only. 1. For example, to enter ":" with a compatible USB cable. 2. Applying the Data Service You can just press the scroll keys to set the language for your service provider. When the installation completes, a shortcut icon of the FWT management program is displayed. 4. Inputting Different Languages In editing mode, select Options > Input language to select ":" from the power adapter before connecting.
User Manual
Page 10
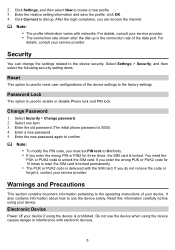
... card. Click Connect to enable or disable Phone lock and PIN lock. Select Security > Change password. 2. Enter a new password. 5. y If you can change the settings related to reset user configurations of the data port. Click Settings, and then select New to On firstly. Enter the relative setting information and save the profile, click OK. 4. y The connection rate shown after the dial-up . For details, consult your device if using the device...
... card. Click Connect to enable or disable Phone lock and PIN lock. Select Security > Change password. 2. Enter a new password. 5. y If you can change the settings related to reset user configurations of the data port. Click Settings, and then select New to On firstly. Enter the relative setting information and save the profile, click OK. 4. y The connection rate shown after the dial-up . For details, consult your device if using the device...
User Manual
Page 11
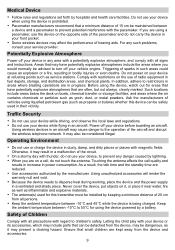
... use or charge the device in an aircraft may also be advised to disperse heat during working, place the device and the power supply in a malfunction of the aircraft and disrupt the wireless telephone network. y Some wireless devices may result in a ventilated and shady place. If you would normally be considered illegal. y Because the device needs to turn...
... use or charge the device in an aircraft may also be advised to disperse heat during working, place the device and the power supply in a malfunction of the aircraft and disrupt the wireless telephone network. y Some wireless devices may result in a ventilated and shady place. If you would normally be considered illegal. y Because the device needs to turn...
User Manual
Page 12
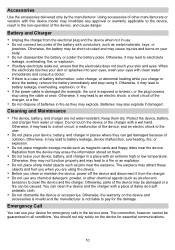
... . y Do not place your device, battery, and charger in places where they can use . Radiation from the charger. Emergency Call You can get damaged because of the charger, or a fire. y Do not connect two poles of batteries in the service area. When the electrolyte touches your skin or ..., keys, or jewelries. y Do not leave your skin and eyes. Otherwise, they may erase the information stored on your eyes with conductors, such as magnetic cards and floppy disks near the earpiece. y Do not disassemble the battery or solder the battery poles. y If the power cable...
... . y Do not place your device, battery, and charger in places where they can use . Radiation from the charger. Emergency Call You can get damaged because of the charger, or a fire. y Do not connect two poles of batteries in the service area. When the electrolyte touches your skin or ..., keys, or jewelries. y Do not leave your skin and eyes. Otherwise, they may erase the information stored on your eyes with conductors, such as magnetic cards and floppy disks near the earpiece. y Do not disassemble the battery or solder the battery poles. y If the power cable...
User Manual
Page 13
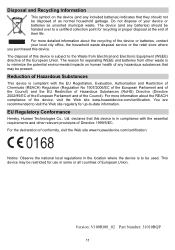
... batteries) indicates that they should be handed over to be used. The reason for separating WEEE and batteries from Electrical and Electronic Equipment (WEEE) directive of the European Union. For more information about the recycling of the device or batteries, contact your device or batteries as normal household garbage. This device may be present. EU Regulatory Conformance Hereby, Huawei...
... batteries) indicates that they should be handed over to be used. The reason for separating WEEE and batteries from Electrical and Electronic Equipment (WEEE) directive of the European Union. For more information about the recycling of the device or batteries, contact your device or batteries as normal household garbage. This device may be present. EU Regulatory Conformance Hereby, Huawei...


