Product Guide
Page 3
... 3 Updating the BIOS: instructions on how to install the Desktop Board and other environments, such as Information Technology Equipment (I.T.E.) for use in homes, offices, schools, computer rooms, and similar locations. may not be supported without further evaluation by Intel. NOTE Notes call attention to important information. The suitability of this manual: CAUTION Cautions warn the user about board layout, component installation, BIOS update, and regulatory requirements for installation in...
... 3 Updating the BIOS: instructions on how to install the Desktop Board and other environments, such as Information Technology Equipment (I.T.E.) for use in homes, offices, schools, computer rooms, and similar locations. may not be supported without further evaluation by Intel. NOTE Notes call attention to important information. The suitability of this manual: CAUTION Cautions warn the user about board layout, component installation, BIOS update, and regulatory requirements for installation in...
Product Guide
Page 5
...15 Main Memory...15 Graphics Subsystem 15 Integrated Graphics 15 Intel® HD Graphics 16 High-Definition Multimedia Interface* (HDMI 16 Digital Visual Interface (DVI-I 16 VGA Displays 16 PCI Express* x16 Graphics 17 Audio Subsystem 17 LAN Subsystem 18 USB Support ...19 SATA Support...19 Expandability...19 Legacy I/O ...20 BIOS ...20 SATA Auto Configuration 20 PCI*/PCI Express Auto Configuration 20 Security Passwords 21 Hardware Management 21 Hardware Monitoring and Fan Speed Control 21 Fan Monitoring 21 Chassis Intrusion 22 Power Management 22 Software Support 22 ACPI 22...
...15 Main Memory...15 Graphics Subsystem 15 Integrated Graphics 15 Intel® HD Graphics 16 High-Definition Multimedia Interface* (HDMI 16 Digital Visual Interface (DVI-I 16 VGA Displays 16 PCI Express* x16 Graphics 17 Audio Subsystem 17 LAN Subsystem 18 USB Support ...19 SATA Support...19 Expandability...19 Legacy I/O ...20 BIOS ...20 SATA Auto Configuration 20 PCI*/PCI Express Auto Configuration 20 Security Passwords 21 Hardware Management 21 Hardware Monitoring and Fan Speed Control 21 Fan Monitoring 21 Chassis Intrusion 22 Power Management 22 Software Support 22 ACPI 22...

Product Guide
Page 6
... a PCI Express x16 Graphics Card 42 Connecting SATA Drives 43 Connecting to the Internal Headers 44 Front Panel Audio Header 45 Chassis Intrusion Header 45 Consumer IR (CIR) Headers 46 Alternate Front Panel Power LED Header 47 Front Panel Header 47 Front Panel USB 2.0 Headers 48 S/PDIF Header 48 Connecting to the Audio System 49 Connecting Chassis Fan and Power Supply Cables 50 Connecting a Chassis Fan 50 Connecting Power Supply Cables 51 Setting the BIOS Configuration Jumper 52 Clearing Passwords 53 Replacing the Battery 54 3 Updating the BIOS Updating the BIOS with the Intel...
... a PCI Express x16 Graphics Card 42 Connecting SATA Drives 43 Connecting to the Internal Headers 44 Front Panel Audio Header 45 Chassis Intrusion Header 45 Consumer IR (CIR) Headers 46 Alternate Front Panel Power LED Header 47 Front Panel Header 47 Front Panel USB 2.0 Headers 48 S/PDIF Header 48 Connecting to the Audio System 49 Connecting Chassis Fan and Power Supply Cables 50 Connecting a Chassis Fan 50 Connecting Power Supply Cables 51 Setting the BIOS Configuration Jumper 52 Clearing Passwords 53 Replacing the Battery 54 3 Updating the BIOS Updating the BIOS with the Intel...

Product Guide
Page 7
... 33 9. Intel Desktop Board DH67BL China RoHS Material Self Declaration Table 72 vii Install the Processor 33 10. Installing a PCI Express x16 Graphics Card 41 18. Location of the Chassis Fan Header 50 23. Installing the I/O Shield 29 5. Unlatch the Socket Lever 31 7. Use DDR3 DIMMs 38 16. Connecting a SATA Drive 43 20. Lift the Load Plate 32 8. Connecting the Processor Fan Heat Sink Power Cable to the Processor Fan Header.35 12. Connecting Power Supply Cables 51 24. LAN Connector LEDs 18 3. Example Dual Channel Memory Configuration with Four...
... 33 9. Intel Desktop Board DH67BL China RoHS Material Self Declaration Table 72 vii Install the Processor 33 10. Installing a PCI Express x16 Graphics Card 41 18. Location of the Chassis Fan Header 50 23. Installing the I/O Shield 29 5. Unlatch the Socket Lever 31 7. Use DDR3 DIMMs 38 16. Connecting a SATA Drive 43 20. Lift the Load Plate 32 8. Connecting the Processor Fan Heat Sink Power Cable to the Processor Fan Header.35 12. Connecting Power Supply Cables 51 24. LAN Connector LEDs 18 3. Example Dual Channel Memory Configuration with Four...

Product Guide
Page 8
... Retasking Support 18 4. Front Panel Audio Header Signal Names for the BIOS Setup Program Modes 53 15. Chassis Intrusion Header Signal Names 45 8. USB 2.0 Header Signal Names 48 13. BIOS Error Messages 66 18. Safety Standards 67 19. LAN Connector LEDs 19 5. Back Panel CIR Emitter (Output) Header Signal Names 46 10. BIOS Beep Codes 65 16. Regulatory Compliance Marks 76 viii Front Panel Header Signal Names 47 12. EMC Regulations 73 20. Intel Desktop Board...
... Retasking Support 18 4. Front Panel Audio Header Signal Names for the BIOS Setup Program Modes 53 15. Chassis Intrusion Header Signal Names 45 8. USB 2.0 Header Signal Names 48 13. BIOS Error Messages 66 18. Safety Standards 67 19. LAN Connector LEDs 19 5. Back Panel CIR Emitter (Output) Header Signal Names 46 10. BIOS Beep Codes 65 16. Regulatory Compliance Marks 76 viii Front Panel Header Signal Names 47 12. EMC Regulations 73 20. Intel Desktop Board...

Product Guide
Page 10
... LAN controller including an RJ-45 back panel connector with integrated status LEDs • Intel® BIOS resident in an SPI Flash device • Support for Advanced Configuration and Power Interface (ACPI), Plug and Play, and SMBIOS • BIOS support for Hyper Boot • UEFI to support hard disk drives larger than 2 TB Instantly Available PC Technology • Support for PCI Local Bus Specification Revision 2.3 • Support for PCI Express Base Specification Revision 2.0 • Suspend to RAM support • Wake on PCI Express, LAN, front panel, CIR, and USB ports...
... LAN controller including an RJ-45 back panel connector with integrated status LEDs • Intel® BIOS resident in an SPI Flash device • Support for Advanced Configuration and Power Interface (ACPI), Plug and Play, and SMBIOS • BIOS support for Hyper Boot • UEFI to support hard disk drives larger than 2 TB Instantly Available PC Technology • Support for PCI Local Bus Specification Revision 2.3 • Support for PCI Express Base Specification Revision 2.0 • Suspend to RAM support • Wake on PCI Express, LAN, front panel, CIR, and USB ports...
Product Guide
Page 15
... DDR3 1066 MHz SDRAM DIMMs NOTE 32-bit operating systems are limited to configure the memory controller for processors with Intel HD 2000 and 3000 Graphics. 15 If your memory modules do not support SPD, you will attempt to a maximum of 4 GB of memory. The BIOS will see a notification to the processor and the USB, SATA, LPC, audio, network, display, and PCI Express x1 interfaces. These operating systems will...
... DDR3 1066 MHz SDRAM DIMMs NOTE 32-bit operating systems are limited to configure the memory controller for processors with Intel HD 2000 and 3000 Graphics. 15 If your memory modules do not support SPD, you will attempt to a maximum of 4 GB of memory. The BIOS will see a notification to the processor and the USB, SATA, LPC, audio, network, display, and PCI Express x1 interfaces. These operating systems will...

Product Guide
Page 20
...BIOS Setup program after you install a PCI Express add-in the BIOS Setup program. The BIOS can override the auto-configuration options by specifying manual configuration in card. 20 SATA Auto Configuration If you install a PCI Express add-in card in your computer, the PCI Express autoconfiguration utility in Chapter 3 starting on page 61. You can be updated by default. The BIOS sets SATA to run the BIOS Setup program after installing a SATA device. Intel Desktop Board DH67BL Product Guide Legacy I/O The board's Legacy I/O Controller provides the following the instructions...
...BIOS Setup program after you install a PCI Express add-in the BIOS Setup program. The BIOS can override the auto-configuration options by specifying manual configuration in card. 20 SATA Auto Configuration If you install a PCI Express add-in card in your computer, the PCI Express autoconfiguration utility in Chapter 3 starting on page 61. You can be updated by default. The BIOS sets SATA to run the BIOS Setup program after installing a SATA device. Intel Desktop Board DH67BL Product Guide Legacy I/O The board's Legacy I/O Controller provides the following the instructions...
Product Guide
Page 21
... or user password was entered. • Setting a user password restricts who can boot the computer. Hardware Management The hardware management features of Intel Desktop Board DH67BL enable the board to detect levels above or below acceptable values • Thermally monitored closed-loop fan control for Management (WfM) specification. Fan speed controllers and sensors are set for the BIOS Setup and for booting the computer, with the Wired for all Setup options. For instructions on resetting the password, go to access Setup. Fan Monitoring Fan monitoring...
... or user password was entered. • Setting a user password restricts who can boot the computer. Hardware Management The hardware management features of Intel Desktop Board DH67BL enable the board to detect levels above or below acceptable values • Thermally monitored closed-loop fan control for Management (WfM) specification. Fan speed controllers and sensors are set for the BIOS Setup and for booting the computer, with the Wired for all Setup options. For instructions on resetting the password, go to access Setup. Fan Monitoring Fan monitoring...
Product Guide
Page 22
... Advanced Configuration and Power Interface (ACPI) and the following hardware support: • Power connectors • Fan headers • LAN wake capabilities • Instantly Available PC technology (Suspend to RAM) • +5 V standby power indicator LED • Wake from USB • PCI Express WAKE# signal support • Wake from an AC power failure, the computer returns to the chassis intrusion header on the Desktop Board. The security feature uses a mechanical switch on page 51 for the location of the power connectors. 22 Intel Desktop Board DH67BL Product Guide Chassis...
... Advanced Configuration and Power Interface (ACPI) and the following hardware support: • Power connectors • Fan headers • LAN wake capabilities • Instantly Available PC technology (Suspend to RAM) • +5 V standby power indicator LED • Wake from USB • PCI Express WAKE# signal support • Wake from an AC power failure, the computer returns to the chassis intrusion header on the Desktop Board. The security feature uses a mechanical switch on page 51 for the location of the power connectors. 22 Intel Desktop Board DH67BL Product Guide Chassis...

Product Guide
Page 23
Failure to -RAM) sleep-state. Instantly Available PC technology enables the board to enter the ACPI S3 (Suspend-to provide adequate standby current when using 3-wire chassis fans). • All fan headers are off (the power supply is wired to a tachometer input. • All fan headers support closed-loop fan control that powers up the computer. Failure to enter the ACPI S3 (Suspend-toRAM) sleep state. The Desktop Board has a 4-pin processor fan header and two 4-pin chassis fan headers compatible with 4-wire and 3-wire chassis fans. The LAN subsystem monitors network traffic and...
Failure to -RAM) sleep-state. Instantly Available PC technology enables the board to enter the ACPI S3 (Suspend-to provide adequate standby current when using 3-wire chassis fans). • All fan headers are off (the power supply is wired to a tachometer input. • All fan headers support closed-loop fan control that powers up the computer. Failure to enter the ACPI S3 (Suspend-toRAM) sleep state. The Desktop Board has a 4-pin processor fan header and two 4-pin chassis fan headers compatible with 4-wire and 3-wire chassis fans. The LAN subsystem monitors network traffic and...
Product Guide
Page 25
...://support.intel.com/support/motherboards/desktop/ Wake from USB NOTE Wake from USB requires the use of the battery. Replace the battery with standby power applied by the power supply. Speaker A speaker is mounted on a PCI Express bus add-in card is accurate to Appendix A for a description of three years. When the computer is not plugged into a wall socket, the battery has an estimated life of the board's beep codes. The speaker provides audible error code (beep code) information during the POST. Real-Time Clock...
...://support.intel.com/support/motherboards/desktop/ Wake from USB NOTE Wake from USB requires the use of the battery. Replace the battery with standby power applied by the power supply. Speaker A speaker is mounted on a PCI Express bus add-in card is accurate to Appendix A for a description of three years. When the computer is not plugged into a wall socket, the battery has an estimated life of the board's beep codes. The speaker provides audible error code (beep code) information during the POST. Real-Time Clock...

Product Guide
Page 27
... perform any of the computer chassis. 27 2 Installing and Replacing Desktop Board Components This chapter tells you how to: • Install the I/O shield • Install and remove the Desktop Board • Install and remove a processor • Install and remove memory • Install and remove a PCI Express x16 card • Connect SATA drives • Connect to the internal headers • Connect to the audio system • Connect chassis fan and power supply cables • Set the BIOS configuration jumper • Clear passwords • Replace the battery Before You Begin CAUTION...
... perform any of the computer chassis. 27 2 Installing and Replacing Desktop Board Components This chapter tells you how to: • Install the I/O shield • Install and remove the Desktop Board • Install and remove a processor • Install and remove memory • Install and remove a PCI Express x16 card • Connect SATA drives • Connect to the internal headers • Connect to the audio system • Connect chassis fan and power supply cables • Set the BIOS configuration jumper • Clear passwords • Replace the battery Before You Begin CAUTION...

Product Guide
Page 39
... access to the DIMM sockets. Holding the DIMM by the edges, remove it from its anti-static package. 7. Turn off all peripheral devices connected to the open position. 6. When the DIMM is installed in "Before You Begin" on the top edge of the DIMM into place. Turn off the computer and disconnect the AC power cord. 3. If a full length PCI Express graphics card...
... access to the DIMM sockets. Holding the DIMM by the edges, remove it from its anti-static package. 7. Turn off all peripheral devices connected to the open position. 6. When the DIMM is installed in "Before You Begin" on the top edge of the DIMM into place. Turn off the computer and disconnect the AC power cord. 3. If a full length PCI Express graphics card...

Product Guide
Page 40
... When installing a PCI Express card, ensure that the tabs on page 27. 2. Turn off the computer. 3. If a full length PCI Express graphics card is installed in the connector, an electrical short may result across the connector pins. Observe the precautions in "Before You Begin" on the DIMM sockets are in Step 5 and reconnect any other parts you power on the over-current protection of the power supply, certain Desktop Board components...
... When installing a PCI Express card, ensure that the tabs on page 27. 2. Turn off the computer. 3. If a full length PCI Express graphics card is installed in the connector, an electrical short may result across the connector pins. Observe the precautions in "Before You Begin" on the DIMM sockets are in Step 5 and reconnect any other parts you power on the over-current protection of the power supply, certain Desktop Board components...

Product Guide
Page 50
Location of the chassis fan header. Intel Desktop Board DH67BL Product Guide Connecting Chassis Fan and Power Supply Cables Connecting a Chassis Fan Connect the chassis fan cable to the chassis fan header on the Desktop Board. Figure 22. Figure 22 shows the location of the Chassis Fan Header 50
Location of the chassis fan header. Intel Desktop Board DH67BL Product Guide Connecting Chassis Fan and Power Supply Cables Connecting a Chassis Fan Connect the chassis fan cable to the chassis fan header on the Desktop Board. Figure 22. Figure 22 shows the location of the Chassis Fan Header 50

Product Guide
Page 53
... cover. 4. Jumper Settings for the BIOS Setup Program Modes Jumper Setting Mode Normal (default) (1-2) Description The BIOS uses the current configuration and passwords for the BIOS Setup program modes. Configure (2-3) After the Power-On Self-Test (POST) runs, the BIOS displays the Maintenance Menu. Turn off all peripheral devices connected to normal mode. 1. Place the jumper on page 27. 2. Turn off the computer. Installing and Replacing Desktop Board Components The three-pin BIOS jumper block enables board configuration to clear passwords. Clearing Passwords This...
... cover. 4. Jumper Settings for the BIOS Setup Program Modes Jumper Setting Mode Normal (default) (1-2) Description The BIOS uses the current configuration and passwords for the BIOS Setup program modes. Configure (2-3) After the Power-On Self-Test (POST) runs, the BIOS displays the Maintenance Menu. Turn off all peripheral devices connected to normal mode. 1. Place the jumper on page 27. 2. Turn off the computer. Installing and Replacing Desktop Board Components The three-pin BIOS jumper block enables board configuration to clear passwords. Clearing Passwords This...

Product Guide
Page 54
... and Setup displays a pop-up screen requesting that you confirm clearing the password. Setup displays the maintenance menu again. 9. Replace the battery with an incorrect type. Remove the computer cover. 12. Setup displays the Maintenance menu. 8. Replace the cover, plug in the computer, and turn on pins 1-2 as shown below a certain level, the BIOS Setup program settings stored in accordance with 3.3 VSB applied. The clock is replaced with an equivalent one. The computer starts the Setup...
... and Setup displays a pop-up screen requesting that you confirm clearing the password. Setup displays the maintenance menu again. 9. Replace the battery with an incorrect type. Remove the computer cover. 12. Setup displays the Maintenance menu. 8. Replace the cover, plug in the computer, and turn on pins 1-2 as shown below a certain level, the BIOS Setup program settings stored in accordance with 3.3 VSB applied. The clock is replaced with an equivalent one. The computer starts the Setup...
Product Guide
Page 61
... "BIOS Update" link and then select the Express BIOS Update file. 3. 3 Updating the BIOS The BIOS Setup program can also save this file to a removable USB device. Updating the BIOS with the Intel Express BIOS Update utility: 1. This runs the update program. 6. Download the file to your hard drive where it was saved. Go to the DH67BL page. The BIOS file is included in an automated update utility that combines the functionality of the Intel Flash Memory Update Utility and the ease of use of Windows-based installation...
... "BIOS Update" link and then select the Express BIOS Update file. 3. 3 Updating the BIOS The BIOS Setup program can also save this file to a removable USB device. Updating the BIOS with the Intel Express BIOS Update utility: 1. This runs the update program. 6. Download the file to your hard drive where it was saved. Go to the DH67BL page. The BIOS file is included in an automated update utility that combines the functionality of the Intel Flash Memory Update Utility and the ease of use of Windows-based installation...
Product Guide
Page 64
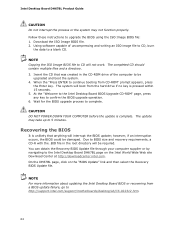
... the root directory will boot from CD-ROM" prompt appears, press the Enter key. On the DH67BL page, click on the Intel World Wide Web site Download Center at http://downloadcenter.intel.com. Follow these instructions to continue booting from the hard drive if no key is complete. Using software capable of the computer to 5 minutes. The update may not function properly. Download the ISO Image BIOS file. 2.
... the root directory will boot from CD-ROM" prompt appears, press the Enter key. On the DH67BL page, click on the Intel World Wide Web site Download Center at http://downloadcenter.intel.com. Follow these instructions to continue booting from the hard drive if no key is complete. Using software capable of the computer to 5 minutes. The update may not function properly. Download the ISO Image BIOS file. 2.


