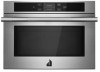
Jenn-Air JMC6224HL1 Support and Manuals
Get Help and Manuals for this Jenn-Air item
View All Support Options Below
Free Jenn-Air JMC6224HL1 manuals!
Problems with Jenn-Air JMC6224HL1?
Ask a Question
Free Jenn-Air JMC6224HL1 manuals!
Problems with Jenn-Air JMC6224HL1?
Ask a Question
Popular Jenn-Air JMC6224HL1 Manual Pages
Owners Manual - Page 6

...the display screen to activate and control. Heavy, dense foods, such as cake.
6
Setup and Demo Mode
1. Microwaves are very sensitive and require only a light touch to enter...options of service and set . From this screen, all automatic cooking programs can be activated, all manual cooking programs can be set, options can be adjusted, and instructions, preparation, and tips can set , you...
Owners Manual - Page 8

...guide for the suggested cooking power of specific foods.
B
C
A. Hub
The turntable rotates in this microwave oven. See the "Assistance or Service...specifically for several minutes after the cooking cycle has been completed. This is larger than high. Aluminum foil and some models... cycle. Simmering stews. Support and rollers C. If ...during microwave cooking. PARTS AND FEATURES
Turntable
...
Owners Manual - Page 12

...on and off Regional Set regional preferences. ■■ Language: English or French
Info
■■ Service and Support: Displays model number, Customer Support contact info, and... Kitchen Timer
Available Selections
Set a kitchen timer by manually entering the desired time into the keypad.
1. Set the screen brightness. ■■ Display Brightness: Set the display brightness ■...
Owners Manual - Page 14

... is less than that may help you avoid a service call an electrician.
Contact us by number): Clear the display. Remove and replace turntable support.
The incoming voltage is normal and depends on some models): See the lower oven Use and Care Guide. The magnetron is tripped: Replace the fuse or reset the circuit breaker.
Tones are...
Installation Instructions - Page 6

...Feed the flexible conduit from the microwave oven.
4. A
A. Locate existing wiring to the
junction box. Electrical Shock Hazard
Disconnect power before servicing.
Use 12 gauge copper wire. INSTALLATION INSTRUCTIONS
Prepare Built-In Microwave Oven
1. Failure to installation.
Electrically ground oven. Remove and set the microwave oven onto cardboard prior to follow these...
Installation Instructions - Page 7

...against outside edges. Replace convection grid, turntable, and support hub. 5. Display...Guide. White wires
D. 4-wire cable from home power supply
B.
A
A.
UL listed or CSA approved conduit connector
F.
If there is an extra part, go back through holes in microwave oven.
7 Mounting rail
4. H
A
C
G
B
F
D
E
A. Red wires
G. Install junction box cover. Install...
Installation Instructions 1 - Page 5

...model/serial/rating tag is for it is properly grounded.
latest edition or CSA Standards C22.1-94, Canadian Electrical Code, Part 1 and C22.2 No. O-M91 -
Electrical Requirements
GROUNDING INSTRUCTIONS... and follow the instructions provided for serviceability of electrical connection you are not sure the oven is recommended that a qualified electrical installer determine that the ...
Installation Instructions 1 - Page 6

INSTALLATION INSTRUCTIONS
Prepare Built-In Microwave Oven
1. Locate existing wiring to installation. To avoid floor damage, set aside racks and other injury.
2. Remove and set the microwave oven onto cardboard prior to avoid drilling into or severing wiring during installation.
The microwave oven is present. 4. Disconnect power. 2. Install a UL listed or CSA approved conduit connector ...
Installation Instructions 1 - Page 7

... screws
5.
Check that all parts are now installed. Dispose of recycle all of your tools. 3. H
C G
F
D
E
A. Cable from microwave oven
E. White wires
D. 4-wire cable from home power supply
B. Install Microwave Oven
1.
Insert the screws through the steps to insert oven into cabinet. Mounting rail B. Replace convection grid, turntable, and support hub. 6. Reconnect power...
Owners Manual 1 - Page 6

...Setup and Demo Mode
1. If you selected Store Demo Mode, select TRY THE PRODUCT to explore the different options and features. Food Characteristics
When microwave cooking, the amount, size and shape, starting temperature, composition, and density of the product.
4. Size and Shape Smaller pieces of service and set...set , options can be adjusted, and instructions..., all manual cooking programs...
Owners Manual 1 - Page 8

..."Assistance or Service" section to use . This is designed specifically for this microwave...guide for microwave cooking specify which cooking power to reorder any other rack in this microwave oven. Simmering stews. PARTS... microwave cooking. Aluminum foil and some models), aluminum foil for several minutes after ....
B
C
A. Turntable B. Support and rollers C. Hub
The turntable...
Owners Manual 1 - Page 12

... on . Your Meal Times Adjust when breakfast/lunch/dinner is used . See the Connectivity Setup sheet for more . Start Demo Mode 1.
Select the Settings keypad. 2. Manually input the time to set the clock, change the language, and more detailed instructions. Select the Settings keypad. 5.
Select the Cancel keypad to utilize the JennAir® app. Select STORE...
Owners Manual 1 - Page 14

... Century Ave.
Error code (display shows letter followed by mail with any questions or concerns at 900 W cooking power.
See the "Assistance or Service" section. Demo Mode (product is not operating properly: Remove turntable. The turntable support is in the magnetron cycles on some models): See the lower oven Use and Care Guide.
Contact us by...
Dimension Guide - Page 3

... 217⁄8" (Depth Without Handle)
OPENING/ CLEARANCE DIMENSIONS
A
D B
C* E
e
e
G
F
FRONT VIEW
SIDE VIEW
MODEL #
JMC6224HM JMC6224HL
A Width of cabinet (min.)
in an upper corner of countertop (min.)
1/2
1.2
I
UNDER COUNTER INSTALLATION (without cooktop installed above)
BACK VIEW
IMPORTANT: Dimensional specifications are appropriately UL, CUL or CSA approved. Do not cut the...
Dimension Guide - Page 4

... spacers will result in the adjacent right or left rear corner of the wall oven. The junction box should be located 3" (7.6 cm) maximum below the support surface. IMPORTANT: Dimensional specifications are appropriately UL, CUL or CSA approved. Do not cut the
F
conduit. Power Supply Location
BACK VIEW
W11318378C Installation Instructions: W11322487
Jenn-Air JMC6224HL1 Reviews
We have not received any reviews for Jenn-Air yet.