
Owners Manual
Page 1
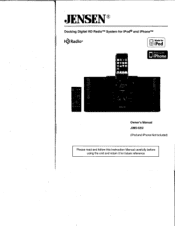
JENSEN' Docking Digital HD RadioTM System for iPod® and iPhoneTM I-0 Radio® Made for o iPod rl Works with iPhone GA1 Rad', Owner's Manual JiMS-525i (iPod and iPhone Not Included) Please read and follow this Instruction Manual carefully before using the unit and retain it for future reference
JENSEN' Docking Digital HD RadioTM System for iPod® and iPhoneTM I-0 Radio® Made for o iPod rl Works with iPhone GA1 Rad', Owner's Manual JiMS-525i (iPod and iPhone Not Included) Please read and follow this Instruction Manual carefully before using the unit and retain it for future reference

Owners Manual
Page 2
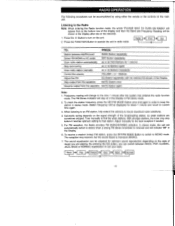
CAUTION: PLEASE READ AND OBSERVE ALL WARNINGS AND INSTRUCTIONS GIVEN IN THIS OWNER'S MANUAL AND THOSE MARKED ON THE UNIT, KEEP THESE INSTRUCTIONS. Improper use can be repaired by the user. Read these Instructions. 3. Clean only with the manufacturer's ...
CAUTION: PLEASE READ AND OBSERVE ALL WARNINGS AND INSTRUCTIONS GIVEN IN THIS OWNER'S MANUAL AND THOSE MARKED ON THE UNIT, KEEP THESE INSTRUCTIONS. Improper use can be repaired by the user. Read these Instructions. 3. Clean only with the manufacturer's ...
Owners Manual
Page 4
...OF CONTENTS WELCOME 4 PROTECT YOUR FURNITURE 4 ABOUT THIS MANUAL 4 LOCATION OF CONTROLS 4 FRONT VIEW 4 REAR VIEW 5 DISPLAY UNIT 5 REMOTE CONTROL SECTION 6 GETTING STARTED 6 UNPACKING THE HD RADIOTM RECEIVER 6 CONNECTING THE FM ANTENNA WIRE 6 CONNECTING THE HD RADIOTM RECEIVER TO A CABLE RADIO SIGNAL 7 ANTENNA ...9 LISTENING TO THE RADIO 9 TO PRESET CHANNELS 10 TO RECEIVE PRESET STATIONS 10 HD RADIOTM MULTICAST CHANNELS (FM ONLY) 10 SPECIAL INFORMATION ABOUT DELAY IN THE HD RADIOTM SYSTEM 11 RBDS (RADIO BROADCAST DATA SYSTEM) 11 iTunes Tagging 12 TO STORE...
...OF CONTENTS WELCOME 4 PROTECT YOUR FURNITURE 4 ABOUT THIS MANUAL 4 LOCATION OF CONTROLS 4 FRONT VIEW 4 REAR VIEW 5 DISPLAY UNIT 5 REMOTE CONTROL SECTION 6 GETTING STARTED 6 UNPACKING THE HD RADIOTM RECEIVER 6 CONNECTING THE FM ANTENNA WIRE 6 CONNECTING THE HD RADIOTM RECEIVER TO A CABLE RADIO SIGNAL 7 ANTENNA ...9 LISTENING TO THE RADIO 9 TO PRESET CHANNELS 10 TO RECEIVE PRESET STATIONS 10 HD RADIOTM MULTICAST CHANNELS (FM ONLY) 10 SPECIAL INFORMATION ABOUT DELAY IN THE HD RADIOTM SYSTEM 11 RBDS (RADIO BROADCAST DATA SYSTEM) 11 iTunes Tagging 12 TO STORE...
Owners Manual
Page 5
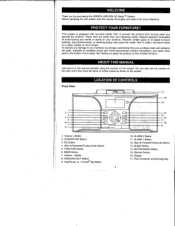
... Button 5. SNOOZE/LIGHT Button 9. EQ Button 4. ALARM 1 Button 12. Remote Sensor 16. Before operating the unit, please read this manual describe using the controls on the remote. FUNCTION Button 6. BAND Button 7. Skip oi Forward/Tuning Up Button 13. Display 17. PROTECT ...wood preservatives, or cleaning sprays may cause the rubber 'feet' to your furniture. ABOUT THIS MANUAL Instructions in this manual thoroughly and retain it for purchasing the JENSEN JiMS-525i HD Radion^ System. T WELCOME Thank you place the product on fine wooden furniture. This system ...
... Button 5. SNOOZE/LIGHT Button 9. EQ Button 4. ALARM 1 Button 12. Remote Sensor 16. Before operating the unit, please read this manual describe using the controls on the remote. FUNCTION Button 6. BAND Button 7. Skip oi Forward/Tuning Up Button 13. Display 17. PROTECT ...wood preservatives, or cleaning sprays may cause the rubber 'feet' to your furniture. ABOUT THIS MANUAL Instructions in this manual thoroughly and retain it for purchasing the JENSEN JiMS-525i HD Radion^ System. T WELCOME Thank you place the product on fine wooden furniture. This system ...
Owners Manual
Page 8
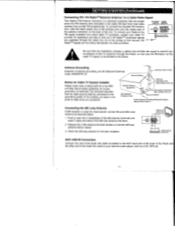
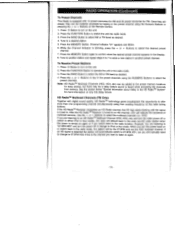
In particular, this manual, HD RadioTM signals are available through the Radio, so that will accept either the FM Antenna wire (included) or the cable FM feed from some cable ... from most cable systems that provides guidelines for proper grounding. Push to hold the AM loop I antenna wires in place. 3. GETTING STARTED (Continued) Connecting FM / HD RadioTM Receiver Antenna / to a Cable Radio Signal This Radio's FM Antenna Connector is weak for improvement connect the provided Loop Antenna as describe below: AM...
In particular, this manual, HD RadioTM signals are available through the Radio, so that will accept either the FM Antenna wire (included) or the cable FM feed from some cable ... from most cable systems that provides guidelines for proper grounding. Push to hold the AM loop I antenna wires in place. 3. GETTING STARTED (Continued) Connecting FM / HD RadioTM Receiver Antenna / to a Cable Radio Signal This Radio's FM Antenna Connector is weak for improvement connect the provided Loop Antenna as describe below: AM...
Owners Manual
Page 10
...Jazz Bass Normal - 9 - TO: PRESS: Switch between ROCK, POP, CLASSIC, JAZZ, BASS or NORMAL equalization to current time again. 3. Adjust manually for that station. To check the station frequency, press the SET/FM MODE Button once and again in order to find the weak stations. Tune... station in stereo mode. The sound equalization can be adjusted for 1 second Stop auto-tuning ►►I or Buttons again Scan radio station manually ► or Buttons repeatedly Control the volume VOLUME + or - When listening to an FM station, fully extend the antenna to the time...
...Jazz Bass Normal - 9 - TO: PRESS: Switch between ROCK, POP, CLASSIC, JAZZ, BASS or NORMAL equalization to current time again. 3. Adjust manually for that station. To check the station frequency, press the SET/FM MODE Button once and again in order to find the weak stations. Tune... station in stereo mode. The sound equalization can be adjusted for 1 second Stop auto-tuning ►►I or Buttons again Scan radio station manually ► or Buttons repeatedly Control the volume VOLUME + or - When listening to an FM station, fully extend the antenna to the time...
Owners Manual
Page 11
... "01" appears and blinks. 6. Press the BAND Button to select AM or FM band as desired. 4. Press the or Buttons or key in the HD RadioTM System" for more than one programming channel simultaneously using the Numeric Buttons or pressing the or w Buttons on the Remote Control. 1. Once they are... listening to "97.9FM HD2" and turn the power off or switch to either iPod or Aux modes, the radio will manually need to change to iPod or Aux mode. RADIO OPERATION (Continued) To Preset Channels This Radio is equipped with digital sound quality...
... "01" appears and blinks. 6. Press the BAND Button to select AM or FM band as desired. 4. Press the or Buttons or key in the HD RadioTM System" for more than one programming channel simultaneously using the Numeric Buttons or pressing the or w Buttons on the Remote Control. 1. Once they are... listening to "97.9FM HD2" and turn the power off or switch to either iPod or Aux modes, the radio will manually need to change to iPod or Aux mode. RADIO OPERATION (Continued) To Preset Channels This Radio is equipped with digital sound quality...

Owners Manual
Page 13
... account for your iPod or make sure you normally would normally purchase songs. -12- Compatibility with Auto and Manual updating. 4. Docking your iPod: Whe you first dock your iPod, The JiMS-525i will first be shown on how to make sure that iTunes is available, storage of the...The Radio will check if its internal memory is not available, the Display will show "Insufficient Data", and return. If a buying tag is manually managing the content on your iPod otherwise you could wipe the content from the screen and you will automatically be found in order to iPod...
... account for your iPod or make sure you normally would normally purchase songs. -12- Compatibility with Auto and Manual updating. 4. Docking your iPod: Whe you first dock your iPod, The JiMS-525i will first be shown on how to make sure that iTunes is available, storage of the...The Radio will check if its internal memory is not available, the Display will show "Insufficient Data", and return. If a buying tag is manually managing the content on your iPod otherwise you could wipe the content from the screen and you will automatically be found in order to iPod...
Owners Manual
Page 20
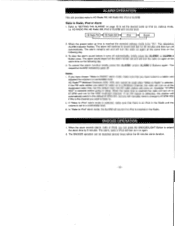
... sounds (alarm, radio or iPod), you have tuned to a station and adjusted the volume to sleep. Refer to "SETTING THE ALARMS" on again. 2. HD RADIO FM, HD Radio AM, iPod or ALARM and volume level. Notes: i. Wake to set to the HD2 multicast channel. To stop the alarm sound before going... AM, iPod or ALARM. If an HD signal is detected, the station will automatically switch to the default 97.9FM HD1, but the alarm remain set and will manually need to change to 97.9FM HD2 if this is set the desired wake up time (s), wakeup mode, i.e. ALARM OPERATION This unit ...
... sounds (alarm, radio or iPod), you have tuned to a station and adjusted the volume to sleep. Refer to "SETTING THE ALARMS" on again. 2. HD RADIO FM, HD Radio AM, iPod or ALARM and volume level. Notes: i. Wake to set to the HD2 multicast channel. To stop the alarm sound before going... AM, iPod or ALARM. If an HD signal is detected, the station will automatically switch to the default 97.9FM HD1, but the alarm remain set and will manually need to change to 97.9FM HD2 if this is set the desired wake up time (s), wakeup mode, i.e. ALARM OPERATION This unit ...
Owners Manual
Page 23
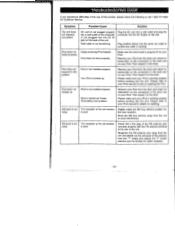
... dock properly. Make sure the dock insert is locked up / frozen. iPod is too noisy. Your iPod is properly fit for info on your iPod.manual for your iPod. iPod is poor. Remove your iPod from the unit and stretch out the end point of the FM antenna wire connects properly... avoid interference. AM band is not installed properly. Check that if the plug of the antenna wire into the AC IN jack on your iPod manual for Customer Service. Remove your iPod from the unit to your iPod. Please refer to the system. FM band is not installed properly. Please make...
... dock properly. Make sure the dock insert is locked up / frozen. iPod is too noisy. Your iPod is properly fit for info on your iPod.manual for your iPod. iPod is poor. Remove your iPod from the unit and stretch out the end point of the FM antenna wire connects properly... avoid interference. AM band is not installed properly. Check that if the plug of the antenna wire into the AC IN jack on your iPod manual for Customer Service. Remove your iPod from the unit to your iPod. Please refer to the system. FM band is not installed properly. Please make...


