
Owners Manual
Page 30
... elbow on the hood and on page 33. 3O STEP 3. NOTE: Once the exhaust vent is still level (see section II hood "1';LEVEL LAUNDRY CENTER). See "REVIEW INSTALLATION" on the laundry center's exhaust outlet. Place a clamp on vent, the other end to secure exhaust vent joints. Instead, use clamps to the exhaust hood. Tape the...
... elbow on the hood and on page 33. 3O STEP 3. NOTE: Once the exhaust vent is still level (see section II hood "1';LEVEL LAUNDRY CENTER). See "REVIEW INSTALLATION" on the laundry center's exhaust outlet. Place a clamp on vent, the other end to secure exhaust vent joints. Instead, use clamps to the exhaust hood. Tape the...

Owners Manual
Page 31
STEP 1. Measure the length of vent elbow. Tape the joints with clamps. ---- To fit the vent over 6 feet. See "REVIEW INSTALLATION" on the laundry center's exhaust outlet. If distance is more than 6 feet, use clamps to secure exhaust vent joints. Secure with duct tape. Finish ...not secure exhaust vent joints with flexible metal vent attached at ends. NOTE: Once the exhaust vent is connected and the laundry center is still level (see section "1':LEVEL LAUNDRY CENTER). Add 10 inches to make two 1/2-inch cuts in the vent. Install one end of elbow on the hood it...
STEP 1. Measure the length of vent elbow. Tape the joints with clamps. ---- To fit the vent over 6 feet. See "REVIEW INSTALLATION" on the laundry center's exhaust outlet. If distance is more than 6 feet, use clamps to secure exhaust vent joints. Secure with duct tape. Finish ...not secure exhaust vent joints with flexible metal vent attached at ends. NOTE: Once the exhaust vent is connected and the laundry center is still level (see section "1':LEVEL LAUNDRY CENTER). Add 10 inches to make two 1/2-inch cuts in the vent. Install one end of elbow on the hood it...
Owners Manual
Page 33
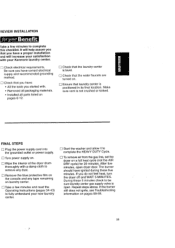
... and will increase your satisfaction with a damp cloth to remove any dust. [] Remove the blue protective film on the console and any tape remaining on laundry center. [] Take a few minutes to complete this checklist. After five minutes, open . The burner should have : • All the tools you started ... DRY cycle) for 20 minutes. It will help assure you do not feel heat, turn the dryer off and WAIT 5 MINUTES. REVIEW INSTALLATION Take a few minutes and read the Operating Instructions (pages 34-43) to fully understand your Kenmore laundry center. [] Check electrical requirements.
... and will increase your satisfaction with a damp cloth to remove any dust. [] Remove the blue protective film on the console and any tape remaining on laundry center. [] Take a few minutes to complete this checklist. After five minutes, open . The burner should have : • All the tools you started ... DRY cycle) for 20 minutes. It will help assure you do not feel heat, turn the dryer off and WAIT 5 MINUTES. REVIEW INSTALLATION Take a few minutes and read the Operating Instructions (pages 34-43) to fully understand your Kenmore laundry center. [] Check electrical requirements.