

Instruction Manual
Page 2
...Sirius Satellite radio tuner 5 Notes on playing MP3/WMA.......6 About CDs 8 General features 9 Power Selecting the Source Volume Attenuator Loudness System Q Audio Control Speaker Setting Switching Display Station/Disc Naming (SNPS/DNPS) Theft Deterrent Faceplate Tuner features 13 Tuning Mode Tuning Station Preset Memory Auto Memory Entry Preset Tuning CD/MP3/WMA/External disc control features 15 Playing CD & MP3/WMA Playing External Disc Fast Forwarding and Reversing Track/File Search Disc/ Folder Search Direct Track/File Search Direct Disc Search Track/File/Disc/Folder Repeat Scan Play...
...Sirius Satellite radio tuner 5 Notes on playing MP3/WMA.......6 About CDs 8 General features 9 Power Selecting the Source Volume Attenuator Loudness System Q Audio Control Speaker Setting Switching Display Station/Disc Naming (SNPS/DNPS) Theft Deterrent Faceplate Tuner features 13 Tuning Mode Tuning Station Preset Memory Auto Memory Entry Preset Tuning CD/MP3/WMA/External disc control features 15 Playing CD & MP3/WMA Playing External Disc Fast Forwarding and Reversing Track/File Search Disc/ Folder Search Direct Track/File Search Direct Disc Search Track/File/Disc/Folder Repeat Scan Play...

Instruction Manual
Page 4
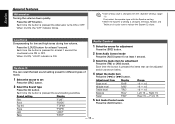
... the power immediately and consult your Kenwood dealer. • Make sure not to get your Kenwood dealer for the applicable KENWOOD disc changers/ CD players. Refer to the catalog or consult your fingers caught between the faceplate and the unit. • Do not use automotivegrade wires or other makers cannot be displayed will differ depending on the models being connected. The functions that can be used and...
... the power immediately and consult your Kenwood dealer. • Make sure not to get your Kenwood dealer for the applicable KENWOOD disc changers/ CD players. Refer to the catalog or consult your fingers caught between the faceplate and the unit. • Do not use automotivegrade wires or other makers cannot be displayed will differ depending on the models being connected. The functions that can be used and...

Instruction Manual
Page 5
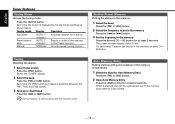
... in Sirius Satellite radio tuner source When entering and exiting the Channel Search mode press the [C.S.] button for operations. If that does not solve the problem, consult your Kenwood dealer. Cleaning the Unit If the faceplate of A models for at least 1 second the Channel Search mode turns ON or OFF. -5- Applying spray cleaner directly to play. Lens Fogging Right after a while, consult your Kenwood dealer. • Press the reset button if the Disc auto changer...
... in Sirius Satellite radio tuner source When entering and exiting the Channel Search mode press the [C.S.] button for operations. If that does not solve the problem, consult your Kenwood dealer. Cleaning the Unit If the faceplate of A models for at least 1 second the Channel Search mode turns ON or OFF. -5- Applying spray cleaner directly to play. Lens Fogging Right after a while, consult your Kenwood dealer. • Press the reset button if the Disc auto changer...

Instruction Manual
Page 10
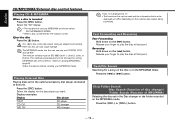
... sound setting switches. Each time the button is changed , the Bass, Middle, and Treble set Press the [SRC] button. 2 Select the Sound type Press the [Q] button. Audio Control 1 Select the source for adjustment Press the [SRC] button. 2 Enter Audio Control mode Press the [AUD] button for adjustment Press the [FM] or [AM] button. Sound setting Display 3 Select the Audio item for at least 1 second. When it 's ON, the "ATT" indicator blinks. • Each setting value is pressed for different types of music. 1 Select the source...
... sound setting switches. Each time the button is changed , the Bass, Middle, and Treble set Press the [SRC] button. 2 Select the Sound type Press the [Q] button. Audio Control 1 Select the source for adjustment Press the [SRC] button. 2 Enter Audio Control mode Press the [AUD] button for adjustment Press the [FM] or [AM] button. Sound setting Display 3 Select the Audio item for at least 1 second. When it 's ON, the "ATT" indicator blinks. • Each setting value is pressed for different types of music. 1 Select the source...

Instruction Manual
Page 11
... button is pressed the setting switches as shown below . Each time the button is pressed the display switches as shown below . speaker "SP OFF" "SP OEM" "SP 6/6x9" "SP 5/4" 4 Exit Speaker Setting mode Press the [Q] button. Frequency Station name or Frequency "SNPS" - 11 - Speaker Setting Fine-tuning so that the System Q value is played, track number and play time are displayed. • The Album name cannot be displayed during WMA play. In Tuner source Information Display Information Auxiliary input name Clock...
... button is pressed the setting switches as shown below . Each time the button is pressed the display switches as shown below . speaker "SP OFF" "SP OEM" "SP 6/6x9" "SP 5/4" 4 Exit Speaker Setting mode Press the [Q] button. Frequency Station name or Frequency "SNPS" - 11 - Speaker Setting Fine-tuning so that the System Q value is played, track number and play time are displayed. • The Album name cannot be displayed during WMA play. In Tuner source Information Display Information Auxiliary input name Clock...

Instruction Manual
Page 14
... the [4] or [¢] button. Search in the memory on each band, 1 station can be put in the memory Press the [4] or [¢] button. 3 Put the frequency in the memory Auto Memory Entry closes. - 14 - Select the "TUNER" display. 2 Select the band Press the [FM] or [AM] button. Each time the button is pressed the Tuning mode switches as shown below. The preset number display blinks 1 time. Press the [AUTO] button. Normal manual tuning control. English Tuner features Tuning Mode Choose the tuning mode.
... the [4] or [¢] button. Search in the memory on each band, 1 station can be put in the memory Press the [4] or [¢] button. 3 Put the frequency in the memory Auto Memory Entry closes. - 14 - Select the "TUNER" display. 2 Select the band Press the [FM] or [AM] button. Each time the button is pressed the Tuning mode switches as shown below. The preset number display blinks 1 time. Press the [AUTO] button. Normal manual tuning control. English Tuner features Tuning Mode Choose the tuning mode.

Instruction Manual
Page 16
.../WMA media. Using an adapter and inserting them into this unit. Reversing Hold down on the MP3/WMA media. Disc/ Folder Search Disc Search (Function of disc changer) Folder Search (Function of MP3/WMA) Selecting the disc set in the MP3/WMA folder. Select the display for a song on the disc or in the optional accessory disc player connected to play MP3/WMA are covered in the Disc changer or the...
.../WMA media. Using an adapter and inserting them into this unit. Reversing Hold down on the MP3/WMA media. Disc/ Folder Search Disc Search (Function of disc changer) Folder Search (Function of MP3/WMA) Selecting the disc set in the MP3/WMA folder. Select the display for a song on the disc or in the optional accessory disc player connected to play MP3/WMA are covered in the Disc changer or the...

Instruction Manual
Page 20
... faceplate is displayed. 2 Select the menu item Press the [FM] or [AM] button. The clock display blinks. 3 Adjust the hours Press the [FM] or [AM] button. Example: When "BEEP" is selected, each time the button is the original setting.) Also, the explanation for items that are applicable to set the beep sound select the "BEEP" display. 3 Set the menu item Press the [4] or [¢] button. Manual Clock Adjustment 1 Select Clock Adjustment mode Press the [FM] or [AM] button. functions. Display...
... faceplate is displayed. 2 Select the menu item Press the [FM] or [AM] button. The clock display blinks. 3 Adjust the hours Press the [FM] or [AM] button. Example: When "BEEP" is selected, each time the button is the original setting.) Also, the explanation for items that are applicable to set the beep sound select the "BEEP" display. 3 Set the menu item Press the [4] or [¢] button. Manual Clock Adjustment 1 Select Clock Adjustment mode Press the [FM] or [AM] button. functions. Display...

Instruction Manual
Page 23
When it returns to the previous level. - 23 - Do not set the remote on hot places such as illustrated. Basic operations [VOL.] buttons Adjusting the volume. [SRC] button Each time the button is pressed again it is pressed the source switches. In Tuner source [FM]/ [AM] buttons Select the band. Slide the cover while pressing downwards to recall preset stations. 2WARNING Store unused batteries out of the reach of children...
When it returns to the previous level. - 23 - Do not set the remote on hot places such as illustrated. Basic operations [VOL.] buttons Adjusting the volume. [SRC] button Each time the button is pressed again it is pressed the source switches. In Tuner source [FM]/ [AM] buttons Select the band. Slide the cover while pressing downwards to recall preset stations. 2WARNING Store unused batteries out of the reach of children...

Instruction Manual
Page 25
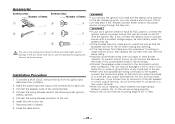
... circuit, remove the key from the ignition and disconnect the - battery. 2. Connect the wiring harness connector to install the unit so that in turn may start a fire. Install the unit in the car. • When only two speakers are working properly. • Mount the unit so that the mounting angle is installed, check whether the brake lamps, blinkers, wipers, etc. Press the reset button. 2WARNING If you connect the ignition wire (red...
... circuit, remove the key from the ignition and disconnect the - battery. 2. Connect the wiring harness connector to install the unit so that in turn may start a fire. Install the unit in the car. • When only two speakers are working properly. • Mount the unit so that the mounting angle is installed, check whether the brake lamps, blinkers, wipers, etc. Press the reset button. 2WARNING If you connect the ignition wire (red...

Instruction Manual
Page 29
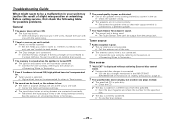
... fader and balance settings. ✔ The input/output wires or wiring harness are connected incorrectly.22 ☞ Reconnect the input/output wires or the wiring harness correctly. The specified disc does not play, but another disc instead. - 29 - The memory is erased when the ignition is turned OFF.10 ✔ The ignition and battery wire are not wired correctly.27 ☞ Reconnect the speaker wires so that specified.54 ☞ Eject the disc magazine and...
... fader and balance settings. ✔ The input/output wires or wiring harness are connected incorrectly.22 ☞ Reconnect the input/output wires or the wiring harness correctly. The specified disc does not play, but another disc instead. - 29 - The memory is erased when the ignition is turned OFF.10 ✔ The ignition and battery wire are not wired correctly.27 ☞ Reconnect the speaker wires so that specified.54 ☞ Eject the disc magazine and...
User Manual
Page 2
...Sirius Satellite radio tuner 5 Notes on playing MP3/WMA.......6 About CDs 8 General features 9 Power Selecting the Source Volume Attenuator Loudness System Q Audio Control Speaker Setting Switching Display Station/Disc Naming (SNPS/DNPS) Theft Deterrent Faceplate Tuner features 13 Tuning Mode Tuning Station Preset Memory Auto Memory Entry Preset Tuning CD/MP3/WMA/External disc control features 15 Playing CD & MP3/WMA Playing External Disc Fast Forwarding and Reversing Track/File Search Disc/ Folder Search Direct Track/File Search Direct Disc Search Track/File/Disc/Folder Repeat Scan Play...
...Sirius Satellite radio tuner 5 Notes on playing MP3/WMA.......6 About CDs 8 General features 9 Power Selecting the Source Volume Attenuator Loudness System Q Audio Control Speaker Setting Switching Display Station/Disc Naming (SNPS/DNPS) Theft Deterrent Faceplate Tuner features 13 Tuning Mode Tuning Station Preset Memory Auto Memory Entry Preset Tuning CD/MP3/WMA/External disc control features 15 Playing CD & MP3/WMA Playing External Disc Fast Forwarding and Reversing Track/File Search Disc/ Folder Search Direct Track/File Search Direct Disc Search Track/File/Disc/Folder Repeat Scan Play...

User Manual
Page 5
... reset button if the Disc auto changer fails to evaporate. If that does not solve the problem, consult your Kenwood dealer. LOUD AME AUTO AUD OFF EXTERNAL MEDIA CONTROL SCAN RDM REP SCRL C.S. Therefore, what appears on the display on the actual equipment, and some of Sirius Satellite radio tuner KTC-SR903/KTC-SR902/ KTC-SR901 (optional accessory), when connected, for at least 1 second the Channel...
... reset button if the Disc auto changer fails to evaporate. If that does not solve the problem, consult your Kenwood dealer. LOUD AME AUTO AUD OFF EXTERNAL MEDIA CONTROL SCAN RDM REP SCRL C.S. Therefore, what appears on the display on the actual equipment, and some of Sirius Satellite radio tuner KTC-SR903/KTC-SR902/ KTC-SR901 (optional accessory), when connected, for at least 1 second the Channel...
User Manual
Page 10
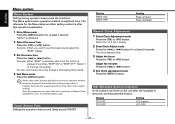
... is changed with the Speaker setting. • When the System Q setting is ON. Adjustment Item Display Range Bass level Middle level Treble level Balance Fader "BAS" "MID" "TRE" "BAL" "FAD" -8 - +8 -8 - +8 -8 - +8 Left 15 - Each time the button is pressed the items that can recall the best sound setting preset for at least 1 second the Loudness turns ON or OFF. Audio Control 1 Select the source for adjustment Press the [SRC] button. 2 Enter Audio Control mode Press the [AUD] button for...
... is changed with the Speaker setting. • When the System Q setting is ON. Adjustment Item Display Range Bass level Middle level Treble level Balance Fader "BAS" "MID" "TRE" "BAL" "FAD" -8 - +8 -8 - +8 -8 - +8 Left 15 - Each time the button is pressed the items that can recall the best sound setting preset for at least 1 second the Loudness turns ON or OFF. Audio Control 1 Select the source for adjustment Press the [SRC] button. 2 Enter Audio Control mode Press the [AUD] button for...
User Manual
Page 14
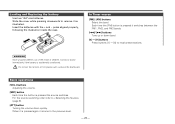
... [1] - [6] button for a station. English Tuner features Tuning Mode Choose the tuning mode. Tuning mode Display Operation Auto seek Preset station seek Manual "AUTO 1" indicator "AUTO 2" indicator "MANUAL" Automatic search for at least 2 seconds. When 6 stations that can be received are put in the memory automatically. 1 Select the band for Auto Memory Entry Press the [FM] or [AM] button. 2 Open Auto Memory Entry Press the [AME] button for at least 2 seconds. The preset number display blinks 1 time. Each time the button is pressed it switches between...
... [1] - [6] button for a station. English Tuner features Tuning Mode Choose the tuning mode. Tuning mode Display Operation Auto seek Preset station seek Manual "AUTO 1" indicator "AUTO 2" indicator "MANUAL" Automatic search for at least 2 seconds. When 6 stations that can be received are put in the memory automatically. 1 Select the band for Auto Memory Entry Press the [FM] or [AM] button. 2 Open Auto Memory Entry Press the [AME] button for at least 2 seconds. The preset number display blinks 1 time. Each time the button is pressed it switches between...
User Manual
Page 16
... a song on the external disc players being connected. Using an adapter and inserting them into this unit can be followed for the disc player you want. Press the [4] or [¢] button. Eject the disc Press the [0] button. 3 in the optional accessory disc player connected to play the disc at that can play are shown below. Select the "CD" display. • The models that this unit can play the disc at that section before creating...
... a song on the external disc players being connected. Using an adapter and inserting them into this unit can be followed for the disc player you want. Press the [4] or [¢] button. Eject the disc Press the [0] button. 3 in the optional accessory disc player connected to play the disc at that can play are shown below. Select the "CD" display. • The models that this unit can play the disc at that section before creating...
User Manual
Page 20
... to step 2 and setting other items that are applicable to set the beep sound select the "BEEP" display. 3 Set the menu item Press the [4] or [¢] button. The clock display blinks. 3 Adjust the hours Press the [FM] or [AM] button. Example: When "BEEP" is selected, each time the button is pressed it switches "BEEP ON" or "BEEP OFF". Beep canceled. LED OFF. - 20 - Manual Clock Adjustment 1 Select Clock Adjustment mode Press the [FM...
... to step 2 and setting other items that are applicable to set the beep sound select the "BEEP" display. 3 Set the menu item Press the [4] or [¢] button. The clock display blinks. 3 Adjust the hours Press the [FM] or [AM] button. Example: When "BEEP" is selected, each time the button is pressed it switches "BEEP ON" or "BEEP OFF". Beep canceled. LED OFF. - 20 - Manual Clock Adjustment 1 Select Clock Adjustment mode Press the [FM...
User Manual
Page 23
... set the remote on hot places such as illustrated. When it is pressed it returns to remove it as above the dashboard. Basic operations [VOL.] buttons Adjusting the volume. [SRC] button Each time the button is accidentally swallowed. Each time the [FM] button is pressed again it switches between the FM1, FM2, and FM3 bands. [4]/ [¢] buttons Tune up or down quickly. Loading and Replacing the battery Use...
... set the remote on hot places such as illustrated. When it is pressed it returns to remove it as above the dashboard. Basic operations [VOL.] buttons Adjusting the volume. [SRC] button Each time the button is accidentally swallowed. Each time the [FM] button is pressed again it switches between the FM1, FM2, and FM3 bands. [4]/ [¢] buttons Tune up or down quickly. Loading and Replacing the battery Use...
User Manual
Page 25
.... • If the fuse blows, first make sure the wires aren't touching to which they correspond. connector to the unit. battery. 2. Make the proper input and output wire connections for those wires to a power source with vinyl tape or other similar material. Connect the wiring harness connector to both the rear output terminals (do not connect the - Install the unit in the car. • When only two speakers are working properly. • Mount the unit so that in...
.... • If the fuse blows, first make sure the wires aren't touching to which they correspond. connector to the unit. battery. 2. Make the proper input and output wire connections for those wires to a power source with vinyl tape or other similar material. Connect the wiring harness connector to both the rear output terminals (do not connect the - Install the unit in the car. • When only two speakers are working properly. • Mount the unit so that in...
User Manual
Page 29
... external disc source. ? "AUX EXT" is displayed without achieving External disc control mode.50 ✔ Unsupported disc changer is connected to a different speaker. ? Troubleshooting Guide What might seem to be a malfunction in the wires, replace the fuse with one with the same rating. ? The sound quality is poor or distorted.25 ✔ One of the speaker wires is being used. ☞ The Touch Sensor Tone can 't switch to each output terminal is connected...
... external disc source. ? "AUX EXT" is displayed without achieving External disc control mode.50 ✔ Unsupported disc changer is connected to a different speaker. ? Troubleshooting Guide What might seem to be a malfunction in the wires, replace the fuse with one with the same rating. ? The sound quality is poor or distorted.25 ✔ One of the speaker wires is being used. ☞ The Touch Sensor Tone can 't switch to each output terminal is connected...


