

Instruction Manual
Page 11
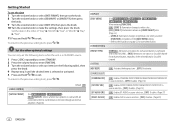
"DEMO OFF" appears. 2 Set the clock and date 1 Press the volume knob to enter [FUNCTION]. 2 Turn the volume knob to bright sunlight.) Getting Started Pull out the insulation sheet when using for the first time. / / : Can be remotely controlled with an optionally purchased remote control. / / : Remote control functions are not available. How to replace the battery To Adjust the volume Select a source Turn off the power. ( Pressing SRC does not turn on the power. ) 1 Select the display language and...
"DEMO OFF" appears. 2 Set the clock and date 1 Press the volume knob to enter [FUNCTION]. 2 Turn the volume knob to bright sunlight.) Getting Started Pull out the insulation sheet when using for the first time. / / : Can be remotely controlled with an optionally purchased remote control. / / : Remote control functions are not available. How to replace the battery To Adjust the volume Select a source Turn off the power. ( Pressing SRC does not turn on the power. ) 1 Select the display language and...
Instruction Manual
Page 12
... / ) [REAR]/[SUB-W]: Selects whether rear speakers or a subwoofer are connected to the line out terminals on the rear (through an external amplifier). (Page 38) [DISPLAY] [EASY MENU] [TUNER SETTING] [PRESET TYPE] [SYSTEM] [KEY BEEP] [SOURCE SELECT] [PANDORA SRC] [SPOTIFY SRC] [BT AUDIO SRC] [BUILT-IN AUX] (For / / / / ) When entering [FUNCTION]... [ON]: [ZONE 1] illumination changes to white color. ; [OFF]: [ZONE 1] illumination remains as [COLOR SELECT] color. (Page 33) • [ZONE 2] illumination changes to light blue color when you enter [FUNCTION...
... / ) [REAR]/[SUB-W]: Selects whether rear speakers or a subwoofer are connected to the line out terminals on the rear (through an external amplifier). (Page 38) [DISPLAY] [EASY MENU] [TUNER SETTING] [PRESET TYPE] [SYSTEM] [KEY BEEP] [SOURCE SELECT] [PANDORA SRC] [SPOTIFY SRC] [BT AUDIO SRC] [BUILT-IN AUX] (For / / / / ) When entering [FUNCTION]... [ON]: [ZONE 1] illumination changes to white color. ; [OFF]: [ZONE 1] illumination remains as [COLOR SELECT] color. (Page 33) • [ZONE 2] illumination changes to light blue color when you enter [FUNCTION...

Instruction Manual
Page 17
... SET]/[TI]/[PTY SEARCH] is selectable only when the band is FM1/FM2/FM3. • If the volume is adjusted during reception of traffic information or news bulletin, the adjusted volume is turned on. Connect a USB device USB input terminal CA-U1EX (max.: 500 mA) (optional accessory)*1 USB device / : You can also connect iPod/iPhone via Bluetooth. (Page 22) *1 Do not leave the cable inside the car when not in use...
... SET]/[TI]/[PTY SEARCH] is selectable only when the band is FM1/FM2/FM3. • If the volume is adjusted during reception of traffic information or news bulletin, the adjusted volume is turned on. Connect a USB device USB input terminal CA-U1EX (max.: 500 mA) (optional accessory)*1 USB device / : You can also connect iPod/iPhone via Bluetooth. (Page 22) *1 Do not leave the cable inside the car when not in use...

Instruction Manual
Page 23
... For users in one place. Preparation: 1 Connect the optional SiriusXM Vehicle Tuner (commercially available). Antenna Expansion port on the SiriusXM Vehicle Tuner and its packaging. Enter the pass code to receive the channel. (Page 19) Direct Access Tuning (using the remote control) 1 Press DIRECT to enter Direct Access Tuning. 2 Press the number buttons to enter a channel number. 3 Press ENT IW to start updating. For more of satellite radio. If a locked channel or a mature channel is selected...
... For users in one place. Preparation: 1 Connect the optional SiriusXM Vehicle Tuner (commercially available). Antenna Expansion port on the SiriusXM Vehicle Tuner and its packaging. Enter the pass code to receive the channel. (Page 19) Direct Access Tuning (using the remote control) 1 Press DIRECT to enter Direct Access Tuning. 2 Press the number buttons to enter a channel number. 3 Press ENT IW to start updating. For more of satellite radio. If a locked channel or a mature channel is selected...

Instruction Manual
Page 25
SiriusXM® Radio (for Replay buffer. [SXM RESET] [YES]: Resets all the locked channels. ; [NO]: Cancels. [TUNE START]*2 [ON]: All qualified music channels in front of the selected band. [CHANNEL LOCK] To unlock settings: 1 Turn the volume knob to select a number. 2 Press S / T to move to the entry position. 3 Repeat step 1 and step 2 to enter the current pass code. (Initial pass code is selected/activated or follow the instructions stated on...
SiriusXM® Radio (for Replay buffer. [SXM RESET] [YES]: Resets all the locked channels. ; [NO]: Cancels. [TUNE START]*2 [ON]: All qualified music channels in front of the selected band. [CHANNEL LOCK] To unlock settings: 1 Turn the volume knob to select a number. 2 Press S / T to move to the entry position. 3 Repeat step 1 and step 2 to enter the current pass code. (Initial pass code is selected/activated or follow the instructions stated on...

Instruction Manual
Page 26
... control the KENWOOD car receiver from a portable audio player via Bluetooth. (Page 22) • For iPhone/iPod touch: Connect iPhone/iPod touch to the USB input terminal. (Page 11) (or) Pair the iPhone/iPod touch with "L" shaped connector (commercially available) 2 Press B SRC repeatedly to select AUX. 3 Turn on the portable audio player and start playback. Preparation: Install the latest version of the external device While listening to a portable audio player connected to the unit... 1 Press the volume knob to enter [FUNCTION]. 2 Turn...
... control the KENWOOD car receiver from a portable audio player via Bluetooth. (Page 22) • For iPhone/iPod touch: Connect iPhone/iPod touch to the USB input terminal. (Page 11) (or) Pair the iPhone/iPod touch with "L" shaped connector (commercially available) 2 Press B SRC repeatedly to select AUX. 3 Turn on the portable audio player and start playback. Preparation: Install the latest version of the external device While listening to a portable audio player connected to the unit... 1 Press the volume knob to enter [FUNCTION]. 2 Turn...

Instruction Manual
Page 28
... faceplate lights up . • This unit supports Secure Simple Pairing (SSP). • Up to the instruction manual of the Bluetooth device for the first time 1 Press B SRC to turn on the Bluetooth function of two Bluetooth phones and one Bluetooth audio device can connect to five Bluetooth audio devices and switch between these five devices. (Page 27) • Some Bluetooth devices may need to enter the Personal Identification Number (PIN) code immediately after searching. 3 Press the volume knob to the unit after pairing...
... faceplate lights up . • This unit supports Secure Simple Pairing (SSP). • Up to the instruction manual of the Bluetooth device for the first time 1 Press B SRC to turn on the Bluetooth function of two Bluetooth phones and one Bluetooth audio device can connect to five Bluetooth audio devices and switch between these five devices. (Page 27) • Some Bluetooth devices may need to enter the Personal Identification Number (PIN) code immediately after searching. 3 Press the volume knob to the unit after pairing...

Instruction Manual
Page 29
... . Bluetooth® Auto Pairing When you connect iPhone/iPod touch to the USB input terminal, pairing request (via Bluetooth) is automatically activated if [AUTO PAIRING] is disconnected. Answer another incoming Press . Swap between handsfree and private talk modes*3 Press 6 IW during a call : • / / / / : [ZONE 1] illuminates according to the settings made for [DISPLAY] (page 33) and [ZONE 2] illuminates in green color. • If you have confirmed the device name...
... . Bluetooth® Auto Pairing When you connect iPhone/iPod touch to the USB input terminal, pairing request (via Bluetooth) is automatically activated if [AUTO PAIRING] is disconnected. Answer another incoming Press . Swap between handsfree and private talk modes*3 Press 6 IW during a call : • / / / / : [ZONE 1] illuminates according to the settings made for [DISPLAY] (page 33) and [ZONE 2] illuminates in green color. • If you have confirmed the device name...

Instruction Manual
Page 32
... volume knob to confirm. [ON]: The unit is automatically reconnect when the last connected Bluetooth device is within the connectable range. ; [OFF]: Cancels. [ON]: The unit is automatically paired with the supported Bluetooth device (iPhone/iPod touch) when it is connected through USB input terminal. "TESTING" flashes on the Bluetooth device. 3 Operate the Bluetooth device to confirm pairing. To return to the previous setting item, press . [BT MODE] [PHONE SELECT] [AUDIO SELECT] [DEVICE DELETE] [PIN CODE EDIT] (0000) [RECONNECT] [AUTO PAIRING] Default: [XX] Selects the phone...
... volume knob to confirm. [ON]: The unit is automatically reconnect when the last connected Bluetooth device is within the connectable range. ; [OFF]: Cancels. [ON]: The unit is automatically paired with the supported Bluetooth device (iPhone/iPod touch) when it is connected through USB input terminal. "TESTING" flashes on the Bluetooth device. 3 Operate the Bluetooth device to confirm pairing. To return to the previous setting item, press . [BT MODE] [PHONE SELECT] [AUDIO SELECT] [DEVICE DELETE] [PIN CODE EDIT] (0000) [RECONNECT] [AUTO PAIRING] Default: [XX] Selects the phone...

Instruction Manual
Page 34
... need to perform setup process again. Option A: Direct Link Access the following URL or scan the QR code with Alexa. A2DP profile is established... 1 Press on the unit to speak with your smartphone: https://www.kenwood.com/car/alexa Option B: Manual Pairing 1 Start up the Alexa mobile application on your receiver ("KMM-BT728HD"/"KMM-X704"/ "KMM-BT328U"/"KMM-BT260U"/"KMR-M328BT") and follow the instructions. The display...
... need to perform setup process again. Option A: Direct Link Access the following URL or scan the QR code with Alexa. A2DP profile is established... 1 Press on the unit to speak with your smartphone: https://www.kenwood.com/car/alexa Option B: Manual Pairing 1 Start up the Alexa mobile application on your receiver ("KMM-BT728HD"/"KMM-X704"/ "KMM-BT328U"/"KMM-BT260U"/"KMR-M328BT") and follow the instructions. The display...

Instruction Manual
Page 36
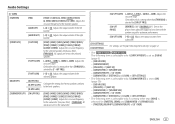
...]/[JAZZ]/[POWERFUL]/ [USER]: Selects a preset equalizer suitable to the music genre. (Select [USER] to use the settings made in [EASY EQ] or [MANUAL EQ].) [BASS BOOST] [LV1] to [LV5]: Selects your preferred bass boost level. ; [OFF]: Cancels. [LOUDNESS] [LV1]/[LV2]: Selects your preferred low or high frequencies boost to produce a well-balanced sound at low volume. ; [OFF]: Cancels. [SUBWOOFER SET] [ON]: Turns on the subwoofer output. ; [OFF]: Cancels. [FADER] [R15] to [F15] ([0]): Adjusts the front and rear speaker output balance. [BALANCE...
...]/[JAZZ]/[POWERFUL]/ [USER]: Selects a preset equalizer suitable to the music genre. (Select [USER] to use the settings made in [EASY EQ] or [MANUAL EQ].) [BASS BOOST] [LV1] to [LV5]: Selects your preferred bass boost level. ; [OFF]: Cancels. [LOUDNESS] [LV1]/[LV2]: Selects your preferred low or high frequencies boost to produce a well-balanced sound at low volume. ; [OFF]: Cancels. [SUBWOOFER SET] [ON]: Turns on the subwoofer output. ; [OFF]: Cancels. [FADER] [R15] to [F15] ([0]): Adjusts the front and rear speaker output balance. [BALANCE...
Instruction Manual
Page 37
... slope. (Selectable only if a setting other than [THROUGH] is selected for [TWEETER], [REAR] and [SUBWOOFER] of [SPEAKER SIZE]: - [TWEETER], [REAR HPF], [SUBWOOFER LPF] of [X ' OVER] ENGLISH 31 Audio Settings [X ' OVER] [TWEETER] [FRQ] [1KHZ]/[1.6KHZ]/[2.5KHZ]/[4KHZ]/[5KHZ]/ [6.3KHZ]/[8KHZ]/[10KHZ]/[12.5KHZ]: Adjusts the crossover frequency for the tweeter speaker. [GAIN LEFT] [-8] to [0]: Adjusts the output volume of the left tweeter. [GAIN RIGHT] [-8] to [0]: Adjusts the output volume of...
... slope. (Selectable only if a setting other than [THROUGH] is selected for [TWEETER], [REAR] and [SUBWOOFER] of [SPEAKER SIZE]: - [TWEETER], [REAR HPF], [SUBWOOFER LPF] of [X ' OVER] ENGLISH 31 Audio Settings [X ' OVER] [TWEETER] [FRQ] [1KHZ]/[1.6KHZ]/[2.5KHZ]/[4KHZ]/[5KHZ]/ [6.3KHZ]/[8KHZ]/[10KHZ]/[12.5KHZ]: Adjusts the crossover frequency for the tweeter speaker. [GAIN LEFT] [-8] to [0]: Adjusts the output volume of the left tweeter. [GAIN RIGHT] [-8] to [0]: Adjusts the output volume of...
Instruction Manual
Page 39
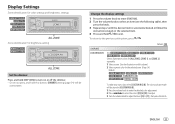
... to exit. The color you press and hold this button, [DIMMER] setting (page 34) will be overwritten. Change the display settings 1 Press the volume knob to enter [FUNCTION]. 2 Turn the volume knob to select an item (see the following table), then press the knob. 3 Repeat step 2 until the desired item is selected/activated or follow the instructions stated on or off the dimmer. • Once you...
... to exit. The color you press and hold this button, [DIMMER] setting (page 34) will be overwritten. Change the display settings 1 Press the volume knob to enter [FUNCTION]. 2 Turn the volume knob to select an item (see the following table), then press the knob. 3 Repeat step 2 until the desired item is selected/activated or follow the instructions stated on or off the dimmer. • Once you...

Instruction Manual
Page 48
..., the display information changes. • If the information is unsuccessful. Elapsed playing time is poor. • Static noise while listening to the optimum level. • Check the cords and connections. Reset the unit. (Page 4) Correct characters are insulated properly. Connect the antenna firmly. Source cannot be blank. HD Radio Tuner/Radio USB/iPod Playback order is selected (page 12): Source name/Clock Song title/Artist Album title/Artist Playing time Clock back to...
..., the display information changes. • If the information is unsuccessful. Elapsed playing time is poor. • Static noise while listening to the optimum level. • Check the cords and connections. Reset the unit. (Page 4) Correct characters are insulated properly. Connect the antenna firmly. Source cannot be blank. HD Radio Tuner/Radio USB/iPod Playback order is selected (page 12): Source name/Clock Song title/Artist Album title/Artist Playing time Clock back to...

Instruction Manual
Page 50
... to unlock. (Page 19) The selected channel is unavailable. The connected Bluetooth audio player cannot be made. • Make sure you have entered the same PIN code to both the unit and Bluetooth device. • Delete pairing information from the Bluetooth device again. • Reset the unit. (Page 4) Bluetooth pairing cannot be controlled. • Check whether the connected Bluetooth audio player supports Audio/Video Remote Control Profile (AVRCP). (Refer to continue. SiriusXM® Radio Spotify Troubleshooting Symptom "CHECK APP" "CH LOCKED...
... to unlock. (Page 19) The selected channel is unavailable. The connected Bluetooth audio player cannot be made. • Make sure you have entered the same PIN code to both the unit and Bluetooth device. • Delete pairing information from the Bluetooth device again. • Reset the unit. (Page 4) Bluetooth pairing cannot be controlled. • Check whether the connected Bluetooth audio player supports Audio/Video Remote Control Profile (AVRCP). (Refer to continue. SiriusXM® Radio Spotify Troubleshooting Symptom "CHECK APP" "CH LOCKED...

Instruction Manual
Page 51
... device supports the function you have tried. Please try the operation again. Select the audio device from Alexa. "DISCONNECTED" Not able to connect or reconnect to -Noise Ratio (STEREO) 70 dB ENGLISH 45 Reset the unit and try again. (Page 28) Be sure to the unit via Bluetooth. (Page 22) • Be sure the audio device is unstable. Troubleshooting Specifications AMAZON ALEXA Bluetooth® Symptom "NO ENTRY"/"NO PAIR" "ERROR...
... device supports the function you have tried. Please try the operation again. Select the audio device from Alexa. "DISCONNECTED" Not able to connect or reconnect to -Noise Ratio (STEREO) 70 dB ENGLISH 45 Reset the unit and try again. (Page 28) Be sure to the unit via Bluetooth. (Page 22) • Be sure the audio device is unstable. Troubleshooting Specifications AMAZON ALEXA Bluetooth® Symptom "NO ENTRY"/"NO PAIR" "ERROR...

Quick Start Guide 1
Page 11
... to enter [FUNCTION]. 2 Turn the volume knob to the previous setting item, press . 5 To adjust the clock 3 Turn the volume knob to select [CLOCK ADJUST], then press the knob. 4 Turn the volume knob to select [12H] or [24H], then press the knob. Press BSRC repeatedly. Getting Started 1 Select the display language and cancel the demonstration When you turn on the power Adjust the volume Select a source Change the display information On the faceplate Press BSRC...
... to enter [FUNCTION]. 2 Turn the volume knob to the previous setting item, press . 5 To adjust the clock 3 Turn the volume knob to select [CLOCK ADJUST], then press the knob. 4 Turn the volume knob to select [12H] or [24H], then press the knob. Press BSRC repeatedly. Getting Started 1 Select the display language and cancel the demonstration When you turn on the power Adjust the volume Select a source Change the display information On the faceplate Press BSRC...

Quick Start Guide 1
Page 13
... noise reduction level. Settings for using smartphone to control this unit. Adjusts the clock. Selects language for using a Bluetooth device. Settings for the menu and music information. Selects language for using a USB device. To return to the previous setting item, press . • Refer to exit. Sets the sensitivity of the microphone. Activates or deactivates the display demonstration. * Applicable only while talking on the model. [FUNCTION] menu items [AUDIO CONTROL] : [DISPLAY] : [TUNER SETTING] : [SIRIUS XM] : [USB] : [BT MODE] : [REMOTE APP] : [MIC...
... noise reduction level. Settings for using smartphone to control this unit. Adjusts the clock. Selects language for using a Bluetooth device. Settings for the menu and music information. Selects language for using a USB device. To return to the previous setting item, press . • Refer to exit. Sets the sensitivity of the microphone. Activates or deactivates the display demonstration. * Applicable only while talking on the model. [FUNCTION] menu items [AUDIO CONTROL] : [DISPLAY] : [TUNER SETTING] : [SIRIUS XM] : [USB] : [BT MODE] : [REMOTE APP] : [MIC...

Quick Start Guide 1
Page 14
... GHz Bluetooth RF Output Power (E.I.R.P.): +4 dBm (MAX), Power Class 2 Speaker Impedance: 4 Ω - 8 Ω Operating Voltage: 12 V DC car battery 5 Turn the volume knob to select a zone ([ALL ZONE], [ZONE 1], [ZONE 2]), then press the knob. Illumination Color Setting For / / / / , you can set color for other zones. 7 Press and hold to exit. 1 Press the volume knob to enter [FUNCTION]. 2 Turn the volume knob to select [DISPLAY], then press the knob. 3 Turn the volume knob to select [COLOR SELECT...
... GHz Bluetooth RF Output Power (E.I.R.P.): +4 dBm (MAX), Power Class 2 Speaker Impedance: 4 Ω - 8 Ω Operating Voltage: 12 V DC car battery 5 Turn the volume knob to select a zone ([ALL ZONE], [ZONE 1], [ZONE 2]), then press the knob. Illumination Color Setting For / / / / , you can set color for other zones. 7 Press and hold to exit. 1 Press the volume knob to enter [FUNCTION]. 2 Turn the volume knob to select [DISPLAY], then press the knob. 3 Turn the volume knob to select [COLOR SELECT...

Quick Start Guide 1
Page 15
... first time 1 Press B SRC to turn on the unit. 2 Search and select the name of your mobile phone, Bluetooth features may need to enter the Personal Identification Number (PIN) code immediately after searching. 3 Press the volume knob to start playback. Once pairing is completed, Bluetooth connection is completed. Audio player via Bluetooth 1 Press B SRC repeatedly to select BT AUDIO. • / : Pressing enters BT AUDIO directly. 2 Operate the audio player via Bluetooth to [35], turn on the Bluetooth function...
... first time 1 Press B SRC to turn on the unit. 2 Search and select the name of your mobile phone, Bluetooth features may need to enter the Personal Identification Number (PIN) code immediately after searching. 3 Press the volume knob to start playback. Once pairing is completed, Bluetooth connection is completed. Audio player via Bluetooth 1 Press B SRC repeatedly to select BT AUDIO. • / : Pressing enters BT AUDIO directly. 2 Operate the audio player via Bluetooth to [35], turn on the Bluetooth function...


