

Operation Manual
Page 21
Compact Stereo System M-725DAB OPERATING INSTRUCTIONS JVCKENWOOD Corporation DEUTSCH ENGLISH FRANÇAIS ITALIANO NEDERLANDS
Compact Stereo System M-725DAB OPERATING INSTRUCTIONS JVCKENWOOD Corporation DEUTSCH ENGLISH FRANÇAIS ITALIANO NEDERLANDS

Operation Manual
Page 22
FM Radio 6.1 Setting an FM station 6.2 Storing stations in the menus 4.3 Adjusting the volume 4.4 Setting the sound (equaliser) 4.5 Additional information 4.6 Setting the menu language 4.7 Setting the time and date 4.8 Setting the display illumination 4.9 Setting the sleep timer 4.10 Setting the alarm clock 5. USB player 8.1 Playing MP3 files 8.2 Repeat and random playback 9. Line-In 11. Before start-up 3. Factory setting 12. Technical specifications 16. Guarantee 2 Page 3 6 7 9 9 9 9 9 9 9 9 10 10 10 11 11 11 11 12 12 12 12 12...
FM Radio 6.1 Setting an FM station 6.2 Storing stations in the menus 4.3 Adjusting the volume 4.4 Setting the sound (equaliser) 4.5 Additional information 4.6 Setting the menu language 4.7 Setting the time and date 4.8 Setting the display illumination 4.9 Setting the sleep timer 4.10 Setting the alarm clock 5. USB player 8.1 Playing MP3 files 8.2 Repeat and random playback 9. Line-In 11. Before start-up 3. Factory setting 12. Technical specifications 16. Guarantee 2 Page 3 6 7 9 9 9 9 9 9 9 9 10 10 10 11 11 11 11 12 12 12 12 12...

Operation Manual
Page 23
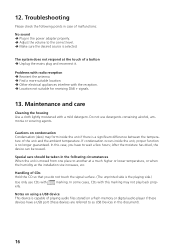
... device on the power supply IMPORTANT SAFETY INSTRUCTIONS Attention: Read this page carefully to protect the device from the mains power socket before cleaning this device from overheating and possible autoignition. Never place containers filled with a dry cloth! • Pull out the mains plug of the device. Power supply • This device may connected only to the manufacturer's instructions. Power cord • Make sure that you are used...
... device on the power supply IMPORTANT SAFETY INSTRUCTIONS Attention: Read this page carefully to protect the device from the mains power socket before cleaning this device from overheating and possible autoignition. Never place containers filled with a dry cloth! • Pull out the mains plug of the device. Power supply • This device may connected only to the manufacturer's instructions. Power cord • Make sure that you are used...

Operation Manual
Page 24
... completing service or repair of this device through the openings or by a qualified customer service. Never place objects with high voltage components or short circuit resulting in any kind on or near hot surfaces, such as direct sunlight, fire, etc. Batteries • If you do not remove screws, covers or body parts. • the power button does not completely disconnect the power supply in...
... completing service or repair of this device through the openings or by a qualified customer service. Never place objects with high voltage components or short circuit resulting in any kind on or near hot surfaces, such as direct sunlight, fire, etc. Batteries • If you do not remove screws, covers or body parts. • the power button does not completely disconnect the power supply in...

Operation Manual
Page 25
... device contains no user serviceable parts; Risks associated with high volume • To prevent possible hearing damage, do not listen at the following Internet address: http://www.kenwood.com/euukdoc/ Manufacturer: JVCKENWOOD Corporation 3-12. This switches the device to direct sunlight or high-frequency fluorescent light may have a limited lifetime. Caution! IMPORTANT FOR LASER PRODUCTS 1. Remote control • Exposing the remote control sensor to standby mode within...
... device contains no user serviceable parts; Risks associated with high volume • To prevent possible hearing damage, do not listen at the following Internet address: http://www.kenwood.com/euukdoc/ Manufacturer: JVCKENWOOD Corporation 3-12. This switches the device to direct sunlight or high-frequency fluorescent light may have a limited lifetime. Caution! IMPORTANT FOR LASER PRODUCTS 1. Remote control • Exposing the remote control sensor to standby mode within...

Operation Manual
Page 26
... antenna connection 1. To do this, press the spring clips and insert the loose cable ends into the openings provided. Start-up 2.1 Unpacking Carefully unpack the device and make sure all accessories are present: • Infrared remote control • FM/DAB + wire antenna • 2 x AAA/R03 batteries • Operating instructions • 2 x speakers 2.2 Connecting • Open the battery compartment of radio stations from the power grid, the socket must always be guaranteed. 6 Fix the antenna...
... antenna connection 1. To do this, press the spring clips and insert the loose cable ends into the openings provided. Start-up 2.1 Unpacking Carefully unpack the device and make sure all accessories are present: • Infrared remote control • FM/DAB + wire antenna • 2 x AAA/R03 batteries • Operating instructions • 2 x speakers 2.2 Connecting • Open the battery compartment of radio stations from the power grid, the socket must always be guaranteed. 6 Fix the antenna...

Operation Manual
Page 27
3. Components and functions 1 Standby On/Off 2 Mode selection 3 Menu 4 Repeat selection 5 Shuffle mode 6 Previous album, preset memory - 7 Increase the volume 8 Skip track / track search backwards 9 Confirm entry, playback/pause 10 Reducing volume 11 Mute On/Off 12 Number keys 13 Track programming, use preset memory 14 Open/close CD tray (eject) 15 Set the time 16 Set alarm clock 17 Stop playback, BLUETOOTH pairing, station search 18 Set the sleep time 19 Next album...
3. Components and functions 1 Standby On/Off 2 Mode selection 3 Menu 4 Repeat selection 5 Shuffle mode 6 Previous album, preset memory - 7 Increase the volume 8 Skip track / track search backwards 9 Confirm entry, playback/pause 10 Reducing volume 11 Mute On/Off 12 Number keys 13 Track programming, use preset memory 14 Open/close CD tray (eject) 15 Set the time 16 Set alarm clock 17 Stop playback, BLUETOOTH pairing, station search 18 Set the sleep time 19 Next album...

Operation Manual
Page 28
Skip track forwards 2 - Headphone port 9 - CD Eject 11 - Line-in input 3 - Components and functions continuation 1 1 - Standby On/Off 4 - Mode selection 3 5 - TFT display 5 8 - USB connection 10 - Volume /SELECT Front side 6 7 11 8 9 10 1 - 3. Play/Pause 6 - Skip track backwards 2 3 - CD drawer 4 7 - Speaker connection 2 - Antennas input Backside 1 2 3 8
Skip track forwards 2 - Headphone port 9 - CD Eject 11 - Line-in input 3 - Components and functions continuation 1 1 - Standby On/Off 4 - Mode selection 3 5 - TFT display 5 8 - USB connection 10 - Volume /SELECT Front side 6 7 11 8 9 10 1 - 3. Play/Pause 6 - Skip track backwards 2 3 - CD drawer 4 7 - Speaker connection 2 - Antennas input Backside 1 2 3 8

Operation Manual
Page 29
... the remote control to switch on and call up the menu. 2. Switch the radio on the radio. If no corresponding station is graphically displayed on the remote control to call up the menu. 2. Press the button again to navigate within the menus. Now select the "Time" menu and confirm. 4. Operating the radio 4.1 Switching On / Off (standby) Press the Standby key on the device or on the Display. 4.4 Setting the sound (equaliser) The system has five preset sound settings...
... the remote control to switch on and call up the menu. 2. Switch the radio on the radio. If no corresponding station is graphically displayed on the remote control to call up the menu. 2. Press the button again to navigate within the menus. Now select the "Time" menu and confirm. 4. Operating the radio 4.1 Switching On / Off (standby) Press the Standby key on the device or on the Display. 4.4 Setting the sound (equaliser) The system has five preset sound settings...

Operation Manual
Page 30
..." / "Weekend" / "Weekdays" To set the alarm time, please proceed as follows: 1. If you can set in the "Backlight" menu: "Timeout": Time until switch off the radio after a preset period of the "On level". "Alarm 1 Setup" is switched on and call up using the key on the remote control. 4.10 Setting the alarm clock This Device can be made in the "Time" menu: "Auto Update": Setting from which source the time is set to 2 different alarm times. Choices: "On / 10...
..." / "Weekend" / "Weekdays" To set the alarm time, please proceed as follows: 1. If you can set in the "Backlight" menu: "Timeout": Time until switch off the radio after a preset period of the "On level". "Alarm 1 Setup" is switched on and call up using the key on the remote control. 4.10 Setting the alarm clock This Device can be made in the "Time" menu: "Auto Update": Setting from which source the time is set to 2 different alarm times. Choices: "On / 10...

Operation Manual
Page 31
... corresponding stations in the station list with . To delete a set ensembles manually. 5. The "Alarm Clock" menu can also be received, change the orientation of the antenna or the location of the 2nd alarm time proceed analogously. The device starts playing automatically. To do this , use the button to confirm. Digital radio DAB+ In order to source"DAB". Now information about the ensemble and the signal strength are shown in the Display. 5.1 Station search...
... corresponding stations in the station list with . To delete a set ensembles manually. 5. The "Alarm Clock" menu can also be received, change the orientation of the antenna or the location of the 2nd alarm time proceed analogously. The device starts playing automatically. To do this , use the button to confirm. Digital radio DAB+ In order to source"DAB". Now information about the ensemble and the signal strength are shown in the Display. 5.1 Station search...

Operation Manual
Page 32
... memory location. Possible settings are available for sleep timer, alarm clock, time, backlight, language, factory reset, software upgrade and SW version. 6. To call up saved stations, please press the key and select the desired memory location by the selected station, it is to adjust the dynamic range. FM Radio To receive FM Radio, please use the key on the remote control or on the remote control, whereby the key...
... memory location. Possible settings are available for sleep timer, alarm clock, time, backlight, language, factory reset, software upgrade and SW version. 6. To call up saved stations, please press the key and select the desired memory location by the selected station, it is to adjust the dynamic range. FM Radio To receive FM Radio, please use the key on the remote control or on the remote control, whereby the key...

Operation Manual
Page 33
Insert the CD and close the tray by pressing and holding the button on the remote control. The number of poor reception conditions, select "Forced mono". • System: Settings for sleep timer, alarm clock, time, backlight, language, factory reset, software upgrade and SW version. 7. The following information can briefly play audio CDs and MP3 CDs. In case of the track currently being played and the time elapsed are displayed during playback. 13 To...
Insert the CD and close the tray by pressing and holding the button on the remote control. The number of poor reception conditions, select "Forced mono". • System: Settings for sleep timer, alarm clock, time, backlight, language, factory reset, software upgrade and SW version. 7. The following information can briefly play audio CDs and MP3 CDs. In case of the track currently being played and the time elapsed are displayed during playback. 13 To...

Operation Manual
Page 34
...source "USB". 8.1 Playing MP3 files Using the or keys you can fast forward and rewind within the track with increasing speed. For CDs that contain MP3 files, the number of available folders and files is displayed as follows: FX/xx TXX/XX The number behind "F" stands for the number...: Repeat All / press four times: Off Random playback : Press once: Random playback On / press twice: Random playback Off 8. USB player You can use this please use the or key on the remote control or the device to switch to the previous Track. With the buttons, playback is paused and continued....
...source "USB". 8.1 Playing MP3 files Using the or keys you can fast forward and rewind within the track with increasing speed. For CDs that contain MP3 files, the number of available folders and files is displayed as follows: FX/xx TXX/XX The number behind "F" stands for the number...: Repeat All / press four times: Off Random playback : Press once: Random playback On / press twice: Random playback Off 8. USB player You can use this please use the or key on the remote control or the device to switch to the previous Track. With the buttons, playback is paused and continued....

Operation Manual
Page 35
... If switched from source "BT" or when the radio is switched off, the BLUETOOTH connection is cancelled. 15 To do this , use the music App of music files (audio streaming) to be paired and start the pairing process. Now open the BLUETOOTH settings on the terminal device to the radio. Factory setting To reset the radio to play /pause and skip forward/backward is possible using the corresponding buttons on the remote control...
... If switched from source "BT" or when the radio is switched off, the BLUETOOTH connection is cancelled. 15 To do this , use the music App of music files (audio streaming) to be paired and start the pairing process. Now open the BLUETOOTH settings on the terminal device to the radio. Factory setting To reset the radio to play /pause and skip forward/backward is possible using the corresponding buttons on the remote control...
Operation Manual
Page 36
... a USB port (these devices are referred to as USB Devices in the power adapter properly. Adjust the volume to the correct level. Make sure the desired source is moved from one place to wait a few hours; In this marking may form inside the unit, proper function is the playing side.) Use only use detergents containing alcohol, ammonia or scouring agents. marking. The system...
... a USB port (these devices are referred to as USB Devices in the power adapter properly. Adjust the volume to the correct level. Make sure the desired source is moved from one place to wait a few hours; In this marking may form inside the unit, proper function is the playing side.) Use only use detergents containing alcohol, ammonia or scouring agents. marking. The system...

Operation Manual
Page 37
... of their respective owners. 17 By helping to properly dispose of this product must not be handled as external storage without the need for a special driver or application software. • Consult your fellow human beings. Disposal instructions for consumers in Germany: https://www.e-schrott-entsorgen.org/ Disposal instructions for the USB Mass Storage Class. • Using a USB device that is...
... of their respective owners. 17 By helping to properly dispose of this product must not be handled as external storage without the need for a special driver or application software. • Consult your fellow human beings. Disposal instructions for consumers in Germany: https://www.e-schrott-entsorgen.org/ Disposal instructions for the USB Mass Storage Class. • Using a USB device that is...

Operation Manual
Page 38
... Profile, AVRCP (Audio/Video Remote Control Profile) Line-In 3.5 mm jack socket Headphone port 3.5 mm jack socket Amplifier part Output power 2 x 25 watts / 6 ohm Frequency response 20 Hz - 20 kHz (+- 3dB) Dimensions and weight Main unit Speaker Temperature range (W x H x D) 200 x 119 x 242 mm / 1.6 kg (W x H x D) 133 x 200 x 220 mm / 1.6 kg per piece. 0°C to 40°C Technical modifications reserved 18 15. Technical specifications M-725DAB Power supply AC ~ 100...
... Profile, AVRCP (Audio/Video Remote Control Profile) Line-In 3.5 mm jack socket Headphone port 3.5 mm jack socket Amplifier part Output power 2 x 25 watts / 6 ohm Frequency response 20 Hz - 20 kHz (+- 3dB) Dimensions and weight Main unit Speaker Temperature range (W x H x D) 200 x 119 x 242 mm / 1.6 kg (W x H x D) 133 x 200 x 220 mm / 1.6 kg per piece. 0°C to 40°C Technical modifications reserved 18 15. Technical specifications M-725DAB Power supply AC ~ 100...

Operation Manual
Page 39
... causes for which Kenwood is used in a country for which the serial number(s) has been completely or partially removed, changed or made to the product since it was not designed and manufactured, warranty work if this context or for damage to records, audio tapes, audio and video cassettes, compact CDs and other rights of the user within the framework of normal customer service, such as: Pick...
... causes for which Kenwood is used in a country for which the serial number(s) has been completely or partially removed, changed or made to the product since it was not designed and manufactured, warranty work if this context or for damage to records, audio tapes, audio and video cassettes, compact CDs and other rights of the user within the framework of normal customer service, such as: Pick...


