
Use & Care Guide
Page 1
MICROWAVE OVEN Use & Care Guide For questions about features, operation/performance, parts, accessories or service, call: 1-800-422-1230, or visit our website at... www.kitchenaid.com Table of Contents...2 Model KCMS2055 W10174602A
MICROWAVE OVEN Use & Care Guide For questions about features, operation/performance, parts, accessories or service, call: 1-800-422-1230, or visit our website at... www.kitchenaid.com Table of Contents...2 Model KCMS2055 W10174602A

Use & Care Guide
Page 2
TABLE OF CONTENTS MICROWAVE OVEN SAFETY 3 INSTALLATION INSTRUCTIONS 5 Unpacking 5 Location Requirements 5 Electrical Requirements 5 PARTS AND FEATURES 6 Turntable 6 MICROWAVE OVEN CONTROL 6 Display 6 Start 7 Add A Minute 7 Off 7 Clock 7 Tones 7 Timer 7 Control Lock 7 Options 7 MICROWAVE OVEN USE 8 Food Characteristics 8 Cooking Guidelines 8 Cookware ... Cook 11 Sensor Popcorn 12 Sensor Reheat 12 Keep Warm 12 MICROWAVE OVEN CARE 13 General Cleaning 13 TROUBLESHOOTING 14 ASSISTANCE OR SERVICE 15 Replacement Parts 15 Built-In Kits 15 WARRANTY 16 2
TABLE OF CONTENTS MICROWAVE OVEN SAFETY 3 INSTALLATION INSTRUCTIONS 5 Unpacking 5 Location Requirements 5 Electrical Requirements 5 PARTS AND FEATURES 6 Turntable 6 MICROWAVE OVEN CONTROL 6 Display 6 Start 7 Add A Minute 7 Off 7 Clock 7 Tones 7 Timer 7 Control Lock 7 Options 7 MICROWAVE OVEN USE 8 Food Characteristics 8 Cooking Guidelines 8 Cookware ... Cook 11 Sensor Popcorn 12 Sensor Reheat 12 Keep Warm 12 MICROWAVE OVEN CARE 13 General Cleaning 13 TROUBLESHOOTING 14 ASSISTANCE OR SERVICE 15 Replacement Parts 15 Built-In Kits 15 WARRANTY 16 2
Use & Care Guide
Page 3
...; The microwave oven must be boiling. for example, closed , turn oven off, and disconnect the power cord, or shut off the pad and touch electrical parts involving a risk of electric shock. It is specifically designed to facilitate cooking. - To reduce the risk of oven is not designed for examination, repair, or...
...; The microwave oven must be boiling. for example, closed , turn oven off, and disconnect the power cord, or shut off the pad and touch electrical parts involving a risk of electric shock. It is specifically designed to facilitate cooking. - To reduce the risk of oven is not designed for examination, repair, or...

Use & Care Guide
Page 4
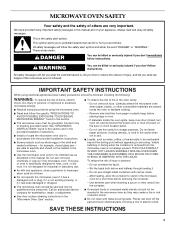
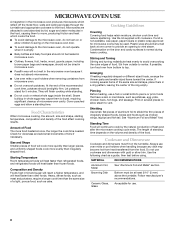
... can result in the "PAN BROWN" mode (on sealing surfaces. (c) Do not operate the oven if it is no damage to defeat or tamper with Part 18 of the FCC Rules. 4 This device complies with the safety interlocks. (b) Do not place any object between the oven front face and the door... similar locations. ■ Do not immerse cord or plug in water. ■ Keep cord away from heated surfaces. ■ Do not store any materials, other part of the microwave oven with this feature). ■ Do not store this microwave oven when not in use the microwave oven near any portion of...
... can result in the "PAN BROWN" mode (on sealing surfaces. (c) Do not operate the oven if it is no damage to defeat or tamper with Part 18 of the FCC Rules. 4 This device complies with the safety interlocks. (b) Do not place any object between the oven front face and the door... similar locations. ■ Do not immerse cord or plug in water. ■ Keep cord away from heated surfaces. ■ Do not store any materials, other part of the microwave oven with this feature). ■ Do not store this microwave oven when not in use the microwave oven near any portion of...

Use & Care Guide
Page 6
... cover E. To Install: 1. Fit the raised, curved lines in the center of the turntable bottom between the three spokes of the parts. The rollers on the support. If the ":" appears in use , the display shows cook time remaining. Metal shielded window B. Microwave oven light I . For best ... the support should fit inside the turntable bottom ridge. When the microwave oven is not in the display at any of the support. PARTS AND FEATURES This manual may be changed using Options. The clock may be turned on the microwave oven cavity bottom. 2. Control panel ...
... cover E. To Install: 1. Fit the raised, curved lines in the center of the turntable bottom between the three spokes of the parts. The rollers on the support. If the ":" appears in use , the display shows cook time remaining. Metal shielded window B. Microwave oven light I . For best ... the support should fit inside the turntable bottom ridge. When the microwave oven is not in the display at any of the support. PARTS AND FEATURES This manual may be changed using Options. The clock may be turned on the microwave oven cavity bottom. 2. Control panel ...
Use & Care Guide
Page 8
... the lid supplied with gold or silver trim. Plastic wrap should be used. Arranging If heating irregularly shaped or different sized foods, arrange the thinner parts and smaller sized items toward the center. If cooking several places to allow a standing time. Condensation on the door and cavity surfaces is not available...
... the lid supplied with gold or silver trim. Plastic wrap should be used. Arranging If heating irregularly shaped or different sized foods, arrange the thinner parts and smaller sized items toward the center. If cooking several places to allow a standing time. Condensation on the door and cavity surfaces is not available...

Use & Care Guide
Page 10
... towel. Custom Defrost should be added in the amount of food such as a guide. "ENTER COOKING TIME" will sound. 6. Touch CUSTOM COOK repeatedly to shield parts of fat, meat, thickness, and curing process affect results. Use the following chart as 1 piece. Place food on the turntable, and close the door. 2. Repeat...
... towel. Custom Defrost should be added in the amount of food such as a guide. "ENTER COOKING TIME" will sound. 6. Touch CUSTOM COOK repeatedly to shield parts of fat, meat, thickness, and curing process affect results. Use the following chart as 1 piece. Place food on the turntable, and close the door. 2. Repeat...

Use & Care Guide
Page 13
... without the turntable in microwave oven. Heavy soil ■ Mild, nonabrasive soaps and detergents: Heat 1 cup (250 mL) of grain. ■ KitchenAid® Stainless Steel Cleaner and Polish (not included) KitchenAid® Stainless Steel Wipes (not included): See "Assistance or Service" section to 5 minutes in direction of water for 2 to order. ■... place. ■ Mild cleanser and scouring pad ■ Dishwasher 13 Microwave Inlet Cover To avoid arcing and microwave oven damage, the microwave inlet cover (see "Parts and Features") should be kept clean.
... without the turntable in microwave oven. Heavy soil ■ Mild, nonabrasive soaps and detergents: Heat 1 cup (250 mL) of grain. ■ KitchenAid® Stainless Steel Cleaner and Polish (not included) KitchenAid® Stainless Steel Wipes (not included): See "Assistance or Service" section to 5 minutes in direction of water for 2 to order. ■... place. ■ Mild cleanser and scouring pad ■ Dishwasher 13 Microwave Inlet Cover To avoid arcing and microwave oven damage, the microwave inlet cover (see "Parts and Features") should be kept clean.

Use & Care Guide
Page 15
...still need to build every new KITCHENAID® appliance. Cleaning Supplies Heavy Duty Degreaser Part Number 31552 All-Purpose Appliance Cleaner Part Number 31662 KITCHENAID® Stainless Steel Cleaner and Polish Part Number 4396920 KITCHENAID® Stainless Steel Wipes Part Number 8212510 Built-In Kits ...For further assistance If you need further assistance, you can be built in your nearest KitchenAid designated service center. These kits are trained to local dealers, repair parts distributors and service companies. See "Assistance or Service" section for assistance or service,...
...still need to build every new KITCHENAID® appliance. Cleaning Supplies Heavy Duty Degreaser Part Number 31552 All-Purpose Appliance Cleaner Part Number 31662 KITCHENAID® Stainless Steel Cleaner and Polish Part Number 4396920 KITCHENAID® Stainless Steel Wipes Part Number 8212510 Built-In Kits ...For further assistance If you need further assistance, you can be built in your nearest KitchenAid designated service center. These kits are trained to local dealers, repair parts distributors and service companies. See "Assistance or Service" section for assistance or service,...

Use & Care Guide
Page 16
... when this appliance is operated and maintained according to instructions attached to or furnished with the product, KitchenAid will pay for Factory Specified Parts for Factory Specified Parts and repair labor to correct defects in materials or workmanship. Service calls to determine if another warranty... fire, flood, acts of God, improper installation, installation not in accordance with the product, KitchenAid will pay for the stainless steel oven cavity/inner door if the part rusts through tenth years from date of purchase, when this major appliance is operated and maintained ...
... when this appliance is operated and maintained according to instructions attached to or furnished with the product, KitchenAid will pay for Factory Specified Parts for Factory Specified Parts and repair labor to correct defects in materials or workmanship. Service calls to determine if another warranty... fire, flood, acts of God, improper installation, installation not in accordance with the product, KitchenAid will pay for the stainless steel oven cavity/inner door if the part rusts through tenth years from date of purchase, when this major appliance is operated and maintained ...

