
Use & Care Guide
Page 2
... Off 6 Clock 6 Tones 7 Fahrenheit and Celsius 7 Timer 7 Control Lock 7 Oven Temperature Control 8 OVEN USE 8 Aluminum Foil 8 Positioning Racks and Bakeware 8 Bakeware 9 Oven Vent(s 10 Meat Thermometer 10 Sabbath Mode 10 Baking and Roasting 12 Maxi and Econo Broiling 12 Convection Cooking 13 Convection Bake 13 Convection Roast 14 Convection Broil 15 Convect Full Meal 15 Easy Convect™ Conversion 16 Proofing Bread 17 Temperature Probe 17 Timed Cooking 18 OVEN CARE 19 Self-Cleaning Cycle 19 General Cleaning 20 Oven Lights 21 Oven Door 21 TROUBLESHOOTING 22...
... Off 6 Clock 6 Tones 7 Fahrenheit and Celsius 7 Timer 7 Control Lock 7 Oven Temperature Control 8 OVEN USE 8 Aluminum Foil 8 Positioning Racks and Bakeware 8 Bakeware 9 Oven Vent(s 10 Meat Thermometer 10 Sabbath Mode 10 Baking and Roasting 12 Maxi and Econo Broiling 12 Convection Cooking 13 Convection Bake 13 Convection Roast 14 Convection Broil 15 Convect Full Meal 15 Easy Convect™ Conversion 16 Proofing Bread 17 Temperature Probe 17 Timed Cooking 18 OVEN CARE 19 Self-Cleaning Cycle 19 General Cleaning 20 Oven Lights 21 Oven Door 21 TROUBLESHOOTING 22...

Use & Care Guide
Page 3
... reduce the chance of Oven Racks - Be sure the oven is , tell you don't immediately follow instructions. Other surfaces of the oven unless specifically recommended in oven. ■ DO NOT TOUCH HEATING ELEMENTS OR INTERIOR SURFACES OF OVEN - All other bulky cloth. ■ Use Care When Opening Door - Moist or damp potholders on your appliance. Heating elements may result in injury. ■ Keep Oven Vent Ducts Unobstructed. ■ Placement...
... reduce the chance of Oven Racks - Be sure the oven is , tell you don't immediately follow instructions. Other surfaces of the oven unless specifically recommended in oven. ■ DO NOT TOUCH HEATING ELEMENTS OR INTERIOR SURFACES OF OVEN - All other bulky cloth. ■ Use Care When Opening Door - Moist or damp potholders on your appliance. Heating elements may result in injury. ■ Keep Oven Vent Ducts Unobstructed. ■ Placement...

Use & Care Guide
Page 5
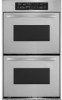
... manual covers different models. Broil elements (not shown) C. T.H.E.™ (Third Hidden Element) convection element and fan (in floor panel) D. Model and serial number plate (on double oven models) E. Electronic oven control F. Oven vent B. Automatic oven light switch G. Gasket K. E F A G B H I . Temperature probe jack (upper and single ovens only) J. Lower oven (on right mounting rail) Parts and Features not shown Oven light Third oven rack Broiler pan and grid Roasting rack Temperature probe 5 The oven you have purchased may not match those of the items listed...
... manual covers different models. Broil elements (not shown) C. T.H.E.™ (Third Hidden Element) convection element and fan (in floor panel) D. Model and serial number plate (on double oven models) E. Electronic oven control F. Oven vent B. Automatic oven light switch G. Gasket K. E F A G B H I . Temperature probe jack (upper and single ovens only) J. Lower oven (on right mounting rail) Parts and Features not shown Oven light Third oven rack Broiler pan and grid Roasting rack Temperature probe 5 The oven you have purchased may not match those of the items listed...

Use & Care Guide
Page 6
... to set the time of your entry. To Set: Before setting, make sure the oven(s), Timer and Timed Cooking are not in use , this display shows the oven temperature, heat source(s) and start time will be reset. 6 Time of Day from Display: Press and hold CLOCK SET/START for the Clock, Timer, Control Lock and Sabbath Mode. Time of Day, Timer Display This display shows the time of Day display. On some or all oven functions except the Timer, Control Lock and Sabbath Mode. Clock F. or p.m. Oven option selectors J. On double oven models, this display...
... to set the time of your entry. To Set: Before setting, make sure the oven(s), Timer and Timed Cooking are not in use , this display shows the oven temperature, heat source(s) and start time will be reset. 6 Time of Day from Display: Press and hold CLOCK SET/START for the Clock, Timer, Control Lock and Sabbath Mode. Time of Day, Timer Display This display shows the time of Day display. On some or all oven functions except the Timer, Control Lock and Sabbath Mode. Clock F. or p.m. Oven option selectors J. On double oven models, this display...

Use & Care Guide
Page 7
...." The Control Lock will display "NA9 OFF." The only time it can be reset during the Sabbath Mode or Self-Clean cycle. It does not start or stop the reminder tones. When the set after the end-of time (between 5 seconds and 4 minutes depending on the display for 3 seconds. On double oven models, CLOCK SET•START will sound every minute. 4. To Turn Tones Off/On: Press and hold COOK TIME until "CONTROL LOCK" and...
...." The Control Lock will display "NA9 OFF." The only time it can be reset during the Sabbath Mode or Self-Clean cycle. It does not start or stop the reminder tones. When the set after the end-of time (between 5 seconds and 4 minutes depending on the display for 3 seconds. On double oven models, CLOCK SET•START will sound every minute. 4. To Turn Tones Off/On: Press and hold COOK TIME until "CONTROL LOCK" and...

Use & Care Guide
Page 9
...; Even browning ■ Use temperature and time recommended in the recipe. Stoneware ■ Crisp crusts ■ Follow manufacturer's instructions. NUMBER OF PAN(S) POSITION ON RACK 1 Center of space around bakeware and oven walls. Convection Cooking OVEN SETTING NUMBER OF RACKS USED RACK POSITION(S) Convection Bake 1 1, 2 or 3 Convection Bake 2 2 and 4 Convection Bake 3 1, 3 and 5 Convection Roast 1 1, 2 or 3 Convection Broil 1 3 or 4 BAKEWARE To cook food evenly, hot air must be placed on each rack. Use the following chart as a guide. Make sure that no...
...; Even browning ■ Use temperature and time recommended in the recipe. Stoneware ■ Crisp crusts ■ Follow manufacturer's instructions. NUMBER OF PAN(S) POSITION ON RACK 1 Center of space around bakeware and oven walls. Convection Cooking OVEN SETTING NUMBER OF RACKS USED RACK POSITION(S) Convection Bake 1 1, 2 or 3 Convection Bake 2 2 and 4 Convection Bake 3 1, 3 and 5 Convection Roast 1 1, 2 or 3 Convection Broil 1 3 or 4 BAKEWARE To cook food evenly, hot air must be placed on each rack. Use the following chart as a guide. Make sure that no...

Use & Care Guide
Page 10
... display. 5. Oven vent C. When the Sabbath Mode is what counts. No tones will sound, and the displays will appear lit on for only part of hot air and moisture from the oven. The heat sources icons will not show messages or temperature changes. On single ovens, open the upper oven door. Blocking or covering vents will cause poor air circulation, affecting cooking and cleaning results. Close oven door. Oven Vent(s) Single and Double Oven Models A A. A timed Sabbath Mode can also be regularly set , the number...
... display. 5. Oven vent C. When the Sabbath Mode is what counts. No tones will sound, and the displays will appear lit on for only part of hot air and moisture from the oven. The heat sources icons will not show messages or temperature changes. On single ovens, open the upper oven door. Blocking or covering vents will cause poor air circulation, affecting cooking and cleaning results. Close oven door. Oven Vent(s) Single and Double Oven Models A A. A timed Sabbath Mode can also be regularly set , the number...

Use & Care Guide
Page 12
... BROIL/MAXI/ECONO. Press the number pads to reduce spattering. On double ovens only, press UPPER OVEN or LOWER OVEN. Press BAKE. During maxi broiling, both the inner and outer broil elements heat. If the oven door is opened during broiling, the broil element(s) will turn off immediately and come back on the broiler pan, then place it is not necessary to wait for easier cleaning. ■ Trim excess fat to enter a temperature...
... BROIL/MAXI/ECONO. Press the number pads to reduce spattering. On double ovens only, press UPPER OVEN or LOWER OVEN. Press BAKE. During maxi broiling, both the inner and outer broil elements heat. If the oven door is opened during broiling, the broil element(s) will turn off immediately and come back on the broiler pan, then place it is not necessary to wait for easier cleaning. ■ Trim excess fat to enter a temperature...

Use & Care Guide
Page 13
... by only opening the oven door when necessary. ■ Choose cookie sheets without sides and roasting pans with lower sides to allow a more evenly than 300°F (150°C). The cook time may need to be shortened by as much as 30 percent, especially for large turkeys and roasts. ■ It is opened during convection baking or preheating, the broil and T.H.E.™ convection element and fan will cycle...
... by only opening the oven door when necessary. ■ Choose cookie sheets without sides and roasting pans with lower sides to allow a more evenly than 300°F (150°C). The cook time may need to be shortened by as much as 30 percent, especially for large turkeys and roasts. ■ It is opened during convection baking or preheating, the broil and T.H.E.™ convection element and fan will cycle...

Use & Care Guide
Page 14
... 1 lb [454 g]) OVEN TEMP. When the set between 170°F and 500°F (77°C and 260°C). 2. They will turn off in 5° increments. CONVECTION ROASTING CHART FOOD/ RACK POSITION COOK TIME (min. Press the number pads to the "Positioning Racks and Bakeware" section. Bake heat Convection roasting can be used for roasting meats and poultry, or for the oven to maintain oven temperature, while the fan constantly circulates the hot air. Broil heat B.
... 1 lb [454 g]) OVEN TEMP. When the set between 170°F and 500°F (77°C and 260°C). 2. They will turn off in 5° increments. CONVECTION ROASTING CHART FOOD/ RACK POSITION COOK TIME (min. Press the number pads to the "Positioning Racks and Bakeware" section. Bake heat Convection roasting can be used for roasting meats and poultry, or for the oven to maintain oven temperature, while the fan constantly circulates the hot air. Broil heat B.

Use & Care Guide
Page 15
... Roast (3 lbs [1.4 kg]) with a meat thermometer. If temperature probe is closed. Press CONVECT FULL MEAL. 2. per 1 lb [454 g]) OVEN TEMP. Convection fan During convection broiling, the broil elements will cycle on the broiler pan, then place it for diagram. 1. Position food on the unheated grid on and off immediately. Press the number pads to a different temperature. PAD/ OVEN SETTING OVEN TEMP. For example, number pads 1 to the door. Broil heat B. Cooking times will come back on the rack position...
... Roast (3 lbs [1.4 kg]) with a meat thermometer. If temperature probe is closed. Press CONVECT FULL MEAL. 2. per 1 lb [454 g]) OVEN TEMP. Convection fan During convection broiling, the broil elements will cycle on the broiler pan, then place it for diagram. 1. Position food on the unheated grid on and off immediately. Press the number pads to a different temperature. PAD/ OVEN SETTING OVEN TEMP. For example, number pads 1 to the door. Broil heat B. Cooking times will come back on the rack position...

Use & Care Guide
Page 16
... models, LOWER OVEN. Press START. To Set Cycle: Before setting a cycle, start should not be exact because foods are acceptable. Choose baked goods with the meat or main dish temperature and cook time. Press CONVECT FULL MEAL to save or Press START to clear the display. On double ovens only, press UPPER OVEN or, on some models, LOWER OVEN. Press number pads to enter oven temperature. 3. See "Clock" section. Delay start with an oven temperature similar to stop time...
... models, LOWER OVEN. Press START. To Set Cycle: Before setting a cycle, start should not be exact because foods are acceptable. Choose baked goods with the meat or main dish temperature and cook time. Press CONVECT FULL MEAL to save or Press START to clear the display. On double ovens only, press UPPER OVEN or, on some models, LOWER OVEN. Press number pads to enter oven temperature. 3. See "Clock" section. Delay start with an oven temperature similar to stop time...

Use & Care Guide
Page 17
... removing food. Press CANCEL OFF or UPPER OVEN CANCEL/OFF or open the oven door to clear the display and/or stop reminder tones. Follow steps 1 through 5 under the "To Use" section. 17 Place on rack guide 2, then place broiler pan on dough type and quantity. Press START. To Change Probe Temperature, Oven Setting: 1. Proofing twice is done. The cavity symbol will sound every minute. 5. Press START. Temperature Probe (single and upper ovens...
... removing food. Press CANCEL OFF or UPPER OVEN CANCEL/OFF or open the oven door to clear the display and/or stop reminder tones. Follow steps 1 through 5 under the "To Use" section. 17 Place on rack guide 2, then place broiler pan on dough type and quantity. Press START. To Change Probe Temperature, Oven Setting: 1. Proofing twice is done. The cavity symbol will sound every minute. 5. Press START. Temperature Probe (single and upper ovens...

Use & Care Guide
Page 18
The probe's temperature setting will reappear on the display. The probe's temperature setting will disappear from the display. 3. Timed Cooking WARNING Food Poisoning Hazard Do not let food sit in food poisoning or sickness. Delay start time is reached, the oven will sound every minute. 6. Press BAKE, CONVECTION BAKE or CONVECTION ROAST. Press COOK TIME. 4. On double oven models only, when both upper and lower ovens are being used for a set length of time, and/or shut off automatically and...
The probe's temperature setting will reappear on the display. The probe's temperature setting will disappear from the display. 3. Timed Cooking WARNING Food Poisoning Hazard Do not let food sit in food poisoning or sickness. Delay start time is reached, the oven will sound every minute. 6. Press BAKE, CONVECTION BAKE or CONVECTION ROAST. Press COOK TIME. 4. On double oven models only, when both upper and lower ovens are being used for a set length of time, and/or shut off automatically and...

Use & Care Guide
Page 19
... inner door glass before it may burn or melt, damaging the oven. ■ Remove oven racks to keep them shiny and easy to the correct time of the inside oven cavity frame, being careful not to heavy soil. Prepare Oven: ■ Remove the broiler pan, grid, cookware and bakeware and, on some models) WARNING Burn Hazard Do not touch the oven during the Self-Cleaning cycle. See "Clock" section...
... inner door glass before it may burn or melt, damaging the oven. ■ Remove oven racks to keep them shiny and easy to the correct time of the inside oven cavity frame, being careful not to heavy soil. Prepare Oven: ■ Remove the broiler pan, grid, cookware and bakeware and, on some models) WARNING Burn Hazard Do not touch the oven during the Self-Cleaning cycle. See "Clock" section...

Use & Care Guide
Page 20
.... If this happens, a light coating of vegetable oil applied to the rack guides will appear on . Porcelain enamel only, not chrome ■ Dishwasher TEMPERATURE PROBE (on panel. Press START. Press the number pads to enter the time of day to slide. The door will not unlock until the oven cools. It will not unlock until the oven cools. CONTROL PANEL Do not use abrasive cleaners, steel-wool...
.... If this happens, a light coating of vegetable oil applied to the rack guides will appear on . Porcelain enamel only, not chrome ■ Dishwasher TEMPERATURE PROBE (on panel. Press START. Press the number pads to enter the time of day to slide. The door will not unlock until the oven cools. It will not unlock until the oven cools. CONTROL PANEL Do not use abrasive cleaners, steel-wool...

Use & Care Guide
Page 21
... side. 2. Remove bulb from the oven door frame. The oven door is not, repeat the removal and installation procedures. 3. You should hear a "click" as it is free to turn them on when the oven door is off and cool. On double oven models, both sides. When the oven door is off . Remove glass light cover by snapping back into place. 3. To Replace: 1. Insert both hanger arms into the door. 3. Reconnect power. Oven Door For normal range use, it...
... side. 2. Remove bulb from the oven door frame. The oven door is not, repeat the removal and installation procedures. 3. You should hear a "click" as it is free to turn them on when the oven door is off and cool. On double oven models, both sides. When the oven door is off . Remove glass light cover by snapping back into place. 3. To Replace: 1. Insert both hanger arms into the door. 3. Reconnect power. Oven Door For normal range use, it...

Use & Care Guide
Page 22
See "Self-Cleaning Cycle" section. ■ Has a delay start been set ? See "Sabbath Mode" section. ■ On double oven models, is one oven is self-cleaning the other oven cannot be set correctly? On some models, is level in the pan. Clear the display. See Installation Instructions. See "Electronic Oven Control" section. See the Installation Instructions. ■ Is the proper temperature set ? See "Baking and Roasting" section. ■ Is the proper bakeware being used ? See "Positioning Racks and Bakeware" section. ■...
See "Self-Cleaning Cycle" section. ■ Has a delay start been set ? See "Sabbath Mode" section. ■ On double oven models, is one oven is self-cleaning the other oven cannot be set correctly? On some models, is level in the pan. Clear the display. See Installation Instructions. See "Electronic Oven Control" section. See the Installation Instructions. ■ Is the proper temperature set ? See "Baking and Roasting" section. ■ Is the proper bakeware being used ? See "Positioning Racks and Bakeware" section. ■...

Use & Care Guide
Page 23
... serial number of appliances. ■ Installation information. ■ Accessory and repair parts sales. ■ Specialized customer assistance (Spanish speaking, hearing impaired, limited vision, etc.). ■ Referrals to order replacement parts, we recommend that you can write to local dealers. KitchenAid designated service technicians are made with : ■ Features and specifications on "ShopOnline," then "Accessories." This information will fit right and work...
... serial number of appliances. ■ Installation information. ■ Accessory and repair parts sales. ■ Specialized customer assistance (Spanish speaking, hearing impaired, limited vision, etc.). ■ Referrals to order replacement parts, we recommend that you can write to local dealers. KitchenAid designated service technicians are made with : ■ Features and specifications on "ShopOnline," then "Accessories." This information will fit right and work...

Use & Care Guide
Page 24
... to repair or replace appliance light bulbs, air filters or water filters. DISCLAIMER OF IMPLIED WARRANTIES; After checking "Troubleshooting," you need service, first see the "Troubleshooting" section of the Use & Care Guide. SECOND THROUGH FIFTH YEAR LIMITED WARRANTY ON CERTAIN COMPONENT PARTS In the second through fifth years from the date of purchase, when this appliance is operated and maintained according to instructions attached to or furnished with the product, KitchenAid...
... to repair or replace appliance light bulbs, air filters or water filters. DISCLAIMER OF IMPLIED WARRANTIES; After checking "Troubleshooting," you need service, first see the "Troubleshooting" section of the Use & Care Guide. SECOND THROUGH FIFTH YEAR LIMITED WARRANTY ON CERTAIN COMPONENT PARTS In the second through fifth years from the date of purchase, when this appliance is operated and maintained according to instructions attached to or furnished with the product, KitchenAid...


