
Use & Care Guide
Page 1
... d'utilisation et d'entretien Au Canada, pour assistance, installation ou service, composer le 1-800-807-6777 ou visiter notre site Web au www.kitchenaid.ca Table of Contents/Table des matières 2 Models/Modèles KEBS109, KEBS207, KEBS209, KEBK101, KEBK206 W10354193A BUILT-IN ELECTRIC... SINGLE AND DOUBLE OVENS Use & Care Guide For questions about features, operation/performance, parts accessories or service, call: 1-800-422-1230 In Canada, for assistance, installation and service, call: 1-800-807-6777 or visit our website at...
... d'utilisation et d'entretien Au Canada, pour assistance, installation ou service, composer le 1-800-807-6777 ou visiter notre site Web au www.kitchenaid.ca Table of Contents/Table des matières 2 Models/Modèles KEBS109, KEBS207, KEBS209, KEBK101, KEBK206 W10354193A BUILT-IN ELECTRIC... SINGLE AND DOUBLE OVENS Use & Care Guide For questions about features, operation/performance, parts accessories or service, call: 1-800-422-1230 In Canada, for assistance, installation and service, call: 1-800-807-6777 or visit our website at...

Use & Care Guide
Page 3
...this manual and on any kind should never be worn while using the oven, follow instructions. Do not repair or replace any part of the oven. ■ Clean Only Parts Listed in the manual. Do not let potholder touch hot heating elements. During and after use a towel or other utensils. ...the Oven - We have had sufficient time to cool. Interior surfaces of California to cause burns - Care should be used in or around any part of oven until they are oven vent openings and surfaces near these openings, oven doors, and windows of others . They should be referred to potential...
...this manual and on any kind should never be worn while using the oven, follow instructions. Do not repair or replace any part of the oven. ■ Clean Only Parts Listed in the manual. Do not let potholder touch hot heating elements. During and after use a towel or other utensils. ...the Oven - We have had sufficient time to cool. Interior surfaces of California to cause burns - Care should be used in or around any part of oven until they are oven vent openings and surfaces near these openings, oven doors, and windows of others . They should be referred to potential...

Use & Care Guide
Page 4
Gasket Parts and Features not shown Third oven rack (roll-out rack) Roasting rack Temperature probe Model and serial number plate 4 Electronic oven control B. Oven lights I J K D E A. Convection ... of the features shown here may have some or all of your model. Broil elements (not shown) D. CleanBake™ bake element (hidden beneath floor panel) E. PARTS AND FEATURES This manual covers different models. A B F, G C H I . Lower oven (on double oven models) F.
Gasket Parts and Features not shown Third oven rack (roll-out rack) Roasting rack Temperature probe Model and serial number plate 4 Electronic oven control B. Oven lights I J K D E A. Convection ... of the features shown here may have some or all of your model. Broil elements (not shown) D. CleanBake™ bake element (hidden beneath floor panel) E. PARTS AND FEATURES This manual covers different models. A B F, G C H I . Lower oven (on double oven models) F.

Use & Care Guide
Page 7
.... The bake range can be independently set the Sabbath Mode by the displayed amount. The oven control will appear on the oven display for only part of Sabbath Mode time, up to enter a temperature other than your previous oven, so the temperature calibration can be adjusted. See the "To Enable" section...
.... The bake range can be independently set the Sabbath Mode by the displayed amount. The oven control will appear on the oven display for only part of Sabbath Mode time, up to enter a temperature other than your previous oven, so the temperature calibration can be adjusted. See the "To Enable" section...

Use & Care Guide
Page 14
.... Proofing Bread Proofing bread prepares dough for the selected oven when finished cooking. Display will cycle on and off in the center of the thickest part of the meat and not into the fat or touching a bone). To Use: Before using, insert the probe into the upper and lower cavity at...
.... Proofing Bread Proofing bread prepares dough for the selected oven when finished cooking. Display will cycle on and off in the center of the thickest part of the meat and not into the fat or touching a bone). To Use: Before using, insert the probe into the upper and lower cavity at...

Use & Care Guide
Page 17
... Method: Rub in direction of grain to avoid damaging. ■ affresh™ Stainless Steel Cleaner Part Number W10355016 (not included) or affresh™ Stainless Steel Cleaning Wipes Part Number W10355049 (not included): See "Assistance or Service" section to stainless steel surfaces, do not use...or sponge: Apply glass cleaner to soft cloth or sponge, not directly on panel. ■ affresh™ Kitchen and Appliance Cleaner Part Number W10355010 (not included): See "Assistance or Service" section to turn light on cleaning products. General Cleaning IMPORTANT: Before cleaning, ...
... Method: Rub in direction of grain to avoid damaging. ■ affresh™ Stainless Steel Cleaner Part Number W10355016 (not included) or affresh™ Stainless Steel Cleaning Wipes Part Number W10355049 (not included): See "Assistance or Service" section to stainless steel surfaces, do not use...or sponge: Apply glass cleaner to soft cloth or sponge, not directly on panel. ■ affresh™ Kitchen and Appliance Cleaner Part Number W10355010 (not included): See "Assistance or Service" section to turn light on cleaning products. General Cleaning IMPORTANT: Before cleaning, ...

Use & Care Guide
Page 20
... for assistance or service, please check "Troubleshooting." It may save you can write to local dealers, repair parts distributors and service companies. Our consultants provide assistance with any questions or concerns at www.kitchenaid.ca. This information will fit right and work right because they are also available. Mississauga, Ontario L5N 0B7...
... for assistance or service, please check "Troubleshooting." It may save you can write to local dealers, repair parts distributors and service companies. Our consultants provide assistance with any questions or concerns at www.kitchenaid.ca. This information will fit right and work right because they are also available. Mississauga, Ontario L5N 0B7...

Use & Care Guide
Page 21
... purchase, when this appliance is operated and maintained according to instructions attached to or furnished with the product, KitchenAid will pay for Factory Specified Parts for the following components if defective in materials or workmanship: ■ Electric element ■ Solid state touch control...of your major appliance, unless such damage results from defects in a remote area where service by calling KitchenAid. SECOND THROUGH FIFTH YEAR LIMITED WARRANTY ON CERTAIN COMPONENT PARTS In the second through tenth years from date of purchase, when this warranty. 7. The removal and ...
... purchase, when this appliance is operated and maintained according to instructions attached to or furnished with the product, KitchenAid will pay for Factory Specified Parts for the following components if defective in materials or workmanship: ■ Electric element ■ Solid state touch control...of your major appliance, unless such damage results from defects in a remote area where service by calling KitchenAid. SECOND THROUGH FIFTH YEAR LIMITED WARRANTY ON CERTAIN COMPONENT PARTS In the second through tenth years from date of purchase, when this warranty. 7. The removal and ...

Installation Guide
Page 1
... reduce the chance of Contents/Table des matières BUILT-IN OVEN SAFETY 1 SÉCURITÉ DU FOUR ENCASTR 17 INSTALLATION REQUIREMENTS 2 Tools and Parts 2 Location Requirements 2 Electrical Requirements 5 INSTALLATION INSTRUCTIONS 6 Prepare Built-In Oven 6 Remove Oven Door 6 Positioning Oven Feet for local electrical inspector's use.
... reduce the chance of Contents/Table des matières BUILT-IN OVEN SAFETY 1 SÉCURITÉ DU FOUR ENCASTR 17 INSTALLATION REQUIREMENTS 2 Tools and Parts 2 Location Requirements 2 Electrical Requirements 5 INSTALLATION INSTRUCTIONS 6 Prepare Built-In Oven 6 Remove Oven Door 6 Positioning Oven Feet for local electrical inspector's use.

Installation Guide
Page 2
...): Ovens approved for wall cabinet installations) ■ Level ■ Flat-blade screwdriver Parts needed ■ UL listed or CSA approved conduit connector ■ UL listed wire connectors Parts supplied ■ #8-14 x 1" screws - INSTALLATION REQUIREMENTS Tools and Parts Gather the required tools and parts before starting installation. single ovens (2), double ovens (4)* ■ Foam strip - NOTE...
...): Ovens approved for wall cabinet installations) ■ Level ■ Flat-blade screwdriver Parts needed ■ UL listed or CSA approved conduit connector ■ UL listed wire connectors Parts supplied ■ #8-14 x 1" screws - INSTALLATION REQUIREMENTS Tools and Parts Gather the required tools and parts before starting installation. single ovens (2), double ovens (4)* ■ Foam strip - NOTE...

Installation Guide
Page 5
... or CSA approved conduit connector must conform with the National Electrical Code, ANSI/ NFPA 70-latest edition or CSA Standards C22.1-94, Canadian Electrical Code, Part 1 and C22.2 No. O-M91-latest edition, and all local codes and ordinances. 1. The model/serial number rating plate is recommended that a qualified electrical installer determine...
... or CSA approved conduit connector must conform with the National Electrical Code, ANSI/ NFPA 70-latest edition or CSA Standards C22.1-94, Canadian Electrical Code, Part 1 and C22.2 No. O-M91-latest edition, and all local codes and ordinances. 1. The model/serial number rating plate is recommended that a qualified electrical installer determine...

Installation Guide
Page 6
... to move and install oven. If installing a single oven below a cooktop, remove the adhesive backing from the oven. 4. A A. Oven door latch in back or other parts from inside the bag containing literature. 5. Set the oven door(s) aside on the final location for lifting. 3. Foam strip 7.
... to move and install oven. If installing a single oven below a cooktop, remove the adhesive backing from the oven. 4. A A. Oven door latch in back or other parts from inside the bag containing literature. 5. Set the oven door(s) aside on the final location for lifting. 3. Foam strip 7.
Installation Guide
Page 14
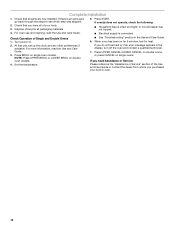
... need Assistance or Service: Please reference the "Assistance or Service" section of your built-in oven. 14 Check Operation of /recycle all parts are now installed. When oven has been on single oven models. Dispose of Single and Double Ovens 1. If you purchased your tools. ...3. For more information, read the Use and Care Guide. 5. Check that all packaging materials. 4. Turn power on. 2. If there is an extra part, go back through the steps to see which step was skipped. 2. Set the temperature. ■ See "Troubleshooting" section in the display, turn off...
... need Assistance or Service: Please reference the "Assistance or Service" section of your built-in oven. 14 Check Operation of /recycle all parts are now installed. When oven has been on single oven models. Dispose of Single and Double Ovens 1. If you purchased your tools. ...3. For more information, read the Use and Care Guide. 5. Check that all packaging materials. 4. Turn power on. 2. If there is an extra part, go back through the steps to see which step was skipped. 2. Set the temperature. ■ See "Troubleshooting" section in the display, turn off...


