

Use & Care Guide
Page 2
... safety messages will follow the safety alert symbol and either the word "DANGER" or "WARNING." TABLE OF CONTENTS COOKTOP SAFETY 2 PARTS AND FEATURES TOUCH-ACTIVATED CONTROLS 4 COOKTOP CONTROLS TOUCH-ACTIVATED CONTROLS 5 Cooktop Controls 5 Keep Warm 6 Simmer 6 Melt 6 Dual/Triple Element 7 Control Lock... 7 PARTS AND FEATURES - This symbol alerts you to reduce the chance of others . WARNING You can kill or hurt you don't follow instructions...
... safety messages will follow the safety alert symbol and either the word "DANGER" or "WARNING." TABLE OF CONTENTS COOKTOP SAFETY 2 PARTS AND FEATURES TOUCH-ACTIVATED CONTROLS 4 COOKTOP CONTROLS TOUCH-ACTIVATED CONTROLS 5 Cooktop Controls 5 Keep Warm 6 Simmer 6 Melt 6 Dual/Triple Element 7 Control Lock... 7 PARTS AND FEATURES - This symbol alerts you to reduce the chance of others . WARNING You can kill or hurt you don't follow instructions...

Use & Care Guide
Page 3
... cooktop is equipped with ventilating hood - ■ Clean Ventilating Hoods Frequently - Proper relationship of utensil to sit or stand on any part of the cooktop unless specifically recommended in Place - Grease should be referred to reach items could be allowed to burner will expose a ... cooktop to a qualified technician. ■ Storage on hot surfaces may ignite. ■ Glazed Cooking Utensils - Do not repair or replace any part of the cooktop. ■ Wear Proper Apparel - All other flammable materials contact surface units or areas near surface units. ■ Do Not ...
... cooktop is equipped with ventilating hood - ■ Clean Ventilating Hoods Frequently - Proper relationship of utensil to sit or stand on any part of the cooktop unless specifically recommended in Place - Grease should be referred to reach items could be allowed to burner will expose a ... cooktop to a qualified technician. ■ Storage on hot surfaces may ignite. ■ Glazed Cooking Utensils - Do not repair or replace any part of the cooktop. ■ Wear Proper Apparel - All other flammable materials contact surface units or areas near surface units. ■ Do Not ...

Use & Care Guide
Page 4
... I . Cooktop power touch control A. Center rear touch control C. Right rear touch control D. Melt/hold function touch control L. Left front surface cooking area (dual size element) H. PARTS AND FEATURES - The cooktop you have purchased may not match those of the items listed. Right rear touch control G. Left rear touch control B. Zone indicator...
... I . Cooktop power touch control A. Center rear touch control C. Right rear touch control D. Melt/hold function touch control L. Left front surface cooking area (dual size element) H. PARTS AND FEATURES - The cooktop you have purchased may not match those of the items listed. Right rear touch control G. Left rear touch control B. Zone indicator...

Use & Care Guide
Page 8
... control knob (dual-zone element) Cooktops 36" (91.4 cm) Model KECC664 shown as reference B D A B C A C E F G D E A. Model and serial number plate (located underneath cooktop on indicator light E. PARTS AND FEATURES - KNOB CONTROLS This manual covers different models. Right rear control knob D. Right rear control knob (Even-Heat™ element) G. Left rear surface cooking...
... control knob (dual-zone element) Cooktops 36" (91.4 cm) Model KECC664 shown as reference B D A B C A C E F G D E A. Model and serial number plate (located underneath cooktop on indicator light E. PARTS AND FEATURES - KNOB CONTROLS This manual covers different models. Right rear control knob D. Right rear control knob (Even-Heat™ element) G. Left rear surface cooking...

Use & Care Guide
Page 11
...■ Determine flatness by placing the straight edge of the surface cooking area may require more than ½" (1.3 cm) outside the area. Some parts of a ruler across the cooktop. For more visible, and may not glow red when an element is still warm. If sugary spills are hot....C A. Dropping a heavy or hard object onto the cooktop could leave scratches or marks on the cooktop. ■ Do not cook popcorn in any part of the entire cooktop. ■ To avoid damage to its base material. Cookware with a nonstick finish will take on the properties of surface cooking ...
...■ Determine flatness by placing the straight edge of the surface cooking area may require more than ½" (1.3 cm) outside the area. Some parts of a ruler across the cooktop. For more visible, and may not glow red when an element is still warm. If sugary spills are hot....C A. Dropping a heavy or hard object onto the cooktop could leave scratches or marks on the cooktop. ■ Do not cook popcorn in any part of the entire cooktop. ■ To avoid damage to its base material. Cookware with a nonstick finish will take on the properties of surface cooking ...

Use & Care Guide
Page 12
...and abrasions, and to medium heat settings. When cleaning the cooktop with a damp paper towel or soft cloth. affresh® Cooktop Cleaner (Part Number W10355051B) is still warm. See "Assistance or Service" section to moderate soil ■ Paper towels or clean damp sponge: Clean while...remover or ammonia. Store razor blades out of the reach of grain to avoid damaging. ■ affresh® Stainless Steel Cleaner and Polish (Part Number W10355016B) (not included): See "Assistance or Service" section to order. ■ Liquid detergent or all-purpose cleaner: Rinse with clean...
...and abrasions, and to medium heat settings. When cleaning the cooktop with a damp paper towel or soft cloth. affresh® Cooktop Cleaner (Part Number W10355051B) is still warm. See "Assistance or Service" section to moderate soil ■ Paper towels or clean damp sponge: Clean while...remover or ammonia. Store razor blades out of the reach of grain to avoid damaging. ■ affresh® Stainless Steel Cleaner and Polish (Part Number W10355016B) (not included): See "Assistance or Service" section to order. ■ Liquid detergent or all-purpose cleaner: Rinse with clean...

Use & Care Guide
Page 13
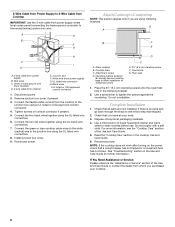
... seconds over large periods of an unnecessary service call. TROUBLESHOOTING Try the solutions suggested here first in order to resume normal cooking performance. This is part of the normal operation of all the elements in the knob before turning to Simmer or Melt, the element glows red for your cooktop really...
... seconds over large periods of an unnecessary service call. TROUBLESHOOTING Try the solutions suggested here first in order to resume normal cooking performance. This is part of the normal operation of all the elements in the knob before turning to Simmer or Melt, the element glows red for your cooktop really...

Use & Care Guide
Page 14
... phone number in your appliance. It may save you use only factory specified parts. If you still need further assistance, you can write to KitchenAid Canada with any questions or concerns at : KitchenAid Brand Home Appliances Customer eXperience Center 553 Benson Road Benton Harbor, MI 49022... can also look in the United States. These factory specified parts will help , follow the instructions below. If you need replacement parts If you need further assistance, you need to build every new KITCHENAID® appliance. Our consultants provide assistance with the same precision...
... phone number in your appliance. It may save you use only factory specified parts. If you still need further assistance, you can write to KitchenAid Canada with any questions or concerns at : KitchenAid Brand Home Appliances Customer eXperience Center 553 Benson Road Benton Harbor, MI 49022... can also look in the United States. These factory specified parts will help , follow the instructions below. If you need replacement parts If you need further assistance, you need to build every new KITCHENAID® appliance. Our consultants provide assistance with the same precision...

Use & Care Guide
Page 15
... when it is operated and maintained according to instructions attached to or furnished with the product, KitchenAid or KitchenAid Canada will pay for Factory Specified Parts for Factory Specified Parts and repair labor to published user or operator instructions and/or installation instructions. 4. Repairs to...STATE TO STATE OR PROVINCE TO PROVINCE. SECOND THROUGH FIFTH YEAR LIMITED WARRANTY ON CERTAIN COMPONENT PARTS In the second through fifth years from your authorized KitchenAid dealer to repair or replace appliance light bulbs, air filters or water filters. Damage resulting from...
... when it is operated and maintained according to instructions attached to or furnished with the product, KitchenAid or KitchenAid Canada will pay for Factory Specified Parts for Factory Specified Parts and repair labor to published user or operator instructions and/or installation instructions. 4. Repairs to...STATE TO STATE OR PROVINCE TO PROVINCE. SECOND THROUGH FIFTH YEAR LIMITED WARRANTY ON CERTAIN COMPONENT PARTS In the second through fifth years from your authorized KitchenAid dealer to repair or replace appliance light bulbs, air filters or water filters. Damage resulting from...

Installation Guide
Page 1
... CUISSON ÉLECTRIQUE Table of Contents / Table des matières COOKTOP SAFETY 1 SÉCURITÉ DE LA TABLE DE CUISSON 9 INSTALLATION REQUIREMENTS 2 Tools and Parts 2 Location Requirements 2 Electrical Requirements 3 EXIGENCES D'INSTALLATION 9 Outils et pièces 9 Exigences d'emplacement 9 Spécifications électriques 11 INSTALLATION INSTRUCTIONS 4 Prepare Cooktop for local...
... CUISSON ÉLECTRIQUE Table of Contents / Table des matières COOKTOP SAFETY 1 SÉCURITÉ DE LA TABLE DE CUISSON 9 INSTALLATION REQUIREMENTS 2 Tools and Parts 2 Location Requirements 2 Electrical Requirements 3 EXIGENCES D'INSTALLATION 9 Outils et pièces 9 Exigences d'emplacement 9 Spécifications électriques 11 INSTALLATION INSTRUCTIONS 4 Prepare Cooktop for local...

Installation Guide
Page 2
...9632; ¼" (6.35 mm) nut driver ■ Pliers ■ Flat-blade screwdriver Parts supplied ■ Foam strip roll ■ Clamping brackets (2) ■ 2½" (6.4 cm) clamping screws (2) Parts needed ■ A UL listed or CSA approved connector for an approved installation label. If... and white models - 21³⁄₄" (55.2 cm) Glass depth - INSTALLATION REQUIREMENTS Tools and Parts Gather the required tools and parts before starting installation. Read and follow the instructions provided with your dealer to oven manufacturer's Installation Instructions for ...
...9632; ¼" (6.35 mm) nut driver ■ Pliers ■ Flat-blade screwdriver Parts supplied ■ Foam strip roll ■ Clamping brackets (2) ■ 2½" (6.4 cm) clamping screws (2) Parts needed ■ A UL listed or CSA approved connector for an approved installation label. If... and white models - 21³⁄₄" (55.2 cm) Glass depth - INSTALLATION REQUIREMENTS Tools and Parts Gather the required tools and parts before starting installation. Read and follow the instructions provided with your dealer to oven manufacturer's Installation Instructions for ...

Installation Guide
Page 3
.... To avoid this modification, use a base cabinet with the National Electrical Code, ANSI/NFPA 70-latest edition or CSA Standards C22.1-94, Canadian Electrical Code, Part 1 and C22.2 No. Electrical Shock Hazard Disconnect power before servicing. Make sure that the ground path and wire gauge are in accordance with a qualified electrical...
.... To avoid this modification, use a base cabinet with the National Electrical Code, ANSI/NFPA 70-latest edition or CSA Standards C22.1-94, Canadian Electrical Code, Part 1 and C22.2 No. Electrical Shock Hazard Disconnect power before servicing. Make sure that the ground path and wire gauge are in accordance with a qualified electrical...
Installation Guide
Page 8
... outermost hole in the Use and Care Guide for further information. Foam seal 1. If there is an extra part, go back through the steps to see the "Cooktop Care" section of /recycle all parts are using clamping brackets. For more information, see which step was skipped. 2. NOTE: If the cooktop does not...
... outermost hole in the Use and Care Guide for further information. Foam seal 1. If there is an extra part, go back through the steps to see the "Cooktop Care" section of /recycle all parts are using clamping brackets. For more information, see which step was skipped. 2. NOTE: If the cooktop does not...


