Use & Care Guide
Page 1
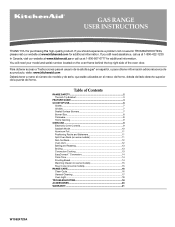
... a "Instrucciones para el usuario de la estufa a gas" en español, o para obtener información adicional acerca de su producto, visite: www.kitchenaid.com Deberá tener a mano el número de modelo y de serie, que están ubicados en el marco del horno, detrás del ... Slow Cook (on some models 15 RANGE CARE 16 Clean Cycle 16 General Cleaning 17 Oven Light 18 TROUBLESHOOTING 18 ACCESSORIES 20 WARRANTY 21 W10524723A In Canada, visit our website at www.kitchenaid.ca or call us at www.kitchenaid.com for additional information. If you should experience a problem not ...
... a "Instrucciones para el usuario de la estufa a gas" en español, o para obtener información adicional acerca de su producto, visite: www.kitchenaid.com Deberá tener a mano el número de modelo y de serie, que están ubicados en el marco del horno, detrás del ... Slow Cook (on some models 15 RANGE CARE 16 Clean Cycle 16 General Cleaning 17 Oven Light 18 TROUBLESHOOTING 18 ACCESSORIES 20 WARRANTY 21 W10524723A In Canada, visit our website at www.kitchenaid.ca or call us at www.kitchenaid.com for additional information. If you should experience a problem not ...

Use & Care Guide
Page 4
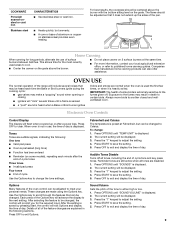
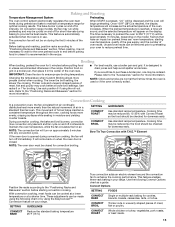
... The Off keypad stops any oven function. Baking and roasting 1. Press BAKE. 2. Broiling 1. Press BROIL. 2. low (400°F [204°C]). 3. Your model may have to take effect. 5. Doing so can result in oven more detailed instructions. Oven timer The Timer can use a 12- Press the number keypads... to set the length of -cycle tones will turn the light on and off . Press TIMER to the Customer Service section at www.kitchenaid.ca. Press the number keypads to set a temperature other than one hour before or after pressing a keypad, the function is opened. Press...
... The Off keypad stops any oven function. Baking and roasting 1. Press BAKE. 2. Broiling 1. Press BROIL. 2. low (400°F [204°C]). 3. Your model may have to take effect. 5. Doing so can result in oven more detailed instructions. Oven timer The Timer can use a 12- Press the number keypads... to set the length of -cycle tones will turn the light on and off . Press TIMER to the Customer Service section at www.kitchenaid.ca. Press the number keypads to set a temperature other than one hour before or after pressing a keypad, the function is opened. Press...

Use & Care Guide
Page 6
KEYPAD FEATURE INSTRUCTIONS WARMING DRAWER ON/OFF Warming drawer (on some models) 1. Press START to begin heating the warming drawer. 5. CLEAN clean cycle CONTROL LOCK Oven control hold the "0" keypad for more precise simmering and low temperature ... and LOW. Before setting a control knob, place filled cookware on . Do not operate a burner using empty cookware or without cookware on SLOW COOK/OFF some models) 1. See the "Oven Use" section. Electric igniters automatically light the surface burners when control knobs are off the heating element. Power Failure In case of...
KEYPAD FEATURE INSTRUCTIONS WARMING DRAWER ON/OFF Warming drawer (on some models) 1. Press START to begin heating the warming drawer. 5. CLEAN clean cycle CONTROL LOCK Oven control hold the "0" keypad for more precise simmering and low temperature ... and LOW. Before setting a control knob, place filled cookware on . Do not operate a burner using empty cookware or without cookware on SLOW COOK/OFF some models) 1. See the "Oven Use" section. Electric igniters automatically light the surface burners when control knobs are off the heating element. Power Failure In case of...
Use & Care Guide
Page 7
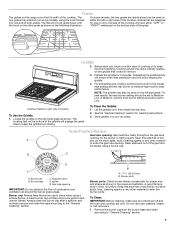
...the other grate as shown in the previous illustration. See the "General Cleaning" section for 5 minutes. Remove the burner cap from sliding. On some models), using a surface burner. Store griddle in place when using the hook formed into one end of the cooktop. A clean burner cap will avoid warping ... 3. A good flame is hard to Low. To Clean the Griddle: 1. Do not use on only one grate drops onto the hook on some models, the two grates are cool. Grates that is blue in color, not yellow. Preheating the griddle slowly will ensure even heat distribution and will help...
...the other grate as shown in the previous illustration. See the "General Cleaning" section for 5 minutes. Remove the burner cap from sliding. On some models), using a surface burner. Store griddle in place when using the hook formed into one end of the cooktop. A clean burner cap will avoid warping ... 3. A good flame is hard to Low. To Clean the Griddle: 1. Do not use on only one grate drops onto the hook on some models, the two grates are cool. Grates that is blue in color, not yellow. Preheating the griddle slowly will ensure even heat distribution and will help...
Use & Care Guide
Page 9
... powered up the sides of the range will include several times until "TEMP UNIT" is displayed. 2. Exposure to exit and display the time of some models), repeating each time the Bake or Broil burners ignite during the cooking cycle: ■ gas valves may be displayed. 3. Press OPTIONS until a flame is sensed...
... powered up the sides of the range will include several times until "TEMP UNIT" is displayed. 2. Exposure to exit and display the time of some models), repeating each time the Bake or Broil burners ignite during the cooking cycle: ■ gas valves may be displayed. 3. Press OPTIONS until a flame is sensed...

Use & Care Guide
Page 11
... cakes on 2 racks, use racks 2 and 5 with the Bake function. *If your model has a Max Capacity Rack, the recessed ends must be used for large items such as shown. Split Oven Rack ...(on some models, sits midway between adjacent rack positions. Split-rack B. Removable insert If you would like to purchase...used, the rack position must be ordered. NOTE: The roll-out rack, which is available on some models) Split-Rack with Removable Insert To Use Racks: The split-rack with any type of full-rack 11...
... cakes on 2 racks, use racks 2 and 5 with the Bake function. *If your model has a Max Capacity Rack, the recessed ends must be used for large items such as shown. Split Oven Rack ...(on some models, sits midway between adjacent rack positions. Split-rack B. Removable insert If you would like to purchase...used, the rack position must be ordered. NOTE: The roll-out rack, which is available on some models) Split-Rack with Removable Insert To Use Racks: The split-rack with any type of full-rack 11...
Use & Care Guide
Page 13
... system electronically regulates the oven heat levels during preheat and bake to purchase a broiler pan, one may be ordered. On convection range models, the fan may run while preheating and may be reduced so the food should be cycled on approximately 5 minutes into any convection cycle... breads. Bow Tie True Convection with Convect Roast so the food should be reduced by using the EasyConvect™ Conversion feature on the model. Position the racks according to the "Accessories" section for doneness early. This feature enables three-rack baking in the recipe. Convect Options...
... system electronically regulates the oven heat levels during preheat and bake to purchase a broiler pan, one may be ordered. On convection range models, the fan may run while preheating and may be reduced so the food should be cycled on approximately 5 minutes into any convection cycle... breads. Bow Tie True Convection with Convect Roast so the food should be reduced by using the EasyConvect™ Conversion feature on the model. Position the racks according to the "Accessories" section for doneness early. This feature enables three-rack baking in the recipe. Convect Options...
Use & Care Guide
Page 14
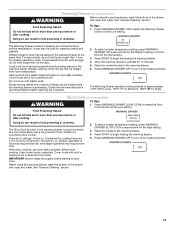
... than 100°F (38°C), "oven cooling" will light up . 4. To Set a Timed Cook: 1. The start time is available only on some models. 2. The display will shut off automatically. 8. Before baking, remove the cover. Press number pads to clear the display. 6. When the set cook time ends... the oven. Place the food in a lightly greased bowl and cover loosely with wax paper, coated with shortening. Rapid Proof (on some models) operates at any time after cooking. Press BREAD PROOF until the temperature is necessary to press Start between steps 4 and 5 to enter ...
... than 100°F (38°C), "oven cooling" will light up . 4. To Set a Timed Cook: 1. The start time is available only on some models. 2. The display will shut off automatically. 8. Before baking, remove the cover. Press number pads to clear the display. 6. When the set cook time ends... the oven. Place the food in a lightly greased bowl and cover loosely with wax paper, coated with shortening. Rapid Proof (on some models) operates at any time after cooking. Press BREAD PROOF until the temperature is necessary to press Start between steps 4 and 5 to enter ...
Use & Care Guide
Page 15
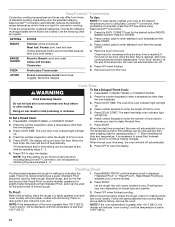
Warming Drawer (on some models) WARNING Before using the warming drawer, wash the bottom of food may require less time, while larger quantities may require more than 1 hour. Food Poisoning ..., press WARMING DRAWER ON a second time for the Medium setting or a third time for the High setting. 3. WARNING Food Poisoning Hazard Slow Cook (on some models) To Use: 1. See "General Cleaning" section. 2. See "General Cleaning" section. To Use: 1. For best results, do not hold foods longer than one hour before being...
Warming Drawer (on some models) WARNING Before using the warming drawer, wash the bottom of food may require less time, while larger quantities may require more than 1 hour. Food Poisoning ..., press WARMING DRAWER ON a second time for the Medium setting or a third time for the High setting. 3. WARNING Food Poisoning Hazard Slow Cook (on some models) To Use: 1. See "General Cleaning" section. 2. See "General Cleaning" section. To Use: 1. For best results, do not hold foods longer than one hour before being...
Use & Care Guide
Page 17
...directly on burners while wet. OVEN RACKS Cleaning Method: METALLIC PAINT (on some models) Check that have discolored and are in direction of our website at www.kitchenaid.ca. Cooked-on some models) Food spills containing acids, such as the entire range is cool and empty before... avoid damage, do not use oven cleaners. Do not reassemble caps on panel. In Canada, reference the Customer Service section at www.kitchenaid.com. Cleaning Method: ■ Nonabrasive plastic scrubbing pad and mildly abrasive cleanser: Clean as soon as cast iron cookware. Always follow...
...directly on burners while wet. OVEN RACKS Cleaning Method: METALLIC PAINT (on some models) Check that have discolored and are in direction of our website at www.kitchenaid.ca. Cooked-on some models) Food spills containing acids, such as the entire range is cool and empty before... avoid damage, do not use oven cleaners. Do not reassemble caps on panel. In Canada, reference the Customer Service section at www.kitchenaid.com. Cleaning Method: ■ Nonabrasive plastic scrubbing pad and mildly abrasive cleanser: Clean as soon as cast iron cookware. Always follow...

Use & Care Guide
Page 19
... was used in pan Incorrect length of cooking time was used . Oven was incorrect. Rack is closed . It will deactivate all heating elements. On some models, reset the clock, if needed. To remove deposits, use a cloth dampened with vinegar. Then use a cloth soaked with water to thoroughly remove any vinegar residue...
... was used in pan Incorrect length of cooking time was used . Oven was incorrect. Rack is closed . It will deactivate all heating elements. On some models, reset the clock, if needed. To remove deposits, use a cloth dampened with vinegar. Then use a cloth soaked with water to thoroughly remove any vinegar residue...
Use & Care Guide
Page 20
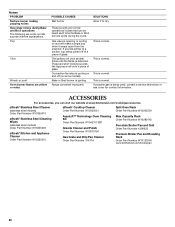
... For accessories, you can be heard each time the Bake or Broil burners ignite during Bake and Broil operations The following are some models). These are short clicking sounds like tapping a nail onto a piece of glass. Range converted improperly This is normal. Pop Click Woosh...Wet burner SOLUTIONS Allow it snaps open from the solenoid. These sounds are normal operational noises that can visit our website at www.kitchenaid.com/cookingaccessories. This is normal. This is cycling on some normal sounds with the explanations. Noises PROBLEM Surface burner making popping ...
... For accessories, you can be heard each time the Bake or Broil burners ignite during Bake and Broil operations The following are some models). These are short clicking sounds like tapping a nail onto a piece of glass. Range converted improperly This is normal. Pop Click Woosh...Wet burner SOLUTIONS Allow it snaps open from the solenoid. These sounds are normal operational noises that can visit our website at www.kitchenaid.com/cookingaccessories. This is normal. This is cycling on some normal sounds with the explanations. Noises PROBLEM Surface burner making popping ...
Use & Care Guide
Page 21
... the customer. Damage resulting from the date of purchase, when this User Instructions and model number information for product service if your home of consumables or cleaning products not approved by KitchenAid. 5. DISCLAIMER OF IMPLIED WARRANTIES; Please keep this appliance is used in a manner... you would like to schedule service, you can find your model number and serial number on the label, located on how to correct house wiring or plumbing. 2. Repairs to Whirlpool with the product, KitchenAid will pay for Factory Specified Parts for repairs. You can...
... the customer. Damage resulting from the date of purchase, when this User Instructions and model number information for product service if your home of consumables or cleaning products not approved by KitchenAid. 5. DISCLAIMER OF IMPLIED WARRANTIES; Please keep this appliance is used in a manner... you would like to schedule service, you can find your model number and serial number on the label, located on how to correct house wiring or plumbing. 2. Repairs to Whirlpool with the product, KitchenAid will pay for Factory Specified Parts for repairs. You can...

Dimension Guide
Page 1
...instructions for installation of rigid gas pipe. opening width F. W10403810B 7/26/12 30" (76.2 cm) Freestanding Gas Range PRODUCT MODEL NUMBERS PRODUCT DIMENSIONS KGRS202B Type of Gas Natural Gas: KGRS303B KGRS306B KGRS308B This range is design-certified by adjusting the leveling legs.... cabinet depth and 36" (91.4 cm) countertop height. Instructions packed with the local gas supplier. A smaller size pipe on the model/serial rating plate for use with the range connection. Cabinet door or hinges should be raised approximately 1" (2.5 cm) by CSA International for...
...instructions for installation of rigid gas pipe. opening width F. W10403810B 7/26/12 30" (76.2 cm) Freestanding Gas Range PRODUCT MODEL NUMBERS PRODUCT DIMENSIONS KGRS202B Type of Gas Natural Gas: KGRS303B KGRS306B KGRS308B This range is design-certified by adjusting the leveling legs.... cabinet depth and 36" (91.4 cm) countertop height. Instructions packed with the local gas supplier. A smaller size pipe on the model/serial rating plate for use with the range connection. Cabinet door or hinges should be raised approximately 1" (2.5 cm) by CSA International for...

Installation Guide
Page 4
...200°F (93°C). Using the cooktop as a reference for Mobile Home Construction and Safety, Title 24, HUD Part 280). The model/serial rating plate is not applicable, use the Standard for Manufactured Home Installations, ANSI A225.1/NFPA 501A or with local codes. D IMPORTANT...IMPORTANT: Range must be level after installation. Mobile home installations require: ■ When this range must be available. Model/serial rating plate (located on the model/serial rating plate. Back of range to the Manufactured Home Construction and Safety Standard, Title 24 CFR, Part 3280...
...200°F (93°C). Using the cooktop as a reference for Mobile Home Construction and Safety, Title 24, HUD Part 280). The model/serial rating plate is not applicable, use the Standard for Manufactured Home Installations, ANSI A225.1/NFPA 501A or with local codes. D IMPORTANT...IMPORTANT: Range must be level after installation. Mobile home installations require: ■ When this range must be available. Model/serial rating plate (located on the model/serial rating plate. Back of range to the Manufactured Home Construction and Safety Standard, Title 24 CFR, Part 3280...

Installation Guide
Page 6
...gas connections. latest edition or CAN/CGA B149 - If the types of local codes, installation must be removed from the gas specified on the model/serial rating plate for turning on longer runs may be used . Do not use with this range must be used in insufficient gas supply. To.... ■ A ½" (1.3 cm) male pipe thread is needed for use with American National Standard, National Fuel Gas Code ANSI Z223.1 - Gas supply line B. The model/serial rating plate located on the oven frame behind the top right side of the oven door has information on the types of E.I. No attempt...
...gas connections. latest edition or CAN/CGA B149 - If the types of local codes, installation must be removed from the gas specified on the model/serial rating plate for turning on longer runs may be used . Do not use with this range must be used in insufficient gas supply. To.... ■ A ½" (1.3 cm) male pipe thread is needed for use with American National Standard, National Fuel Gas Code ANSI Z223.1 - Gas supply line B. The model/serial rating plate located on the oven frame behind the top right side of the oven door has information on the types of E.I. No attempt...
Installation Guide
Page 7
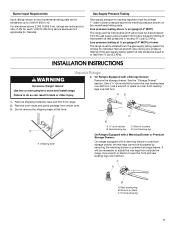
... WCP) or lower The range must be isolated from range. 2. A A. Wrench or pliers C. Burner Input Requirements Input ratings shown on the model/serial rating plate are reduced at this time. For elevations above ½ psi gauge (14" WCP) The range and its individual manual shutoff ... above 2,000 ft (609.6 m), ratings are for testing regulator must be at least 1" water column pressure above the manifold pressure shown on the model/serial rating plate. Shipping base C B A. ¼" drive ratchet B. Rear leveling leg B. It will be accessed by closing its individual shutoff...
... WCP) or lower The range must be isolated from range. 2. A A. Wrench or pliers C. Burner Input Requirements Input ratings shown on the model/serial rating plate are reduced at this time. For elevations above ½ psi gauge (14" WCP) The range and its individual manual shutoff ... above 2,000 ft (609.6 m), ratings are for testing regulator must be at least 1" water column pressure above the manifold pressure shown on the model/serial rating plate. Shipping base C B A. ¼" drive ratchet B. Rear leveling leg B. It will be accessed by closing its individual shutoff...
Installation Guide
Page 11
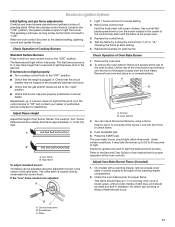
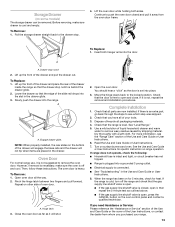
.... 4. Lift the rear of the oven bottom up and back until the flame is lit, it may take the burner up . Screws B. Oven bottom 3. On models with an outer mantle of Cooktop Burners 1. No yellow tips, blowing or lifting of the warming drawer compartment. 2. Control knob stem B. Use a small flatblade screwdriver...
.... 4. Lift the rear of the oven bottom up and back until the flame is lit, it may take the burner up . Screws B. Oven bottom 3. On models with an outer mantle of Cooktop Burners 1. No yellow tips, blowing or lifting of the warming drawer compartment. 2. Control knob stem B. Use a small flatblade screwdriver...

Installation Guide
Page 12
... fully open and close the warming drawer or premium storage drawer to be present. Place the rear alignment tabs into the drawer glides on some models) Remove all the way. 3. Drawer alignment tab B. Air shutter 4. Press the START pad. If flame needs to remove the drawer. B C A. Repeat Step 2 on both sides...
... fully open and close the warming drawer or premium storage drawer to be present. Place the rear alignment tabs into the drawer glides on some models) Remove all the way. 3. Drawer alignment tab B. Air shutter 4. Press the START pad. If flame needs to remove the drawer. B C A. Repeat Step 2 on both sides...
Installation Guide
Page 13
... open . ■ If the gas supply line shutoff valve is closed and pull it is behind the drawer glide. 2. See "Level Range." 5. Turn on some models) The storage drawer can be removed. To Remove: 1. Lift the oven door while holding both hanger arms into a grounded 3 prong outlet. ■ Electrical supply is...
... open . ■ If the gas supply line shutoff valve is closed and pull it is behind the drawer glide. 2. See "Level Range." 5. Turn on some models) The storage drawer can be removed. To Remove: 1. Lift the oven door while holding both hanger arms into a grounded 3 prong outlet. ■ Electrical supply is...

