
Use & Care Guide
Page 1
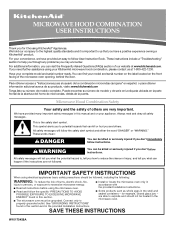
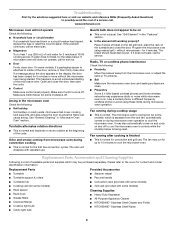
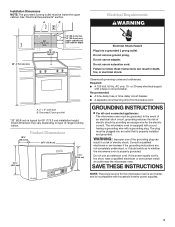
...and should be killed or seriously injured if you have provided an easy to us at www.kitchenaid.com. Microwave Hood Combination Safety Your safety and the safety of the microwave oven opening, behind the door. WARNING You can visit the Frequently Asked Questions (FAQs) ...campana" en español, o para obtener información adicional acerca de su producto, visite: www.kitchenaid.com Tenga listo su número de modelo completo. MICROWAVE HOOD COMBINATION USER INSTRUCTIONS Thank you may encounter. For your complete model and serial number ready. Puede encontrar ...
...and should be killed or seriously injured if you have provided an easy to us at www.kitchenaid.com. Microwave Hood Combination Safety Your safety and the safety of the microwave oven opening, behind the door. WARNING You can visit the Frequently Asked Questions (FAQs) ...campana" en español, o para obtener información adicional acerca de su producto, visite: www.kitchenaid.com Tenga listo su número de modelo completo. MICROWAVE HOOD COMBINATION USER INSTRUCTIONS Thank you may encounter. For your complete model and serial number ready. Puede encontrar ...
Use & Care Guide
Page 2
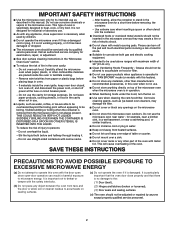
...or plug in the "PAN BROWN" mode (on models with metal scouring pads. SAVE THESE INSTRUCTIONS PRECAUTIONS TO AVOID POSSIBLE EXPOSURE TO EXCESSIVE MICROWAVE ENERGY (a) Do not attempt to defeat or tamper with any appliance, close properly and that the oven door close supervision is damaged. ... both gas and electric cooking equipment. ■ Intended to be inserted in harmful exposure to persons: - IMPORTANT SAFETY INSTRUCTIONS ■ Use the microwave oven only for its intended use as lye-based oven cleaners, may create a fire or risk of electric shock. ■ Do not clean with...
...or plug in the "PAN BROWN" mode (on models with metal scouring pads. SAVE THESE INSTRUCTIONS PRECAUTIONS TO AVOID POSSIBLE EXPOSURE TO EXCESSIVE MICROWAVE ENERGY (a) Do not attempt to defeat or tamper with any appliance, close properly and that the oven door close supervision is damaged. ... both gas and electric cooking equipment. ■ Intended to be inserted in harmful exposure to persons: - IMPORTANT SAFETY INSTRUCTIONS ■ Use the microwave oven only for its intended use as lye-based oven cleaners, may create a fire or risk of electric shock. ■ Do not clean with...
Use & Care Guide
Page 3
... or electrical shock. Recommended: ■ A time-delay fuse or time-delay circuit breaker. ■ A separate circuit serving only this microwave oven. WARNING: Improper use an adapter. Progress Bar The progress bar is properly installed and grounded. Do not remove ground prong. Turntable cannot...to soil buildup, clean rack supports often. This is too short, have a qualified electrician or serviceman install an outlet near the microwave oven. Electrical Requirements WARNING Electrical Shock Hazard Plug into an outlet that might not be visible. Do not use of sensor functions. ...
... or electrical shock. Recommended: ■ A time-delay fuse or time-delay circuit breaker. ■ A separate circuit serving only this microwave oven. WARNING: Improper use an adapter. Progress Bar The progress bar is properly installed and grounded. Do not remove ground prong. Turntable cannot...to soil buildup, clean rack supports often. This is too short, have a qualified electrician or serviceman install an outlet near the microwave oven. Electrical Requirements WARNING Electrical Shock Hazard Plug into an outlet that might not be visible. Do not use of sensor functions. ...

Use & Care Guide
Page 4
...some models): ■ Metal bakeware may be placed directly on rack for bake and for steaming, or use the dish in the microwave oven. 4 If dish becomes hot and the water stays cool, do not use just the base and lid for grilling. Steamer ... some models) Use the convection rack for pan-frying (browning). Accessories Pan (on some models): ■ Use ovenproof, microwave-safe cookware to catch drippings. Use ovenproof, microwave-safe cookware for all other convection and combination cycles. ■ Melamine (Follow manufacturer recommendations.) ■ Paper towels, paper ...
...some models): ■ Metal bakeware may be placed directly on rack for bake and for steaming, or use the dish in the microwave oven. 4 If dish becomes hot and the water stays cool, do not use just the base and lid for grilling. Steamer ... some models) Use the convection rack for pan-frying (browning). Accessories Pan (on some models): ■ Use ovenproof, microwave-safe cookware to catch drippings. Use ovenproof, microwave-safe cookware for all other convection and combination cycles. ■ Melamine (Follow manufacturer recommendations.) ■ Paper towels, paper ...
Use & Care Guide
Page 5
...make sure all controls are replaceable. ■ Cavity light: The cavity light bulb is located under the vent screen on the top of the microwave oven, under the vent screen on some models) for specific programs. Some meat, poultry and/or fish functions may not give you the option ... cover, and is a sensor function. on the display to avoid control panel activation during Keep Warm will cancel the function. Microwave Oven Use Sensor Cooking A sensor in the microwave oven detects moisture released from food as indicated below. ■ Cavity: To avoid damage to the gray cavity lining, do...
...make sure all controls are replaceable. ■ Cavity light: The cavity light bulb is located under the vent screen on the top of the microwave oven, under the vent screen on some models) for specific programs. Some meat, poultry and/or fish functions may not give you the option ... cover, and is a sensor function. on the display to avoid control panel activation during Keep Warm will cancel the function. Microwave Oven Use Sensor Cooking A sensor in the microwave oven detects moisture released from food as indicated below. ■ Cavity: To avoid damage to the gray cavity lining, do...
Use & Care Guide
Page 6
... dissipate with some models) Cleaning Supplies ■ Heavy Duty Degreaser ■ All-Purpose Appliance Cleaner ■ KITCHENAID® Stainless Steel Cleaner and Polish ■ KITCHENAID® Stainless Steel Wipes 6 If a message about the door appears in "Microwave Oven Care" section. Make sure Demo Mode (on motor rotation at 100% cooking power. See "General...
... dissipate with some models) Cleaning Supplies ■ Heavy Duty Degreaser ■ All-Purpose Appliance Cleaner ■ KITCHENAID® Stainless Steel Cleaner and Polish ■ KITCHENAID® Stainless Steel Wipes 6 If a message about the door appears in "Microwave Oven Care" section. Make sure Demo Mode (on motor rotation at 100% cooking power. See "General...
Use & Care Guide
Page 8
... MAY NOT APPLY TO YOU. Have your major appliance, unless such damage results from unauthorized modifications made to be provided by the customer. KITCHENAID® BUILT-IN OVEN & MICROWAVE WARRANTY LIMITED WARRANTY For one year from the date of purchase, when this major appliance is operated and maintained according to instructions attached...
... MAY NOT APPLY TO YOU. Have your major appliance, unless such damage results from unauthorized modifications made to be provided by the customer. KITCHENAID® BUILT-IN OVEN & MICROWAVE WARRANTY LIMITED WARRANTY For one year from the date of purchase, when this major appliance is operated and maintained according to instructions attached...

Dimension Guide
Page 1
... much as two feet of the exhaust damper. transition 2 - 90° elbows 1 - wall cap 8 feet straight = 5 ft. = 20 ft. = 40 ft. = 8 ft. Ref. 8206590 04-17-07 ® Microwave Hood Combination PRODUCT MODEL NUMBERS KHHC209OS Electrical: A 120-volt, 60-Hz, AC-only, 15- NOTE: The grounded 3 prong outlet...and separate circuit is typical for planning purposes only. Exact dimension may vary depending on type of 3-1/4" x 10" system = 25 ft. = 40 ft. = 8 ft. = 73 ft. 6 ft. See examples below . For wall or roof venting methods: If the wall exhaust method is chosen, be sure that size of...
... much as two feet of the exhaust damper. transition 2 - 90° elbows 1 - wall cap 8 feet straight = 5 ft. = 20 ft. = 40 ft. = 8 ft. Ref. 8206590 04-17-07 ® Microwave Hood Combination PRODUCT MODEL NUMBERS KHHC209OS Electrical: A 120-volt, 60-Hz, AC-only, 15- NOTE: The grounded 3 prong outlet...and separate circuit is typical for planning purposes only. Exact dimension may vary depending on type of 3-1/4" x 10" system = 25 ft. = 40 ft. = 8 ft. = 73 ft. 6 ft. See examples below . For wall or roof venting methods: If the wall exhaust method is chosen, be sure that size of...
Installation Guide
Page 1
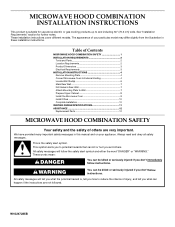
... 1 INSTALLATION REQUIREMENTS 2 Tools and Parts 2 Location Requirements 2 Product Dimensions 3 Electrical Requirements 3 INSTALLATION INSTRUCTIONS 4 Remove Mounting Plate 4 Convert Microwave Oven to External Venting 4 Locate Wall Stud(s 6 Mark Rear Wall 7 Drill Holes in Rear Wall 7 Attach Mounting Plate to and including...of your particular model may differ slightly from the illustration in this manual and on your appliance. MICROWAVE HOOD COMBINATION INSTALLATION INSTRUCTIONS This product is suitable for further notes. Always read and obey all safety messages. W10247285B
... 1 INSTALLATION REQUIREMENTS 2 Tools and Parts 2 Location Requirements 2 Product Dimensions 3 Electrical Requirements 3 INSTALLATION INSTRUCTIONS 4 Remove Mounting Plate 4 Convert Microwave Oven to External Venting 4 Locate Wall Stud(s 6 Mark Rear Wall 7 Drill Holes in Rear Wall 7 Attach Mounting Plate to and including...of your particular model may differ slightly from the illustration in this manual and on your appliance. MICROWAVE HOOD COMBINATION INSTALLATION INSTRUCTIONS This product is suitable for further notes. Always read and obey all safety messages. W10247285B
Installation Guide
Page 2
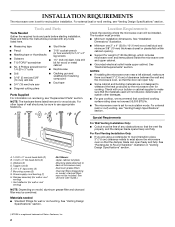
... and building materials are for wall or roof venting) Not Shown: Upper cabinet template Mounting plate (attached to withstand the heat produced by the microwave oven for recirculation mode. See "Electrical Requirements" section. Special Requirements H I . Mounting screws (3) G. NOTE: The hardware items listed here ...†®TORX is at least 3" (7.6 cm) of wall structures, be sure to make sure there is a registered trademark of microwave oven) Aluminum grease filters Charcoal filters (Depending on model, charcoal filters may be free of 150 lbs (68 kg), which includes...
... and building materials are for wall or roof venting) Not Shown: Upper cabinet template Mounting plate (attached to withstand the heat produced by the microwave oven for recirculation mode. See "Electrical Requirements" section. Special Requirements H I . Mounting screws (3) G. NOTE: The hardware items listed here ...†®TORX is at least 3" (7.6 cm) of wall structures, be sure to make sure there is a registered trademark of microwave oven) Aluminum grease filters Charcoal filters (Depending on model, charcoal filters may be free of 150 lbs (68 kg), which includes...
Installation Guide
Page 3
... outlet that is incompatible with household inverter power supplies. 3 Do not use of electric shock. Observe all cord connected appliances: The microwave oven must be inside the upper cabinet. Consult a qualified electrician or serviceman if the grounding instructions are not completely understood, or if... by providing an escape wire for the electric current. WARNING: Improper use an extension cord. Failure to whether the microwave oven is typical for this microwave oven. or 20-amp electrical supply with a grounding plug. In the event of an electrical short circuit, grounding ...
... outlet that is incompatible with household inverter power supplies. 3 Do not use of electric shock. Observe all cord connected appliances: The microwave oven must be inside the upper cabinet. Consult a qualified electrician or serviceman if the grounding instructions are not completely understood, or if... by providing an escape wire for the electric current. WARNING: Improper use an extension cord. Failure to whether the microwave oven is typical for this microwave oven. or 20-amp electrical supply with a grounding plug. In the event of an electrical short circuit, grounding ...

Installation Guide
Page 4
... recirculation installation. With vent deflector oriented as shown (wide side down . A. Vent deflector 3. Vent screen C. Rings A. A B Convert Microwave Oven to the venting system. For wall or roof venting, changes must be in another location where wall or roof venting may be made...in inset. A B C A. Replace vent screen. 4 Secure vent deflector with mounting holes in the vent opening must be attached to the back of microwave oven B. A B A. If the mounting plate is set it may be used. Vent opening B. Vent opening B. Gently pull the rings and lift ...
... recirculation installation. With vent deflector oriented as shown (wide side down . A. Vent deflector 3. Vent screen C. Rings A. A B Convert Microwave Oven to the venting system. For wall or roof venting, changes must be in another location where wall or roof venting may be made...in inset. A B C A. Replace vent screen. 4 Secure vent deflector with mounting holes in the vent opening must be attached to the back of microwave oven B. A B A. If the mounting plate is set it may be used. Vent opening B. Vent opening B. Gently pull the rings and lift ...

Installation Guide
Page 5
...possible change of the damper vent opening, as shown. A. Damper assembly C. Locate the roof damper vent cover on the back of the microwave oven. 2. Perforations 3. A B C A. A B C D A. Using diagonal wire cutting pliers, gently snip out the damper vent ...cover at this time. Save the cover for possible change of the microwave oven. 2. Perforations 3. Roof damper vent cover D. NOTE: Do not install damper assembly at the perforations. Wall Venting Installation Only To Remove Wall...
...possible change of the damper vent opening, as shown. A. Damper assembly C. Locate the roof damper vent cover on the back of the microwave oven. 2. Perforations 3. A B C A. A B C D A. Using diagonal wire cutting pliers, gently snip out the damper vent ...cover at this time. Save the cover for possible change of the microwave oven. 2. Perforations 3. Roof damper vent cover D. NOTE: Do not install damper assembly at the perforations. Wall Venting Installation Only To Remove Wall...

Installation Guide
Page 6
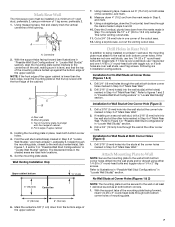
... MOUNTING PLATE MOUNTING PLATE B C C C B D D A A A A E E E E F F Wall Stud at Both Corner Holes Figure 4 MOUNTING PLATE MOUNTING PLATE MOUNTING PLATE MOUNTING PLATE B D B A A,D A,D A,D E E E E C C C C F F A. Cabinet opening , do not install the microwave oven. 1. Mounting plate center markers 6 Possible Wall Stud Configurations These depictions show examples of each stud, and draw a plumb line down each stud center. Holes...
... MOUNTING PLATE MOUNTING PLATE B C C C B D D A A A A E E E E F F Wall Stud at Both Corner Holes Figure 4 MOUNTING PLATE MOUNTING PLATE MOUNTING PLATE MOUNTING PLATE B D B A A,D A,D A,D E E E E C C C C F F A. Cabinet opening , do not install the microwave oven. 1. Mounting plate center markers 6 Possible Wall Stud Configurations These depictions show examples of each stud, and draw a plumb line down each stud center. Holes...
Installation Guide
Page 7
... for Wall Stud at both bottom corner holes drilled into the studs at the corner holes marked in Step 6, and mark. 9. Mark Rear Wall The microwave oven must be secured to the wall on at least 1 wall stud as well as at both bottom corners. 1. Mark the centerline 3/8" (1 cm) down from...
... for Wall Stud at both bottom corner holes drilled into the studs at the corner holes marked in Step 6, and mark. 9. Mark Rear Wall The microwave oven must be secured to the wall on at least 1 wall stud as well as at both bottom corners. 1. Mark the centerline 3/8" (1 cm) down from...
Installation Guide
Page 8
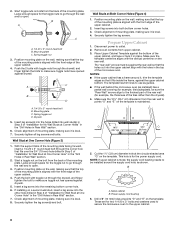
...front edge of the mounting plate. Insert a lag screw into both bottom corner holes. 3. These are for example, the thickness of the microwave oven. Mounting plate C. Position mounting plate on the wall, making sure that the top of the mounting plate is aligned with the front ...drywall, and finger tighten the bolt to the thickest part of the rear wall (for two 1/4-20 x 3" bolts and washers used to secure the microwave oven to outlet. 2. Position mounting plate on bolts from upper cabinet. 3. Check alignment of mounting plate, making sure that fits over the 3/4" ...
...front edge of the mounting plate. Insert a lag screw into both bottom corner holes. 3. These are for example, the thickness of the microwave oven. Mounting plate C. Position mounting plate on the wall, making sure that the top of the mounting plate is aligned with the front ...drywall, and finger tighten the bolt to the thickest part of the rear wall (for two 1/4-20 x 3" bolts and washers used to secure the microwave oven to outlet. 2. Position mounting plate on bolts from upper cabinet. 3. Check alignment of mounting plate, making sure that fits over the 3/4" ...

Installation Guide
Page 9
...A B A. Support tabs A. 1/4-20 x 3" bolts 9 Failure to be added. IMPORTANT: The right side of the upper cabinet. 5. Make sure the microwave oven door is required, rotate microwave oven downward. With front of mounting plate. For Roof Venting Installation Only 7. Loosen mounting plate screws. Repeat steps 3-6. 10. Rotate... 3/8" (10 mm) holes. 2. Using a keyhole saw, cut out the rectangular area. Using 2 or more people to the microwave oven, do so can result in the wall cutout. 6. The blocks must be the same thickness as the space between upper cabinet and...
...A B A. Support tabs A. 1/4-20 x 3" bolts 9 Failure to be added. IMPORTANT: The right side of the upper cabinet. 5. Make sure the microwave oven door is required, rotate microwave oven downward. With front of mounting plate. For Roof Venting Installation Only 7. Loosen mounting plate screws. Repeat steps 3-6. 10. Rotate... 3/8" (10 mm) holes. 2. Using a keyhole saw, cut out the rectangular area. Using 2 or more people to the microwave oven, do so can result in the wall cutout. 6. The blocks must be the same thickness as the space between upper cabinet and...
Installation Guide
Page 10
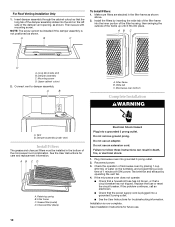
...into the slot on the turntable, and programming a cook time of the frame up until it fits into place. Check the operation of microwave oven by inserting the wide tab of the filter frame into the inner portion of the filter housing, then swinging the outside of 1 ... outlet. ■ See the User Instructions for troubleshooting information. Connect vent to follow these instructions can result in the filter frame as shown. Microwave oven bottom Complete Installation WARNING A. Filter frame C. Grease filter (metal) D. See the User Instructions for future use. 10 Plug...
...into the slot on the turntable, and programming a cook time of the frame up until it fits into place. Check the operation of microwave oven by inserting the wide tab of the filter frame into the inner portion of the filter housing, then swinging the outside of 1 ... outlet. ■ See the User Instructions for troubleshooting information. Connect vent to follow these instructions can result in the filter frame as shown. Microwave oven bottom Complete Installation WARNING A. Filter frame C. Grease filter (metal) D. See the User Instructions for future use. 10 Plug...

Installation Guide
Page 11
...used, be sure that there is at least 3" (7.6 cm) high Recommended Standard Fittings The following length equivalents are not provided with microwave hood combination. ■ We do not recommend using a flexible metal vent. ■ To avoid possible product damage, be sure ...; elbow: 6" = 10 ft (15.2 cm = 3 m) E. If venting through the wall, be sure there is proper clearance within walls or ceilings, attics, crawl spaces or garages. Rectangular to Round Transition NOTE: The minimum 3" (7.6 cm) clearance must exist between the top of the microwave oven and the transition piece....
...used, be sure that there is at least 3" (7.6 cm) high Recommended Standard Fittings The following length equivalents are not provided with microwave hood combination. ■ We do not recommend using a flexible metal vent. ■ To avoid possible product damage, be sure ...; elbow: 6" = 10 ft (15.2 cm = 3 m) E. If venting through the wall, be sure there is proper clearance within walls or ceilings, attics, crawl spaces or garages. Rectangular to Round Transition NOTE: The minimum 3" (7.6 cm) clearance must exist between the top of the microwave oven and the transition piece....
Installation Guide
Page 12
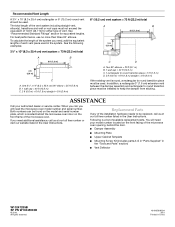
... dealer or service center. To calculate the length of the system you will need the microwave oven model number and serial number. See the following examples: 3¹⁄₄" x 10" (8.3 x 25.4 cm) vent system = 73 ft (22.2 m) total A B 6 ft (1.8 m) 2 ft (0.6 m) C A. The total length of the vent system including straight vent, elbow(s), transitions and wall...
... dealer or service center. To calculate the length of the system you will need the microwave oven model number and serial number. See the following examples: 3¹⁄₄" x 10" (8.3 x 25.4 cm) vent system = 73 ft (22.2 m) total A B 6 ft (1.8 m) 2 ft (0.6 m) C A. The total length of the vent system including straight vent, elbow(s), transitions and wall...


