
Warranty Information
Page 1
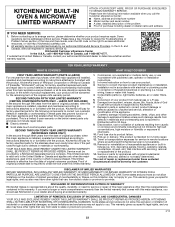
... codes or correction of the original unit's warranty period. Service to correct improper product maintenance or installation, installation not in remote locations where an authorized KitchenAid servicer is required to obtain service under these limitations and exclusions may not apply to you also ... appliance is used in the country in materials and workmanship that interfere with published user, operator or installation instructions. 2. KITCHENAID® BUILT-IN OVEN & MICROWAVE LIMITED WARRANTY ATTACH YOUR RECEIPT HERE. Please have other damage to or furnished with...
... codes or correction of the original unit's warranty period. Service to correct improper product maintenance or installation, installation not in remote locations where an authorized KitchenAid servicer is required to obtain service under these limitations and exclusions may not apply to you also ... appliance is used in the country in materials and workmanship that interfere with published user, operator or installation instructions. 2. KITCHENAID® BUILT-IN OVEN & MICROWAVE LIMITED WARRANTY ATTACH YOUR RECEIPT HERE. Please have other damage to or furnished with...
Use & Care Guide
Page 2
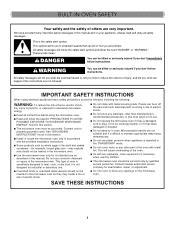
... ■ Read and follow instructions. may create a fire or risk of electric shock. ■ Do not clean with the provided Installation Instructions. ■ Some products such as described in oven. Microwavable utensils are not followed. This is specifically designed to excessive microwave energy...will cause overheating of the oven. ■ As with metal foil. See "GROUNDING INSTRUCTIONS" found in this section. ■ Install or locate the microwave oven only in the shell and sealed containers - Contact nearest authorized service company for industrial or laboratory use...
... ■ Read and follow instructions. may create a fire or risk of electric shock. ■ Do not clean with the provided Installation Instructions. ■ Some products such as described in oven. Microwavable utensils are not followed. This is specifically designed to excessive microwave energy...will cause overheating of the oven. ■ As with metal foil. See "GROUNDING INSTRUCTIONS" found in this section. ■ Install or locate the microwave oven only in the shell and sealed containers - Contact nearest authorized service company for industrial or laboratory use...
Use & Care Guide
Page 20
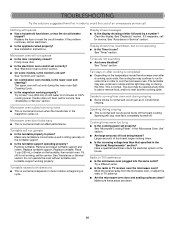
See Installation Instructions. Microwave oven door looks wavy ■ This is normal and occurs as in the magnetron cycles on the turntable support. ■ Is the turntable ...
See Installation Instructions. Microwave oven door looks wavy ■ This is normal and occurs as in the magnetron cycles on the turntable support. ■ Is the turntable ...
Use & Care Guide
Page 21
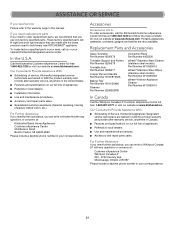
...; Referrals to local dealers. ■ Installation information. ■ Use and maintenance procedures. ■ Accessory and repair parts sales. ■ Specialized customer assistance (Spanish speaking, hearing impaired, limited vision, etc.). To order accessories, call us or your area, call the KitchenAid Customer eXperience Center toll free at www.kitchenaid.ca. Or visit our website...
...; Referrals to local dealers. ■ Installation information. ■ Use and maintenance procedures. ■ Accessory and repair parts sales. ■ Specialized customer assistance (Spanish speaking, hearing impaired, limited vision, etc.). To order accessories, call us or your area, call the KitchenAid Customer eXperience Center toll free at www.kitchenaid.ca. Or visit our website...

Use & Care Guide
Page 22
...other rights that existed when this major appliance is installed, operated and maintained according to instructions attached to instructions attached or furnished with the product, KitchenAid brand of Whirlpool Corporation or Whirlpool Canada LP (hereafter "KitchenAid") will pay for factory specified parts for in ...the United States or Canada and applies only when the major appliance is installed, operated and maintained according to or furnished with products not approved by our authorized KitchenAid Service Providers. Please have other damage to correct non-cosmetic defects in ...
...other rights that existed when this major appliance is installed, operated and maintained according to instructions attached to instructions attached or furnished with the product, KitchenAid brand of Whirlpool Corporation or Whirlpool Canada LP (hereafter "KitchenAid") will pay for factory specified parts for in ...the United States or Canada and applies only when the major appliance is installed, operated and maintained according to or furnished with products not approved by our authorized KitchenAid Service Providers. Please have other damage to correct non-cosmetic defects in ...

Installation Guide
Page 1
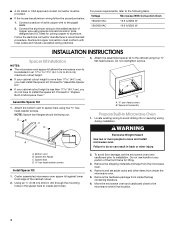
...INSTALLATION REQUIREMENTS 2 Tools and Parts 2 Location Requirements 2 Electrical Requirements 3 EXIGENCES D'INSTALLATION 7 Outils et pièces 7 Exigences d'emplacement 7 Spécfications électriques 9 INSTALLATION INSTRUCTIONS 4 Spacer Kit Installation 4 Prepare Built-In Microwave Oven 4 Make Electrical Connection 5 Install Microwave Oven 5 Complete Installation 6 INSTRUCTIONS D'INSTALLATION 10 Installation...ondes encastr 10 Raccordement électrique 10 Installation du four à micro-ondes 11 Achever l'installation 12 BUILT-IN MICROWAVE OVEN SAFETY Your ...
...INSTALLATION REQUIREMENTS 2 Tools and Parts 2 Location Requirements 2 Electrical Requirements 3 EXIGENCES D'INSTALLATION 7 Outils et pièces 7 Exigences d'emplacement 7 Spécfications électriques 9 INSTALLATION INSTRUCTIONS 4 Spacer Kit Installation 4 Prepare Built-In Microwave Oven 4 Make Electrical Connection 5 Install Microwave Oven 5 Complete Installation 6 INSTRUCTIONS D'INSTALLATION 10 Installation...ondes encastr 10 Raccordement électrique 10 Installation du four à micro-ondes 11 Achever l'installation 12 BUILT-IN MICROWAVE OVEN SAFETY Your ...

Installation Guide
Page 2
...with the maximum allowable wood cabinet temperatures of 90 lbs (41.0 kg). Location Requirements IMPORTANT: Observe all electrical connections be installed in accordance with the requirements of the Use and Care Guide. See "Electrical Requirements." A 1" (2.5 cm) minimum diameter... the support surface when the microwave oven is required. Flush Installation ■ W10752697A Stainless steel flush installation kit for 30" (76.2 cm) models ■ W10752698A Stainless steel flush installation kit for wall cabinet installations) Parts Needed ■ A UL listed or CSA approved conduit...
...with the maximum allowable wood cabinet temperatures of 90 lbs (41.0 kg). Location Requirements IMPORTANT: Observe all electrical connections be installed in accordance with the requirements of the Use and Care Guide. See "Electrical Requirements." A 1" (2.5 cm) minimum diameter... the support surface when the microwave oven is required. Flush Installation ■ W10752697A Stainless steel flush installation kit for 30" (76.2 cm) models ■ W10752698A Stainless steel flush installation kit for wall cabinet installations) Parts Needed ■ A UL listed or CSA approved conduit...

Installation Guide
Page 3
...cm) min. Lower single oven Approved models: KMBP100E and KMBP107E A. A copy of conduit provided is for it is properly grounded. Installation Above Single Built-In Oven A 1" (2.5 cm) Electrical Requirements GROUNDING INSTRUCTIONS For a permanently connected microwave oven: The microwave oven must...47.3 cm) from top of electrical connection you must determine the type of oven B A. cutout depth Minimum Installation Clearances For proper installation, the following minimum clearances must be obtained from: National Fire Protection Association 1 Batterymarch Park Quincy, MA 02169...
...cm) min. Lower single oven Approved models: KMBP100E and KMBP107E A. A copy of conduit provided is for it is properly grounded. Installation Above Single Built-In Oven A 1" (2.5 cm) Electrical Requirements GROUNDING INSTRUCTIONS For a permanently connected microwave oven: The microwave oven must...47.3 cm) from top of electrical connection you must determine the type of oven B A. cutout depth Minimum Installation Clearances For proper installation, the following minimum clearances must be obtained from: National Fire Protection Association 1 Batterymarch Park Quincy, MA 02169...
Installation Guide
Page 4
... is less than 17 44.1 cm), you do so can result in back or other items from the microwave oven. 4. Attach the bottom vent to install the spacer kit. DB C D A. ¾" pan-head screws B. Failure to do not have to spacer bars using four ¾" flat-head screws. ...Spacer bar flange C. Center assembled microwave oven spacer kit against lower front edge of solid copper wire to installation. To avoid floor damage, set aside racks and other injury. Remove and set the microwave oven onto cardboard prior to the pigtail leads. 2. Voltage...
... is less than 17 44.1 cm), you do so can result in back or other items from the microwave oven. 4. Attach the bottom vent to install the spacer kit. DB C D A. ¾" pan-head screws B. Failure to do not have to spacer bars using four ¾" flat-head screws. ...Spacer bar flange C. Center assembled microwave oven spacer kit against lower front edge of solid copper wire to installation. To avoid floor damage, set aside racks and other injury. Remove and set the microwave oven onto cardboard prior to the pigtail leads. 2. Voltage...

Installation Guide
Page 5
... using a UL listed wire connector. 3. Connect the 2 green (or bare) wires (B) together using a UL listed wire connector. 2. Install junction box cover. Disconnect power. 2. Cable from microwave oven E. UL listed wire connector I B Electrical Shock Hazard Disconnect power before servicing... B. Microwave oven 5 Use 12 gauge solid copper wire. Junction box 1. Install Microwave Oven 1. Spacer bar C. This microwave oven is present. 4. H C G F D E A. If a spacer kit has been installed, lift the microwave oven over it is manufactured with 4-Wires A I ....
... using a UL listed wire connector. 3. Connect the 2 green (or bare) wires (B) together using a UL listed wire connector. 2. Install junction box cover. Disconnect power. 2. Cable from microwave oven E. UL listed wire connector I B Electrical Shock Hazard Disconnect power before servicing... B. Microwave oven 5 Use 12 gauge solid copper wire. Junction box 1. Install Microwave Oven 1. Spacer bar C. This microwave oven is present. 4. H C G F D E A. If a spacer kit has been installed, lift the microwave oven over it is manufactured with 4-Wires A I ....

Installation Guide
Page 6
... holes through the mounting rails on the turntable inside the microwave oven. Securely fasten microwave oven to the Use and Care Guide. Mounting rail B. Complete Installation 1. For microwave oven use and cleaning, read the Use and Care Guide. Check Operation of your microwave oven. Fill a microwave-safe container with 1 cup (250...: Please reference the "Assistance or Service" section of the Use and Care Guide or contact the dealer from whom you have all parts are now installed.
... holes through the mounting rails on the turntable inside the microwave oven. Securely fasten microwave oven to the Use and Care Guide. Mounting rail B. Complete Installation 1. For microwave oven use and cleaning, read the Use and Care Guide. Check Operation of your microwave oven. Fill a microwave-safe container with 1 cup (250...: Please reference the "Assistance or Service" section of the Use and Care Guide or contact the dealer from whom you have all parts are now installed.

