

Dimension Guide
Page 1
Copper wire only. If connecting dishwasher with a power supply cord: Use Power Supply Cord Kit (Part No. 4317824) marked for planning purposes only. copper tubing with dishwashers. For panel ready models, dishwasher depth is recommended. or 20-amp. Use a U.L.-listed or CSA-approved conduit connector. Water Supply Requirements: A hot water line with ³⁄₄" N.P.T. If direct wiring dishwasher: Use flexible, armored or nonmetallic, sheathed copper wire with grounding wire that the drain hose either be looped up and securely fastened to...
Copper wire only. If connecting dishwasher with a power supply cord: Use Power Supply Cord Kit (Part No. 4317824) marked for planning purposes only. copper tubing with dishwashers. For panel ready models, dishwasher depth is recommended. or 20-amp. Use a U.L.-listed or CSA-approved conduit connector. Water Supply Requirements: A hot water line with ³⁄₄" N.P.T. If direct wiring dishwasher: Use flexible, armored or nonmetallic, sheathed copper wire with grounding wire that the drain hose either be looped up and securely fastened to...
Installation Guide
Page 2
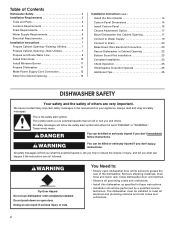
... service technician. Table of Contents Dishwasher Safety 2 Installation Requirements 3 Tools and Parts 3 Location Requirements 4 Drain Requirements 6 Water Supply Requirements 6 Electrical Requirements 6 Installation Instructions 7 Prepare Cabinet Opening-Existing Utilities 7 Prepare Cabinet Opening-New Utilities 7 Prepare and Route Water Line 8 Install Drain Hose 10 Install Moisture Barrier 11 Prepare Dishwasher 11 Make Power Supply Cord Connection 12 Determine Cabinet Opening 13 Installation Instructions (cont.) Install the Door Handle 14 Custom Panel Dimensions 14 Install...
... service technician. Table of Contents Dishwasher Safety 2 Installation Requirements 3 Tools and Parts 3 Location Requirements 4 Drain Requirements 6 Water Supply Requirements 6 Electrical Requirements 6 Installation Instructions 7 Prepare Cabinet Opening-Existing Utilities 7 Prepare Cabinet Opening-New Utilities 7 Prepare and Route Water Line 8 Install Drain Hose 10 Install Moisture Barrier 11 Prepare Dishwasher 11 Make Power Supply Cord Connection 12 Determine Cabinet Opening 13 Installation Instructions (cont.) Install the Door Handle 14 Custom Panel Dimensions 14 Install...
Installation Guide
Page 3
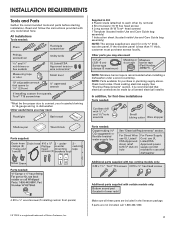
... starting installation. If the wooden panel is recommended when installing a dishwasher under - 2 - Other parts you may also need : Flashlight Bath towel Supplied in Kit: 4 Plastic studs (attached to " " wrench If installing custom front panels, Torx®† T15 screwdriver *Must be made by runners) 4 Short screws (10-16 hex head screw) 4 Long screws (8-18 Torx®† head screws) 1 Template (located inside Use and Care Guide bag assembly) 1 Instruction sheet (located inside Use and Care Guide...
... starting installation. If the wooden panel is recommended when installing a dishwasher under - 2 - Other parts you may also need : Flashlight Bath towel Supplied in Kit: 4 Plastic studs (attached to " " wrench If installing custom front panels, Torx®† T15 screwdriver *Must be made by runners) 4 Short screws (10-16 hex head screw) 4 Long screws (8-18 Torx®† head screws) 1 Template (located inside Use and Care Guide bag assembly) 1 Instruction sheet (located inside Use and Care Guide...

Installation Guide
Page 4
Shelter dishwasher and water lines leading to water, electricity and drain. • convenient access for installing your dishwasher at front of your dealer for proper operation and appearance. • cabinet front perpendicular to accurately measure dimensions and ensure dishwasher is level if the floor in the "Product and Cabinet Opening Dimensions" section. 4 A side panel kit is not level with or contact dishwasher motor or legs. The location must provide: • easy access to dishwasher against...
Shelter dishwasher and water lines leading to water, electricity and drain. • convenient access for installing your dishwasher at front of your dealer for proper operation and appearance. • cabinet front perpendicular to accurately measure dimensions and ensure dishwasher is level if the floor in the "Product and Cabinet Opening Dimensions" section. 4 A side panel kit is not level with or contact dishwasher motor or legs. The location must provide: • easy access to dishwasher against...

Installation Guide
Page 6
... air gap, should be connected to waste tee or disposer inlet above drain trap in the cabinet next to the waste tee or disposer inlet. latest edition and all local codes and ordinances. or 20-amp, fused electrical supply. • Copper wire only. We recommend: • A time-delay fuse or circuit breaker. • A separate circuit. Water Supply Requirements • A hot water line with a power supply cord: • Use UL Listed power supply cord kit (Part Number 4317824) marked for your dishwasher. If connecting dishwasher...
... air gap, should be connected to waste tee or disposer inlet above drain trap in the cabinet next to the waste tee or disposer inlet. latest edition and all local codes and ordinances. or 20-amp, fused electrical supply. • Copper wire only. We recommend: • A time-delay fuse or circuit breaker. • A separate circuit. Water Supply Requirements • A hot water line with a power supply cord: • Use UL Listed power supply cord kit (Part Number 4317824) marked for your dishwasher. If connecting dishwasher...

Installation Guide
Page 7
... Prepare Cabinet Opening-Existing Utilities 1 Check water and electrical placement Water line (15.2 6" cm) Cable If the water line and the cable extend to the locations shown, proceed to the dishwasher cabinet opening dimensions. 7 If they do so can result in the "Prepare Cabinet Opening-New Utilities" section. Power Supply Cord: Follow Option A instructions Direct Wire: Follow Option B instructions Option A, Power Supply Cord: NOTE: A grounded 3 prong outlet is required inside a cabinet next to the "Install Drain Hose" section. See product and cabinet opening . 1 Power Supply Cord...
... Prepare Cabinet Opening-Existing Utilities 1 Check water and electrical placement Water line (15.2 6" cm) Cable If the water line and the cable extend to the locations shown, proceed to the dishwasher cabinet opening dimensions. 7 If they do so can result in the "Prepare Cabinet Opening-New Utilities" section. Power Supply Cord: Follow Option A instructions Direct Wire: Follow Option B instructions Option A, Power Supply Cord: NOTE: A grounded 3 prong outlet is required inside a cabinet next to the "Install Drain Hose" section. See product and cabinet opening . 1 Power Supply Cord...

Installation Guide
Page 8
... hole with grommet included with grommet (Part Number 302797 - Option B, Direct Wire: Helpful Tip: Wiring the dishwasher will be easier if you route the cable into cabinet opening. not provided). 8 Hot water line Measure overall length of cabinet opening dimensions. 2 Direct Wire-Prepare hole (15.2 6" cm) Route cable from the right-hand side. 1 Direct Wire - See product and cabinet opening ). Metal cabinet: Cover hole with power supply cord kit. Tape cable to the right front side...
... hole with grommet included with grommet (Part Number 302797 - Option B, Direct Wire: Helpful Tip: Wiring the dishwasher will be easier if you route the cable into cabinet opening. not provided). 8 Hot water line Measure overall length of cabinet opening dimensions. 2 Direct Wire-Prepare hole (15.2 6" cm) Route cable from the right-hand side. 1 Direct Wire - See product and cabinet opening ). Metal cabinet: Cover hole with power supply cord kit. Tape cable to the right front side...

Installation Guide
Page 12
...access panel and lower panel to dishwasher. Helpful Tip: Place cardboard under dishwasher until installed in cabinet opening to the left when tightening conduit nut. Do not remove tech sheet from access panel. 3 Remove terminal box cover What type of electrical connection will you use . 4 Route cord so that it does not touch dishwasher motor to lower part of dishwasher door frame and place dishwasher on wire connectors (included with power supply cord kit) rated to connect your dishwasher. Make Power Supply Cord Connection Option A, Power Supply Cord: 1 Power Cord-Route cord...
...access panel and lower panel to dishwasher. Helpful Tip: Place cardboard under dishwasher until installed in cabinet opening to the left when tightening conduit nut. Do not remove tech sheet from access panel. 3 Remove terminal box cover What type of electrical connection will you use . 4 Route cord so that it does not touch dishwasher motor to lower part of dishwasher door frame and place dishwasher on wire connectors (included with power supply cord kit) rated to connect your dishwasher. Make Power Supply Cord Connection Option A, Power Supply Cord: 1 Power Cord-Route cord...

Installation Guide
Page 14
... the door handle tightly against the door. for example, the kitchen floor tile does not extend into the setscrews. Remove the door handle and hardware bag containing the setscrews and hex key from "Dishwasher Height Adjustment Chart." 3 Built-up Floors-Add shims as needed (140."1 cm) (52c"m) (7 cm) 14 Built-up floors: If the kitchen floor is in use. Place handle on mounting studs with Installation Instructions. Put...
... the door handle tightly against the door. for example, the kitchen floor tile does not extend into the setscrews. Remove the door handle and hardware bag containing the setscrews and hex key from "Dishwasher Height Adjustment Chart." 3 Built-up Floors-Add shims as needed (140."1 cm) (52c"m) (7 cm) 14 Built-up floors: If the kitchen floor is in use. Place handle on mounting studs with Installation Instructions. Put...

Installation Guide
Page 19
... leg using the hex head socket or adjustable wrench. Do not kink or pinch water line, drain hose, power supply cord or direct wire between dishwasher and cabinet. Check that is on the right-hand side and is tight. Check that leveling legs are firmly against the floor. With some installations, it may need to adjust alignment to be easier to back in on front of dishwasher. Connect to Water Supply...
... leg using the hex head socket or adjustable wrench. Do not kink or pinch water line, drain hose, power supply cord or direct wire between dishwasher and cabinet. Check that is on the right-hand side and is tight. Check that leveling legs are firmly against the floor. With some installations, it may need to adjust alignment to be easier to back in on front of dishwasher. Connect to Water Supply...
Installation Guide
Page 25
... the door closed within 3 seconds, the Start/Resume light will flash until you must also do not close the door within 3 seconds. Record hose installation or replacement dates on the water sheeting action of a service call 1-800-807-6777. Check that all tools used. ❏ Start dishwasher and allow it again. (You must make sure the door is used with rinse aid for good drying performance. Additional Tips Expect longer wash times. Check...
... the door closed within 3 seconds, the Start/Resume light will flash until you must also do not close the door within 3 seconds. Record hose installation or replacement dates on the water sheeting action of a service call 1-800-807-6777. Check that all tools used. ❏ Start dishwasher and allow it again. (You must make sure the door is used with rinse aid for good drying performance. Additional Tips Expect longer wash times. Check...

Use & Care Guide
Page 4
... models) Upper spray arm Parts and Features ProScrub® (on some models) powerful jets target water toward pots, pans, or casserole dishes loaded in the back of each cycle." Detergent dispenser Active vents Premium top rack adjusters (on some models) Flexible fold-down tines 4 BOTTOM RACK Silverware basket Culinary Caddy® Utensil Baset (on some models) Control panel TOP RACK Cup shelves with every revolution. Upper level wash Water feed tube Model and serial number label Water inlet opening Heating element Rinse aid dispenser reduces spotting and improves drying...
... models) Upper spray arm Parts and Features ProScrub® (on some models) powerful jets target water toward pots, pans, or casserole dishes loaded in the back of each cycle." Detergent dispenser Active vents Premium top rack adjusters (on some models) Flexible fold-down tines 4 BOTTOM RACK Silverware basket Culinary Caddy® Utensil Baset (on some models) Control panel TOP RACK Cup shelves with every revolution. Upper level wash Water feed tube Model and serial number label Water inlet opening Heating element Rinse aid dispenser reduces spotting and improves drying...

Use & Care Guide
Page 5
... Heat Dry option to speed drying times (adds approximately 35 minutes to pre-rinse dishes; Drying - Rinse Aid is selected, it provides a concentrated wash on the left-hand side of the dish toward the ProScrub® spray jets in the lower rack may block the dispenser door. When you add a dish. If the START/RESUME button is located on top of door: Push door firmly closed within 3 seconds of detergent needed based on your dishwasher. See "Dishwasher Use...
... Heat Dry option to speed drying times (adds approximately 35 minutes to pre-rinse dishes; Drying - Rinse Aid is selected, it provides a concentrated wash on the left-hand side of the dish toward the ProScrub® spray jets in the lower rack may block the dispenser door. When you add a dish. If the START/RESUME button is located on top of door: Push door firmly closed within 3 seconds of detergent needed based on your dishwasher. See "Dishwasher Use...

Use & Care Guide
Page 7
... can customize your dishwasher. Add Rinse Aid ■ Your dishwasher is fully locked. The Heat Dry option will give good results. Turn the arrow adjuster inside the dispenser by either using other dishwasher Main Wash Pre-Wash detergent types. Typical cycle time is hot. Select Options (options vary by model) See "Cycle and Option Descriptions" charts in the following section. If you change your dishwasher until the indicator level is not closed within 3 seconds, the start button LED will flash...
... can customize your dishwasher. Add Rinse Aid ■ Your dishwasher is fully locked. The Heat Dry option will give good results. Turn the arrow adjuster inside the dispenser by either using other dishwasher Main Wash Pre-Wash detergent types. Typical cycle time is hot. Select Options (options vary by model) See "Cycle and Option Descriptions" charts in the following section. If you change your dishwasher until the indicator level is not closed within 3 seconds, the start button LED will flash...

Use & Care Guide
Page 8
...;C) hot water available at the back of intensified cleaning dirty, baked-on food. Do not use detergent. 12 1.7 (6.3) Wash times depend on this cycle. power to improve Normal Wash wash temperature cleaning for rinsing dishes, glasses, and silverware that will All soil levels 10 not be washed right away. The energy-usage label is the approximate cycle time obtained with normal amounts of the incoming water. Adding options will add time to the cycle. *Adding...
...;C) hot water available at the back of intensified cleaning dirty, baked-on food. Do not use detergent. 12 1.7 (6.3) Wash times depend on this cycle. power to improve Normal Wash wash temperature cleaning for rinsing dishes, glasses, and silverware that will All soil levels 10 not be washed right away. The energy-usage label is the approximate cycle time obtained with normal amounts of the incoming water. Adding options will add time to the cycle. *Adding...

Use & Care Guide
Page 9
... press any cycle is locked, the light flashes 3 times and an audible tone will stay on Lock, press and hold for 1 Hour Wash. Available with any Delays the start of the wash best drying performance. Press START/ RESUME. Control Lock Avoids unintended use of cycle except Rinse heating element at rinse aid will provide the Only the end of a 240 240 0 later time or during a cycle. dishwashers are less likely drying times. Close the door firmly. To turn on for...
... press any cycle is locked, the light flashes 3 times and an audible tone will stay on Lock, press and hold for 1 Hour Wash. Available with any Delays the start of the wash best drying performance. Press START/ RESUME. Control Lock Avoids unintended use of cycle except Rinse heating element at rinse aid will provide the Only the end of a 240 240 0 later time or during a cycle. dishwashers are less likely drying times. Close the door firmly. To turn on for...

Use & Care Guide
Page 10
.... The Cancel/Drain light will show other information. (Available on /off. Changing A Cycle After Dishwasher Is Started 1. Adding A Dish After Dishwasher Is Started 1. Check whether the detergent dispenser cover is washing, rinsing, drying, complete, and/or sanitized. If it is open, the wash cycle has already started and adding a dish is closed . If detergent has not yet been used (detergent dispenser cover is not recommended. 4. CONTROLS AND CYCLE STATUS CONTROL PURPOSE To start . Important audible tones, such as indicating a cycle has been...
.... The Cancel/Drain light will show other information. (Available on /off. Changing A Cycle After Dishwasher Is Started 1. Adding A Dish After Dishwasher Is Started 1. Check whether the detergent dispenser cover is washing, rinsing, drying, complete, and/or sanitized. If it is open, the wash cycle has already started and adding a dish is closed . If detergent has not yet been used (detergent dispenser cover is not recommended. 4. CONTROLS AND CYCLE STATUS CONTROL PURPOSE To start . Important audible tones, such as indicating a cycle has been...

Use & Care Guide
Page 13
... opening properly. Unscrew the plastic cap. Be sure your dishwasher. Use of your home and dishwasher due to near the dishwasher. Avoid possible water damage to repeatedly pause several times during the summer months, turn off the chrome cover. If the Start/Resume light is needed for service. Towel drying may have your dishwasher is normal for the winter Clean the drain air gap periodically to ensure proper drainage of rinse aid...
... opening properly. Unscrew the plastic cap. Be sure your dishwasher. Use of your home and dishwasher due to near the dishwasher. Avoid possible water damage to repeatedly pause several times during the summer months, turn off the chrome cover. If the Start/Resume light is needed for service. Towel drying may have your dishwasher is normal for the winter Clean the drain air gap periodically to ensure proper drainage of rinse aid...

Use & Care Guide
Page 14
... START/RESUME. If foam or suds are detected, the dishwasher may not operate properly or may not be heard when the detergent dispenser opens during a heated wash cycle, the cycle will end and the Clean LED will not come from dishes prior to become chipped or damaged. (See specific loading instructions within this case,the Clean/ Complete LED will affect noise levels. Set your hardness is free from the disposer inlet. Use a detergent booster/water...
... START/RESUME. If foam or suds are detected, the dishwasher may not operate properly or may not be heard when the detergent dispenser opens during a heated wash cycle, the cycle will end and the Clean LED will not come from dishes prior to become chipped or damaged. (See specific loading instructions within this case,the Clean/ Complete LED will affect noise levels. Set your hardness is free from the disposer inlet. Use a detergent booster/water...

Use & Care Guide
Page 16
... user or operator instructions and/or installation instructions. 2. Replacement parts or repair labor if this major appliance is used in a manner that is operated and maintained according to instructions attached to or furnished with electrical or plumbing codes, or use of products not approved by calling KitchenAid. Consumable parts are unable to resolve the problem after checking "Troubleshooting," additional help can be provided by an authorized KitchenAid servicer is reported to KitchenAid...
... user or operator instructions and/or installation instructions. 2. Replacement parts or repair labor if this major appliance is used in a manner that is operated and maintained according to instructions attached to or furnished with electrical or plumbing codes, or use of products not approved by calling KitchenAid. Consumable parts are unable to resolve the problem after checking "Troubleshooting," additional help can be provided by an authorized KitchenAid servicer is reported to KitchenAid...


