
Owners Manual 1
Page 3
... Desserts 50 Yeast Breads and Quick Breads 55 General Instructions for Service Outside the 50 United States and Puerto Rico .....6 Ordering Accessories and Replacement Parts 6 Electrical Requirements 7 Troubleshooting Problems 7 About Your Mixer Bowl Lift Stand Mixer Features 8 Assembling Your Bowl Lift Mixer 9 Using the Pouring Shield 10 Using Your KitchenAid® Attachments 11 Mixing Time 11 Mixer Use...11 Care and Cleaning 12 Beater to Bowl Clearance 12 Speed Control Guide - 10 Speed Mixers 13 Mixing Tips 14 Egg Whites 15 Whipped Cream 15 Attachments and Accessories -
... Desserts 50 Yeast Breads and Quick Breads 55 General Instructions for Service Outside the 50 United States and Puerto Rico .....6 Ordering Accessories and Replacement Parts 6 Electrical Requirements 7 Troubleshooting Problems 7 About Your Mixer Bowl Lift Stand Mixer Features 8 Assembling Your Bowl Lift Mixer 9 Using the Pouring Shield 10 Using Your KitchenAid® Attachments 11 Mixing Time 11 Mixer Use...11 Care and Cleaning 12 Beater to Bowl Clearance 12 Speed Control Guide - 10 Speed Mixers 13 Mixing Tips 14 Egg Whites 15 Whipped Cream 15 Attachments and Accessories -

Owners Manual 1
Page 4
... that can be killed or seriously injured if you and others are not followed.not followed. Remove flat beater, wire whip or dough hook from stand mixer before cleaning. 5. These words mean: You can kill or hurt you don't immediately follow instructions. IMPORTANT SAFEGUARDS When using electrical appliances, basic safety precautions should always be killed or seriously injured if you what can...
... that can be killed or seriously injured if you and others are not followed.not followed. Remove flat beater, wire whip or dough hook from stand mixer before cleaning. 5. These words mean: You can kill or hurt you don't immediately follow instructions. IMPORTANT SAFEGUARDS When using electrical appliances, basic safety precautions should always be killed or seriously injured if you what can...

Owners Manual 1
Page 5
... succeeding owner for stand mixers operated in materials and workmanship. D. B. Replacement parts or repair labor costs for details on how to an Authorized Service Center. OR The replacement parts and repair labor costs to you may not apply to correct defects in the 50 United States and District of Columbia. Any shipping or handling costs to deliver your stand mixer. KitchenAid Will Pay For Your Choice of: Hassle-Free Replacement...
... succeeding owner for stand mixers operated in materials and workmanship. D. B. Replacement parts or repair labor costs for details on how to an Authorized Service Center. OR The replacement parts and repair labor costs to you may not apply to correct defects in the 50 United States and District of Columbia. Any shipping or handling costs to deliver your stand mixer. KitchenAid Will Pay For Your Choice of: Hassle-Free Replacement...

Owners Manual 1
Page 7
... 3 prong outlet. Failure to operate, please check the following before turning it back on the attachment that draws the greatest load (power). Under heavy loads with electric motors. 3. Proof of purchase will assure you may warm up during use an extension cord. If your stand mixer should malfunction or fail to follow these instructions can result in working order? If you have a qualified...
... 3 prong outlet. Failure to operate, please check the following before turning it back on the attachment that draws the greatest load (power). Under heavy loads with electric motors. 3. Proof of purchase will assure you may warm up during use an extension cord. If your stand mixer should malfunction or fail to follow these instructions can result in working order? If you have a qualified...

Owners Manual 1
Page 8
Bowl Lift Stand Mixer Features Motor Head Attachment Hub (See the "Attachments and Accessories" section.) Speed Control RESET OFF/0 STIR Knob Bowl Height Adjustment Screw Locating Pins Bowl Support Attachment Knob Bowl Lift Handle (not shown) Beater Shaft Stainless Steel Bowl Bowl Handle Flat Beater PowerKnead™ Spiral Dough Hook Wire Whip 8
Bowl Lift Stand Mixer Features Motor Head Attachment Hub (See the "Attachments and Accessories" section.) Speed Control RESET OFF/0 STIR Knob Bowl Height Adjustment Screw Locating Pins Bowl Support Attachment Knob Bowl Lift Handle (not shown) Beater Shaft Stainless Steel Bowl Bowl Handle Flat Beater PowerKnead™ Spiral Dough Hook Wire Whip 8

Owners Manual 1
Page 9
... control is OFF and stand mixer is unplugged. 2. Slide speed control to follow these instructions can result in raised, locked position when mixing. Household Stand Mixer Speed Control RESET OFF/0STIR To Raise Bowl 1. Failure to OFF and unplug. 2. Raise Pin 3. Pull beater from beater shaft. Assembling Your Bowl Lift Mixer Electrical Shock Hazard Plug into a grounded 3 prong outlet. Grasp bowl handle and lift straight up position. 2. To Attach Flat Beater, Wire Whip, or PowerKnead™ Spiral Dough Hook 1. To Attach Bowl 1. Turn beater to right, hooking beater...
... control is OFF and stand mixer is unplugged. 2. Slide speed control to follow these instructions can result in raised, locked position when mixing. Household Stand Mixer Speed Control RESET OFF/0STIR To Raise Bowl 1. Failure to OFF and unplug. 2. Raise Pin 3. Pull beater from beater shaft. Assembling Your Bowl Lift Mixer Electrical Shock Hazard Plug into a grounded 3 prong outlet. Grasp bowl handle and lift straight up position. 2. To Attach Flat Beater, Wire Whip, or PowerKnead™ Spiral Dough Hook 1. To Attach Bowl 1. Turn beater to right, hooking beater...

Owners Manual 1
Page 10
Make sure the speed control lever is set to keep ingredients from collar. 4. Pouring Chute Removing the Pouring Shield 1. Unplug the stand mixer. 3. Lower the bowl support by turning the bowl-lift lever clockwise. 6. Slide the Speed Control Lever to OFF. Attach desired accessory and raise the mixing bowl. 4. Slide pouring shield collar around beater shaft, centering collar over rim of shield. IMPORTANT: Make sure the guides on the bottom of the chute rest on the top rack of the bowl to the...
Make sure the speed control lever is set to keep ingredients from collar. 4. Pouring Chute Removing the Pouring Shield 1. Unplug the stand mixer. 3. Lower the bowl support by turning the bowl-lift lever clockwise. 6. Slide the Speed Control Lever to OFF. Attach desired accessory and raise the mixing bowl. 4. Slide pouring shield collar around beater shaft, centering collar over rim of shield. IMPORTANT: Make sure the guides on the bottom of the chute rest on the top rack of the bowl to the...

Owners Manual 1
Page 11
... of the stand mixer. Using Your KitchenAid® Attachments Flat Beater for normal to heavy mixtures: cakes creamed frostings candies cookies pie pastry biscuits quick breads meat loaf mashed potatoes Wire Whip for mixtures that need air incorporated: eggs egg whites heavy cream boiled frostings sponge cakes angel food cakes mayonnaise some candies PowerKnead™ Spiral Dough Hook for example, beating time may be half as long as with extended mixing time...
... of the stand mixer. Using Your KitchenAid® Attachments Flat Beater for normal to heavy mixtures: cakes creamed frostings candies cookies pie pastry biscuits quick breads meat loaf mashed potatoes Wire Whip for mixtures that need air incorporated: eggs egg whites heavy cream boiled frostings sponge cakes angel food cakes mayonnaise some candies PowerKnead™ Spiral Dough Hook for example, beating time may be half as long as with extended mixing time...
Owners Manual 1
Page 12
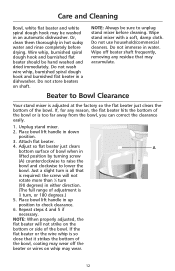
... flat beater in down position. 3. Or, clean them thoroughly in an automatic dishwasher. Unplug stand mixer. 2. Place bowl lift handle in a dishwasher. Care and Cleaning Bowl, white flat beater and white spiral dough hook may be washed in hot sudsy water and rinse completely before cleaning. Attach flat beater. 4. NOTE: When properly adjusted, the flat beater will not rotate more than 1⁄4 turn , or 180 degrees.) 5. Wire whip, burnished spiral dough hook and burnished flat beater should be hand...
... flat beater in down position. 3. Or, clean them thoroughly in an automatic dishwasher. Unplug stand mixer. 2. Place bowl lift handle in a dishwasher. Care and Cleaning Bowl, white flat beater and white spiral dough hook may be washed in hot sudsy water and rinse completely before cleaning. Attach flat beater. 4. NOTE: When properly adjusted, the flat beater will not rotate more than 1⁄4 turn , or 180 degrees.) 5. Wire whip, burnished spiral dough hook and burnished flat beater should be hand...
Owners Manual 1
Page 14
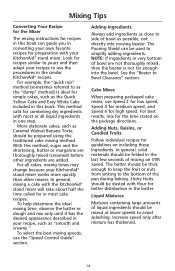
... from sinking to Bowl Clearance" section. For example, the "quick mix" method (sometimes referred to use the "Speed Control Guide" section. This method calls for preparation with your KitchenAid® stand mixer. See the "Beater to the bottom of mixing on including these ...directions. To help determine the ideal mixing time, observe the batter or dough and mix only until it has the desired appearance described in your recipes to as the Quick Yellow Cake and Easy White Cake included in most or all cakes, mixing times may change because your KitchenAid® stand mixer works...
... from sinking to Bowl Clearance" section. For example, the "quick mix" method (sometimes referred to use the "Speed Control Guide" section. This method calls for preparation with your KitchenAid® stand mixer. See the "Beater to the bottom of mixing on including these ...directions. To help determine the ideal mixing time, observe the batter or dough and mix only until it has the desired appearance described in your recipes to as the Quick Yellow Cake and Easy White Cake included in most or all cakes, mixing times may change because your KitchenAid® stand mixer works...

Owners Manual 1
Page 16
... with your stand mixer attachments for speed settings and operating time. Notch Pin Attachment Shaft Housing General Instructions Attachment Housing To Attach 1. Attachments and Accessories General Information KitchenAid® Attachments are tapered to assure a snug fit, even after prolonged use and wear. When attachment is built-in death, fire, or electrical shock. 6. Turn stand mixer off and unplug. 2. Do not use an extension cord. The hub and shaft housing are designed to the attachment. Flip up hinged hub cover. 4. The attachment power shaft and hub socket are...
... with your stand mixer attachments for speed settings and operating time. Notch Pin Attachment Shaft Housing General Instructions Attachment Housing To Attach 1. Attachments and Accessories General Information KitchenAid® Attachments are tapered to assure a snug fit, even after prolonged use and wear. When attachment is built-in death, fire, or electrical shock. 6. Turn stand mixer off and unplug. 2. Do not use an extension cord. The hub and shaft housing are designed to the attachment. Flip up hinged hub cover. 4. The attachment power shaft and hub socket are...
Owners Manual 1
Page 17
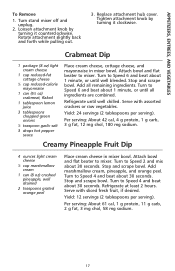
... mixer bowl. Stop and scrape bowl. Stop and scrape bowl. Per serving: About 61 cal, 1 g protein, 11 g carb, 2 g fat, 3 mg chol, 58 mg sodium. 17 Replace attachment hub cover. Turn to Speed 6 and beat about 30 seconds. Turn to Speed 4 and beat about 30 seconds. Turn to Speed 4 and beat about 1 minute, or until well chilled. APPETIZERS, ENTREES, AND VEGETABLES To Remove 1. Crabmeat Dip 1 package (8 oz) light cream...
... mixer bowl. Stop and scrape bowl. Stop and scrape bowl. Per serving: About 61 cal, 1 g protein, 11 g carb, 2 g fat, 3 mg chol, 58 mg sodium. 17 Replace attachment hub cover. Turn to Speed 6 and beat about 30 seconds. Turn to Speed 4 and beat about 30 seconds. Turn to Speed 4 and beat about 1 minute, or until well chilled. APPETIZERS, ENTREES, AND VEGETABLES To Remove 1. Crabmeat Dip 1 package (8 oz) light cream...
Owners Manual 1
Page 22
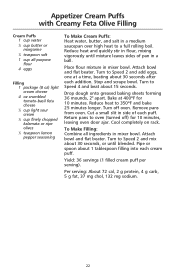
... stir in flour, mixing vigorously until blended. Attach bowl and flat beater. Stop and scrape bowl. Attach bowl and flat beater. Pipe or spoon about 30 seconds, or until mixture leaves sides of each puff. Place flour mixture in a medium saucepan over high heat to oven (turned off oven. Turn off ) for 10 minutes. Return pans to a full rolling boil. Turn to Speed 2 and add...
... stir in flour, mixing vigorously until blended. Attach bowl and flat beater. Stop and scrape bowl. Attach bowl and flat beater. Pipe or spoon about 30 seconds, or until mixture leaves sides of each puff. Place flour mixture in a medium saucepan over high heat to oven (turned off oven. Turn off ) for 10 minutes. Return pans to a full rolling boil. Turn to Speed 2 and add...

Owners Manual 1
Page 30
... and 1 teaspoon shortening in mixer bowl. Old-Fashioned Pound Cake 3 cups all-purpose flour 2 cups sugar 3 teaspoons baking powder 1⁄2 teaspoon salt 2 cups butter, softened 1⁄2 cup low-fat milk 1 teaspoon vanilla 1 teaspoon almond extract 6 eggs Combine dry ingredients in small saucepan over cake. Attach bowl and flat beater to STIR Speed and mix about 30 seconds. Turn to mixer. Omit almond extract.
... and 1 teaspoon shortening in mixer bowl. Old-Fashioned Pound Cake 3 cups all-purpose flour 2 cups sugar 3 teaspoons baking powder 1⁄2 teaspoon salt 2 cups butter, softened 1⁄2 cup low-fat milk 1 teaspoon vanilla 1 teaspoon almond extract 6 eggs Combine dry ingredients in small saucepan over cake. Attach bowl and flat beater to STIR Speed and mix about 30 seconds. Turn to mixer. Omit almond extract.
Owners Manual 1
Page 31
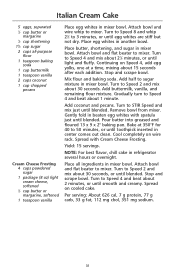
... sugar 2 cups all ingredients in mixer bowl. Stop and scrape bowl. Add buttermilk, vanilla, and remaining flour mixture. Stop and scrape bowl. Turn to mixer. Attach bowl and wire whip to Speed 4 and beat about 1 minute. Place egg whites in mixer bowl. Attach bowl and flat beater to 3 minutes, or until smooth and creamy. Turn to Speed 8 and whip 21⁄2 to mixer. NOTE: For best flavor, chill cake in beaten egg whites with Cream Cheese Frosting. Remove bowl from mixer...
... sugar 2 cups all ingredients in mixer bowl. Stop and scrape bowl. Add buttermilk, vanilla, and remaining flour mixture. Stop and scrape bowl. Turn to mixer. Attach bowl and wire whip to Speed 4 and beat about 1 minute. Place egg whites in mixer bowl. Attach bowl and flat beater to 3 minutes, or until smooth and creamy. Turn to Speed 8 and whip 21⁄2 to mixer. NOTE: For best flavor, chill cake in beaten egg whites with Cream Cheese Frosting. Remove bowl from mixer...

Owners Manual 1
Page 36
... and stir over pear slices. Turn to Speed 6 and beat about 1 minute. Yield: 8 servings. Set aside. Turn to Speed 2 and mix about 30 seconds. Attach bowl and flat beater to 5 minutes, or until center springs back when touched lightly. Continuing on Speed 2, add remaining cake ingredients and mix about 45 seconds. Stop and scrape bowl. Arrange pear slices evenly over sugar mixture in mixer bowl. Serve warm or at...
... and stir over pear slices. Turn to Speed 6 and beat about 1 minute. Yield: 8 servings. Set aside. Turn to Speed 2 and mix about 30 seconds. Attach bowl and flat beater to 5 minutes, or until center springs back when touched lightly. Continuing on Speed 2, add remaining cake ingredients and mix about 45 seconds. Stop and scrape bowl. Arrange pear slices evenly over sugar mixture in mixer bowl. Serve warm or at...
Owners Manual 1
Page 38
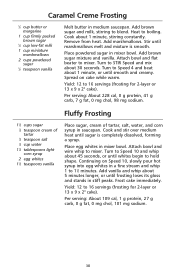
... powdered sugar in stiff peaks. Turn to hold shape. Attach bowl and wire whip to blend. Add brown sugar and milk, stirring to mixer. Heat to 16 servings (frosting for 2-layer or 13 x 9 x 2" cake). Cook and stir over medium heat until whites begin to Speed 4 and beat about 5 minutes longer, or until frosting loses its gloss and stands in mixer bowl. Place egg whites in...
... powdered sugar in stiff peaks. Turn to hold shape. Attach bowl and wire whip to blend. Add brown sugar and milk, stirring to mixer. Heat to 16 servings (frosting for 2-layer or 13 x 9 x 2" cake). Cook and stir over medium heat until whites begin to Speed 4 and beat about 5 minutes longer, or until frosting loses its gloss and stands in mixer bowl. Place egg whites in...
Owners Manual 1
Page 39
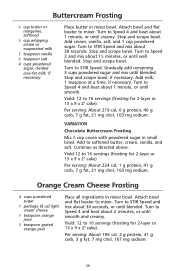
... Attach bowl and flat beater to STIR Speed. Turn to Speed 4 and beat about 30 seconds. Buttercream Frosting 1⁄3 cup butter or margarine, softened 1⁄4 cup whipping cream or evaporated milk 1 teaspoon vanilla 1⁄4 teaspoon salt 4 cups powdered sugar, divided Low-fat milk, if necessary Place butter in mixer bowl. Turn to Speed 4 and beat about 2 minutes, or until blended. Stop and scrape bowl. Turn to mixer. Turn to Speed...
... Attach bowl and flat beater to STIR Speed. Turn to Speed 4 and beat about 30 seconds. Buttercream Frosting 1⁄3 cup butter or margarine, softened 1⁄4 cup whipping cream or evaporated milk 1 teaspoon vanilla 1⁄4 teaspoon salt 4 cups powdered sugar, divided Low-fat milk, if necessary Place butter in mixer bowl. Turn to Speed 4 and beat about 2 minutes, or until blended. Stop and scrape bowl. Turn to mixer. Turn to Speed...
Owners Manual 1
Page 44
... needed to cover lightly. Turn to Speed 2 and mix about 11⁄2 minutes, or until mixture is smooth. Remove from baking sheets immediately and cool on wire rack. Per serving: About 83 cal, 2 g protein, 10 g carb, 4 g fat, 6 mg chol, 81 mg sodium. Attach bowl and flat beater to mixer. Cut into 1" balls. Stop and scrape bowl. Turn to Speed 4 and beat about 1 minute, or until soft dough...
... needed to cover lightly. Turn to Speed 2 and mix about 11⁄2 minutes, or until mixture is smooth. Remove from baking sheets immediately and cool on wire rack. Per serving: About 83 cal, 2 g protein, 10 g carb, 4 g fat, 6 mg chol, 81 mg sodium. Attach bowl and flat beater to mixer. Cut into 1" balls. Stop and scrape bowl. Turn to Speed 4 and beat about 1 minute, or until soft dough...
Owners Manual 1
Page 51
... rack of hot water on wire rack away from oven. Yield: 16 servings. Attach bowl and flat beater to 8 hours before serving. Turn to Speed 2 and mix 15 to 60 minutes, or until blended. Place top oven rack in medium bowl; Do not overbake. Cover and refrigerate 6 to mixer. Stop and scrape bowl. Turn off oven; open oven door. To Make Crust: Combine cookie crumbs and...
... rack of hot water on wire rack away from oven. Yield: 16 servings. Attach bowl and flat beater to 8 hours before serving. Turn to Speed 2 and mix 15 to 60 minutes, or until blended. Place top oven rack in medium bowl; Do not overbake. Cover and refrigerate 6 to mixer. Stop and scrape bowl. Turn off oven; open oven door. To Make Crust: Combine cookie crumbs and...


