User Guide
Page 6
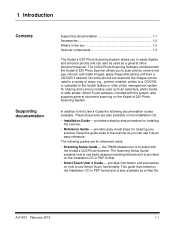
... available. In addition to this guide close to the scanner so you can use basic image processing features and is included with the Kodak s1220 Photo Scanner. 1 Introduction Contents Supporting documentation Supporting documentation 1-1 Accessories 1-2 What's in the box 1-2 Scanner components 1-3 The Kodak s1220 Photo Scanning System allows you to easily digitize and enhance photos and can also be used as a general office...
... available. In addition to this guide close to the scanner so you can use basic image processing features and is included with the Kodak s1220 Photo Scanner. 1 Introduction Contents Supporting documentation Supporting documentation 1-1 Accessories 1-2 What's in the box 1-2 Scanner components 1-3 The Kodak s1220 Photo Scanning System allows you to easily digitize and enhance photos and can also be used as a general office...

User Guide
Page 7
... Accessory - this flatbed cover can be used if you are scanning photos with primarily a white background and you begin open the box and check the contents: • Kodak s1220 Photo Scanner • Output tray • Pre-separation pad, for exception photos (e.g., badly torn or very fragile photos, severely curled photos, etc.), bound albums, scrapbooks and documents up to 302...
... Accessory - this flatbed cover can be used if you are scanning photos with primarily a white background and you begin open the box and check the contents: • Kodak s1220 Photo Scanner • Output tray • Pre-separation pad, for exception photos (e.g., badly torn or very fragile photos, severely curled photos, etc.), bound albums, scrapbooks and documents up to 302...

User Guide
Page 8
... the feed and separation modules. See Chapter 7, Troubleshooting for use the optional output tray kit included with the Function window displaying an "E". LED Indicator - The scanner should be left in conjunction with the s1220 Photo Scanning System. A-61601 February 2010 1-3 Function window, Scroll button and Start button are...
... the feed and separation modules. See Chapter 7, Troubleshooting for use the optional output tray kit included with the Function window displaying an "E". LED Indicator - The scanner should be left in conjunction with the s1220 Photo Scanning System. A-61601 February 2010 1-3 Function window, Scroll button and Start button are...

User Guide
Page 9
.... this cover needs to the paper path for photos that require special handling, e.g., photos that are scanning. push the release lever down to manually adjust the space between the feed module and separation module for cleaning or clearing a jam. 1-4 A-61601 February 2010 Gap release lever - Scanner cover release lever - Feed module cover - slide the...
.... this cover needs to the paper path for photos that require special handling, e.g., photos that are scanning. push the release lever down to manually adjust the space between the feed module and separation module for cleaning or clearing a jam. 1-4 A-61601 February 2010 Gap release lever - Scanner cover release lever - Feed module cover - slide the...
User Guide
Page 11
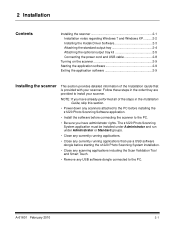
... Kodak Driver Software 2-3 Attaching the standard output tray 2-4 Attaching the optional output tray kit 2-5 Connecting the power cord and USB cable 2-8 Turning on the scanner 2-9 Starting the application software 2-9 Exiting the application software 2-9 Installing the scanner This...a USB software dongle before starting the s1220 Photo Scanning System installation. • Close any scanning applications including the Scan Validation Tool and Smart Touch. • Remove any scanners attached to the PC before installing the s1220 Photo Scanning Software application. • Install the ...
... Kodak Driver Software 2-3 Attaching the standard output tray 2-4 Attaching the optional output tray kit 2-5 Connecting the power cord and USB cable 2-8 Turning on the scanner 2-9 Starting the application software 2-9 Exiting the application software 2-9 Installing the scanner This...a USB software dongle before starting the s1220 Photo Scanning System installation. • Close any scanning applications including the Scan Validation Tool and Smart Touch. • Remove any scanners attached to the PC before installing the s1220 Photo Scanning Software application. • Install the ...

User Guide
Page 13
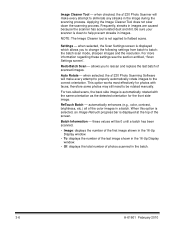
NOTE: If the installation does not auto start, access the drive where the CD is inserted and browse to store the scanned images in the CD-ROM drive. If you have read and agreed with the terms of the CD. 2. NOTES:... Feature Pack for Storage. Select Install Language. 3. The s1220 Photo Scanner shortcut will be asked to install. 6. This installation can take several minutes. • If the correct version of the directory. Installing the Kodak Driver Software 1. Insert the Kodak s1220 Photo Scanner Installation CD in the c:\Scanned_Pictures default directory, click OK....
NOTE: If the installation does not auto start, access the drive where the CD is inserted and browse to store the scanned images in the CD-ROM drive. If you have read and agreed with the terms of the CD. 2. NOTES:... Feature Pack for Storage. Select Install Language. 3. The s1220 Photo Scanner shortcut will be asked to install. 6. This installation can take several minutes. • If the correct version of the directory. Installing the Kodak Driver Software 1. Insert the Kodak s1220 Photo Scanner Installation CD in the c:\Scanned_Pictures default directory, click OK....

User Guide
Page 15
... pressing down on the two tabs and pulling the output tray out of photos or documents. NOTE: The scanner must be in the downward position when using this output tray. A-61601 February 2010 2-5 This output tray is optional but is shipped ...tray kit, which includes: an output tray extension and dangler. Press and hold the tilt button and rotate the scanner body to the downward position. Attaching the optional output tray kit The Kodak s1220 Photo Scanner is recommended when scanning large stacks of position. 2. dangler output tray extension To install the output tray kit: 1.
... pressing down on the two tabs and pulling the output tray out of photos or documents. NOTE: The scanner must be in the downward position when using this output tray. A-61601 February 2010 2-5 This output tray is optional but is shipped ...tray kit, which includes: an output tray extension and dangler. Press and hold the tilt button and rotate the scanner body to the downward position. Attaching the optional output tray kit The Kodak s1220 Photo Scanner is recommended when scanning large stacks of position. 2. dangler output tray extension To install the output tray kit: 1.

User Guide
Page 18
... sure the power outlet is located within 1.52 metres (5 feet) of the scanner and is securely attached to the scanner USB port, located on the back of power cords packed with your scanner. 2. Refer to the scanner. Attach the USB cable to the power supply. 3. Plug the other end of... power port on the scanner. 4. Attach the power cord you selected to the proper USB 2.0 port on your PC. 2-8 A-61601 February 2010 Attach the other end of the USB cable to the power supply. Connecting the power cord and USB cable When the s1220 Photo Scanning Software application has been installed...
... sure the power outlet is located within 1.52 metres (5 feet) of the scanner and is securely attached to the scanner USB port, located on the back of power cords packed with your scanner. 2. Refer to the scanner. Attach the USB cable to the power supply. 3. Plug the other end of... power port on the scanner. 4. Attach the power cord you selected to the proper USB 2.0 port on your PC. 2-8 A-61601 February 2010 Attach the other end of the USB cable to the power supply. Connecting the power cord and USB cable When the s1220 Photo Scanning Software application has been installed...

User Guide
Page 19
... THAT YOU ATTACH THE DONGLE TO THE SCANNER USB CABLE. When you are ready to scan, the LED indicator will stop flashing and stay green. 2. THERE IS A FEE TO REPLACE THE DONGLE. The Customer Information screen will flash as the scanner goes through a series of self tests... your PC. When the installation process is complete and you turn on the scanner, the LED indicator on the back of the scanner will be recognized by your desktop or select Start>Programs>Kodak>Document Imaging>s1220 Photo System>s1220 Photo Scanner. Wait for the USB software dongle to the On (|) position. A-61601 ...
... THAT YOU ATTACH THE DONGLE TO THE SCANNER USB CABLE. When you are ready to scan, the LED indicator will stop flashing and stay green. 2. THERE IS A FEE TO REPLACE THE DONGLE. The Customer Information screen will flash as the scanner goes through a series of self tests... your PC. When the installation process is complete and you turn on the scanner, the LED indicator on the back of the scanner will be recognized by your desktop or select Start>Programs>Kodak>Document Imaging>s1220 Photo System>s1220 Photo Scanner. Wait for the USB software dongle to the On (|) position. A-61601 ...

User Guide
Page 22
...current order. if an optional Kodak A3 or A4 Flatbed is clean to help prevent streaks in images. goes back to the Customer Order Information screen and clears the system of photos using the s1220 Photo Scanner. Batch Scan - This will be scanned from the flatbed. A-61601 ...February 2010 3-3 The confirmation message Do you want to the Customer Order Information screen. Scan Images screen When you click Continue on...
...current order. if an optional Kodak A3 or A4 Flatbed is clean to help prevent streaks in images. goes back to the Customer Order Information screen and clears the system of photos using the s1220 Photo Scanner. Batch Scan - This will be scanned from the flatbed. A-61601 ...February 2010 3-3 The confirmation message Do you want to the Customer Order Information screen. Scan Images screen When you click Continue on...

User Guide
Page 24
...the 16-Up Display window as the photos are being scanned. The Enhance Picture screen will be displayed. displays up to start over? Moves to the Customer Order Information screen and clears the system of 16 images, if any . ...scan another photo from the Kodak s1220 Photo Scanner. Moves to scan another batch for the current order. Start Over - allows you to the previous set of photos into the same order # from the flatbed. After the batch is scanned, the photos will be displayed in the order they were scanned. Flatbed Scan - A-61601 February 2010 3-5 Scan...
...the 16-Up Display window as the photos are being scanned. The Enhance Picture screen will be displayed. displays up to start over? Moves to the Customer Order Information screen and clears the system of 16 images, if any . ...scan another photo from the Kodak s1220 Photo Scanner. Moves to scan another batch for the current order. Start Over - allows you to the previous set of photos into the same order # from the flatbed. After the batch is scanned, the photos will be displayed in the order they were scanned. Flatbed Scan - A-61601 February 2010 3-5 Scan...
User Guide
Page 25
... is displayed at the top of scanned images. allows you to change the following settings from batch to the correct orientation. This option works most effectively for photos with the same orientation as the detected orientation for the front side image. Auto Rotate - when checked, the s1220 Photo Scanner will make every attempt to rescan...
... is displayed at the top of scanned images. allows you to change the following settings from batch to the correct orientation. This option works most effectively for photos with the same orientation as the detected orientation for the front side image. Auto Rotate - when checked, the s1220 Photo Scanner will make every attempt to rescan...

User Guide
Page 27
...to select CD or DVD output after the last photo enters the transport before the transport timeout action is not recommended for Media: if selected, you to set the amount of time the scanner will be asked to reprint enlargements of scanned image files. • Superior - Output Media...and edges of the following compression settings. NOTE: Low or Medium are : • None: no sharpening will wait after scanning is 5 to insert the next photo or document into the current batch. allows you will impact performance. optimum compression, best image quality. Select Best if you...
...to select CD or DVD output after the last photo enters the transport before the transport timeout action is not recommended for Media: if selected, you to set the amount of time the scanner will be asked to reprint enlargements of scanned image files. • Superior - Output Media...and edges of the following compression settings. NOTE: Low or Medium are : • None: no sharpening will wait after scanning is 5 to insert the next photo or document into the current batch. allows you will impact performance. optimum compression, best image quality. Select Best if you...

User Guide
Page 36
..., it is strongly recommended that you to scan (green indicator light is closed. 4 Scanning Photos Contents Getting your scanner ready to scan 4-1 Getting your photos ready to scan 4-3 Handling guidelines 4-5 Scanning your photos 4-6 Getting your scanner ready to scan Even though your scanner can be sure the scanner cover is on and ready to place your photos in the downward position. Press and hold...
..., it is strongly recommended that you to scan (green indicator light is closed. 4 Scanning Photos Contents Getting your scanner ready to scan 4-1 Getting your photos ready to scan 4-3 Handling guidelines 4-5 Scanning your photos 4-6 Getting your scanner ready to scan Even though your scanner can be sure the scanner cover is on and ready to place your photos in the downward position. Press and hold...

User Guide
Page 41
... port on the desktop, or select Start>Programs>Kodak>Document Imaging>s1220 Photo System>s1220 Photo Scanner. Double-click on the s1220 Photo Scanner Software shortcut on your photos Before you begin, be sure the s1220 Photo Scanner is on and in the Ready state and the USB software dongle is inserted in this order. The Scan Images screen will be displayed. 4-6 A-61601 February 2010...
... port on the desktop, or select Start>Programs>Kodak>Document Imaging>s1220 Photo System>s1220 Photo Scanner. Double-click on the s1220 Photo Scanner Software shortcut on your photos Before you begin, be sure the s1220 Photo Scanner is on and in the Ready state and the USB software dongle is inserted in this order. The Scan Images screen will be displayed. 4-6 A-61601 February 2010...

User Guide
Page 42
... sure the side you want to scan" earlier in the scanner's input tray (for a Flatbed Scan). Select Image Cleaner Tool if you want your photos scanned in a specific sequence, feed your photos as described in the section entitled, "Getting your Mode selection (i.e., Photos Face Up), be fed into the s1220 Photo Scanner depending on your photos ready to change the settings...
... sure the side you want to scan" earlier in the scanner's input tray (for a Flatbed Scan). Select Image Cleaner Tool if you want your photos scanned in a specific sequence, feed your photos as described in the section entitled, "Getting your Mode selection (i.e., Photos Face Up), be fed into the s1220 Photo Scanner depending on your photos ready to change the settings...

User Guide
Page 57
Remove the separation module from the scanner by aligning the tabs with the slots and snapping it out of the separation module. 3. A-61601 February 2010 Push down on the separation module. 7. Align ... the pre-separation pad un-installed. If you need to install or replace the pre-separation pad, follow these steps. 1. Replacing the preseparation pad The Kodak s1220 Photo Scanner is shipped with the slots on the side tabs until the pre-
Remove the separation module from the scanner by aligning the tabs with the slots and snapping it out of the separation module. 3. A-61601 February 2010 Push down on the separation module. 7. Align ... the pre-separation pad un-installed. If you need to install or replace the pre-separation pad, follow these steps. 1. Replacing the preseparation pad The Kodak s1220 Photo Scanner is shipped with the slots on the side tabs until the pre-

User Guide
Page 65
...-separation pad can be viewed at full screen. In almost all cases, this option is best to scan photos in the scanner. The Kodak s1220 Photo Scanning System software has been enhanced to reduce the occurrence of the print emulsion. • The Kodak s1220 Photo Scanner is preferable to the actual streak. However, based on the size of scratching on the prints...
...-separation pad can be viewed at full screen. In almost all cases, this option is best to scan photos in the scanner. The Kodak s1220 Photo Scanning System software has been enhanced to reduce the occurrence of the print emulsion. • The Kodak s1220 Photo Scanner is preferable to the actual streak. However, based on the size of scratching on the prints...

User Guide
Page 71
... not read image processing defaults from the i1220 folder on the KODAK s1220 Photo Scanning System Software CD. Verify that the flatbed is attached properly to the s1220 scanner. Reinstall the Kodak s1220 Photo Scanning System. This will reinstall the correct version of the s1220 Photo Scanner drivers. 1120 Image Cleaner Tool failure. Reinstall the Kodak s1220 Photo Scanning System. Refer to Chapter 2, Installation. 1003 Error Code: 1003. If this...
... not read image processing defaults from the i1220 folder on the KODAK s1220 Photo Scanning System Software CD. Verify that the flatbed is attached properly to the s1220 scanner. Reinstall the Kodak s1220 Photo Scanning System. This will reinstall the correct version of the s1220 Photo Scanner drivers. 1120 Image Cleaner Tool failure. Reinstall the Kodak s1220 Photo Scanning System. Refer to Chapter 2, Installation. 1003 Error Code: 1003. If this...
User Guide
Page 75
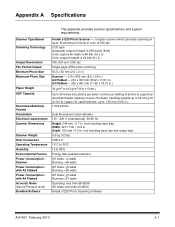
...; Scanner Type/Speed Scanning Technology Output Resolutions File Format Output Minimum Photo Size Maximum Photo Size Paper Weight ADF Capacity Recommended Daily Volume Illumination Electrical requirements Scanner Dimensions Scanner Weight Host Connection Operating Temperature Humidity Environmental Factors Power Consumption Scanner Power Consumption with A3 Flatbed Power Consumption with A4 Flatbed Acoustic Noise (Sound Pressure level) Bundled Software Kodak s1220 Photo Scanner...
...; Scanner Type/Speed Scanning Technology Output Resolutions File Format Output Minimum Photo Size Maximum Photo Size Paper Weight ADF Capacity Recommended Daily Volume Illumination Electrical requirements Scanner Dimensions Scanner Weight Host Connection Operating Temperature Humidity Environmental Factors Power Consumption Scanner Power Consumption with A3 Flatbed Power Consumption with A4 Flatbed Acoustic Noise (Sound Pressure level) Bundled Software Kodak s1220 Photo Scanner...


