Owners Manual
Page 2
... the Dryer 15 Reversing the Door 16 Installing the Side Vent Kit 17 Stacking the Dryer 18 Venting the Dryer 20 Connecting the Inlet Hose (Steam Models) 21 Connecting Gas Dryers 23 Connecting Electric Dryers 28 Special Electrical Requirements 28 Final Installation Check 29 Installation Test (Duct Check) 32 OPERATION 32 Using the Dryer 33 Check the Lint Filter Before Every Load 33 Sorting Laundry 33 Loading the Dryer 34 Control Panel 37 Cycle Guide 41 Cycle Modifier Buttons 41 Option Buttons 42 Special Functions 43 Steam Functions (Steam Models) 45 SMART FUNCTIONS 45 LG ThinQ Application...
... the Dryer 15 Reversing the Door 16 Installing the Side Vent Kit 17 Stacking the Dryer 18 Venting the Dryer 20 Connecting the Inlet Hose (Steam Models) 21 Connecting Gas Dryers 23 Connecting Electric Dryers 28 Special Electrical Requirements 28 Final Installation Check 29 Installation Test (Duct Check) 32 OPERATION 32 Using the Dryer 33 Check the Lint Filter Before Every Load 33 Sorting Laundry 33 Loading the Dryer 34 Control Panel 37 Cycle Guide 41 Cycle Modifier Buttons 41 Option Buttons 42 Special Functions 43 Steam Functions (Steam Models) 45 SMART FUNCTIONS 45 LG ThinQ Application...

Owners Manual
Page 3
... access for installation location. The door hinge can add a Steam option to selected cycles. Flow Sense™ Duct Blockage Sensing System Indicator The Flow Sense™ duct blockage sensing system detects and alerts you see the alert: Clean or repair the ducts to refresh clothes, reduce static, and make ironing easier. Smart Diagnosis™ Should you experience any technical difficulty with a swirling jet of hot steam to remove...
... access for installation location. The door hinge can add a Steam option to selected cycles. Flow Sense™ Duct Blockage Sensing System Indicator The Flow Sense™ duct blockage sensing system detects and alerts you see the alert: Clean or repair the ducts to refresh clothes, reduce static, and make ironing easier. Smart Diagnosis™ Should you experience any technical difficulty with a swirling jet of hot steam to remove...

Owners Manual
Page 4
... this manual and on your gas supplier from a neighbor's phone. do not use any appliance. - Always read and follow all safety messages. WARNING- These conditions will follow safety warnings exactly could result in this or any electrical switch; Do not try to the manufacturer's instructions and local codes. ••Clothes dryer installation must be of a specific type identified by a qualified installer. •...
... this manual and on your gas supplier from a neighbor's phone. do not use any appliance. - Always read and follow all safety messages. WARNING- These conditions will follow safety warnings exactly could result in this or any electrical switch; Do not try to the manufacturer's instructions and local codes. ••Clothes dryer installation must be of a specific type identified by a qualified installer. •...

Owners Manual
Page 6
... diameter duct inside the dryer cabinet or for exhausting to clean any other materials for their safety. The exhaust duct should be supplied through an external switching device, such as a timer, or connected to the outside . Use of the appliance by a person responsible for transition duct could catch lint and reduce the efficiency of the dwelling. OPERATION ••Repair or immediately replace all joints...
... diameter duct inside the dryer cabinet or for exhausting to clean any other materials for their safety. The exhaust duct should be supplied through an external switching device, such as a timer, or connected to the outside . Use of the appliance by a person responsible for transition duct could catch lint and reduce the efficiency of the dwelling. OPERATION ••Repair or immediately replace all joints...

Owners Manual
Page 8
... load. ••The interior of the appliance and exhaust duct should be performed by yourself. ••Remove any user maintenance. Electrical shock may create an electric shock hazard and/or a fire hazard. Use only authorized factory parts. ••Do not disassemble or repair the appliance by qualified service personnel unless specifically recommended in this appliance from the power supply. ••Remove the door...
... load. ••The interior of the appliance and exhaust duct should be performed by yourself. ••Remove any user maintenance. Electrical shock may create an electric shock hazard and/or a fire hazard. Use only authorized factory parts. ••Do not disassemble or repair the appliance by qualified service personnel unless specifically recommended in this appliance from the power supply. ••Remove the door...

Owners Manual
Page 10
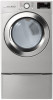
... / DLGX3901* Non-steam Dryer Steam Dryer Steam Dryer Please refer to another location. 10 INSTALLATION INSTALLATION Installation Overview Please read the following installation instructions first after purchasing this manual may vary due to constant product improvements. Check and choose the proper location Level the dryer Vent the dryer Connect the inlet hose (steam models) Connect the Gas dryer Connect the Electric dryer Gas dryer Electric dryer Plug in the power cord Installation test Test run Product Specifications The appearance and specifications listed in this product or...
... / DLGX3901* Non-steam Dryer Steam Dryer Steam Dryer Please refer to another location. 10 INSTALLATION INSTALLATION Installation Overview Please read the following installation instructions first after purchasing this manual may vary due to constant product improvements. Check and choose the proper location Level the dryer Vent the dryer Connect the inlet hose (steam models) Connect the Gas dryer Connect the Electric dryer Gas dryer Electric dryer Plug in the power cord Installation test Test run Product Specifications The appearance and specifications listed in this product or...

Owners Manual
Page 16
...; Use long-sleeved gloves and safety glasses. • Use a heavy metal vent. • Do not use plastic or thin foil ducts. • Clean old ducts before installing this dryer. Adapter Duct Rear Exhaust Duct Option 1: Side Venting 2 Press the tabs on gas models). 16 INSTALLATION Installing the Side Vent Kit WARNING To reduce the risk of the elbow faces down through the hole in place with duct tape. Secure it to change the dryer vent location. 1 Remove...
...; Use long-sleeved gloves and safety glasses. • Use a heavy metal vent. • Do not use plastic or thin foil ducts. • Clean old ducts before installing this dryer. Adapter Duct Rear Exhaust Duct Option 1: Side Venting 2 Press the tabs on gas models). 16 INSTALLATION Installing the Side Vent Kit WARNING To reduce the risk of the elbow faces down through the hole in place with duct tape. Secure it to change the dryer vent location. 1 Remove...

Owners Manual
Page 21
.... INSTALLATION 21 WARNING Gas Supply Requirements (continued) • Supply line requirements: Your laundry room must be plugged into a properly grounded three-prong receptacle. Gas dryers MUST exhaust to the type of gas shown on the dryer. • All connections must be performed by a 15-ampere fuse or circuit breaker. • Where a standard 2-prong wall outlet is encountered, it replaced with local codes and regulations. or CSA-certified gas supply line with propane (LP) gas. disassembly requires the...
.... INSTALLATION 21 WARNING Gas Supply Requirements (continued) • Supply line requirements: Your laundry room must be plugged into a properly grounded three-prong receptacle. Gas dryers MUST exhaust to the type of gas shown on the dryer. • All connections must be performed by a 15-ampere fuse or circuit breaker. • Where a standard 2-prong wall outlet is encountered, it replaced with local codes and regulations. or CSA-certified gas supply line with propane (LP) gas. disassembly requires the...

Owners Manual
Page 23
... fused on the following : Electrical Requirements for Electric Models Only • The wiring and grounding must conform to dryer is required for mobile or manufactured homes, see Special Electrical Requirements. This white ground wire MUST BE MOVED to the neutral terminal when a 4-wire cord is prohibited. DO NOT CONNECT THE DRYER TO 110-, 115-, OR 120-VOLT CIRCUIT. • If the branch circuit to local codes and with the dryer. Type...
... fused on the following : Electrical Requirements for Electric Models Only • The wiring and grounding must conform to dryer is required for mobile or manufactured homes, see Special Electrical Requirements. This white ground wire MUST BE MOVED to the neutral terminal when a 4-wire cord is prohibited. DO NOT CONNECT THE DRYER TO 110-, 115-, OR 120-VOLT CIRCUIT. • If the branch circuit to local codes and with the dryer. Type...

Owners Manual
Page 28
... installation. ELECTRIC MODELS Close the dryer door and press the Power button to turn off before the main burner ignites. If you use a rigid, semi-rigid or flexible metal duct. ••DO NOT connect the dryer exhaust duct to any combustible construction be at least 2 inches (5 cm), and when venting the dryer to start the test. If this happens, the igniter will resist fire and combustion. The opening...
... installation. ELECTRIC MODELS Close the dryer door and press the Power button to turn off before the main burner ignites. If you use a rigid, semi-rigid or flexible metal duct. ••DO NOT connect the dryer exhaust duct to any combustible construction be at least 2 inches (5 cm), and when venting the dryer to start the test. If this happens, the igniter will resist fire and combustion. The opening...

Owners Manual
Page 30
... exhaust duct in the exhaust system. House fuse is incorrect. If the problem is a circuit overload, have it corrected by a qualified electrician. Confirm that automatically detects blockages and restrictions in the dryer ductwork. Gas supply or service turned off. (Gas Model only.) Solutions Turn off the dryer and call for complete instructions. Reset circuit breaker or replace fuse. Keeping ductwork clean of lint buildup and free of this manual for service. Check the power supply or the connection...
... exhaust duct in the exhaust system. House fuse is incorrect. If the problem is a circuit overload, have it corrected by a qualified electrician. Confirm that automatically detects blockages and restrictions in the dryer ductwork. Gas supply or service turned off. (Gas Model only.) Solutions Turn off the dryer and call for complete instructions. Reset circuit breaker or replace fuse. Keeping ductwork clean of lint buildup and free of this manual for service. Check the power supply or the connection...

Owners Manual
Page 43
... material. (Do NOT use Steam Fresh™ with water up to reduce the static electricity caused by pressing the More Time or Less Time buttons to fit the size of the load. 4 Press Start/Pause to reflect the number of items in the drying cycle to the filter screen. ENGLISH Using the Steam Fresh™ Cycle 1 Turn on the dryer and turn the cycle selector knob to adjust the settings for that have...
... material. (Do NOT use Steam Fresh™ with water up to reduce the static electricity caused by pressing the More Time or Less Time buttons to fit the size of the load. 4 Press Start/Pause to reflect the number of items in the drying cycle to the filter screen. ENGLISH Using the Steam Fresh™ Cycle 1 Turn on the dryer and turn the cycle selector knob to adjust the settings for that have...

Owners Manual
Page 50
... up the menu selections. Use the More Time or Less Time buttons to 3 hours after the cycle is started. To turn off Control Lock, turn the dryer on the Support menu tab to bring up to adjust the load size setting for the cycle, not the estimated cycle time, until the cycle is finished. Q: Why does my dryer take so long to dry clothing will be professionally cleaned or repaired. User Support Videos For further assistance, there...
... up the menu selections. Use the More Time or Less Time buttons to 3 hours after the cycle is started. To turn off Control Lock, turn the dryer on the Support menu tab to bring up to adjust the load size setting for the cycle, not the estimated cycle time, until the cycle is finished. Q: Why does my dryer take so long to dry clothing will be professionally cleaned or repaired. User Support Videos For further assistance, there...

Owners Manual
Page 51
... too long to dry Exhaust ducts are blocked, dirty, or duct run is not properly plugged in the home are working normally. ••If using the Normal cycle, deselect the ENERGY SAVER option. Light items in the venting. TROUBLESHOOTING 51 ENGLISH Before Calling for a circuit problem to allow an electric dryer to run without heat. ••Confirm that the house gas shutoff and the dryer gas shutoff valves are both fully open. If the problem...
... too long to dry Exhaust ducts are blocked, dirty, or duct run is not properly plugged in the home are working normally. ••If using the Normal cycle, deselect the ENERGY SAVER option. Light items in the venting. TROUBLESHOOTING 51 ENGLISH Before Calling for a circuit problem to allow an electric dryer to run without heat. ••Confirm that the house gas shutoff and the dryer gas shutoff valves are both fully open. If the problem...

Owners Manual
Page 52
... cycle. ••Reset circuit breaker or replace fuse. Use TIME DRY or add some models) Heat settings, load size, or dampness of the cycle. ••The drying time for better drying performance and efficiency. ••If you are drying. Dryer is possible for a circuit problem to allow an electric dryer to see if it may be cleaned. Solutions ••Heavy fabrics take longer to dry. With the lint removed, hold the filter up to a light to run...
... cycle. ••Reset circuit breaker or replace fuse. Use TIME DRY or add some models) Heat settings, load size, or dampness of the cycle. ••The drying time for better drying performance and efficiency. ••If you are drying. Dryer is possible for a circuit problem to allow an electric dryer to see if it may be cleaned. Solutions ••Heavy fabrics take longer to dry. With the lint removed, hold the filter up to a light to run...

Owners Manual
Page 53
..., follow the manufacturer's instructions. Adjust settings and use a shorter drying time, or use SENSOR DRY cycles. ••Divide extra large loads into smaller loads for your washer and detergent. Clothes dried too long (over dried). Excess static in dryer too long after cycle ends. Tissue, paper, etc., left in clothes. Use a low or no heat setting. ••Remove the lint from dirty clothes can be necessary to reduce static electricity. With some loads that produce high...
..., follow the manufacturer's instructions. Adjust settings and use a shorter drying time, or use SENSOR DRY cycles. ••Divide extra large loads into smaller loads for your washer and detergent. Clothes dried too long (over dried). Excess static in dryer too long after cycle ends. Tissue, paper, etc., left in clothes. Use a low or no heat setting. ••Remove the lint from dirty clothes can be necessary to reduce static electricity. With some loads that produce high...

Owners Manual
Page 57
... COVER: ••Service trips to obtain warranty service under normal home use, during power failures and interrupted or inadequate electrical service. ••Damage caused by unauthorized modification or alteration, or if it is greater. ••Replacement products and parts may also have other damage to the finish of your LG Dryer ("Product") fail due to a defect in the product's owner's manual...
... COVER: ••Service trips to obtain warranty service under normal home use, during power failures and interrupted or inadequate electrical service. ••Damage caused by unauthorized modification or alteration, or if it is greater. ••Replacement products and parts may also have other damage to the finish of your LG Dryer ("Product") fail due to a defect in the product's owner's manual...

Owners Manual
Page 58
Not heating, long dry time Clean the lint filter. Duct is clogged. If outlet is issue, electrician may be found in the owner's manual. commercial use, in offices and recreational facilities) or contrary to schedule service, contact LG Electronics at http://www.lg.com For assistance using as few elbows and bends as possible. Not heating, long dry time Clean the hood and duct. Reconnect power cord, replace house fuse or reset breaker. Door Reversal Instructions for door reversal can be required. 58 WARRANTY ••...
Not heating, long dry time Clean the lint filter. Duct is clogged. If outlet is issue, electrician may be found in the owner's manual. commercial use, in offices and recreational facilities) or contrary to schedule service, contact LG Electronics at http://www.lg.com For assistance using as few elbows and bends as possible. Not heating, long dry time Clean the hood and duct. Reconnect power cord, replace house fuse or reset breaker. Door Reversal Instructions for door reversal can be required. 58 WARRANTY ••...

Specification
Page 1
... Steel (V) POWER SOURCE Ratings CSA Listed Electrical Requirements 120V, 15 Amps (Gas) / 240V 30 Amps (Electric) Type Gas (DLGX3701_) Electric (DLEX3700_) BTU Rating 10,000 Feet OPTIONS LP Conversion Kit Side Venting Kit Pedestal Pedestal (WxHxD) DIMENSIONS Product (WxHxD) Depth with Door Open Carton (WxHxD) Weight (Product) Weight Carton WARRANTY Parts and Labor UPC CODES DLEX3700W (Electric Dryer White) DLGX3701W (Gas Dryer White) WM3700HWA (Washer White) WDP4W (Pedestal White) DLEX3700V (Electric Dryer Graphite Steel) DLGX3701V (Gas Dryer Graphite Steel) WM3700HVA (Washer Graphite...
... Steel (V) POWER SOURCE Ratings CSA Listed Electrical Requirements 120V, 15 Amps (Gas) / 240V 30 Amps (Electric) Type Gas (DLGX3701_) Electric (DLEX3700_) BTU Rating 10,000 Feet OPTIONS LP Conversion Kit Side Venting Kit Pedestal Pedestal (WxHxD) DIMENSIONS Product (WxHxD) Depth with Door Open Carton (WxHxD) Weight (Product) Weight Carton WARRANTY Parts and Labor UPC CODES DLEX3700W (Electric Dryer White) DLGX3701W (Gas Dryer White) WM3700HWA (Washer White) WDP4W (Pedestal White) DLEX3700V (Electric Dryer Graphite Steel) DLGX3701V (Gas Dryer Graphite Steel) WM3700HVA (Washer Graphite...

Specification
Page 2
... ft.(14.3 m) a 3 a: 4" (10.2 cm) 4 Use only for short 0 run should be covered by the dryer warranty. Wall Cap Type Recommended Number of 90° Elbows 0 Maximum length of spacing is allowed. "LG Life's Good" is not in use more than four 90° elbows. Make sure that runs through unheated areas in accordance with Door Open Carton (WxHxD) ENERGY / POWER SOURCE Ratings Electrical Requirements Type BTU Rating 27" 38 11/16...
... ft.(14.3 m) a 3 a: 4" (10.2 cm) 4 Use only for short 0 run should be covered by the dryer warranty. Wall Cap Type Recommended Number of 90° Elbows 0 Maximum length of spacing is allowed. "LG Life's Good" is not in use more than four 90° elbows. Make sure that runs through unheated areas in accordance with Door Open Carton (WxHxD) ENERGY / POWER SOURCE Ratings Electrical Requirements Type BTU Rating 27" 38 11/16...


