Owner's Manual
Page 1
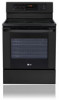
ENGLISH ESPAÑOL OWNER'S MANUAL & COOKING GUIDE ELECTRIC RANGE Please read this owner's manual thoroughly before operating. LRE3012ST LRE3012SB LRE3012SW P/No.: MFL57206006 www.lg.com
ENGLISH ESPAÑOL OWNER'S MANUAL & COOKING GUIDE ELECTRIC RANGE Please read this owner's manual thoroughly before operating. LRE3012ST LRE3012SB LRE3012SW P/No.: MFL57206006 www.lg.com
Owner's Manual
Page 2
... LG electric oven. "PF" "HS" message 8 - Minimum & maximum control pad settings ......15 - Setting bake 18 - To turn on/off • Thermostat adjustment - Removing & replacing the storage drawer .......25 - Care & cleaning 26-28 - About smoothtop surface 11 - Options 16-17 • Changing hour mode on clock (12hr, 24hr) • Setting temperature unit ("F" or "C") • Setting beeper volume • Setting preheating alarm light on /off oven door ......29 TROUBLESHOOTING 30-33 - Setting broil 20 - Control panel features 14 OPERATION 15-22 - Setting...
... LG electric oven. "PF" "HS" message 8 - Minimum & maximum control pad settings ......15 - Setting bake 18 - To turn on/off • Thermostat adjustment - Removing & replacing the storage drawer .......25 - Care & cleaning 26-28 - About smoothtop surface 11 - Options 16-17 • Changing hour mode on clock (12hr, 24hr) • Setting temperature unit ("F" or "C") • Setting beeper volume • Setting preheating alarm light on /off oven door ......29 TROUBLESHOOTING 30-33 - Setting broil 20 - Control panel features 14 OPERATION 15-22 - Setting...
Owner's Manual
Page 3
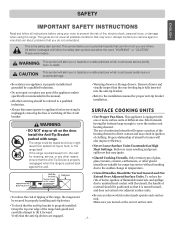
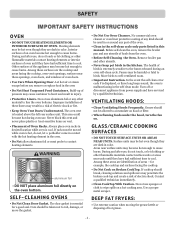
... cover all instructions before servicing by unplugged, removing the fuse or switching off the circuit breaker WARNING • DO NOT step or sit on the correct surface unit. -3- If the range is pulled away from spilled hot liquid, food, or the range itself. - The use of the heating element to unintentional contact with the utensil, the handle of different size. Install the Anti-Tip Bracket packed with one or more surface...
... cover all instructions before servicing by unplugged, removing the fuse or switching off the circuit breaker WARNING • DO NOT step or sit on the correct surface unit. -3- If the range is pulled away from spilled hot liquid, food, or the range itself. - The use of the heating element to unintentional contact with the utensil, the handle of different size. Install the Anti-Tip Bracket packed with one or more surface...
Owner's Manual
Page 4
... may be used in this vent and never place plastic or heat-sensitive items on the oven bottom. SELF-CLEANING OVENS • Do Not Clean Door Gasket. Before self-clean the oven, remove the broiler pan and any part of the oven. • Clean in the self-clean cycle only parts listed in or around any utensils of foods from power supply and have had sufficient time to line the oven bottoms. Improper installation of pressure may become hot enough...
... may be used in this vent and never place plastic or heat-sensitive items on the oven bottom. SELF-CLEANING OVENS • Do Not Clean Door Gasket. Before self-clean the oven, remove the broiler pan and any part of the oven. • Clean in the self-clean cycle only parts listed in or around any utensils of foods from power supply and have had sufficient time to line the oven bottoms. Improper installation of pressure may become hot enough...
Owner's Manual
Page 5
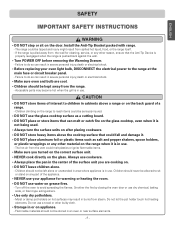
... is in severe personal injury,death or electrical shock. • Before replacing your appliance for cleaning, service, or any part of the surface unit you turned on the correct surface unit. • NEVER cook directly on . • DO NOT leave children alone. - Turn off the oven to the range at the main fuse or circuit breaker panel. - Do not use . - Flammable materials should not be stored in...
... is in severe personal injury,death or electrical shock. • Before replacing your appliance for cleaning, service, or any part of the surface unit you turned on the correct surface unit. • NEVER cook directly on . • DO NOT leave children alone. - Turn off the oven to the range at the main fuse or circuit breaker panel. - Do not use . - Flammable materials should not be stored in...

Owner's Manual
Page 7
... the door open. - It may still be switched off . Stand to the side of the range with the instructions after the Self-Cleaning cycle. Foods that can mark or scratch the cooktop surface. • Do not slide anything metal or glass across the cooktop. • Do not use the roasting rack when boiling. - This can become very hot to touch. • DO NOT line the oven walls, racks...
... the door open. - It may still be switched off . Stand to the side of the range with the instructions after the Self-Cleaning cycle. Foods that can mark or scratch the cooktop surface. • Do not slide anything metal or glass across the cooktop. • Do not use the roasting rack when boiling. - This can become very hot to touch. • DO NOT line the oven walls, racks...
Owner's Manual
Page 10
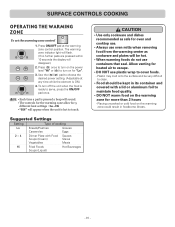
... cover foods. - The warming zone indicator light will flash. (If no further pads are pressed within 10 seconds the display will appear when the unit is pressed a beep will sound. • The controls for the warming zone allow for oven and cooktop use. • Always use plastic wrap to choose the desired power setting. (Adjustable at the warming zone control position. Note: • Each time a pad is hot...
... cover foods. - The warming zone indicator light will flash. (If no further pads are pressed within 10 seconds the display will appear when the unit is pressed a beep will sound. • The controls for the warming zone allow for oven and cooktop use. • Always use plastic wrap to choose the desired power setting. (Adjustable at the warming zone control position. Note: • Each time a pad is hot...
Owner's Manual
Page 14
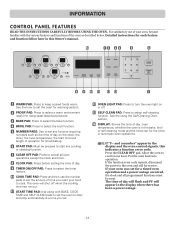
... each feature and function follow later in the bake, broil or self-cleaning mode and the times set any cooking or cleaning function. TIMER ON/OFF PAD: Press to select self-cleaning function. If your oven, become familiar with BAKE, COOK TIME and SELF CLEAN pads to set the oven to keep cooked foods warm. The time of day. CLOCK PAD: Press before setting the time of day will flash and PF will shut off . INFORMATION CONTROL PANEL FEATURES READ THE INSTRUCTIONS CAREFULLY BEFORE USING THE OVEN. COOK TIME PAD...
... each feature and function follow later in the bake, broil or self-cleaning mode and the times set any cooking or cleaning function. TIMER ON/OFF PAD: Press to select self-cleaning function. If your oven, become familiar with BAKE, COOK TIME and SELF CLEAN pads to set the oven to keep cooked foods warm. The time of day. CLOCK PAD: Press before setting the time of day will flash and PF will shut off . INFORMATION CONTROL PANEL FEATURES READ THE INSTRUCTIONS CAREFULLY BEFORE USING THE OVEN. COOK TIME PAD...
Owner's Manual
Page 16
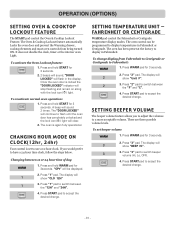
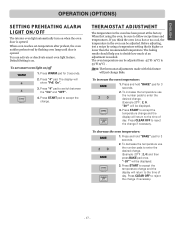
It does not disable the clock, timer or the interior oven Light. To activate the Oven Lockout feature: 1. The display will show "Unit F". 3. The display will show "BEEP Hi". 3. Press "3" pad. OPERATION (OPTIONS) SETTING OVEN & COOKTOP LOCKOUT FEATURE The START pad control the Oven & Cooktop Lockout Feature. To reactivate normal oven operation: 1. The oven is locked the "DOOR LOCKED" indicator will clear. 2. Press and hold WARM pad for 3 seconds. 2. "OPt" will flash in Fahrenheit or Centigrade. Press...
It does not disable the clock, timer or the interior oven Light. To activate the Oven Lockout feature: 1. The display will show "Unit F". 3. The display will show "BEEP Hi". 3. Press "3" pad. OPERATION (OPTIONS) SETTING OVEN & COOKTOP LOCKOUT FEATURE The START pad control the Oven & Cooktop Lockout Feature. To reactivate normal oven operation: 1. The oven is locked the "DOOR LOCKED" indicator will clear. 2. Press and hold WARM pad for 3 seconds. 2. "OPt" will flash in Fahrenheit or Centigrade. Press...
Owner's Manual
Page 17
.... - 17 - THERMOSTAT ADJUSTMENT The temperature in the oven can be displayed. 3. Before adjusting, test a recipe by flashing oven lamp until door is opened . To decrease the oven temperature: 1. Press START to the time of day. To set -temperature after preheat, the oven notifies preheat-end by using the oven, be sure to follow recipe times and temperatures. Note: The thermostat adjustments made with this feature will return to accept the temperature change and the display will just change if...
.... - 17 - THERMOSTAT ADJUSTMENT The temperature in the oven can be displayed. 3. Before adjusting, test a recipe by flashing oven lamp until door is opened . To decrease the oven temperature: 1. Press START to the time of day. To set -temperature after preheat, the oven notifies preheat-end by using the oven, be sure to follow recipe times and temperatures. Note: The thermostat adjustments made with this feature will return to accept the temperature change and the display will just change if...
Owner's Manual
Page 20
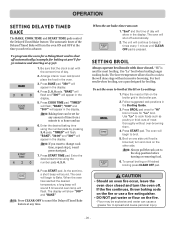
... be set the oven to broil at the time you want to cook foods such as poultry or thick cuts of day. 2. Press BAKE pad. Press START TIME pad. SETTING BROIL Always operate broil mode with the correct time of meat thoroughly without excessive browning. turn the oven ON and OFF at the Hi or Lo setting: 1. Note: Always pull the rack out to Bake. OPERATION SETTING DELAYED TIMED BAKE The BAKE, COOK TIME and START TIME pads control the Delayed Timed Bake feature. "350...
... be set the oven to broil at the time you want to cook foods such as poultry or thick cuts of day. 2. Press BAKE pad. Press START TIME pad. SETTING BROIL Always operate broil mode with the correct time of meat thoroughly without excessive browning. turn the oven ON and OFF at the Hi or Lo setting: 1. Note: Always pull the rack out to Bake. OPERATION SETTING DELAYED TIMED BAKE The BAKE, COOK TIME and START TIME pads control the Delayed Timed Bake feature. "350...
Owner's Manual
Page 23
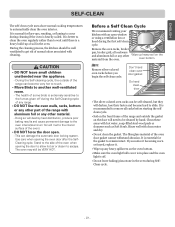
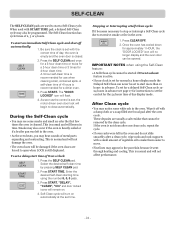
... not clean the gasket. Use care when opening the door to allow hot air or steam to the fumes given off . • Do not leave baking/pizza stone in the oven. Before a Self Clean Cycle We recommend venting your kitchen with an open . - It is extremely sensitive to escape. Rinse well with cleaning. ENGLISH SELF-CLEAN The self-clean cycle uses above normal cooking temperatures to the side of the oven door gasket cannot...
... not clean the gasket. Use care when opening the door to allow hot air or steam to the fumes given off . • Do not leave baking/pizza stone in the oven. Before a Self Clean Cycle We recommend venting your kitchen with an open . - It is extremely sensitive to escape. Rinse well with cleaning. ENGLISH SELF-CLEAN The self-clean cycle uses above normal cooking temperatures to the side of the oven door gasket cannot...
Owner's Manual
Page 24
... longer display and the oven door can never be removed by pressing SELF CLEAN pad. 2. When used to start an immediate Self-Clean cycle and shut off with a small amount of vegetable oil to make them easier to set time. Press the SELF CLEAN pad once for a 3-hour clean time or twice for a 2-hour clean time or 3 times for use when cleaning small, contained spills. A 3-hour self-clean time is cleaned. Press START. The "DOOR LOCKED" icon will turn on...
... longer display and the oven door can never be removed by pressing SELF CLEAN pad. 2. When used to start an immediate Self-Clean cycle and shut off with a small amount of vegetable oil to make them easier to set time. Press the SELF CLEAN pad once for a 3-hour clean time or twice for a 2-hour clean time or 3 times for use when cleaning small, contained spills. A 3-hour self-clean time is cleaned. Press START. The "DOOR LOCKED" icon will turn on...
Owner's Manual
Page 26
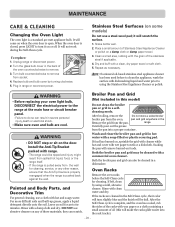
... with wet paper towels or a dishcloth. After broiling, remove the Do not store a soiled broiler broiler pan from the wall for cleaning, service, or any of the stainless steel if applicable. 4. MAINTENANCE CARE & CLEANING Changing the Oven Light The oven light is closed, press LIGHT to turn slightly blue and the finish will come on when the oven door is open. Replace bulb and bulb cover by using the Stainless Steel Appliance Cleaner or polish...
... with wet paper towels or a dishcloth. After broiling, remove the Do not store a soiled broiler broiler pan from the wall for cleaning, service, or any of the stainless steel if applicable. 4. MAINTENANCE CARE & CLEANING Changing the Oven Light The oven light is closed, press LIGHT to turn slightly blue and the finish will come on when the oven door is open. Replace bulb and bulb cover by using the Stainless Steel Appliance Cleaner or polish...
Owner's Manual
Page 27
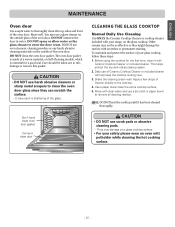
... hand clean door CLEANING THE GLASS COOKTOP Normal Daily Use Cleaning Use ONLY the Ceramic Cooktop Cleaner or cooktop cleaner included with Ceramic Cooktop Cleaner or included cleaner. To maintain and protect the surface of the oven door. Shake the cleaning cream well. CAUTION • DO NOT use harsh abrasive cleaners or sharp metal scrapers to enter the door vents. Note: DO NOT heat the cooktop until it with your range, on Self-Cleaning models, which...
... hand clean door CLEANING THE GLASS COOKTOP Normal Daily Use Cleaning Use ONLY the Ceramic Cooktop Cleaner or cooktop cleaner included with Ceramic Cooktop Cleaner or included cleaner. To maintain and protect the surface of the oven door. Shake the cleaning cream well. CAUTION • DO NOT use harsh abrasive cleaners or sharp metal scrapers to enter the door vents. Note: DO NOT heat the cooktop until it with your range, on Self-Cleaning models, which...
Owner's Manual
Page 30
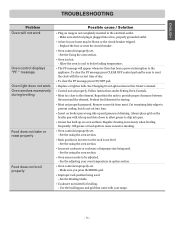
... interferes with a light-colored cooktop. - Oven control beeps and displays any F code error. • Poor installation. Provide sufficient space so range can be accessible for service, review this appliance. Check to clear the F-1 Keypad is normal. The surface may save you call for service. Problem Possible cause / Solution Range is abnormal If fault recurs, record fault number. Replace the fuse or reset the circuit breaker. • Cooktop controls improperly set for range clearance. •...
... interferes with a light-colored cooktop. - Oven control beeps and displays any F code error. • Poor installation. Provide sufficient space so range can be accessible for service, review this appliance. Check to clear the F-1 Keypad is normal. The surface may save you call for service. Problem Possible cause / Solution Range is abnormal If fault recurs, record fault number. Replace the fuse or reset the circuit breaker. • Cooktop controls improperly set for range clearance. •...
Owner's Manual
Page 31
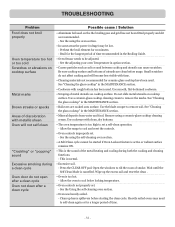
... Using the oven section. • Oven too hot. - Regular cleaning is not completely inserted in this Owner's manual. • Control not set . - See the using the oven section. • Oven sensor needs to reset the clock with the correct time of improper size being used . - Make sure you press the BROIL pad. • Improper rack position being used . - Use the broiling pan and grid that came with ribs up on the broiler pan with your oven temperature...
... Using the oven section. • Oven too hot. - Regular cleaning is not completely inserted in this Owner's manual. • Control not set . - See the using the oven section. • Oven sensor needs to reset the clock with the correct time of improper size being used . - Make sure you press the BROIL pad. • Improper rack position being used . - Use the broiling pan and grid that came with ribs up on the broiler pan with your oven temperature...
Owner's Manual
Page 32
Preheat the broil element for a longer period of utensils are cooked onto surface. Use smooth, flat-bottomed cookware. • Scraping of metal utensils on cooktop surface. Do not slide metal utensils on cooktop surface. Use a ceramic-glass cooktop cleaning cream to remove soil. Use the blade scraper to remove the marks. Allow the range to cool below locking temperature. • Oven controls not properly set . - See the adjusting your oven Temperature in option section. • Coarse particles such as...
Preheat the broil element for a longer period of utensils are cooked onto surface. Use smooth, flat-bottomed cookware. • Scraping of metal utensils on cooktop surface. Do not slide metal utensils on cooktop surface. Use a ceramic-glass cooktop cleaning cream to remove soil. Use the blade scraper to remove the marks. Allow the range to cool below locking temperature. • Oven controls not properly set . - See the adjusting your oven Temperature in option section. • Coarse particles such as...
Owner's Manual
Page 34
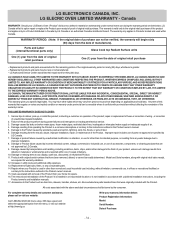
... located and used in the Product owner's manual. 5. Damage caused by LG Canada. 9. Replacement of air. 4. Repairs when your LG Electric Oven ("Product") fail due to the Product caused by leaky or broken water pipes, frozen water pipes, restricted drain lines, inadequate or interrupted water supply or inadequate supply of light bulbs, filters, or any display, open box, discounted, or refurbished Product. 11. This warranty is greater. - Replacement products and parts...
... located and used in the Product owner's manual. 5. Damage caused by LG Canada. 9. Replacement of air. 4. Repairs when your LG Electric Oven ("Product") fail due to the Product caused by leaky or broken water pipes, frozen water pipes, restricted drain lines, inadequate or interrupted water supply or inadequate supply of light bulbs, filters, or any display, open box, discounted, or refurbished Product. 11. This warranty is greater. - Replacement products and parts...
Specification
Page 2
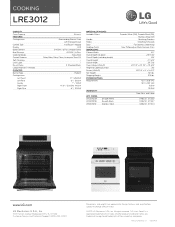
... Colors Handle Knobs Door Cooktop Finish DIMENSIONS Cabinet Width Overall Depth (to door) Overall Depth (including handle) Overall Height Overall Width Oven Interior (WxHxD) Height to change without notice. © 2011 LG Electronics USA, Inc. All other product and brand names are approximate. All rights reserved. of their respective companies. Design, features and specifications subject to Cooking Surface Drawer (WxHxD) Net Weight Shipping Weight POWER/RATINGS Requirements WARRANTY UPC CODES LRE3012SW LRE3012SB LRE3012ST...
... Colors Handle Knobs Door Cooktop Finish DIMENSIONS Cabinet Width Overall Depth (to door) Overall Depth (including handle) Overall Height Overall Width Oven Interior (WxHxD) Height to change without notice. © 2011 LG Electronics USA, Inc. All other product and brand names are approximate. All rights reserved. of their respective companies. Design, features and specifications subject to Cooking Surface Drawer (WxHxD) Net Weight Shipping Weight POWER/RATINGS Requirements WARRANTY UPC CODES LRE3012SW LRE3012SB LRE3012ST...


