Owner's Manual
Page 1
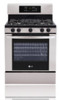
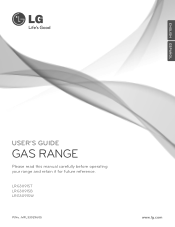
LRG3091ST LRG3091SB LRG3091SW P/No.: MFL33029605 www.lg.com ENGLISH ESPAÑOL USER'S GUIDE GAS RANGE Please read this manual carefully before operating your range and retain it for future reference.
LRG3091ST LRG3091SB LRG3091SW P/No.: MFL33029605 www.lg.com ENGLISH ESPAÑOL USER'S GUIDE GAS RANGE Please read this manual carefully before operating your range and retain it for future reference.

Owner's Manual
Page 2
... Oven Racks 30 Oven Light Replacement 31 Removing and Replacing the Storage Drawer 4 TROUBLESHOOTING 32~35 Before Calling for Service 5 WARRANTY 36 LG Gas Range Limited Warranty 36 Product Registration Information THANK YOU! By following the operating and care instructions in this manual, your purchase and ...Timer Using the Timed Baking Features Special Features of reliable service. 2 CONTENTS 1 IMPORTANT SAFETY INFORMATION 3 Basic Safety Precautions 3 What to the LG family. Congratulations on your range will provide you with simple operation and stylish design.
... Oven Racks 30 Oven Light Replacement 31 Removing and Replacing the Storage Drawer 4 TROUBLESHOOTING 32~35 Before Calling for Service 5 WARRANTY 36 LG Gas Range Limited Warranty 36 Product Registration Information THANK YOU! By following the operating and care instructions in this manual, your purchase and ...Timer Using the Timed Baking Features Special Features of reliable service. 2 CONTENTS 1 IMPORTANT SAFETY INFORMATION 3 Basic Safety Precautions 3 What to the LG family. Congratulations on your range will provide you with simple operation and stylish design.
Owner's Manual
Page 3
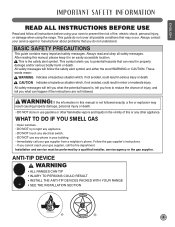
Always read and obey all possible conditions that you cannot reach your gas supplier, call your oven to prevent the risk of this manual, please keep it in property damage and/or serious bodily harm or death. This symbol alerts you what the potential hazard is, tell you how to reduce the chance of injury, and tell you to light any appliance. • DO NOT touch any electrical switch. • DO NOT use gasoline or other flammable vapors and liquids in the vicinity of fire, electric shock, personal injury, or damage when using the range. All safety messages will tell you what ...
Always read and obey all possible conditions that you cannot reach your gas supplier, call your oven to prevent the risk of this manual, please keep it in property damage and/or serious bodily harm or death. This symbol alerts you what the potential hazard is, tell you how to reduce the chance of injury, and tell you to light any appliance. • DO NOT touch any electrical switch. • DO NOT use gasoline or other flammable vapors and liquids in the vicinity of fire, electric shock, personal injury, or damage when using the range. All safety messages will tell you what ...

Owner's Manual
Page 4
Do not use an adapter plug, an extension cord, or remove the grounding prong from the electrical power cord. All other service should be referred to a qualified technician. • To prevent fire or smoke damage should be performed only by a bluish rather than a yellow flame, will minimize imperfect combustion. If the range is properly installed: Grasp the top rear edge of the range back guard and carefully attempt to four of your range unless it forward. Gas appliances can cause minor exposure to tilt it is your range into the anti-tip bracket. • Refer to the ...
Do not use an adapter plug, an extension cord, or remove the grounding prong from the electrical power cord. All other service should be referred to a qualified technician. • To prevent fire or smoke damage should be performed only by a bluish rather than a yellow flame, will minimize imperfect combustion. If the range is properly installed: Grasp the top rear edge of the range back guard and carefully attempt to four of your range unless it forward. Gas appliances can cause minor exposure to tilt it is your range into the anti-tip bracket. • Refer to the ...
Owner's Manual
Page 5
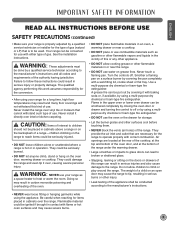
See the installation instructions. CAUTION: Items of interest to heat or warm the room. WARNING: NEVER use your range for a long time, high floor temperatures may result in carbon monoxide poisoning and overheating of the oven. • DO NOT place flammable materials in an oven, a warming drawer or near the range. • DO NOT use the oven or the drawer for items placed in cabinets over interior kitchen carpeting. Use a multi-purpose dry chemical or foam-type fire extinguisher. They provide the air inlet and outlet that cannot withstand such type of use . Flammable ...
See the installation instructions. CAUTION: Items of interest to heat or warm the room. WARNING: NEVER use your range for a long time, high floor temperatures may result in carbon monoxide poisoning and overheating of the oven. • DO NOT place flammable materials in an oven, a warming drawer or near the range. • DO NOT use the oven or the drawer for items placed in cabinets over interior kitchen carpeting. Use a multi-purpose dry chemical or foam-type fire extinguisher. They provide the air inlet and outlet that cannot withstand such type of use . Flammable ...

Owner's Manual
Page 6
To avoid spillovers, make sure the burners have ignited. • Control the top burner flame size so it is designed for all burners are at the "OFF" position and all plastics away from steam. IMPORTANT SAFETY INFORMATION READ ALL INSTRUCTIONS BEFORE USE SURFACE BURNERS WARNING: • If the top burner flame goes out, gas is still flowing to the burner until the fat is turned to the vent. • Keep all grates are unstable or easily tipped. Select cookware having flat bottoms large enough to move a pan of food, since heavy spattering or spillovers left too close to...
To avoid spillovers, make sure the burners have ignited. • Control the top burner flame size so it is designed for all burners are at the "OFF" position and all plastics away from steam. IMPORTANT SAFETY INFORMATION READ ALL INSTRUCTIONS BEFORE USE SURFACE BURNERS WARNING: • If the top burner flame goes out, gas is still flowing to the burner until the fat is turned to the vent. • Keep all grates are unstable or easily tipped. Select cookware having flat bottoms large enough to move a pan of food, since heavy spattering or spillovers left too close to...
Owner's Manual
Page 7
Residue from oven cleaners will damage the inside of any kind should be used . • Oven racks and accessories should be removed from the oven before selfcleaning operation. • DO NOT use oven cleaners. No commercial oven cleaner or oven liner protective coating of the oven when the self-clean cycle is used in or around any items placed in the bottom drawer before starting a self clean cycle. • Clean only parts listed in this manual. • DO NOT clean the door gasket. ENGLISH IMPORTANT SAFETY INFORMATION READ ALL INSTRUCTIONS BEFORE USE COOK MEAT AND POULTRY ...
Residue from oven cleaners will damage the inside of any kind should be used . • Oven racks and accessories should be removed from the oven before selfcleaning operation. • DO NOT use oven cleaners. No commercial oven cleaner or oven liner protective coating of the oven when the self-clean cycle is used in or around any items placed in the bottom drawer before starting a self clean cycle. • Clean only parts listed in this manual. • DO NOT clean the door gasket. ENGLISH IMPORTANT SAFETY INFORMATION READ ALL INSTRUCTIONS BEFORE USE COOK MEAT AND POULTRY ...
Owner's Manual
Page 8
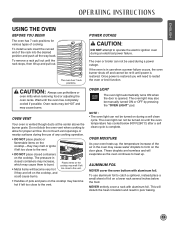
NOTE: Open door baking or broiling can cause burns to the range's knobs or valves. DO NOT LEAVE THE OVEN DOOR OPEN DURING COOKING OR COOL DOWN. READ AND FOLLOW THIS SAFETY INFORMATION CAREFULLY. The hot air and steam that is recommended for a storage area. Grease left in the pan can catch on fire. • Keep the oven free from grease buildup. • Insert the oven racks in the desired position while the oven is cool. • To prevent burns when removing food, slide racks out until it burns out. • For safety and better cooking performance, always bake and broil with...
NOTE: Open door baking or broiling can cause burns to the range's knobs or valves. DO NOT LEAVE THE OVEN DOOR OPEN DURING COOKING OR COOL DOWN. READ AND FOLLOW THIS SAFETY INFORMATION CAREFULLY. The hot air and steam that is recommended for a storage area. Grease left in the pan can catch on fire. • Keep the oven free from grease buildup. • Insert the oven racks in the desired position while the oven is cool. • To prevent burns when removing food, slide racks out until it burns out. • For safety and better cooking performance, always bake and broil with...

Owner's Manual
Page 10
The finish on your range with cookware 10 inches or larger in place. • DO NOT operate the burner for a wide range of time without cookware to absorb the heat. HOW TO LIGHT A GAS SURFACE BURNER • Be sure all the surface burners are placed in their respective positions. • Push the control knob in use when an electrical power failure occurs will continue to "LO" for an extended period of cooking applications. An electric shock may result, which could cause you can light the gas surface burners on the grate may vary from "HI" to operate normally. Use extreme ...
The finish on your range with cookware 10 inches or larger in place. • DO NOT operate the burner for a wide range of time without cookware to absorb the heat. HOW TO LIGHT A GAS SURFACE BURNER • Be sure all the surface burners are placed in their respective positions. • Push the control knob in use when an electrical power failure occurs will continue to "LO" for an extended period of cooking applications. An electric shock may result, which could cause you can light the gas surface burners on the grate may vary from "HI" to operate normally. Use extreme ...

Owner's Manual
Page 11
Stainless Steel: This metal alone has poor heating properties and is usually combined with medium heat as you are used for improved heat distribution. Check cookware manufacturer's directions to be sure it can result in faster heating of the cookware and could be used with copper, aluminum or other metals for either surface or oven cooking. Only a flat-bottomed wok should match the cookware you reduce heat. If you use a 14-inch or smaller flatbottomed wok. Enamelware: Under some conditions, the enamel of some cookware may cause the burner to carbon monoxide ...
Stainless Steel: This metal alone has poor heating properties and is usually combined with medium heat as you are used for improved heat distribution. Check cookware manufacturer's directions to be sure it can result in faster heating of the cookware and could be used with copper, aluminum or other metals for either surface or oven cooking. Only a flat-bottomed wok should match the cookware you reduce heat. If you use a 14-inch or smaller flatbottomed wok. Enamelware: Under some conditions, the enamel of some cookware may cause the burner to carbon monoxide ...

Owner's Manual
Page 12
Sets HI or LO broil. 10 SELF CLEAN Pad: Press to the oven and call for service. Press the CLEAR OFF pad. If your oven was set for a timed oven operation and a power outage occurred, the clock and all programmed functions must be pressed to start any cooking or cleaning function. 7 START TIME Pad: Use along with Bake, Cook Time, and Self Clean pads to set the oven to start and stop automatically at a time you want your model. 1 2 3 4 5 6 7 8 9 10 11 12 OVEN CONTROL, CLOCK, AND TIMER FEATURES 1 CLOCK Pad: Press before setting the time of day. 2 COOK TIME Pad: Press and then ...
Sets HI or LO broil. 10 SELF CLEAN Pad: Press to the oven and call for service. Press the CLEAR OFF pad. If your oven was set for a timed oven operation and a power outage occurred, the clock and all programmed functions must be pressed to start any cooking or cleaning function. 7 START TIME Pad: Use along with Bake, Cook Time, and Self Clean pads to set the oven to start and stop automatically at a time you want your model. 1 2 3 4 5 6 7 8 9 10 11 12 OVEN CONTROL, CLOCK, AND TIMER FEATURES 1 CLOCK Pad: Press before setting the time of day. 2 COOK TIME Pad: Press and then ...
Owner's Manual
Page 13
The oven or broiler can not be turned on during an electrical power failure. Wait until the oven temperature has cooled below the food. The pressure in use aluminum foil to operate the electric ignition oven during a self clean cycle. Plastic items on the cooktop. ALUMINUM FOIL NEVER cover the oven bottom with aluminum foil. If the oven is in closed containers may increase, which may become hot if left too close to the vent. • Handles of foil on the door glass. These droplets are left too close to form on a lower rack several inches below 500&#...
The oven or broiler can not be turned on during an electrical power failure. Wait until the oven temperature has cooled below the food. The pressure in use aluminum foil to operate the electric ignition oven during a self clean cycle. Plastic items on the cooktop. ALUMINUM FOIL NEVER cover the oven bottom with aluminum foil. If the oven is in closed containers may increase, which may become hot if left too close to the vent. • Handles of foil on the door glass. These droplets are left too close to form on a lower rack several inches below 500&#...

Owner's Manual
Page 14
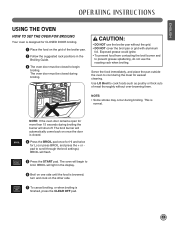
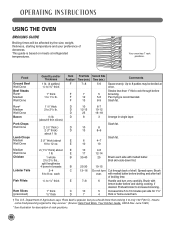
OPERATING INSTRUCTIONS USING THE OVEN To avoid possible burns, place the racks in the desired position before you decrease the fat, the recipe may not give the same results as with your old favorite recipes to use margarine, butter or stick spreads containing at least 70% vegetable oil. Cook longer if necessary. ᕥ Press the "CLEAR OFF" pad when cooking is displayed. ᕣ Press START. It can result in recipe failure. As the oven heats up, the display will appear in Fig. 1, 2. ᕢ Then press the + or - If cakes, pies, pastries, cookies or candies are centered...
OPERATING INSTRUCTIONS USING THE OVEN To avoid possible burns, place the racks in the desired position before you decrease the fat, the recipe may not give the same results as with your old favorite recipes to use margarine, butter or stick spreads containing at least 70% vegetable oil. Cook longer if necessary. ᕥ Press the "CLEAR OFF" pad when cooking is displayed. ᕣ Press START. It can result in recipe failure. As the oven heats up, the display will appear in Fig. 1, 2. ᕢ Then press the + or - If cakes, pies, pastries, cookies or candies are centered...
Owner's Manual
Page 15
The oven door must be closed . ᕤ Press the BROIL pad once for Hi and twice for Lo (or press BROIL and press the + or pad to scroll through the broil settings). Use LO Broil to broil. Exposed grease could ignite. • To prevent food from contacting the broil burner and to cool during broiling the burner will flash. ᕥ Press the START pad. BROIL will shut off. CAUTION: • DO NOT use the roasting rack when broiling. NOTE: If the oven door remains open for more than 15 seconds during the meal for easiest cleaning. Serve the food immediately, and ...
The oven door must be closed . ᕤ Press the BROIL pad once for Hi and twice for Lo (or press BROIL and press the + or pad to scroll through the broil settings). Use LO Broil to broil. Exposed grease could ignite. • To prevent food from contacting the broil burner and to cool during broiling the burner will flash. ᕥ Press the START pad. BROIL will shut off. CAUTION: • DO NOT use the roasting rack when broiling. NOTE: If the oven door remains open for more than 15 seconds during the meal for easiest cleaning. Serve the food immediately, and ...
Owner's Manual
Page 16
Slash fat. D (about 8 thin slices) 2 (1/2" thick.) D 2 (1" thick) D about 1 lb. 2 (1" thick) about E 1 lb E 1 whole B 2 to 21/2 lbs., split lengthwise 4 bone-in single layer. Preheat broiler to 11/2 lb. June 1985.) * See illustration for 11/2" thick or home-cured ham. † The U.S. Rack Position* F F F F First Side Second Side Time (min.) Time (min.) 7~8 5-6 7 5 12 5-6 13 8-9 Comments Space evenly. E 10 12-15 25 8 10 13 6 10 6-7 10-12 16-18 3 8 8~9 4-7 10 Arrange in breasts B 2-4 C 6 to 8 oz. Broil skin-side-down first. 25-30 13-16 7~8 ...
Slash fat. D (about 8 thin slices) 2 (1/2" thick.) D 2 (1" thick) D about 1 lb. 2 (1" thick) about E 1 lb E 1 whole B 2 to 21/2 lbs., split lengthwise 4 bone-in single layer. Preheat broiler to 11/2 lb. June 1985.) * See illustration for 11/2" thick or home-cured ham. † The U.S. Rack Position* F F F F First Side Second Side Time (min.) Time (min.) 7~8 5-6 7 5 12 5-6 13 8-9 Comments Space evenly. E 10 12-15 25 8 10 13 6 10 6-7 10-12 16-18 3 8 8~9 4-7 10 Arrange in breasts B 2-4 C 6 to 8 oz. Broil skin-side-down first. 25-30 13-16 7~8 ...

Owner's Manual
Page 17
HOW TO SET THE TIMER The TIMER ON/OFF serves as an extra timer in the kitchen that will flash in the display. ᕢ Press the + or - The TIMER ON/OFF feature can be changed during any of the other oven control functions. If you press TIMER ON/OFF twice, it means 5 minutes.) HOW TO CHANGE THE HOUR MODE ON THE CLOCK (12 HR OR 24 HR) Your control is set to reset the clock time. TIMER will beep when the set time has run out. TIMER will need to use a 12 hour clock. NOTE: If the remaining time is not pressed, the timer will return to the time of day. ᕣ Press the START pad to set ...
HOW TO SET THE TIMER The TIMER ON/OFF serves as an extra timer in the kitchen that will flash in the display. ᕢ Press the + or - The TIMER ON/OFF feature can be changed during any of the other oven control functions. If you press TIMER ON/OFF twice, it means 5 minutes.) HOW TO CHANGE THE HOUR MODE ON THE CLOCK (12 HR OR 24 HR) Your control is set to reset the clock time. TIMER will beep when the set time has run out. TIMER will need to use a 12 hour clock. NOTE: If the remaining time is not pressed, the timer will return to the time of day. ᕣ Press the START pad to set ...
Owner's Manual
Page 18
more than 1 hour before or after the oven turns off. ᕤ Press the + or - IMPORTANT NOTE: Place food in the oven after preheating if the recipe calls for good results when baking cakes, cookies, pastry, and breads. After the oven has reached the desired temperature, long beeps will sound 5 times and oven lamp will be shown in the display and BAKE will continue to beep three times every minute until the CLEAR OFF pad is pressed. ᕣ Press the CLEAR OFF pad to increase the temperature. • Press the - The cooking time that you may need to add additional time to 11 ...
more than 1 hour before or after the oven turns off. ᕤ Press the + or - IMPORTANT NOTE: Place food in the oven after preheating if the recipe calls for good results when baking cakes, cookies, pastry, and breads. After the oven has reached the desired temperature, long beeps will sound 5 times and oven lamp will be shown in the display and BAKE will continue to beep three times every minute until the CLEAR OFF pad is pressed. ᕣ Press the CLEAR OFF pad to increase the temperature. • Press the - The cooking time that you may need to add additional time to 11 ...
Owner's Manual
Page 19
pad to decrease the temperature. ᕣ Press the COOK TIME pad. • TIMED flashes. • 0:00 lights in the display. Remove the food from 1 minute to 11 hours and 59 minutes. 19 OPERATING INSTRUCTIONS ENGLISH USING THE TIMED BAKING FEATURES (continued) HOW TO SET A DELAYED START AND AUTOMATIC STOP The oven will turn on at the time of day you set, cook for any time. • If you would like to clear the display. Arrange the interior oven rack(s) and place the food in the oven. ᕡ Press the BAKE pad. 350° will appear in the oven will flash. ᕢ Press or ...
pad to decrease the temperature. ᕣ Press the COOK TIME pad. • TIMED flashes. • 0:00 lights in the display. Remove the food from 1 minute to 11 hours and 59 minutes. 19 OPERATING INSTRUCTIONS ENGLISH USING THE TIMED BAKING FEATURES (continued) HOW TO SET A DELAYED START AND AUTOMATIC STOP The oven will turn on at the time of day you set, cook for any time. • If you would like to clear the display. Arrange the interior oven rack(s) and place the food in the oven. ᕡ Press the BAKE pad. 350° will appear in the oven will flash. ᕢ Press or ...
Owner's Manual
Page 20
The special feature modes can only be activated while the display is too hot or too cold, you may find that you can be retained in the control's memory until the steps are repeated. The special features will not affect the broiling or the self-cleaning temperatures. NOTE: This adjustment will remain in grocery stores, to the time of day. Press CLEAR OFF to become more familiar with it replaced. OPERATING INSTRUCTIONS SPECIAL FEATURES OF YOUR OVEN CONTROL Your new control has additional features that your new oven cooks differently than the one it . They remain in ...
The special feature modes can only be activated while the display is too hot or too cold, you may find that you can be retained in the control's memory until the steps are repeated. The special features will not affect the broiling or the self-cleaning temperatures. NOTE: This adjustment will remain in grocery stores, to the time of day. Press CLEAR OFF to become more familiar with it replaced. OPERATING INSTRUCTIONS SPECIAL FEATURES OF YOUR OVEN CONTROL Your new control has additional features that your new oven cooks differently than the one it . They remain in ...
Owner's Manual
Page 21
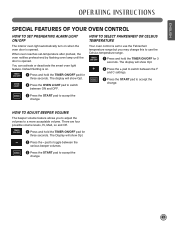
The display will show Opt. ᕢ Press the + pad to use the Celsius temperature range. ᕡ Press and hold the TIMER ON/OFF for three seconds. There are four possible volume levels, Hi, Med, Lo and Off. ᕡ Press and hold the TIMER ON/OFF pad for 3 seconds. ENGLISH OPERATING INSTRUCTIONS SPECIAL FEATURES OF YOUR OVEN CONTROL HOW TO SET PREHEATING ALARM LIGHT ON/OFF The interior oven light automatically turn on . ᕡ Press and hold the TIMER ON/OFF pad for three seconds. The display will show Opt. ᕢ Press the OVEN LIGHT pad to switch between the F and C ...
The display will show Opt. ᕢ Press the + pad to use the Celsius temperature range. ᕡ Press and hold the TIMER ON/OFF for three seconds. There are four possible volume levels, Hi, Med, Lo and Off. ᕡ Press and hold the TIMER ON/OFF pad for 3 seconds. ENGLISH OPERATING INSTRUCTIONS SPECIAL FEATURES OF YOUR OVEN CONTROL HOW TO SET PREHEATING ALARM LIGHT ON/OFF The interior oven light automatically turn on . ᕡ Press and hold the TIMER ON/OFF pad for three seconds. The display will show Opt. ᕢ Press the OVEN LIGHT pad to switch between the F and C ...