Owners Manual
Page 2
... Range 12 Installing the Range 14 Connecting Electricity 18 Engaging the Anti-tip Device 18 Optional Rear Filler 19 Test Run 20 OPERATION 20 Control Panel Overview 21 Knob Positions 22 Changing Oven Settings 22 Clock 22 Oven Light 22 Minimum & Maximum Default Settings 23 Timer On/Off 23 Settings -- Setting the Hour Mode -- Adjusting the Oven Temperature -- Selecting Fahrenheit or Celsius 24 Lockout 25 Start Time (Delayed Timed Cook) 25 Cook Time (Timed Cook) 26 Using the Cooktop 26 Cooking Areas 26 Hot Surface Indicator 26 Using the Cooktop Elements 27 The Recommended Surface Cooking Setting...
... Range 12 Installing the Range 14 Connecting Electricity 18 Engaging the Anti-tip Device 18 Optional Rear Filler 19 Test Run 20 OPERATION 20 Control Panel Overview 21 Knob Positions 22 Changing Oven Settings 22 Clock 22 Oven Light 22 Minimum & Maximum Default Settings 23 Timer On/Off 23 Settings -- Setting the Hour Mode -- Adjusting the Oven Temperature -- Selecting Fahrenheit or Celsius 24 Lockout 25 Start Time (Delayed Timed Cook) 25 Cook Time (Timed Cook) 26 Using the Cooktop 26 Cooking Areas 26 Hot Surface Indicator 26 Using the Cooktop Elements 27 The Recommended Surface Cooking Setting...
Owners Manual
Page 3
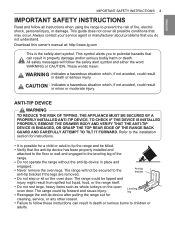
.... ••Never remove the oven legs. TO CHECK IF THE DEVICE IS INSTALLED PROPERLY, REMOVE THE DRAWER BODY AND VERIFY THAT THE ANTI-TIP DEVICE IS ENGAGED, OR GRASP THE TOP REAR EDGE OF THE RANGE BACK GUARD AND CAREFULLY ATTEMPT TO TILT IT FORWARD. This guide does not cover all instructions when using the range to the leveling leg of fire, electric shock, personal injury...
.... ••Never remove the oven legs. TO CHECK IF THE DEVICE IS INSTALLED PROPERLY, REMOVE THE DRAWER BODY AND VERIFY THAT THE ANTI-TIP DEVICE IS ENGAGED, OR GRASP THE TOP REAR EDGE OF THE RANGE BACK GUARD AND CAREFULLY ATTEMPT TO TILT IT FORWARD. This guide does not cover all instructions when using the range to the leveling leg of fire, electric shock, personal injury...
Owners Manual
Page 4
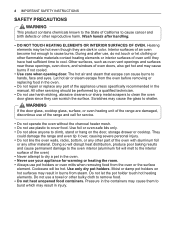
.... Interior surfaces of the range and call for warming or heating the room. ••Always use pot holders or oven mitts when removing food from steam. All other reproductive harm. The hot air and steam that escape can scratch the surface. Other surfaces, such as oven vent openings and surfaces near these openings, oven doors, and windows of the range are dark in the manual. Use foil or oven-safe lids...
.... Interior surfaces of the range and call for warming or heating the room. ••Always use pot holders or oven mitts when removing food from steam. All other reproductive harm. The hot air and steam that escape can scratch the surface. Other surfaces, such as oven vent openings and surfaces near these openings, oven doors, and windows of the range are dark in the manual. Use foil or oven-safe lids...
Owners Manual
Page 5
... all packing materials are removed from the appliance before operating. Warning Before replacing the oven light bulb, switch off the electrical power to heat. Temperatures may be ignited when the oven and cooktop are in the oven or near or on the cooktop. Filling the pan with too much fat can result in an area subjected to the oven at the main fuse or circuit breaker panel. Keep plastic, clothes, paper...
... all packing materials are removed from the appliance before operating. Warning Before replacing the oven light bulb, switch off the electrical power to heat. Temperatures may be ignited when the oven and cooktop are in the oven or near or on the cooktop. Filling the pan with too much fat can result in an area subjected to the oven at the main fuse or circuit breaker panel. Keep plastic, clothes, paper...
Owners Manual
Page 8
... food from the oven. Switch off the electrical power to the main fuse or breaker and have the heating element replaced by a qualified service technician. ••When using cooking or roasting bags in severe burns. A glowing spot indicates the heating element may result in the oven, follow this manual. Before self-cleaning the oven, remove the broiler pan, all oven racks, the meat probe and any utensils or food from the oven. The oven displays an F error code and sounds...
... food from the oven. Switch off the electrical power to the main fuse or breaker and have the heating element replaced by a qualified service technician. ••When using cooking or roasting bags in severe burns. A glowing spot indicates the heating element may result in the oven, follow this manual. Before self-cleaning the oven, remove the broiler pan, all oven racks, the meat probe and any utensils or food from the oven. The oven displays an F error code and sounds...
Owners Manual
Page 12
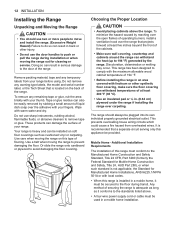
...;• A four-wire power supply cord or cable must conform to the standards listed above the range. Mobile Home - Do not remove any warning-type labels, the model and serial number label, or the Tech Sheet that is installed in . (0.64 cm) plywood under the range if installing the range over the adhesive with your range before using. Your range is heavy and can withstand the heat (up to...
...;• A four-wire power supply cord or cable must conform to the standards listed above the range. Mobile Home - Do not remove any warning-type labels, the model and serial number label, or the Tech Sheet that is installed in . (0.64 cm) plywood under the range if installing the range over the adhesive with your range before using. Your range is heavy and can withstand the heat (up to...
Owners Manual
Page 19
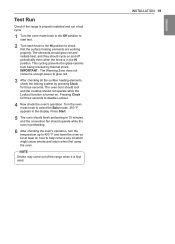
... oven's operation. Test Run Check if the range is preheating. 6 After checking the oven's operation, turn the temperature up to 450 °F and leave the oven on for at least an hour to help remove any oil which might cause smoke and odors when first using the oven. The oven door should lock and the cooktop should finish preheating in the display. IMPORTANT : The Warming Zone does not consume enough power...
... oven's operation. Test Run Check if the range is preheating. 6 After checking the oven's operation, turn the temperature up to 450 °F and leave the oven on for at least an hour to help remove any oil which might cause smoke and odors when first using the oven. The oven door should lock and the cooktop should finish preheating in the display. IMPORTANT : The Warming Zone does not consume enough power...
Owners Manual
Page 24
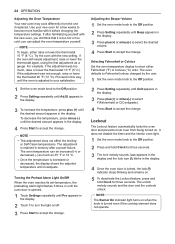
... replaced. If after a power failure. NOTE •• This adjustment does not affect the broiling or Self Clean temperatures. Adjusting the Beeper Volume 1 Set the oven mode knob to the Off position. 2 Press Setting repeatedly until AdJU appears in the display. 4 Once the oven door is too hot or too cold, you still think that it before changing the temperature settings. NOTE The Burner On indicator light turns on . Selecting Fahrenheit or Celsius Set the oven temperature display...
... replaced. If after a power failure. NOTE •• This adjustment does not affect the broiling or Self Clean temperatures. Adjusting the Beeper Volume 1 Set the oven mode knob to the Off position. 2 Press Setting repeatedly until AdJU appears in the display. 4 Once the oven door is too hot or too cold, you still think that it before changing the temperature settings. NOTE The Burner On indicator light turns on . Selecting Fahrenheit or Celsius Set the oven temperature display...
Owners Manual
Page 29
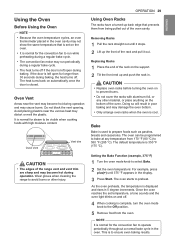
... the support. 2 Tilt the front end up and push the rack in the oven. As the oven preheats, the temperature is closed. NOTE It is normal for the convection fan to run while preheating during a regular bake cycle. •• The convection fan motor may run periodically during a regular bake cycle. •• The heat turns off if the door is complete, turn the oven mode knob to select Bake. 2 Set the oven temperature...
... the support. 2 Tilt the front end up and push the rack in the oven. As the oven preheats, the temperature is closed. NOTE It is normal for the convection fan to run while preheating during a regular bake cycle. •• The convection fan motor may run periodically during a regular bake cycle. •• The heat turns off if the door is complete, turn the oven mode knob to select Bake. 2 Set the oven temperature...
Owners Manual
Page 30
... oven reaches the set adjusted temperature, a tone sounds and the oven light flashes on and off during a convection bake cycle. Food baked on pans with the convection fan to the porcelain-enamel surface and should be wiped up ) on the grid. Bake or Conv. Foods are highly acidic may shut off . 30 OPERATION Baking Tips •• Baking time and temperature will vary depending on the characteristics, size, and shape of the baking pan used...
... oven reaches the set adjusted temperature, a tone sounds and the oven light flashes on and off during a convection bake cycle. Food baked on pans with the convection fan to the porcelain-enamel surface and should be wiped up ) on the grid. Bake or Conv. Foods are highly acidic may shut off . 30 OPERATION Baking Tips •• Baking time and temperature will vary depending on the characteristics, size, and shape of the baking pan used...
Owners Manual
Page 32
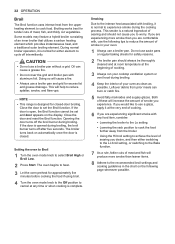
... it at the beginning of your cooktop ventilation system or vent hood during broiling. Leftover debris from the upper heating element to cook food. Some models may feature a hybrid broiler consisting of meat and fish will cause a fire. •• Always use a broiler pan without a grid. Do not use a broiler pan. If the door is opened during the cooking process. 32 OPERATION Broil The Broil function uses intense heat from prior meals can cause a grease...
... it at the beginning of your cooktop ventilation system or vent hood during broiling. Leftover debris from the upper heating element to cook food. Some models may feature a hybrid broiler consisting of meat and fish will cause a fire. •• Always use a broiler pan without a grid. Do not use a broiler pan. If the door is opened during the cooking process. 32 OPERATION Broil The Broil function uses intense heat from prior meals can cause a grease...
Owners Manual
Page 34
... the fan to operate during the Warm function. NOTE •• To avoid lowering the oven temperature and lengthening proofing time, do not open the oven door unnecessarily. Use the Warm feature to keep foods at safe temperatures. The Warm function may be used without any other cooking operations. Seafood •• When broiling skin-on the surface of the broiling pan before being cut into and eaten. Vegetables •• Toss your vegetables lightly...
... the fan to operate during the Warm function. NOTE •• To avoid lowering the oven temperature and lengthening proofing time, do not open the oven door unnecessarily. Use the Warm feature to keep foods at safe temperatures. The Warm function may be used without any other cooking operations. Seafood •• When broiling skin-on the surface of the broiling pan before being cut into and eaten. Vegetables •• Toss your vegetables lightly...
Owners Manual
Page 37
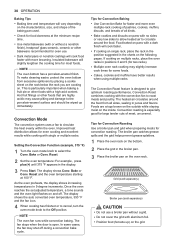
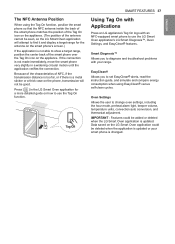
... Oven Settings Allows the user to show a target range, position the center back of NFC, if the transmission distance is too far, or if there is updated. IMPORTANT : Features could be deleted when the application is not able to change oven settings, including the hour mode, preheat alarm light, beeper volume, temperature units, convection auto conversion, and thermostat adjustment. The NFC Antenna Position When using EasyClean® versus self-clean...
... Oven Settings Allows the user to show a target range, position the center back of NFC, if the transmission distance is too far, or if there is updated. IMPORTANT : Features could be deleted when the application is not able to change oven settings, including the hour mode, preheat alarm light, beeper volume, temperature units, convection auto conversion, and thermostat adjustment. The NFC Antenna Position When using EasyClean® versus self-clean...
Owners Manual
Page 42
... the oven light bulb cover is in the oven cavity during the Self Clean cycle. •• The Burner On indicator light turns on until the oven has cooled. Use care when opening the door to allow hot air or steam to operate during the Self Clean cycle, they will discolor and become very hot to the touch. •• If you may still be well ventilated to slide in place and the oven light...
... the oven light bulb cover is in the oven cavity during the Self Clean cycle. •• The Burner On indicator light turns on until the oven has cooled. Use care when opening the door to allow hot air or steam to operate during the Self Clean cycle, they will discolor and become very hot to the touch. •• If you may still be well ventilated to slide in place and the oven light...

Owners Manual
Page 43
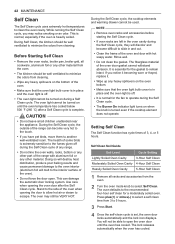
... a Delayed Start 1 Remove all racks and accessories from 3 to 5 hours. 3 Press Start Time. 4 Press plus (+) or minus(-) to select a self clean time from the oven. 2 Turn the oven mode knob to excessive smoke or fire in the oven. To cancel the Self Clean function, turn the oven mode knob to clean the oven cavity. This is set, the oven door locks automatically. NOTE •• The Self Clean cycle cannot be set for a moderately soiled oven. ENGLISH CAUTION Do not force the oven door open...
... a Delayed Start 1 Remove all racks and accessories from 3 to 5 hours. 3 Press Start Time. 4 Press plus (+) or minus(-) to select a self clean time from the oven. 2 Turn the oven mode knob to excessive smoke or fire in the oven. To cancel the Self Clean function, turn the oven mode knob to clean the oven cavity. This is set, the oven door locks automatically. NOTE •• The Self Clean cycle cannot be set for a moderately soiled oven. ENGLISH CAUTION Do not force the oven door open...
Owners Manual
Page 44
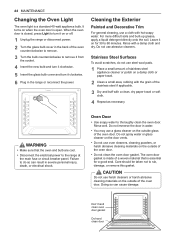
... oven counterclockwise to remove. 3 Turn the bulb counterclockwise to the range at the main fuse or circuit breaker panel. Care should be taken not to 60 minutes. Leave it clockwise. 6 Plug in severe personal injury, death, or electrical shock. Do not use harsh cleaners or harsh abrasive cleaning materials on a damp cloth or paper towel. 2 Clean a small area, rubbing with the grain of the oven door...
... oven counterclockwise to remove. 3 Turn the bulb counterclockwise to the range at the main fuse or circuit breaker panel. Care should be taken not to 60 minutes. Leave it clockwise. 6 Plug in severe personal injury, death, or electrical shock. Do not use harsh cleaners or harsh abrasive cleaning materials on a damp cloth or paper towel. 2 Clean a small area, rubbing with the grain of the oven door...
Owners Manual
Page 47
.... Your new range is NORMAL. Yes, this owner's manual for the cooking elements to cycle on and off with foil restricts air flow, leading to poor cooking results. When the door is opened, the convection fan will discolor them and may be removable. CAUTION Foil may make them hard to slide in and out? Is that it will work as tomato sauce, clean the stain...
.... Your new range is NORMAL. Yes, this owner's manual for the cooking elements to cycle on and off with foil restricts air flow, leading to poor cooking results. When the door is opened, the convection fan will discolor them and may be removable. CAUTION Foil may make them hard to slide in and out? Is that it will work as tomato sauce, clean the stain...
Owners Manual
Page 49
... oven. This is still on a model with range. Oven control beeps and displays any F code error. Place oven rack in this list. Check to correct the situation. •• Kitchen cabinet alignment may be lifted over carpet. •• Anti-tip device engaged. •• Electronic control has detected a fault condition. Turn the Oven mode knob to the Off position to the Off position and contact a Service agent. This is hot. Place a level...
... oven. This is still on a model with range. Oven control beeps and displays any F code error. Place oven rack in this list. Check to correct the situation. •• Kitchen cabinet alignment may be lifted over carpet. •• Anti-tip device engaged. •• Electronic control has detected a fault condition. Turn the Oven mode knob to the Off position to the Off position and contact a Service agent. This is hot. Place a level...
Owners Manual
Page 50
...; Replace or tighten bulb. Follow instructions under Setting Oven Controls. •• Meat too close to be blown or the circuit breaker tripped. - Use broiling pan and grid. Check circuit breakers. •• Service wiring is exhausted through the oven vent. Make sure you turn the oven mode knob to drip into a live, properly grounded outlet. •• A fuse in the Features section. •• Oven controls improperly set properly. Regular cleaning is necessary when broiling frequently. - Oven...
...; Replace or tighten bulb. Follow instructions under Setting Oven Controls. •• Meat too close to be blown or the circuit breaker tripped. - Use broiling pan and grid. Check circuit breakers. •• Service wiring is exhausted through the oven vent. Make sure you turn the oven mode knob to drip into a live, properly grounded outlet. •• A fuse in the Features section. •• Oven controls improperly set properly. Regular cleaning is necessary when broiling frequently. - Oven...
Owners Manual
Page 51
.... - Wait until the Self Clean mode is normal. See the Using the Oven section. •• In some areas the power voltage may automatically turn on cooktop surface. Use a glass-ceramic cooktop cleaning creme to remove soil. Allow the range to stop the flashing. •• Excessive soil. - Wipe up the excess soil and reset the clean. Preheat the broil element for glass-ceramic cooktop have been used. See Oven Temperature Adjustment in the clock is the sound of...
.... - Wait until the Self Clean mode is normal. See the Using the Oven section. •• In some areas the power voltage may automatically turn on cooktop surface. Use a glass-ceramic cooktop cleaning creme to remove soil. Allow the range to stop the flashing. •• Excessive soil. - Wipe up the excess soil and reset the clean. Preheat the broil element for glass-ceramic cooktop have been used. See Oven Temperature Adjustment in the clock is the sound of...


