

XChip - User Guide
Page 5
... Host List Configuration 25 Retry Settings...26 Host Information 26 Channel 1 Configuration 26 Serial Settings ...26 Connection Settings - Setup Mode: Channel Configuration 44 Channel 1 (Option 1 44 Baudrate ...44 I/F (Interface) Mode ...45 RS-232 ...45 XPort User Guide 5 UDP 32 Email Configuration ...33 Recipients ...34 Trigger Configuration 34 Conditions ...34 Message Properties 35...
... Host List Configuration 25 Retry Settings...26 Host Information 26 Channel 1 Configuration 26 Serial Settings ...26 Connection Settings - Setup Mode: Channel Configuration 44 Channel 1 (Option 1 44 Baudrate ...44 I/F (Interface) Mode ...45 RS-232 ...45 XPort User Guide 5 UDP 32 Email Configuration ...33 Recipients ...34 Trigger Configuration 34 Conditions ...34 Message Properties 35...

XChip - User Guide
Page 6
Setup Mode: Advanced Settings 59 Email Settings (Option 3 59 Mail Server ...60 Unit Name ...60 Domain Name ...60 Recipient 1 ...60 Recipient 2 ...60 Trigger 1...60 Trigger 2...61 ... ...46 Connect Mode ...47 a) Incoming Connection 48 b) Response...48 c) Active Startup 48 d) Datagram Type 51 e) Modem Mode 51 Send the Escape Sequence (+++) in Seconds 62 XPort User Guide 6
Setup Mode: Advanced Settings 59 Email Settings (Option 3 59 Mail Server ...60 Unit Name ...60 Domain Name ...60 Recipient 1 ...60 Recipient 2 ...60 Trigger 1...60 Trigger 2...61 ... ...46 Connect Mode ...47 a) Incoming Connection 48 b) Response...48 c) Active Startup 48 d) Datagram Type 51 e) Modem Mode 51 Send the Escape Sequence (+++) in Seconds 62 XPort User Guide 6

XChip - User Guide
Page 9
Flow Control Options 46 Table 7-6. Modem Mode Messages 52 Table 7-11. Lantronix Web Manager 20 Figure 4-3. TCP Connection Settings 29 Figure 4-8. Email Trigger Settings 34 Figure 4-11. Setup Menu Options 39 Figure 7-1. Interface Mode Options 45 Figure 7-9 Hostlist Option 50 Figure ... Connect Mode Options 47 Table 7-8. Disconnect Mode Options 55 Table 7-13. Email Settings 33 Figure 4-10. Security Settings 64 XPort User Guide 9 Product Label 14 Figure 4-1. Interface Mode Options 45 Table 7-5. Manual Connection Address Example 49 Table 7-10. Email...
Flow Control Options 46 Table 7-6. Modem Mode Messages 52 Table 7-11. Lantronix Web Manager 20 Figure 4-3. TCP Connection Settings 29 Figure 4-8. Email Trigger Settings 34 Figure 4-11. Setup Menu Options 39 Figure 7-1. Interface Mode Options 45 Figure 7-9 Hostlist Option 50 Figure ... Connect Mode Options 47 Table 7-8. Disconnect Mode Options 55 Table 7-13. Email Settings 33 Figure 4-10. Security Settings 64 XPort User Guide 9 Product Label 14 Figure 4-1. Interface Mode Options 45 Table 7-5. Manual Connection Address Example 49 Table 7-10. Email...

XChip - User Guide
Page 10
...: Server Configuration Details the network (server) settings 7: Setup Mode: Channel Configuration Details the serial port settings. 8: Setup Mode: Advanced Settings Details email, expert, and security settings and explains how to reset the unit to configure, use, and update the XPort firmware and is intended for OEMs and system integrators who are embedding the...
...: Server Configuration Details the network (server) settings 7: Setup Mode: Channel Configuration Details the serial port settings. 8: Setup Mode: Advanced Settings Details email, expert, and security settings and explains how to reset the unit to configure, use, and update the XPort firmware and is intended for OEMs and system integrators who are embedding the...
XChip - User Guide
Page 13
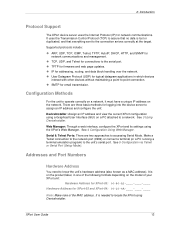
...) on the model of your XPort unit: Hardware Address for XPort-05: 00-80-A3 Hardware Address for network communications. Serial & Telnet Ports: There are three basic methods for email transmission. See 5 Configuration via Telnet or Serial Port (Setup Mode). Addresses and Port Numbers Hardware... Address You need to accessing Serial Mode. Make a Telnet connection to the network port (9999) or connect a terminal (or a PC running a terminal emulation program) to locate the XPort using DeviceInstaller. It is ...
...) on the model of your XPort unit: Hardware Address for XPort-05: 00-80-A3 Hardware Address for network communications. Serial & Telnet Ports: There are three basic methods for email transmission. See 5 Configuration via Telnet or Serial Port (Setup Mode). Addresses and Port Numbers Hardware... Address You need to accessing Serial Mode. Make a Telnet connection to the network port (9999) or connect a terminal (or a PC running a terminal emulation program) to locate the XPort using DeviceInstaller. It is ...

XChip - User Guide
Page 14
... address and a port number. Ports 0-1024 are reserved as it is similar to the unit's Setup (configuration) Mode window. For more information on the product label will vary according the unit model (XPort-03, XPort-04 or XPort-05). XPort User Guide 14 2: Introduction IP Address Every device connected to Table 7-5. Product Information Label The... MAC Address/Serial Number* on reserved port numbers, see to an IP network must have a unique IP address. This address is defined by default. The XPort is automatically assigned an IP address on page 46.
... address and a port number. Ports 0-1024 are reserved as it is similar to the unit's Setup (configuration) Mode window. For more information on the product label will vary according the unit model (XPort-03, XPort-04 or XPort-05). XPort User Guide 14 2: Introduction IP Address Every device connected to Table 7-5. Product Information Label The... MAC Address/Serial Number* on reserved port numbers, see to an IP network must have a unique IP address. This address is defined by default. The XPort is automatically assigned an IP address on page 46.

XChip - User Guide
Page 15
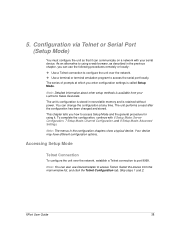
...Configuration via Telnet or Serial Port (Setup Mode) on the local network. Note: If the unit already has an IP address (e.g., DHCP has assigned an IP address), click the Search icon and select the unit from http://www.lantronix.com/downloads. 2. XPort User Guide 15 3. The hardware ...and related settings or for getting the XPort device server online and viewing its current configuration. To assign an IP address manually: 1. Download the latest version of DeviceInstaller from the list of an Ethernet connection to 0.0.0.0 at www.lantronix.com/support/downloads. The unit is a...
...Configuration via Telnet or Serial Port (Setup Mode) on the local network. Note: If the unit already has an IP address (e.g., DHCP has assigned an IP address), click the Search icon and select the unit from http://www.lantronix.com/downloads. 2. XPort User Guide 15 3. The hardware ...and related settings or for getting the XPort device server online and viewing its current configuration. To assign an IP address manually: 1. Download the latest version of DeviceInstaller from the list of an Ethernet connection to 0.0.0.0 at www.lantronix.com/support/downloads. The unit is a...

XChip - User Guide
Page 17
... Obtain via Telnet or Serial Port (Setup Mode). Displays the XPort's current gateway. Configurable field. Double-click the field, type in the value, and press Enter to categorize the XPort. Displays the XPort's device family as XPort. Non-configurable field. Non-configurable field. Non-...value of True or False Non-configurable field. To change the DHCP device name, see Assigning an IP Address on the XPort. Non-configurable field. 3: Using DeviceInstaller DHCP Device Name Group Comments Device Family Type ID Hardware Address Firmware Version Extended ...
... Obtain via Telnet or Serial Port (Setup Mode). Displays the XPort's current gateway. Configurable field. Double-click the field, type in the value, and press Enter to categorize the XPort. Displays the XPort's device family as XPort. Non-configurable field. Non-configurable field. Non-...value of True or False Non-configurable field. To change the DHCP device name, see Assigning an IP Address on the XPort. Non-configurable field. 3: Using DeviceInstaller DHCP Device Name Group Comments Device Family Type ID Hardware Address Firmware Version Extended ...

XChip - User Guide
Page 18
... become available. Web Port Non-configurable field. Maximum Baud Rate Supported Non-configurable field. Displays True, indicating the XPort's firmware is 45. Supports AES Data Stream Non-configurable field. Displays True. Telnet Supported Non-configurable field. Telnet Port ...1-65s, the XPort's TCP keepalive value. Note: the XPort may not currently be running at this rate. XPort supports baud rates up to 921600 bits per second (bps). Supports HTTP Setup Non-configurable field. Displays True. XPort User Guide 18 Displays the XPort's maximum baud ...
... become available. Web Port Non-configurable field. Maximum Baud Rate Supported Non-configurable field. Displays True, indicating the XPort's firmware is 45. Supports AES Data Stream Non-configurable field. Displays True. Telnet Supported Non-configurable field. Telnet Port ...1-65s, the XPort's TCP keepalive value. Note: the XPort may not currently be running at this rate. XPort supports baud rates up to 921600 bits per second (bps). Supports HTTP Setup Non-configurable field. Displays True. XPort User Guide 18 Displays the XPort's maximum baud ...

XChip - User Guide
Page 19
... power. Note: The examples in a web browser, click the External Browser button. Select the XPort unit by clicking the + symbol next to prompt for the list of available Lantronix device servers. 2. Note: Alternatively, to open Web Manager, open the Web Manager in this ... Manager, Lantronix's browser-based configuration tool. (For information on a network with your web browser and enter the IP address of available XPorts displays. 3. In the right pane, click the Web Configuration tab. 6. Click on DeviceInstaller, see 5 Configuration via Telnet or Serial Port (Setup Mode). ...
... power. Note: The examples in a web browser, click the External Browser button. Select the XPort unit by clicking the + symbol next to prompt for the list of available Lantronix device servers. 2. Note: Alternatively, to open Web Manager, open the Web Manager in this ... Manager, Lantronix's browser-based configuration tool. (For information on a network with your web browser and enter the IP address of available XPorts displays. 3. In the right pane, click the Web Configuration tab. 6. Click on DeviceInstaller, see 5 Configuration via Telnet or Serial Port (Setup Mode). ...
XChip - User Guide
Page 38
... the unit so that it . To complete the configuration, continue with your Lantronix Sales Associate. Note: You can communicate on a network with 6 Setup Mode: Server Configuration, 7 Setup Mode: Channel Configuration, and 8 Setup Mode: Advanced Settings. As an alternative to using it can also use the...reset after the configuration has been changed and stored. Note: Detailed information about other setup methods is available from the main window list, and click the Telnet Configuration tab. XPort User Guide 38 5. The unit's configuration is stored in nonvolatile memory and is ...
... the unit so that it . To complete the configuration, continue with your Lantronix Sales Associate. Note: You can communicate on a network with 6 Setup Mode: Server Configuration, 7 Setup Mode: Channel Configuration, and 8 Setup Mode: Advanced Settings. As an alternative to using it can also use the...reset after the configuration has been changed and stored. Note: Detailed information about other setup methods is available from the main window list, and click the Telnet Configuration tab. XPort User Guide 38 5. The unit's configuration is stored in nonvolatile memory and is ...

XChip - User Guide
Page 39
... to your unit's serial port. 2. Note: The XPort always uses these serial port settings on the menu by entering the number of the option in the Your choice ? Reset the XPort unit by the Change Setup menu. XPort User Guide 39 The unit reboots. Figure 5-2. Immediately ...upon resetting the device, enter three lowercase x characters (xxx). To enter a value for Setup Mode 3. Figure 5-1. When you are finished, save 9 ...
... to your unit's serial port. 2. Note: The XPort always uses these serial port settings on the menu by entering the number of the option in the Your choice ? Reset the XPort unit by the Change Setup menu. XPort User Guide 39 The unit reboots. Figure 5-2. Immediately ...upon resetting the device, enter three lowercase x characters (xxx). To enter a value for Setup Mode 3. Figure 5-1. When you are finished, save 9 ...

XChip - User Guide
Page 40
... the terminal (or emulation) while resetting the unit. All values are stored in the section Telnet Connection. At this within three seconds of resetting the XPort. 5: Configuration via Telnet or Serial Port (Setup Mode) Note: The easiest way to enter Setup Mode is the same as when you use a Telnet connection.
... the terminal (or emulation) while resetting the unit. All values are stored in the section Telnet Connection. At this within three seconds of resetting the XPort. 5: Configuration via Telnet or Serial Port (Setup Mode) Note: The easiest way to enter Setup Mode is the same as when you use a Telnet connection.

XChip - User Guide
Page 41
... To disable an option, set to assign IP addresses, enter the IP address manually. Change Telnet/Web Manager password (N) ? Table 6-1. Setup Mode: Server Configuration This chapter explains how to disable AutoIP, DHCP, or BootP. 6. Note: Current values appear in parentheses. The following...select Server configuration (option 0). Server Configuration (Option 0) The unit's basic network parameters display when you can manually configure to force the XPort to configure the network settings. only DHCP is enabled. (The value 5 results from adding the binary equivalents of 0 and 2.) ...
... To disable an option, set to assign IP addresses, enter the IP address manually. Change Telnet/Web Manager password (N) ? Table 6-1. Setup Mode: Server Configuration This chapter explains how to disable AutoIP, DHCP, or BootP. 6. Note: Current values appear in parentheses. The following...select Server configuration (option 0). Server Configuration (Option 0) The unit's basic network parameters display when you can manually configure to force the XPort to configure the network settings. only DHCP is enabled. (The value 5 results from adding the binary equivalents of 0 and 2.) ...

XChip - User Guide
Page 42
...Telnet/Web Manager Password Setting the Telnet/Web Manager password prevents unauthorized access to the setup menu through web pages. Table 6-2. Note: This setting is N (No), meaning the gateway address has not been set . 6: Setup Mode: Server Configuration Set Gateway IP Address The gateway address, or router, allows...to be the IP address of a remote machine to the same LAN segment as the unit. Change Telnet/Web Manager password (N) ? _ XPort User Guide 42 To set the gateway address, type Y and enter the address. The default is DHCP enabled, the DHCP server provides ...
...Telnet/Web Manager Password Setting the Telnet/Web Manager password prevents unauthorized access to the setup menu through web pages. Table 6-2. Note: This setting is N (No), meaning the gateway address has not been set . 6: Setup Mode: Server Configuration Set Gateway IP Address The gateway address, or router, allows...to be the IP address of a remote machine to the same LAN segment as the unit. Change Telnet/Web Manager password (N) ? _ XPort User Guide 42 To set the gateway address, type Y and enter the address. The default is DHCP enabled, the DHCP server provides ...

XChip - User Guide
Page 43
... 00-20-4A-12-34-56, then the default DHCP name is Change DHCP device name. This method only works with 2 digit numbers (01-99). XPort User Guide 43 Change DHCP device name (not set) ? (N) Y Enter new DHCP device name : LTX Numeric DHCP Name: You can create your own...(XXXXXX is the last 6 digits of the MAC address shown on the label on page 64. There are using the DeviceInstaller network search feature. 6: Setup Mode: Server Configuration An enhanced password setting (for Telnet access only) of 16 characters is available under Security Settings (Option 6) on the bottom/side of...
... 00-20-4A-12-34-56, then the default DHCP name is Change DHCP device name. This method only works with 2 digit numbers (01-99). XPort User Guide 43 Change DHCP device name (not set) ? (N) Y Enter new DHCP device name : LTX Numeric DHCP Name: You can create your own...(XXXXXX is the last 6 digits of the MAC address shown on the label on page 64. There are using the DeviceInstaller network search feature. 6: Setup Mode: Server Configuration An enhanced password setting (for Telnet access only) of 16 characters is available under Security Settings (Option 6) on the bottom/side of...

XChip - User Guide
Page 44
... (00:00) ?: SendChar 1 (00) ? Baudrate (9600) ? _ XPort User Guide 44 Flow (00) ? Auto increment source port (N) ? SendChar 2 (00) ? Channel 1 (Option 1) Select Channel 1 (option 1) from the Change Setup menu to define how the serial port responds to use for the serial connection.... and 230400 bits per second. (See CPU Performance on a speed or baud rate to network and serial communications. I/F Mode (4C) ? 7. Setup Mode: Channel Configuration This chapter explains how to configure the serial port. Figure 7-1. Port No (10001) ? Remote IP Address : (000) .(000...
... (00:00) ?: SendChar 1 (00) ? Baudrate (9600) ? _ XPort User Guide 44 Flow (00) ? Auto increment source port (N) ? SendChar 2 (00) ? Channel 1 (Option 1) Select Channel 1 (option 1) from the Change Setup menu to define how the serial port responds to use for the serial connection.... and 230400 bits per second. (See CPU Performance on a speed or baud rate to network and serial communications. I/F Mode (4C) ? 7. Setup Mode: Channel Configuration This chapter explains how to configure the serial port. Figure 7-1. Port No (10001) ? Remote IP Address : (000) .(000...

XChip - User Guide
Page 45
... RS-232C, 8-bit, No Parity, 1 stop bit 0100 1100 4C RS-232C, 7-bit, Even Parity, 1 stop bits are available on the XPort models. 7: Setup Mode: Channel Configuration I/F (Interface) Mode The Interface (I/F) Mode is a bit-coded byte entered in the table that are blank represent "don't care... be set to either a 0 or 1 value. The following table displays available I /F Mode Option 7 6 5 4 3 2 1 0 RS-422 4-wire 0 1 RS-485 2-wire 1 1 XPort User Guide 45 Figure 7-2. Note: All bit positions in the table that are blank represent "don't care" bits, for RS-422 4-wire and RS-485...
... RS-232C, 8-bit, No Parity, 1 stop bit 0100 1100 4C RS-232C, 7-bit, Even Parity, 1 stop bits are available on the XPort models. 7: Setup Mode: Channel Configuration I/F (Interface) Mode The Interface (I/F) Mode is a bit-coded byte entered in the table that are blank represent "don't care... be set to either a 0 or 1 value. The following table displays available I /F Mode Option 7 6 5 4 3 2 1 0 RS-422 4-wire 0 1 RS-485 2-wire 1 1 XPort User Guide 45 Figure 7-2. Note: All bit positions in the table that are blank represent "don't care" bits, for RS-422 4-wire and RS-485...

XChip - User Guide
Page 46
...remote initiating connections. Only use the reserved port numbers for the following table to initiate a connection using UDP instead of TCP. XPort User Guide 46 The range is the number that you not use this setting as incorrect operation may result. Reserved Port Numbers Port... Numbers Reserved for 1 - 1024 9999 14000-14009 30704 30718 Reserved (well known ports) Telnet setup Reserved for Redirector Reserved (77F0h) Reserved (77FEh) WARNING: We recommend that identifies the channel for the outgoing local port to change ...
...remote initiating connections. Only use the reserved port numbers for the following table to initiate a connection using UDP instead of TCP. XPort User Guide 46 The range is the number that you not use this setting as incorrect operation may result. Reserved Port Numbers Port... Numbers Reserved for 1 - 1024 9999 14000-14009 30704 30718 Reserved (well known ports) Telnet setup Reserved for Redirector Reserved (77F0h) Reserved (77FEh) WARNING: We recommend that identifies the channel for the outgoing local port to change ...

XChip - User Guide
Page 47
...the table that are blank represent "don't care" bits, for that particular option, which can be set to incoming connections over the network. 7: Setup Mode: Channel Configuration Connect Mode Connect Mode defines how the unit makes a connection, and how it reacts to either a 0 or 1 value. Note... Echo Data Echo & Modem Response (Numeric) Data Echo & Modem Response (Verbose) Modem Response Only (Numeric) Modem Response Only (Verbose) 0 1 0 0 0 0 0 0 0 1 0 0 1 0 0 0 1 1 0 1 0 0 0 1 0 1 0 0 1 0 1 1 0 0 0 0 0 1 0 1 0 01 0 0 1 1 1 1 1 1 1 1 0 1 1 1 1 1 0 XPort User Guide 47 Table 7-7.
...the table that are blank represent "don't care" bits, for that particular option, which can be set to incoming connections over the network. 7: Setup Mode: Channel Configuration Connect Mode Connect Mode defines how the unit makes a connection, and how it reacts to either a 0 or 1 value. Note... Echo Data Echo & Modem Response (Numeric) Data Echo & Modem Response (Verbose) Modem Response Only (Numeric) Modem Response Only (Verbose) 0 1 0 0 0 0 0 0 0 1 0 0 1 0 0 0 1 1 0 1 0 0 0 1 0 1 0 0 1 0 1 1 0 0 0 0 0 1 0 1 0 01 0 0 1 1 1 1 1 1 1 1 0 1 1 1 1 1 0 XPort User Guide 47 Table 7-7.