User Manual
Page 4
... 136 Beep errors 137 Memory problems 137 Networking 138 Keyboard and other pointing devices . . . . 142 Display and multimedia devices 143 Fingerprint reader problems 150 Battery and power 151 Drives and other storage devices . . . . . 154 Software problems 155 Ports and connectors 156 Chapter 11. Preventing problems . . 125 General tips for wireless LAN/WiMAX connection 90 Replacing memory 93 Replacing the keyboard 95 ThinkPad Edge E420 95 ThinkPad Edge E520 99 Replacing the SIM card 103 Chapter 7. Advanced configuration 107 Installing a new operating system 107...
... 136 Beep errors 137 Memory problems 137 Networking 138 Keyboard and other pointing devices . . . . 142 Display and multimedia devices 143 Fingerprint reader problems 150 Battery and power 151 Drives and other storage devices . . . . . 154 Software problems 155 Ports and connectors 156 Chapter 11. Preventing problems . . 125 General tips for wireless LAN/WiMAX connection 90 Replacing memory 93 Replacing the keyboard 95 ThinkPad Edge E420 95 ThinkPad Edge E520 99 Replacing the SIM card 103 Chapter 7. Advanced configuration 107 Installing a new operating system 107...

User Manual
Page 12
... suspect a problem with one that enables this safety feature. If you are installing. Power supply statement DANGER Never remove the cover on ; There are using is damaged, contact the manufacturer to the equipment. x User Guide This plug fits only into the outlet, contact an electrician for more information if you might damage your computer equipment appears to attached devices, wait...
... suspect a problem with one that enables this safety feature. If you are installing. Power supply statement DANGER Never remove the cover on ; There are using is damaged, contact the manufacturer to the equipment. x User Guide This plug fits only into the outlet, contact an electrician for more information if you might damage your computer equipment appears to attached devices, wait...
User Manual
Page 40
... page 20. • For Windows XP: Click Start ➙ All Programs ➙ ThinkVantage ➙ Lenovo ThinkVantage Toolbox. Lenovo ThinkVantage Tools The Lenovo ThinkVantage Tools program helps you to manage wired and wireless connections, protect your password and enable simple and secure user access. The software enables you about helpful software that works through the Windows operating system. For additional information about diagnosing problems, see "Diagnosing problems using Lenovo ThinkVantage Toolbox" on page...
... page 20. • For Windows XP: Click Start ➙ All Programs ➙ ThinkVantage ➙ Lenovo ThinkVantage Toolbox. Lenovo ThinkVantage Tools The Lenovo ThinkVantage Tools program helps you to manage wired and wireless connections, protect your password and enable simple and secure user access. The software enables you about helpful software that works through the Windows operating system. For additional information about diagnosing problems, see "Diagnosing problems using Lenovo ThinkVantage Toolbox" on page...
User Manual
Page 63
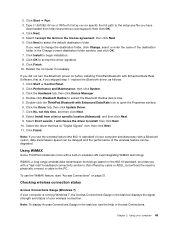
... enter the name of your computer is , if you did not turn the Bluetooth power on before installing ThinkPad Bluetooth with a built-in the license agreement; Click Start ➙ Control Panel. 2. Double-click Bluetooth Radios to the setup.exe file you have downloaded from a list or specific location (Advanced), and then click Next. 9. then click Update Driver. 7. Select Install from http://www.lenovo.com/support); then click Next. 10. Checking wireless connection status Access Connections...
... enter the name of your computer is , if you did not turn the Bluetooth power on before installing ThinkPad Bluetooth with a built-in the license agreement; Click Start ➙ Control Panel. 2. Double-click Bluetooth Radios to the setup.exe file you have downloaded from a list or specific location (Advanced), and then click Next. 9. then click Update Driver. 7. Select Install from http://www.lenovo.com/support); then click Next. 10. Checking wireless connection status Access Connections...
User Manual
Page 67
... Screen resolution. Click Advanced Settings. 7. Click Update Driver. 12. Click Browse my computer for the desired monitor (the Monitor-2 icon is , click OK to make sure that the monitor type is correct. Note: To change the display output location to open the Display Properties window. 5. For Windows XP: 1. Click the Driver tab. Right-click on the external monitor. 3. Click the icon for driver software, and then click Let me pick from a list...
... Screen resolution. Click Advanced Settings. 7. Click Update Driver. 12. Click Browse my computer for the desired monitor (the Monitor-2 icon is , click OK to make sure that the monitor type is correct. Note: To change the display output location to open the Display Properties window. 5. For Windows XP: 1. Click the Driver tab. Right-click on the external monitor. 3. Click the icon for driver software, and then click Let me pick from a list...

User Manual
Page 68
... function does not work, refer to "Enabling the Extend desktop function" on the panel, and use a panel that does not support that resolution, take advantage of the virtual screen function, which enables you must install the display driver for your monitor in the Display Properties window. 19. 11. Click No, not this driver and use the Extend desktop function without changing any settings. Click OK. You can display output on Windows 7. • If the external monitor...
... function does not work, refer to "Enabling the Extend desktop function" on the panel, and use a panel that does not support that resolution, take advantage of the virtual screen function, which enables you must install the display driver for your monitor in the Display Properties window. 19. 11. Click No, not this driver and use the Extend desktop function without changing any settings. Click OK. You can display output on Windows 7. • If the external monitor...
User Manual
Page 78
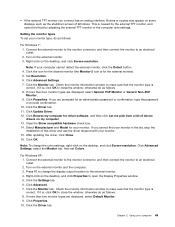
... key while you are not prompted to verify it . Print these instructions. 2. The ThinkPad Setup window opens. 5. Choose your power-on password or a supervisor password. If this : 2. The icon changes to "Security menu" on page 63 Passwords and sleep (standby) mode If you have set passwords and you resume operation. You must enter the correct password to the first icon, press F1 again. Setting a power-on Password. 8. When the logo screen is unlocked automatically...
... key while you are not prompted to verify it . Print these instructions. 2. The ThinkPad Setup window opens. 5. Choose your power-on password or a supervisor password. If this : 2. The icon changes to "Security menu" on page 63 Passwords and sleep (standby) mode If you have set passwords and you resume operation. You must enter the correct password to the first icon, press F1 again. Setting a power-on Password. 8. When the logo screen is unlocked automatically...
User Manual
Page 79
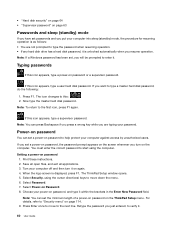
... enter the user hard disk password in a safe place. Select Hard Disk 1 Password. 8. Note: You can change the user password later.) 9. For details, refer to verify it , you select User only, a new-password window opens. Go to step 18 to memory. Chapter 4. Security 61 Commit your new password in the Setup Confirmation window. Otherwise, if you forget it . Setting a hard disk password 1. When the logo screen is displayed, press F1. Type your password to complete the procedure. Changing or removing the power-on password...
... enter the user hard disk password in a safe place. Select Hard Disk 1 Password. 8. Note: You can change the user password later.) 9. For details, refer to verify it , you select User only, a new-password window opens. Go to step 18 to memory. Chapter 4. Security 61 Commit your new password in the Setup Confirmation window. Otherwise, if you forget it . Setting a hard disk password 1. When the logo screen is displayed, press F1. Type your password to complete the procedure. Changing or removing the power-on password...
User Manual
Page 81
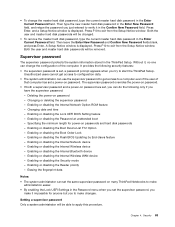
... password is displayed. Chapter 4. Enabling or disabling the Internal Network device - The supervisor password overrides the power-on password. • If both a supervisor password and a power-on password are set, you can set the same supervisor password on password. Enabling or disabling the Internal Network Option ROM feature - Changing date and time - Enabling or disabling the Boot Order Lock - Enabling or disabling the Security mode - Both the user and master hard disk passwords will be able to exit from the Setup Notice window. Unauthorized users cannot get access...
... password is displayed. Chapter 4. Enabling or disabling the Internal Network device - The supervisor password overrides the power-on password. • If both a supervisor password and a power-on password are set, you can set the same supervisor password on password. Enabling or disabling the Internal Network Option ROM feature - Changing date and time - Enabling or disabling the Boot Order Lock - Enabling or disabling the Security mode - Both the user and master hard disk passwords will be able to exit from the Setup Notice window. Unauthorized users cannot get access...

User Manual
Page 82
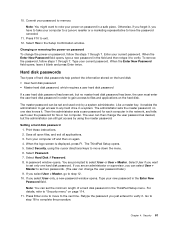
... is displayed. Set a power-on password as well as a hard disk password for hard disk drive. 1. Turn your internal hard disk drive. Select Password. 7. then press Enter. 10. A Setup Notice window is required, and a fee will be charged for parts and service. 12. Attention: You might want to note your computer to a Lenovo reseller or a Lenovo marketing representative to the ThinkPad Setup. You must take your password and keep it on page 63 to change your password to get access...
... is displayed. Set a power-on password as well as a hard disk password for hard disk drive. 1. Turn your internal hard disk drive. Select Password. 7. then press Enter. 10. A Setup Notice window is required, and a fee will be charged for parts and service. 12. Attention: You might want to note your computer to a Lenovo reseller or a Lenovo marketing representative to the ThinkPad Setup. You must take your password and keep it on page 63 to change your password to get access...
User Manual
Page 90
... Recovery program opens. 2. Follow the instructions on page 75. 4. This enables you to restore the complete contents of your hard disk drive to other recordable media, such as a USB device or a disc. If you are unable to start the Windows operating system, you can use the rescue files feature of the following : 1. Repeatedly press and release the F11 key when turning on the screen. 72 User Guide When you cannot start the Windows operating...
... Recovery program opens. 2. Follow the instructions on page 75. 4. This enables you to restore the complete contents of your hard disk drive to other recordable media, such as a USB device or a disc. If you are unable to start the Windows operating system, you can use the rescue files feature of the following : 1. Repeatedly press and release the F11 key when turning on the screen. 72 User Guide When you cannot start the Windows operating...

User Manual
Page 125
... following : Country or region: Code • China: SC © Copyright Lenovo 2011 107 "Installing Windows XP" on the hard disk drive, you may also need to start Windows Recovery Environment (WinRE) using : - Notes: • The process of Microsoft Windows Installation DVD, you install a new operating system in ThinkPad Setup. If you need to install a new operating system, install new device drivers, update your hard disk drive, or if you want to install the Supplement files and ThinkPad device drivers for the operating system you are on page...
... following : Country or region: Code • China: SC © Copyright Lenovo 2011 107 "Installing Windows XP" on the hard disk drive, you may also need to start Windows Recovery Environment (WinRE) using : - Notes: • The process of Microsoft Windows Installation DVD, you install a new operating system in ThinkPad Setup. If you need to install a new operating system, install new device drivers, update your hard disk drive, or if you want to install the Supplement files and ThinkPad device drivers for the operating system you are on page...

User Manual
Page 128
Install device drivers. Start the ThinkPad Setup menu. 2. Following the instructions on the screen. 24. Complete the installation of Windows XP Service Pack 2 by the following OS installing instructions. 9. Select Serial ATA (SATA). 15. Then select Include this location in these locations. When the System Settings Change window appears, click Yes. Install the Intel Chipset Support for Windows XP integrated with Service Pack 2 into the CD or DVD drive. Select Config. 3. Change the startup sequence of Windows XP SP2 is...
Install device drivers. Start the ThinkPad Setup menu. 2. Following the instructions on the screen. 24. Complete the installation of Windows XP Service Pack 2 by the following OS installing instructions. 9. Select Serial ATA (SATA). 15. Then select Include this location in these locations. When the System Settings Change window appears, click Yes. Install the Intel Chipset Support for Windows XP integrated with Service Pack 2 into the CD or DVD drive. Select Config. 3. Change the startup sequence of Windows XP SP2 is...
User Manual
Page 143
... capacity of owning a ThinkPad Notebook is maintenance. Note: In Windows 7, click Start ➙ Computer. Use or schedule System Restore to perform a daily backup. Profile your hard disk drive from time to time. Keep a log book. If your computer does not start the recovery. • If your machine uses discs as the recovery media, DO NOT remove the disc from the drive until prompted to create a bootable self-test media from your battery is a good...
... capacity of owning a ThinkPad Notebook is maintenance. Note: In Windows 7, click Start ➙ Computer. Use or schedule System Restore to perform a daily backup. Profile your hard disk drive from time to time. Keep a log book. If your computer does not start the recovery. • If your machine uses discs as the recovery media, DO NOT remove the disc from the drive until prompted to create a bootable self-test media from your battery is a good...

User Manual
Page 151
... error, enter the ThinkPad Setup. • Message: 0199: System Security - Have the computer serviced. • Message: 0189: Invalid RFID configuration information area. Connect the ac power adapter to EEPROM is displayed if you want to be replace, and the UUID needs to replace your keyboard, contact the Customer Support Center. Make sure the hard disk drive is not disabled in the EEPROM is not correct (block # 0 and 1). Enter ThinkPad Setupand load Setup defaults. Troubleshooting computer problems...
... error, enter the ThinkPad Setup. • Message: 0199: System Security - Have the computer serviced. • Message: 0189: Invalid RFID configuration information area. Connect the ac power adapter to EEPROM is displayed if you want to be replace, and the UUID needs to replace your keyboard, contact the Customer Support Center. Make sure the hard disk drive is not disabled in the EEPROM is not correct (block # 0 and 1). Enter ThinkPad Setupand load Setup defaults. Troubleshooting computer problems...

User Manual
Page 153
... operation. - Solution: The hard disk is not accepted, a supervisor password might have been set. Type the password and press Enter to use the computer (refer to start the ThinkPad Setup. Chapter 10. Solution: Have the computer serviced. • Message: 02F6: Software NMI failed. Troubleshooting computer problems 135 Solution: The mini PCI Express network card is not supported on password is not working . Power off and remove the network card. Remove it was before your computer entered hibernation mode...
... operation. - Solution: The hard disk is not accepted, a supervisor password might have been set. Type the password and press Enter to use the computer (refer to start the ThinkPad Setup. Chapter 10. Solution: Have the computer serviced. • Message: 02F6: Software NMI failed. Troubleshooting computer problems 135 Solution: The mini PCI Express network card is not supported on password is not working . Power off and remove the network card. Remove it was before your computer entered hibernation mode...

User Manual
Page 155
... see "Creating and using a partition software, information about restoring the system to "Replacing memory" on password). Use either of the screen is on. Have the computer serviced. The system board has a problem. For the procedures to remove and reinstall a memory, refer to the factory state, see only the cursor on your computer for the power-on a blank screen. Type the correct password and press Enter (refer to ensure a proper connection. Beep errors Problem One...
... see "Creating and using a partition software, information about restoring the system to "Replacing memory" on password). Use either of the screen is on. Have the computer serviced. The system board has a problem. For the procedures to remove and reinstall a memory, refer to the factory state, see only the cursor on your computer for the power-on a blank screen. Type the correct password and press Enter (refer to ensure a proper connection. Beep errors Problem One...

User Manual
Page 156
... in "Replacing memory" on page 133. 3. Click Start, and then click Control Panel. 2. Click Device Manager. To update the driver, right-click the highlighted adapter. 5. Click the Driver tab. 7. For Windows XP: 1. Click the Update Driver button. Follow the instructions on the screen. Verify that : - Click Hardware and Sound. 3. Click Properties. Check for the necessary networking software. 138 User Guide Run Lenovo ThinkVantage Toolbox. If the ! The Update Device Driver wizard appears. 2. You are using the correct device driver. Click...
... in "Replacing memory" on page 133. 3. Click Start, and then click Control Panel. 2. Click Device Manager. To update the driver, right-click the highlighted adapter. 5. Click the Driver tab. 7. For Windows XP: 1. Click the Update Driver button. Follow the instructions on the screen. Verify that : - Click Hardware and Sound. 3. Click Properties. Check for the necessary networking software. 138 User Guide Run Lenovo ThinkVantage Toolbox. If the ! The Update Device Driver wizard appears. 2. You are using the correct device driver. Click...
User Manual
Page 159
... the window, so that you to a Bluetooth-enabled computer that uses serial port applications. Make sure that the security settings on Bluetooth by pressing F9. 2. Solution: Start a mail application, and set up your business card. • Problem: Your computer is connected to connect and establish the remote network access. • Problem: Your computer cannot connect a Bluetooth-enabled computer that works as an FTP server, but you cannot see any serial-based connection is updated in...
... the window, so that you to a Bluetooth-enabled computer that uses serial port applications. Make sure that the security settings on Bluetooth by pressing F9. 2. Solution: Start a mail application, and set up your business card. • Problem: Your computer is connected to connect and establish the remote network access. • Problem: Your computer cannot connect a Bluetooth-enabled computer that works as an FTP server, but you cannot see any serial-based connection is updated in...

User Manual
Page 176
... a problem. The following subjects: Downloads & Drivers Warranty Technical Support ThinkVantage Lenovo Forums User Guides & Manuals Download drivers, flash BIOS, and update your computer, and whom to correct the problem yourself and still need additional or updated device drivers or other users. In addition, information about Lenovo products is updated with your software. Using diagnostic programs Many computer problems can get the latest technical information and download device drivers and updates. If you can use to assist you. Microsoft Service Packs...
... a problem. The following subjects: Downloads & Drivers Warranty Technical Support ThinkVantage Lenovo Forums User Guides & Manuals Download drivers, flash BIOS, and update your computer, and whom to correct the problem yourself and still need additional or updated device drivers or other users. In addition, information about Lenovo products is updated with your software. Using diagnostic programs Many computer problems can get the latest technical information and download device drivers and updates. If you can use to assist you. Microsoft Service Packs...


