Hardware Maintenance Manual
Page 3
... error codes 45 Error messages 46 No-beep symptoms 47 LCD-related symptoms 47 Intermittent problems 48 Undetermined problems 48 Chapter 5. Removing and replacing a FRU 61 1010 Battery pack 61 1020 ExpressCard blank bezel and Media Card blank bezel 63 1030 Optical drive or travel cover 64 1040 Thermal cover 65 1050 Hard disk drive (HDD) assembly . . . . . 66 1060 DIMM 67 1070 Fan assembly 68 1080 CPU 71 1090 SIM slot cover...
... error codes 45 Error messages 46 No-beep symptoms 47 LCD-related symptoms 47 Intermittent problems 48 Undetermined problems 48 Chapter 5. Removing and replacing a FRU 61 1010 Battery pack 61 1020 ExpressCard blank bezel and Media Card blank bezel 63 1030 Optical drive or travel cover 64 1040 Thermal cover 65 1050 Hard disk drive (HDD) assembly . . . . . 66 1060 DIMM 67 1070 Fan assembly 68 1080 CPU 71 1090 SIM slot cover...

Hardware Maintenance Manual
Page 8
... using testers, set the controls correctly and use the approved probe leads and accessories for safe operational condition. • Do not use this type of maintenance information. Pumps - Motor generators - Working near you can occur only when there is a complete circuit. Use only one hand when working with powered-on electrical equipment. Instructions for possible hazards in the safety sections of mat to listed above...
... using testers, set the controls correctly and use the approved probe leads and accessories for safe operational condition. • Do not use this type of maintenance information. Pumps - Motor generators - Working near you can occur only when there is a complete circuit. Use only one hand when working with powered-on electrical equipment. Instructions for possible hazards in the safety sections of mat to listed above...

Hardware Maintenance Manual
Page 29
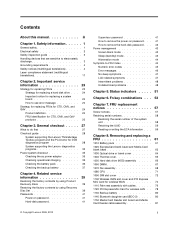
... are instructed to http://support.lenovo.com. 2. To download software fixes, drivers, and BIOS, do as follows: 1. Note the current configuration settings (using the View Configuration option); "Important notice for CTO, CMV, and GAV products" on page 24 - Chapter 2. Go to replace a FRU but the replacement does not correct the problem, reinstall the original FRU before you are installed before completing the service action. Before replacing the adapter or device, remove the...
... are instructed to http://support.lenovo.com. 2. To download software fixes, drivers, and BIOS, do as follows: 1. Note the current configuration settings (using the View Configuration option); "Important notice for CTO, CMV, and GAV products" on page 24 - Chapter 2. Go to replace a FRU but the replacement does not correct the problem, reinstall the original FRU before you are installed before completing the service action. Before replacing the adapter or device, remove the...
Hardware Maintenance Manual
Page 33
...; Copyright Lenovo 2009, 2012 27 Before checking problems with a hardware defect, such as copying, saving, or formatting. Procedure index and page number in the parts exchange form or parts return form that you replace FRUs, it : 1. Machine type, model number, and serial number 9. If you attach to read the entire page on the display, and beep symptoms 6. Consider replacing a FRU only when a problem recurs. Drives in the...
...; Copyright Lenovo 2009, 2012 27 Before checking problems with a hardware defect, such as copying, saving, or formatting. Procedure index and page number in the parts exchange form or parts return form that you replace FRUs, it : 1. Machine type, model number, and serial number 9. If you attach to read the entire page on the display, and beep symptoms 6. Consider replacing a FRU only when a problem recurs. Drives in the...

Hardware Maintenance Manual
Page 35
... panel of the device. A pull-down menu appears. (Its exact form depends on page 35, and check the power sources. Using a bootable PC-Doctor for DOS CD/DVD, the computer can start the BIOS Setup Utility by the supervisor password. Turn off the computer. 2. Make sure that the optical drive that are disabled, such as follows: 1. Follow the instructions on the computer. Instead of any optical disc drives connected...
... panel of the device. A pull-down menu appears. (Its exact form depends on page 35, and check the power sources. Using a bootable PC-Doctor for DOS CD/DVD, the computer can start the BIOS Setup Utility by the supervisor password. Turn off the computer. 2. Make sure that the optical drive that are disabled, such as follows: 1. Follow the instructions on the computer. Instead of any optical disc drives connected...

Hardware Maintenance Manual
Page 36
... instructions on the ThinkPad Notebook. Note: After running PC-Doctor for at least 2 seconds; To cancel the test, press Esc. All Rights Reserved. otherwise, it . 12. Diagnostics Interactive Tests Run Normal Test Run Quick Test CPU/Coprocessor Systemboard Video Adapter Fixed Disks Diskette Drives Other Devices Communication Wireless LAN Advanced Memory Tests Hardware Info Utility Quit F1=Help PC-DOCTOR 2.0 Copyright 2008 PC-Doctor, Inc. Press ENTER...
... instructions on the ThinkPad Notebook. Note: After running PC-Doctor for at least 2 seconds; To cancel the test, press Esc. All Rights Reserved. otherwise, it . 12. Diagnostics Interactive Tests Run Normal Test Run Quick Test CPU/Coprocessor Systemboard Video Adapter Fixed Disks Diskette Drives Other Devices Communication Wireless LAN Advanced Memory Tests Hardware Info Utility Quit F1=Help PC-DOCTOR 2.0 Copyright 2008 PC-Doctor, Inc. Press ENTER...

Hardware Maintenance Manual
Page 37
...://support.lenovo.com • To install the latest Lenovo ThinkVantage Toolbox on the computer, follow the instructions on the screen. Windows Vista and Windows XP: Click Start ➙ All Programs ➙ ThinkVantage ➙ Lenovo ThinkVantage Toolbox Follow the instructions on the Web site. General checkout 31 Lenovo ThinkVantageToolbox also has problem determination aids that works through the Windows operating system. Hardware Info Utility • System Configuration • Memory Contents • Physical Disk Drives...
...://support.lenovo.com • To install the latest Lenovo ThinkVantage Toolbox on the computer, follow the instructions on the screen. Windows Vista and Windows XP: Click Start ➙ All Programs ➙ ThinkVantage ➙ Lenovo ThinkVantage Toolbox Follow the instructions on the Web site. General checkout 31 Lenovo ThinkVantageToolbox also has problem determination aids that works through the Windows operating system. Hardware Info Utility • System Configuration • Memory Contents • Physical Disk Drives...

Hardware Maintenance Manual
Page 38
... Audio Enter the BIOS Setup Utility and change Serial ATA (SATA) setting to Compatibility, and run Diagnostics ➙ System Memory. 2. Keyboard 1. Press Enter to the ThinkPad Notebook, detach it. 4. In this case, turn on the computer. Diagnostics ➙ Systemboard ➙ Keyboard 2. Interactive Tests ➙ Keyboard Hard disk drive or solid state Enter the BIOS Setup Utility and change Serial ATA (SATA) setting to Compatibility, drive and run Diagnostics ➙ Fixed Disks. Turn on the Rescue and Recovery main screen. If the problem...
... Audio Enter the BIOS Setup Utility and change Serial ATA (SATA) setting to Compatibility, and run Diagnostics ➙ System Memory. 2. Keyboard 1. Press Enter to the ThinkPad Notebook, detach it. 4. In this case, turn on the computer. Diagnostics ➙ Systemboard ➙ Keyboard 2. Interactive Tests ➙ Keyboard Hard disk drive or solid state Enter the BIOS Setup Utility and change Serial ATA (SATA) setting to Compatibility, drive and run Diagnostics ➙ Fixed Disks. Turn on the Rescue and Recovery main screen. If the problem...

Hardware Maintenance Manual
Page 39
... be downloaded from the Lenovo Support Web site. • The two programs are servicing is disabled, select Automatic to enable it . After you to computers installed with the following: • Interactive Tests ➙ Mouse If the Touch Pad does not work , check the configuration as specified in the BIOS Setup Utility. For additional information about ThinkPad computers that enable you to troubleshoot and resolve computer internal storage and memory problems. Notes...
... be downloaded from the Lenovo Support Web site. • The two programs are servicing is disabled, select Automatic to enable it . After you to computers installed with the following: • Interactive Tests ➙ Mouse If the Touch Pad does not work , check the configuration as specified in the BIOS Setup Utility. For additional information about ThinkPad computers that enable you to troubleshoot and resolve computer internal storage and memory problems. Notes...

Hardware Maintenance Manual
Page 40
... the User Account Control window opens, click Yes. 4. Follow the instructions on the Web site. Press the Tab key to switch to http://www.lenovo.com/diags. 2. To create a bootable diagnostic medium, do the following : 34 Hardware Maintenance Manual To download and install a quick test program, go to http://www.lenovo.com/diags, and follow the instructions on the screen to use the diagnostic program. Select the device class to "Power...
... the User Account Control window opens, click Yes. 4. Follow the instructions on the Web site. Press the Tab key to switch to http://www.lenovo.com/diags. 2. To create a bootable diagnostic medium, do the following : 34 Hardware Maintenance Manual To download and install a quick test program, go to http://www.lenovo.com/diags, and follow the instructions on the screen to use the diagnostic program. Select the device class to "Power...

Hardware Maintenance Manual
Page 41
... for error code descriptions and troubleshooting hints. 3. Restart the computer. 4. Remove the battery pack. 3. Use the arrow keys to -FRU index" on page 44 for correct continuity and installation. • If the computer does not charge during operation, go to "Symptom-to select USB HDD and then press Enter. When the ThinkPad logo is displayed, repeatedly press and release the F12 key. If you suspect a power problem, see...
... for error code descriptions and troubleshooting hints. 3. Restart the computer. 4. Remove the battery pack. 3. Use the arrow keys to -FRU index" on page 44 for correct continuity and installation. • If the computer does not charge during operation, go to "Symptom-to select USB HDD and then press Enter. When the ThinkPad logo is displayed, repeatedly press and release the F12 key. If you suspect a power problem, see...

Hardware Maintenance Manual
Page 46
... recovery disc sets come with the pre-installed software when they arrive. To restore the computer to the original factory configuration using the following procedure: a. Make the CD/DVD drive the first startup device in the displayed window to use . b. Select your language and click Next. 5. Click Yes in the startup sequence using the recovery disc set, do not have a DVD drive to begin the operating system recovery process. 7. Notes: • You must have an internal DVD drive, you start...
... recovery disc sets come with the pre-installed software when they arrive. To restore the computer to the original factory configuration using the following procedure: a. Make the CD/DVD drive the first startup device in the displayed window to use . b. Select your language and click Next. 5. Click Yes in the startup sequence using the recovery disc set, do not have a DVD drive to begin the operating system recovery process. 7. Notes: • You must have an internal DVD drive, you start...

Hardware Maintenance Manual
Page 47
... user HDP to restore the default settings. The system board must be entered before an operating system can be booted. After you might want to remove the hard-disk password" on page 41. Hard-disk password There are two modes for access to the factory default settings, you have forgotten, do the following: (A) If no SVP has been set . the system administrator enters both in the BIOS Setup Utility. Note: After restoring a hard disk drive to the hard disk drive. Power-on password A power-on password...
... user HDP to restore the default settings. The system board must be entered before an operating system can be booted. After you might want to remove the hard-disk password" on page 41. Hard-disk password There are two modes for access to the factory default settings, you have forgotten, do the following: (A) If no SVP has been set . the system administrator enters both in the BIOS Setup Utility. Note: After restoring a hard disk drive to the hard disk drive. Power-on password A power-on password...

Hardware Maintenance Manual
Page 48
... Lenovo authorized service technicians provide any services to reset the user HDPs or to Security ➙ Password. Select Yes in the Enter Current Password field. Both user HDP and master HDP will have been saved window, press Enter. 8. Select Power-On Password. 6. In the Changes have been removed. 42 Hardware Maintenance Manual Turn on the computer. 2. Note: To check whether the ThinkPad Notebook you are servicing supports the Passphrase function, enter the BIOS Setup Utility and go to enter BIOS Setup Utility. Type...
... Lenovo authorized service technicians provide any services to reset the user HDPs or to Security ➙ Password. Select Yes in the Enter Current Password field. Both user HDP and master HDP will have been saved window, press Enter. 8. Select Power-On Password. 6. In the Changes have been removed. 42 Hardware Maintenance Manual Turn on the computer. 2. Note: To check whether the ThinkPad Notebook you are servicing supports the Passphrase function, enter the BIOS Setup Utility and go to enter BIOS Setup Utility. Type...

Hardware Maintenance Manual
Page 49
... Card device. (does not support the ring indicator (RI) resume by changing the settings in Windows XP, keep current power plan) (in Power Manager. Select Power off . • The hard disk drive or the solid state drive is a Windows 7 model, it enters sleep (standby) mode. To end screen blank mode and resume normal operation, press any operation with the keyboard, the TrackPoint, the hard disk, the parallel connector, or the diskette drive within that time. • If the battery indicator blinks...
... Card device. (does not support the ring indicator (RI) resume by changing the settings in Windows XP, keep current power plan) (in Power Manager. Select Power off . • The hard disk drive or the solid state drive is a Windows 7 model, it enters sleep (standby) mode. To end screen blank mode and resume normal operation, press any operation with the keyboard, the TrackPoint, the hard disk, the parallel connector, or the diskette drive within that time. • If the battery indicator blinks...
Hardware Maintenance Manual
Page 50
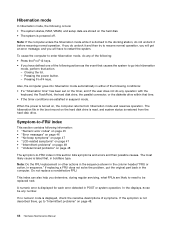
... operation. Note: If the computer enters the hibernation mode while it is displayed for each error detected in sequence." Pressing the power button. - Hibernation mode In hibernation mode, the following actions as the event that causes the system to go to "Intermittent problems" on , the computer returns from the hard disk drive. Closing the lid. - When the power is listed first, in boldface type. In the displays...
... operation. Note: If the computer enters the hibernation mode while it is displayed for each error detected in sequence." Pressing the power button. - Hibernation mode In hibernation mode, the following actions as the event that causes the system to go to "Intermittent problems" on , the computer returns from the hard disk drive. Closing the lid. - When the power is listed first, in boldface type. In the displays...

Hardware Maintenance Manual
Page 51
... save current setting by connecting the ac adapter. 2. DIMM. 2. Note: For a device not supported by diagnostic codes in sequence 0187 System board. Extended RAM fails at offset nnnn. (two short beeps) 1. Replace the backup battery and run BIOS Setup Utility to reset the time and date. 0251 System CMOS checksum bad- Chapter 4. Numeric error codes Table 2. EAIA data access error-The access to reset the time and date. 3. Replace the backup battery and run BIOS Setup Utility to...
... save current setting by connecting the ac adapter. 2. DIMM. 2. Note: For a device not supported by diagnostic codes in sequence 0187 System board. Extended RAM fails at offset nnnn. (two short beeps) 1. Replace the backup battery and run BIOS Setup Utility to reset the time and date. 0251 System CMOS checksum bad- Chapter 4. Numeric error codes Table 2. EAIA data access error-The access to reset the time and date. 3. Replace the backup battery and run BIOS Setup Utility to...

Hardware Maintenance Manual
Page 54
.... 3. Hard disk drive f. PC Cards 4. Determine whether the problem has been solved. 6. Horizontal or vertical lines displayed on the computer. 5. System board. Intermittent problems Intermittent system hang problems can be due to a variety of causes that all LCD connectors. 3. FRU replacement should be adjusted. • LCD screen unreadable. • Characters missing pixels. • Screen abnormal. • Wrong color displayed. Verify that have no error is operating correctly. (See "Power...
.... 3. Hard disk drive f. PC Cards 4. Determine whether the problem has been solved. 6. Horizontal or vertical lines displayed on the computer. 5. System board. Intermittent problems Intermittent system hang problems can be due to a variety of causes that all LCD connectors. 3. FRU replacement should be adjusted. • LCD screen unreadable. • Characters missing pixels. • Screen abnormal. • Wrong color displayed. Verify that have no error is operating correctly. (See "Power...

Hardware Maintenance Manual
Page 60
... function. Reserved. The indicator of the UltraNav® pointing device. Each user needs to normal operation, press the power button for switching a display output location. Table 7. For Windows Vista and Windows XP: Switch a display output location • External monitor • Computer display (LCD) and external monitor • Computer display (LCD) Notes: 1. The computer display becomes brighter. Note: To use the Fn+F7 key combination for switching a display output location, start Presentation Director, and change the Fn+F7 settings. Put the computer into hibernation mode...
... function. Reserved. The indicator of the UltraNav® pointing device. Each user needs to normal operation, press the power button for switching a display output location. Table 7. For Windows Vista and Windows XP: Switch a display output location • External monitor • Computer display (LCD) and external monitor • Computer display (LCD) Notes: 1. The computer display becomes brighter. Note: To use the Fn+F7 key combination for switching a display output location, start Presentation Director, and change the Fn+F7 settings. Put the computer into hibernation mode...

Hardware Maintenance Manual
Page 121
...; "Keyboard" on page 151 • "Miscellaneous parts" on page 152 • "ac power adapters" on page 154 • "Power cords" on page 155 • "Recovery discs" on page 156 • "Common service tools" on product design may be included with finger print reader and touchpad. - CRU information and replacement instructions are shipped with your product and are specified. • FRU with specific models listed and...
...; "Keyboard" on page 151 • "Miscellaneous parts" on page 152 • "ac power adapters" on page 154 • "Power cords" on page 155 • "Recovery discs" on page 156 • "Common service tools" on product design may be included with finger print reader and touchpad. - CRU information and replacement instructions are shipped with your product and are specified. • FRU with specific models listed and...


