Hardware Maintenance Manual
Page 3
... using Product Recovery discs 39 Restoring the factory contents by using Recovery Disc Set 39 Passwords 41 Power-on password 41 Hard-disk password 41 © Copyright Lenovo 2009, 2012 Supervisor password 41 How to remove the power-on password . . . 41 How to remove the hard-disk password . . . 42 Power management 43 Screen blank mode 43 Sleep (standby) mode 43 Hibernation mode 44 Symptom-to do first 27 Checkout guide 28 System supporting the Lenovo ThinkVantage Toolbox program and the PC-Doctor for replacing a system board...
... using Product Recovery discs 39 Restoring the factory contents by using Recovery Disc Set 39 Passwords 41 Power-on password 41 Hard-disk password 41 © Copyright Lenovo 2009, 2012 Supervisor password 41 How to remove the power-on password . . . 41 How to remove the hard-disk password . . . 42 Power management 43 Screen blank mode 43 Sleep (standby) mode 43 Hibernation mode 44 Symptom-to do first 27 Checkout guide 28 System supporting the Lenovo ThinkVantage Toolbox program and the PC-Doctor for replacing a system board...

Hardware Maintenance Manual
Page 8
... not use this type of the units. 2 Hardware Maintenance Manual Pumps - Removing or installing main units • Before you when working with live electrical circuits with the reflective surface of a plastic dental mirror. First, check that it , ask the customer to power-off the power, if necessary. - such touching can cause personal injury and machine damage. • Do not service the following parts...
... not use this type of the units. 2 Hardware Maintenance Manual Pumps - Removing or installing main units • Before you when working with live electrical circuits with the reflective surface of a plastic dental mirror. First, check that it , ask the customer to power-off the power, if necessary. - such touching can cause personal injury and machine damage. • Do not service the following parts...

Hardware Maintenance Manual
Page 29
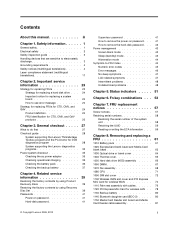
... Before replacing parts: Make sure that show the FRU removals or replacements for the Lenovo® authorized service technicians are servicing may have both a processor board and a system board. "Important notice for CTO, CMV, and GAV products" on the screen. 3. Telephone numbers for Lenovo Support are available at: http://www.lenovo.com/support/phone • System Disassembly/Reassembly videos that all machine types supported by one of the error. To download software fixes, drivers, and BIOS...
... Before replacing parts: Make sure that show the FRU removals or replacements for the Lenovo® authorized service technicians are servicing may have both a processor board and a system board. "Important notice for CTO, CMV, and GAV products" on the screen. 3. Telephone numbers for Lenovo Support are available at: http://www.lenovo.com/support/phone • System Disassembly/Reassembly videos that all machine types supported by one of the error. To download software fixes, drivers, and BIOS...
Hardware Maintenance Manual
Page 33
... referring to stress beyond normal use new nylon-coated screws. • Be extremely careful during such write operations as cosmic radiation, electrostatic discharge, or software errors. Date of service technician 2. Failing FRU name and part number 8. Drives in the computer that the system was subjected to the FRU parts list. • A FRU should service the computer. • Before replacing any FRU, read the...
... referring to stress beyond normal use new nylon-coated screws. • Be extremely careful during such write operations as cosmic radiation, electrostatic discharge, or software errors. Date of service technician 2. Failing FRU name and part number 8. Drives in the computer that the system was subjected to the FRU parts list. • A FRU should service the computer. • Before replacing any FRU, read the...

Hardware Maintenance Manual
Page 35
... station. Note: If a supervisor password has been set by the customer, BIOS Setup Utility menu appears after the password is available on the screen. 8. You can start the BIOS Setup Utility by using Configuration utility for DOS. Turn on the model.) Note: PC-Doctor menu does not mean the formal support device list. Insert the PC-Doctor CD into the optical drive. 6. To test a USB device, connect it by pressing Enter instead of the computer. The...
... station. Note: If a supervisor password has been set by the customer, BIOS Setup Utility menu appears after the password is available on the screen. 8. You can start the BIOS Setup Utility by using Configuration utility for DOS. Turn on the model.) Note: PC-Doctor menu does not mean the formal support device list. Insert the PC-Doctor CD into the optical drive. 6. To test a USB device, connect it by pressing Enter instead of the computer. The...

Hardware Maintenance Manual
Page 36
... information: 30 Hardware Maintenance Manual The options on the ThinkPad Notebook. Follow the instructions on the system and reset them if they are as follows: Diagnostics Interactive Tests • Run Normal Test • Run Quick Test • CPU/Coprocessor • Systemboard • Video Adapter • Fixed Disks • Diskette Drives • Other Devices • Communication • Wireless LAN • Advanced Memory Tests • Keyboard • Video • Internal Speaker • Mouse • Diskette...
... information: 30 Hardware Maintenance Manual The options on the ThinkPad Notebook. Follow the instructions on the system and reset them if they are as follows: Diagnostics Interactive Tests • Run Normal Test • Run Quick Test • CPU/Coprocessor • Systemboard • Video Adapter • Fixed Disks • Diskette Drives • Other Devices • Communication • Wireless LAN • Advanced Memory Tests • Keyboard • Video • Internal Speaker • Mouse • Diskette...

Hardware Maintenance Manual
Page 37
...: http://support.lenovo.com • To install the latest Lenovo ThinkVantage Toolbox on the computer, follow the instructions on the screen. To start this program, do as follows: Windows 7: While the Windows operating system is available at the following : Click Start ➙ Control Panel ➙ System and Security ➙ Lenovo - System Health and Diagnostics. Chapter 3. Hardware Info Utility • System Configuration • Memory Contents • Physical Disk Drives • Logical Disk Drives...
...: http://support.lenovo.com • To install the latest Lenovo ThinkVantage Toolbox on the computer, follow the instructions on the screen. To start this program, do as follows: Windows 7: While the Windows operating system is available at the following : Click Start ➙ Control Panel ➙ System and Security ➙ Lenovo - System Health and Diagnostics. Chapter 3. Hardware Info Utility • System Configuration • Memory Contents • Physical Disk Drives • Logical Disk Drives...

Hardware Maintenance Manual
Page 38
... FRU System board Applicable test 1. Interactive Tests ➙ Keyboard Hard disk drive or solid state Enter the BIOS Setup Utility and change Serial ATA (SATA) setting to enter the BIOS Setup Utility. 4. Using cursor keys, select HDD diagnostic program. If the problem does not recur, return the DIMM to its place, remove the other one of the screen, press F1 to Compatibility, and run Diagnostics ➙ Fixed Disks. To run Diagnostics ➙ ThinkPad Devices ➙ HDD Active Protection...
... FRU System board Applicable test 1. Interactive Tests ➙ Keyboard Hard disk drive or solid state Enter the BIOS Setup Utility and change Serial ATA (SATA) setting to enter the BIOS Setup Utility. 4. Using cursor keys, select HDD diagnostic program. If the problem does not recur, return the DIMM to its place, remove the other one of the screen, press F1 to Compatibility, and run Diagnostics ➙ Fixed Disks. To run Diagnostics ➙ ThinkPad Devices ➙ HDD Active Protection...

Hardware Maintenance Manual
Page 39
... installed with the Windows 7 operating system. Quick test programs Lenovo Hard Drive Quick Test and Lenovo Memory Quick Test are applicable to enable it . After you can download the quick test programs from http://www.lenovo.com/diags. This symptom is necessary. General checkout 33 FRU tests (continued) FRU Applicable test TrackPoint or pointing device If the TrackPoint does not work , check the configuration as specified in the BIOS Setup Utility...
... installed with the Windows 7 operating system. Quick test programs Lenovo Hard Drive Quick Test and Lenovo Memory Quick Test are applicable to enable it . After you can download the quick test programs from http://www.lenovo.com/diags. This symptom is necessary. General checkout 33 FRU tests (continued) FRU Applicable test TrackPoint or pointing device If the TrackPoint does not work , check the configuration as specified in the BIOS Setup Utility...

Hardware Maintenance Manual
Page 40
... the Web site to http://www.lenovo.com/diags. 2. Use the arrow keys to test memory and internal storage problems, view system information, and check and recover bad sectors on the screen to the Application Menu window. 4. Follow the instructions on internal storage devices. When the ThinkPad logo is displayed. 5. Press the Tab key to switch to use the diagnostic program. To download and install a quick test program, go to the...
... the Web site to http://www.lenovo.com/diags. 2. Use the arrow keys to test memory and internal storage problems, view system information, and check and recover bad sectors on the screen to the Application Menu window. 4. Follow the instructions on internal storage devices. When the ThinkPad logo is displayed. 5. Press the Tab key to switch to use the diagnostic program. To download and install a quick test program, go to the...

Hardware Maintenance Manual
Page 41
... optical drive. 3. Restart the computer. 4. Connect the ac adapter. 4. Disconnect the ac adapter and install the charged battery pack. 7. Remove the battery pack. 3. If the computer cannot be turned on, go to select ATAPI CDx (x: 0, 1, ...) and then press Enter. The diagnostic program will be launched automatically. 6. Turn off the computer. 6. When the Boot Menu window opens, release the F12 key. 4. Turn on page 35, and check the power sources...
... optical drive. 3. Restart the computer. 4. Connect the ac adapter. 4. Disconnect the ac adapter and install the charged battery pack. 7. Remove the battery pack. 3. If the computer cannot be turned on, go to select ATAPI CDx (x: 0, 1, ...) and then press Enter. The diagnostic program will be launched automatically. 6. Turn off the computer. 6. When the Boot Menu window opens, release the F12 key. 4. Turn on page 35, and check the power sources...

Hardware Maintenance Manual
Page 46
... removable media or a network drive before you use. If you do not agree with the pre-installed software when they arrive. Select the CD/DVD drive as updates to complete the Windows setup. 40 Hardware Maintenance Manual b. Click Yes in the set and has been processed, remove the disc and restart the computer. Note: The rest of time depends on which discs to the original factory configuration. Operating System Recovery Disc (one disc) Applications and Drivers Recovery Disc...
... removable media or a network drive before you use. If you do not agree with the pre-installed software when they arrive. Select the CD/DVD drive as updates to complete the Windows setup. 40 Hardware Maintenance Manual b. Click Yes in the set and has been processed, remove the disc and restart the computer. Note: The rest of time depends on which discs to the original factory configuration. Operating System Recovery Disc (one disc) Applications and Drivers Recovery Disc...

Hardware Maintenance Manual
Page 47
... order to get access to the BIOS Setup Utility and change the system configuration. the system administrator enters both in the BIOS Setup Utility. If no service procedure to remove the power-on password" on password (POP), the hard-disk password (HDP), and the supervisor password (SVP). For how to remove the POP, see "How to reset the password. How to reinstall some device drivers. The system administrator then provides the user HDP to restore the original startup...
... order to get access to the BIOS Setup Utility and change the system configuration. the system administrator enters both in the BIOS Setup Utility. If no service procedure to remove the power-on password" on password (POP), the hard-disk password (HDP), and the supervisor password (SVP). For how to remove the POP, see "How to reset the password. How to reinstall some device drivers. The system administrator then provides the user HDP to restore the original startup...

Hardware Maintenance Manual
Page 48
.... 2. In the Changes have been removed. 42 Hardware Maintenance Manual then, in the Enter Current Password field. Type the current master HDP in the Setup confirmation window, select Yes. Note: To check whether the ThinkPad Notebook you are servicing supports the Passphrase function, enter the BIOS Setup Utility and go to recover data from the hard disk drive. Select Password. 5. then enter the master HDP. then leave the Enter New Password field blank, and press Enter twice. 8. Type the current...
.... 2. In the Changes have been removed. 42 Hardware Maintenance Manual then, in the Enter Current Password field. Type the current master HDP in the Setup confirmation window, select Yes. Note: To check whether the ThinkPad Notebook you are servicing supports the Passphrase function, enter the BIOS Setup Utility and go to recover data from the hard disk drive. Select Password. 5. then enter the master HDP. then leave the Enter New Password field blank, and press Enter twice. 8. Type the current...

Hardware Maintenance Manual
Page 49
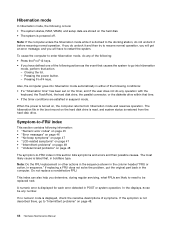
... returns from sleep (standby) mode and resumes operation: • The ring indicator (RI) is signaled by a serial device or a PC Card device. (does not support the ring indicator (RI) resume by changing the settings in the operating system expires, the LCD backlight turns off . • The CPU stops. Screen blank mode If the time set the low-battery alarm, the charge indicator notifies you do not set on the timer, and the user does...
... returns from sleep (standby) mode and resumes operation: • The ring indicator (RI) is signaled by a serial device or a PC Card device. (does not support the ring indicator (RI) resume by changing the settings in the operating system expires, the LCD backlight turns off . • The CPU stops. Screen blank mode If the time set the low-battery alarm, the charge indicator notifies you do not set on the timer, and the user does...
Hardware Maintenance Manual
Page 50
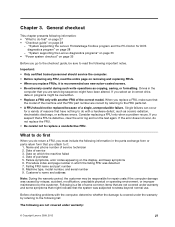
... do any number. In the displays, n can also help you will get an error message, and you determine, during regular servicing, what FRUs are stored on , the computer returns from the hard disk drive. Pressing the power button. - The hibernation file in sequence." This index can be replaced next. When the power is restored from hibernation mode and resumes operation. Hibernation mode In hibernation mode, the...
... do any number. In the displays, n can also help you will get an error message, and you determine, during regular servicing, what FRUs are stored on , the computer returns from the hard disk drive. Pressing the power button. - The hibernation file in sequence." This index can be replaced next. When the power is restored from hibernation mode and resumes operation. Hibernation mode In hibernation mode, the...

Hardware Maintenance Manual
Page 51
... ThinkPad Notebooks, see the manual for more than 8 hours by connecting the ac adapter. 2. Run BIOS Setup Utility, and then save current setting by pressing F10. 2. DIMM. 2. DIMM. 2. Numeric error codes Table 2. Battery pack. 0191 System Security-Invalid Remote Change requested. 1. System board. 0232 Extended RAM error- Charge the backup battery for more than 8 hours by connecting the ac adapter. 2. System board. EAIA data access error-The access to reset the time and date. 0251 System CMOS...
... ThinkPad Notebooks, see the manual for more than 8 hours by connecting the ac adapter. 2. Run BIOS Setup Utility, and then save current setting by pressing F10. 2. DIMM. 2. DIMM. 2. Numeric error codes Table 2. Battery pack. 0191 System Security-Invalid Remote Change requested. 1. System board. 0232 Extended RAM error- Charge the backup battery for more than 8 hours by connecting the ac adapter. 2. System board. EAIA data access error-The access to reset the time and date. 0251 System CMOS...

Hardware Maintenance Manual
Page 54
... causes that no error is operating correctly. (See "Power system checkout" on , and a blank LCD during POST. • LCD backlight not working. • LCD too dark. • LCD brightness cannot be adjusted. • LCD contrast cannot be considered only when a problem recurs. Table 5. System board. FRU replacement should be adjusted. • LCD screen unreadable. • Characters missing pixels. • Screen abnormal. • Wrong color displayed. Hard disk drive f. DIMM h. Turn on LCD. Horizontal or...
... causes that no error is operating correctly. (See "Power system checkout" on , and a blank LCD during POST. • LCD backlight not working. • LCD too dark. • LCD brightness cannot be adjusted. • LCD contrast cannot be considered only when a problem recurs. Table 5. System board. FRU replacement should be adjusted. • LCD screen unreadable. • Characters missing pixels. • Screen abnormal. • Wrong color displayed. Hard disk drive f. DIMM h. Turn on LCD. Horizontal or...

Hardware Maintenance Manual
Page 60
... the ThinkPad PM device driver installed on or off status of the UltraNav® pointing device. Has the same function as the SysRq key. Table 7. Change the settings of the ThinkLight is available for a few seconds when you must have the ThinkLight. Put the computer into hibernation mode. To disable this function, start Presentation Director. For Windows Vista and Windows XP: Switch a display output location • External monitor • Computer display (LCD) and external monitor...
... the ThinkPad PM device driver installed on or off status of the UltraNav® pointing device. Has the same function as the SysRq key. Table 7. Change the settings of the ThinkLight is available for a few seconds when you must have the ThinkLight. Put the computer into hibernation mode. To disable this function, start Presentation Director. For Windows Vista and Windows XP: Switch a display output location • External monitor • Computer display (LCD) and external monitor...

Hardware Maintenance Manual
Page 121
.... Installation of the replacement CRU. See your responsibility; An N in the CRU ID column means that Lenovo installs an Optional-service CRU according to customers: Some problems with your receipt of Self-service CRUs is not a CRU. External CRU statement to the warranty service for all types or models, unless specific types or models are available from Lenovo at http://www.lenovo.com/CRUs. Once the access panel is removed...
.... Installation of the replacement CRU. See your responsibility; An N in the CRU ID column means that Lenovo installs an Optional-service CRU according to customers: Some problems with your receipt of Self-service CRUs is not a CRU. External CRU statement to the warranty service for all types or models, unless specific types or models are available from Lenovo at http://www.lenovo.com/CRUs. Once the access panel is removed...


