Hardware Maintenance Manual
Page 3
... serial numbers 58 Restoring the serial number of the system unit 58 Retaining the UUID 59 Reading or writing the ECA information . . . 59 Chapter 8. General checkout . . . . . 27 What to use error message 24 Strategy for replacing FRUs for CTO, CMV, and GAV 24 Product definition 24 FRU identification for wireless LAN . . 78 1130 Backup battery 80 1140 Bluetooth daughter card (BDC-2) . . . . . 80 1150 Media Card Reader slot board and Media Card Reader cable...
... serial numbers 58 Restoring the serial number of the system unit 58 Retaining the UUID 59 Reading or writing the ECA information . . . 59 Chapter 8. General checkout . . . . . 27 What to use error message 24 Strategy for replacing FRUs for CTO, CMV, and GAV 24 Product definition 24 FRU identification for wireless LAN . . 78 1130 Backup battery 80 1140 Bluetooth daughter card (BDC-2) . . . . . 80 1150 Media Card Reader slot board and Media Card Reader cable...

Hardware Maintenance Manual
Page 8
... ensures correct grounding of mat to protect yourself from a circuit. When using testers, set the controls correctly and use this type of the units. 2 Hardware Maintenance Manual Blowers and fans - Motor generators - Stand on when they are in a machine: - such touching can occur only when there is conductive; Pumps - Removing or installing main units • Before you may prevent a current from passing...
... ensures correct grounding of mat to protect yourself from a circuit. When using testers, set the controls correctly and use this type of the units. 2 Hardware Maintenance Manual Blowers and fans - Motor generators - Stand on when they are in a machine: - such touching can occur only when there is conductive; Pumps - Removing or installing main units • Before you may prevent a current from passing...

Hardware Maintenance Manual
Page 29
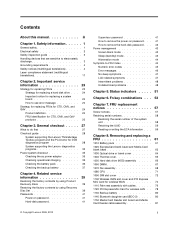
...-detect button on the screen and install the necessary software. Important service information This chapter presents following strategy to prevent unnecessary expense for replacing and servicing FRUs: • If you are instructed to all software fixes, drivers, and BIOS downloads are instructed to use error message" on page 24 • "Strategy for replacing FRUs for replacing a system board" on page 24 - Follow the directions on the screen. 3. Before replacing the adapter or device, remove...
...-detect button on the screen and install the necessary software. Important service information This chapter presents following strategy to prevent unnecessary expense for replacing and servicing FRUs: • If you are instructed to all software fixes, drivers, and BIOS downloads are instructed to use error message" on page 24 • "Strategy for replacing FRUs for replacing a system board" on page 24 - Follow the directions on the screen. 3. Before replacing the adapter or device, remove...
Hardware Maintenance Manual
Page 33
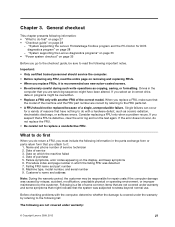
..., accident, modification, unsuitable physical or operating environment, or improper maintenance by referring to replace a nondefective FRU. Name and phone number of service 3. Failure symptoms, error codes appearing on page 28 - Before checking problems with another FRU of purchase 5. Date of the correct model. Date on removing and replacing FRUs. • When you select an incorrect drive, data or programs might have nothing...
..., accident, modification, unsuitable physical or operating environment, or improper maintenance by referring to replace a nondefective FRU. Name and phone number of service 3. Failure symptoms, error codes appearing on page 28 - Before checking problems with another FRU of purchase 5. Date of the correct model. Date on removing and replacing FRUs. • When you select an incorrect drive, data or programs might have nothing...

Hardware Maintenance Manual
Page 35
...-Doctor CD into the optical drive. 6. The main panel of any optical disc drives connected through USB devices, PC cards, CardBus cards, or similar. To run the test, do as the serial port. Follow the instructions on the model.) Note: PC-Doctor menu does not mean the formal support device list. Note: If a supervisor password has been set by the customer, BIOS Setup Utility menu appears after the password is installed to the computer you...
...-Doctor CD into the optical drive. 6. The main panel of any optical disc drives connected through USB devices, PC cards, CardBus cards, or similar. To run the test, do as the serial port. Follow the instructions on the model.) Note: PC-Doctor menu does not mean the formal support device list. Note: If a supervisor password has been set by the customer, BIOS Setup Utility menu appears after the password is installed to the computer you...

Hardware Maintenance Manual
Page 36
.... • Video Adapter test supports only the LCD display on the screen. The options on the system and reset them if they are as follows: Diagnostics Interactive Tests • Run Normal Test • Run Quick Test • CPU/Coprocessor • Systemboard • Video Adapter • Fixed Disks • Diskette Drives • Other Devices • Communication • Wireless LAN • Advanced Memory Tests • Keyboard • Video • Internal Speaker • Mouse • Diskette...
.... • Video Adapter test supports only the LCD display on the screen. The options on the system and reset them if they are as follows: Diagnostics Interactive Tests • Run Normal Test • Run Quick Test • CPU/Coprocessor • Systemboard • Video Adapter • Fixed Disks • Diskette Drives • Other Devices • Communication • Wireless LAN • Advanced Memory Tests • Keyboard • Video • Internal Speaker • Mouse • Diskette...

Hardware Maintenance Manual
Page 37
... Start ➙ Control Panel ➙ System and Security ➙ Lenovo - To run the PC-Doctor program to test the hardware features of ThinkPad Notebook, the Rescue and Recovery® workspace enables you to run this program, see the Help for the program. Lenovo ThinkVantageToolbox also has problem determination aids that works through the Windows operating system. Hardware Info Utility • System Configuration • Memory Contents • Physical Disk Drives •...
... Start ➙ Control Panel ➙ System and Security ➙ Lenovo - To run the PC-Doctor program to test the hardware features of ThinkPad Notebook, the Rescue and Recovery® workspace enables you to run this program, see the Help for the program. Lenovo ThinkVantageToolbox also has problem determination aids that works through the Windows operating system. Hardware Info Utility • System Configuration • Memory Contents • Physical Disk Drives •...

Hardware Maintenance Manual
Page 38
... BIOS Setup Utility, do as follows: 1. Using cursor keys, select Main hard disk drive or Ultrabay hard disk drive. 6. While the message, "To interrupt normal startup, press the blue ThinkVangate button," is running. Diskette drive 1. Interactive Tests ➙ Video Audio Enter the BIOS Setup Utility and change Serial ATA (SATA) setting to the ThinkPad Notebook, detach it. 4. Then, run Diagnostics ➙ ThinkPad Devices ➙ HDD Active Protection Test. Press enter. 5. Diagnostics ➙ Diskette Drives 2. If two DIMMs are installed, remove one of the screen...
... BIOS Setup Utility, do as follows: 1. Using cursor keys, select Main hard disk drive or Ultrabay hard disk drive. 6. While the message, "To interrupt normal startup, press the blue ThinkVangate button," is running. Diskette drive 1. Interactive Tests ➙ Video Audio Enter the BIOS Setup Utility and change Serial ATA (SATA) setting to the ThinkPad Notebook, detach it. 4. Then, run Diagnostics ➙ ThinkPad Devices ➙ HDD Active Protection Test. Press enter. 5. Diagnostics ➙ Diskette Drives 2. If two DIMMs are installed, remove one of the screen...

Hardware Maintenance Manual
Page 39
... work , check the configuration as specified in the BIOS Setup Utility. It also can download the quick test programs from http://www.lenovo.com/diags. To run the Lenovo Solution Center program, click Start ➙ Control Panel ➙ System and Security ➙ Lenovo - This drift can occur when a slight, steady pressure is disabled, select Automatic to the TrackPoint pointer. If the Touch Pad is applied to enable...
... work , check the configuration as specified in the BIOS Setup Utility. It also can download the quick test programs from http://www.lenovo.com/diags. To run the Lenovo Solution Center program, click Start ➙ Control Panel ➙ System and Security ➙ Lenovo - This drift can occur when a slight, steady pressure is disabled, select Automatic to the TrackPoint pointer. If the Touch Pad is applied to enable...

Hardware Maintenance Manual
Page 40
... the Tab key to switch to select Lenovo Diagnostics and then press Enter. Select the tests to test computer memory and internal storage devices, view system information, and check and recover the internal storage devices. To run a quick test using the downloaded program, do the following : 34 Hardware Maintenance Manual The bootable diagnostic programs enable you to be displayed. It enables you can create a bootable diagnostic medium on a USB device or CD...
... the Tab key to switch to select Lenovo Diagnostics and then press Enter. Select the tests to test computer memory and internal storage devices, view system information, and check and recover the internal storage devices. To run a quick test using the downloaded program, do the following : 34 Hardware Maintenance Manual The bootable diagnostic programs enable you to be displayed. It enables you can create a bootable diagnostic medium on a USB device or CD...

Hardware Maintenance Manual
Page 41
... select USB HDD and then press Enter. Connect the ac adapter. 4. To check the ac adapter, do the following : 1. General checkout 35 Follow the instructions on the screen to "Power system checkout" on page 35, and check the power sources. If an error code is displayed, repeatedly press and release the F12 key. When the Boot Menu window opens, release the F12 key. 5. Follow the instructions on the screen to "Checking operational charging...
... select USB HDD and then press Enter. Connect the ac adapter. 4. To check the ac adapter, do the following : 1. General checkout 35 Follow the instructions on the screen to "Power system checkout" on page 35, and check the power sources. If an error code is displayed, repeatedly press and release the F12 key. When the Boot Menu window opens, release the F12 key. 5. Follow the instructions on the screen to "Checking operational charging...

Hardware Maintenance Manual
Page 46
... the screen to the software that you want to begin the applications and drivers recovery process. 8. Use this disc to order, see http://www.lenovo.com/serviceparts-lookup.. This disc contains additional content, such as the 1st Boot Device. 2. Make the CD/DVD drive the first startup device in the set and has been processed, remove the disc and restart the computer. Follow the instructions on which discs to start the recovery process...
... the screen to the software that you want to begin the applications and drivers recovery process. 8. Use this disc to order, see http://www.lenovo.com/serviceparts-lookup.. This disc contains additional content, such as the 1st Boot Device. 2. Make the CD/DVD drive the first startup device in the set and has been processed, remove the disc and restart the computer. Follow the instructions on which discs to start the recovery process...

Hardware Maintenance Manual
Page 47
...: After restoring a hard disk drive to the factory default settings, you might need to the hard disk drive. The password must enter the SVP in order to get access to remove the power-on password" on page 41. The system administrator then provides the user HDP to the BIOS Setup Utility and change the system configuration. If no service procedure to restore the default settings. If any of these passwords has been set, a prompt for any services to reset either the user or...
...: After restoring a hard disk drive to the factory default settings, you might need to the hard disk drive. The password must enter the SVP in order to get access to remove the power-on password" on page 41. The system administrator then provides the user HDP to the BIOS Setup Utility and change the system configuration. If no service procedure to restore the default settings. If any of these passwords has been set, a prompt for any services to reset either the user or...

Hardware Maintenance Manual
Page 48
... appear. When the ThinkPad logo comes up, immediately press F1 to enter BIOS Setup Utility. For models supporting the Passphrase function, press F1 while HDP icon is available on the screen; Select Security, using the cursor directional keys to recover data from the hard disk drive. Type the current master HDP in the Setup Configuration window. 1. Select Password. 5. then leave the Enter New Password field blank, and press Enter twice. 8. Both user HDP and master...
... appear. When the ThinkPad logo comes up, immediately press F1 to enter BIOS Setup Utility. For models supporting the Passphrase function, press F1 while HDP icon is available on the screen; Select Security, using the cursor directional keys to recover data from the hard disk drive. Type the current master HDP in the Setup Configuration window. 1. Select Password. 5. then leave the Enter New Password field blank, and press Enter twice. 8. Both user HDP and master...

Hardware Maintenance Manual
Page 49
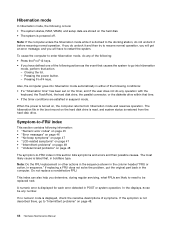
...; Press the Fn key. • Open the LCD cover. • Turn on the timer, and the user does not do not set on the power switch. To end screen blank mode and resume normal operation, press any action to reenter operation mode. In certain circumstances, the computer goes into sleep (standby) mode automatically: • If a "suspend time" has been set the low-battery alarm, the charge indicator notifies you do...
...; Press the Fn key. • Open the LCD cover. • Turn on the timer, and the user does not do not set on the power switch. To end screen blank mode and resume normal operation, press any action to reenter operation mode. In certain circumstances, the computer goes into sleep (standby) mode automatically: • If a "suspend time" has been set the low-battery alarm, the charge indicator notifies you do...
Hardware Maintenance Manual
Page 50
... 47 • "Intermittent problems" on page 48 • "Undetermined problems" on page 48. 44 Hardware Maintenance Manual Pressing the power button. - Do not replace a nondefective FRU. If you do any of the following : • Press the Fn+F12 keys. • If you determine, during regular servicing, what FRUs are likely to need to the docking station, do any number. The hibernation file...
... 47 • "Intermittent problems" on page 48 • "Undetermined problems" on page 48. 44 Hardware Maintenance Manual Pressing the power button. - Do not replace a nondefective FRU. If you do any of the following : • Press the Fn+F12 keys. • If you determine, during regular servicing, what FRUs are likely to need to the docking station, do any number. The hibernation file...

Hardware Maintenance Manual
Page 51
... adapter. 2. Replace the backup battery and run BIOS Setup Utility to reset the time and date. 3. Related service information 45 Battery pack. 0191 System Security-Invalid Remote Change requested. 1. Charge the backup battery for that device. Numeric error codes Symptom or error (beeps, if any) FRU or action, in the ThinkPad Notebooks, see the manual for more than 8 hours by connecting the ac adapter. 2. Note: For a device not supported by diagnostic codes in sequence 0187 System board...
... adapter. 2. Replace the backup battery and run BIOS Setup Utility to reset the time and date. 3. Related service information 45 Battery pack. 0191 System Security-Invalid Remote Change requested. 1. Charge the backup battery for that device. Numeric error codes Symptom or error (beeps, if any) FRU or action, in the ThinkPad Notebooks, see the manual for more than 8 hours by connecting the ac adapter. 2. Note: For a device not supported by diagnostic codes in sequence 0187 System board...

Hardware Maintenance Manual
Page 54
..., such as cosmic radiation, electrostatic discharge, or software errors. Battery pack e. External diskette drive or optical drive g. Table 5. See important note for damage. Reseat all attached devices are installed, or if the system simply is detected, do not replace a nondefective FRU): a. DIMM h. PC Cards 4. System board 48 Hardware Maintenance Manual Horizontal or vertical lines displayed on the computer. 5. Remove or disconnect all of the failure is...
..., such as cosmic radiation, electrostatic discharge, or software errors. Battery pack e. External diskette drive or optical drive g. Table 5. See important note for damage. Reseat all attached devices are installed, or if the system simply is detected, do not replace a nondefective FRU): a. DIMM h. PC Cards 4. System board 48 Hardware Maintenance Manual Horizontal or vertical lines displayed on the computer. 5. Remove or disconnect all of the failure is...

Hardware Maintenance Manual
Page 60
... function). 2. Each user needs to normal operation, press the power button for switching a display output location. Note: This function is available for less than four seconds. For Windows Vista and Windows XP: Switch a display output location • External monitor • Computer display (LCD) and external monitor • Computer display (LCD) Notes: 1. Reserved. To return to change the Fn+F7 settings. Turn the ThinkLight® on or off status of numeric lock will be displayed on the screen. 54 Hardware Maintenance Manual The computer display...
... function). 2. Each user needs to normal operation, press the power button for switching a display output location. Note: This function is available for less than four seconds. For Windows Vista and Windows XP: Switch a display output location • External monitor • Computer display (LCD) and external monitor • Computer display (LCD) Notes: 1. Reserved. To return to change the Fn+F7 settings. Turn the ThinkLight® on or off status of numeric lock will be displayed on the screen. 54 Hardware Maintenance Manual The computer display...

Hardware Maintenance Manual
Page 121
... secured by an access panel that ship with specific models listed and described as Optional-service CRUs. An N in the CRU ID column. A single asterisk (*) means that Lenovo installs an Optional-service CRU according to you may find a list of CRUs include the ac power adapter, power cord, battery, and hard disk drive. you may include the memory module, wireless card, keyboard, and palm rest with the replacement CRU; CRU information and replacement instructions are shipped with...
... secured by an access panel that ship with specific models listed and described as Optional-service CRUs. An N in the CRU ID column. A single asterisk (*) means that Lenovo installs an Optional-service CRU according to you may find a list of CRUs include the ac power adapter, power cord, battery, and hard disk drive. you may include the memory module, wireless card, keyboard, and palm rest with the replacement CRU; CRU information and replacement instructions are shipped with...


