
User Manual
Page 25
... for replacing FRUs Before replacing parts: Make sure that the latest BIOS is loaded to the system board before replacing any software fixes, drivers, and BIOS downloads. Go to contact the Customer Support Center at 800-426-7378 if they need assistance in Canada should call the ...If you are instructed to replace a FRU but the replacement does not correct the problem, reinstall the original FRU before you continue. © Copyright Lenovo 2007, 2008 17 "Important notice for CTO, CMV, and GAV products" on page 19 v "Important information about replacing RoHS compliant FRUs" on the...
... for replacing FRUs Before replacing parts: Make sure that the latest BIOS is loaded to the system board before replacing any software fixes, drivers, and BIOS downloads. Go to contact the Customer Support Center at 800-426-7378 if they need assistance in Canada should call the ...If you are instructed to replace a FRU but the replacement does not correct the problem, reinstall the original FRU before you continue. © Copyright Lenovo 2007, 2008 17 "Important notice for CTO, CMV, and GAV products" on page 19 v "Important information about replacing RoHS compliant FRUs" on the...
User Manual
Page 63
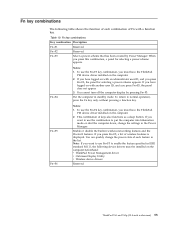
..., you must be installed on with another user ID, and you have logged on the computer beforehand: v ThinkPad Power Management driver v OnScreen Display Utility v Wireless device drivers Reserved. Enable or disable the built-in standby mode. Fn+F4 Notes: 1. You can quickly change the settings in the ... (15.4-inch widescreen) 55 Table 10. Fn+F2 Reserved. To use the Fn+F4 key combination, you must have the ThinkPad PM device driver installed on the computer. 2. Note: If you want to use Fn+F5 to enable the feature specified in IEEE standard 802.11, the...
..., you must be installed on with another user ID, and you have logged on the computer beforehand: v ThinkPad Power Management driver v OnScreen Display Utility v Wireless device drivers Reserved. Enable or disable the built-in standby mode. Fn+F4 Notes: 1. You can quickly change the settings in the ... (15.4-inch widescreen) 55 Table 10. Fn+F2 Reserved. To use the Fn+F4 key combination, you must have the ThinkPad PM device driver installed on the computer. 2. Note: If you want to use Fn+F5 to enable the feature specified in IEEE standard 802.11, the...

User Manual
Page 64
... has been attached to detach the computer from Mini Dock: This button is supported only on the ThinkPad computers that have the ThinkPad PM device driver installed on the computer display and the external monitor (the Extend desktop function). 2. Reserved. The computer display becomes dimmer. 56 ThinkPad T61 and T61p (15...
... has been attached to detach the computer from Mini Dock: This button is supported only on the ThinkPad computers that have the ThinkPad PM device driver installed on the computer display and the external monitor (the Extend desktop function). 2. Reserved. The computer display becomes dimmer. 56 ThinkPad T61 and T61p (15...

User Manual
Page 66
... country specifications. 58 ThinkPad T61 and T61p (15.4-inch widescreen) Hardware Maintenance Manual v Always use the correct screw. v Make sure that have a torque driver, refer to tighten. Read this problem is addressed with shock or vibration. If you have one. v Ensure torque screw...related to plastic Turn an additional 180 degrees after the screw head touches the surface of the plastic part: 90 degrees more (Cross-section) v Torque driver If you have the following when you service this machine: v Keep the screw kit (for each step. v They do not easily come loose, even...
... country specifications. 58 ThinkPad T61 and T61p (15.4-inch widescreen) Hardware Maintenance Manual v Always use the correct screw. v Make sure that have a torque driver, refer to tighten. Read this problem is addressed with shock or vibration. If you have one. v Ensure torque screw...related to plastic Turn an additional 180 degrees after the screw head touches the surface of the plastic part: 90 degrees more (Cross-section) v Torque driver If you have the following when you service this machine: v Keep the screw kit (for each step. v They do not easily come loose, even...


