User Guide
Page 3
... 2-5 Understanding power management 2-6 Caring for your option 1-5 Chapter 2. Notices B-1 Trademarks B-2 © Copyright Lenovo 2007,2008 iii Service and Support A-1 Online technical support A-1 Telephone technical support A-1 Worldwide telephone list A-1 Appendix B. Reference information 3-1 Monitor specifications 3-1 Troubleshooting 3-2 Manual image setup 3-3 Manually installing the monitor driver 3-4 Service information 3-6 Appendix A. Getting started 1-1 Shipping contents 1-1 Attaching the base and handling...
... 2-5 Understanding power management 2-6 Caring for your option 1-5 Chapter 2. Notices B-1 Trademarks B-2 © Copyright Lenovo 2007,2008 iii Service and Support A-1 Online technical support A-1 Telephone technical support A-1 Worldwide telephone list A-1 Appendix B. Reference information 3-1 Monitor specifications 3-1 Troubleshooting 3-2 Manual image setup 3-3 Manually installing the monitor driver 3-4 Service information 3-6 Appendix A. Getting started 1-1 Shipping contents 1-1 Attaching the base and handling...
User Guide
Page 5
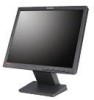
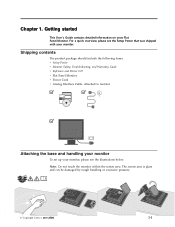
... excessive pressure. © Copyright Lenovo 2007,2008 1-1 Shipping contents The product package should include the following items: v Setup Poster v Monitor Safety, Troubleshooting, and Warranty Guide v Reference and Driver CD v Flat Panel Monitor v Power Cord v Analog Interface Cable- Attached to monitor Attaching the base and handling your monitor To set up your monitor, please see the Setup Poster...
... excessive pressure. © Copyright Lenovo 2007,2008 1-1 Shipping contents The product package should include the following items: v Setup Poster v Monitor Safety, Troubleshooting, and Warranty Guide v Reference and Driver CD v Flat Panel Monitor v Power Cord v Analog Interface Cable- Attached to monitor Attaching the base and handling your monitor To set up your monitor, please see the Setup Poster...
User Guide
Page 9
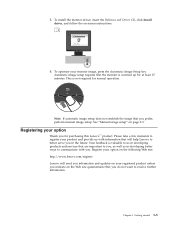
... for normal operation. Register your option on the following Web site: http://www.lenovo.com/register Lenovo will help Lenovo to receive further information. To install the monitor driver, insert the Reference and Driver CD, click Install driver, and follow the on page 3-3. Getting started 1-5 To optimize your option Thank...not establish the image that are important to you in developing better ways to communicate with information that the monitor is not required for purchasing this Lenovo™ product. Registering your monitor image, press the Automatic Image Setup key.
... for normal operation. Register your option on the following Web site: http://www.lenovo.com/register Lenovo will help Lenovo to receive further information. To install the monitor driver, insert the Reference and Driver CD, click Install driver, and follow the on page 3-3. Getting started 1-5 To optimize your option Thank...not establish the image that are important to you in developing better ways to communicate with information that the monitor is not required for purchasing this Lenovo™ product. Registering your monitor image, press the Automatic Image Setup key.
User Guide
Page 17
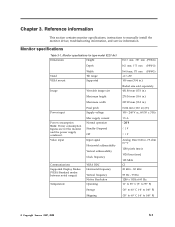
... 173 mm (PSWG) 366.8 mm; 371 mm -4°/+30° 100 mm (3.94 in.) (PSWG) Radial arm sold separately. 431.80 mm (17.0 in.) 270.34 mm (10.6 in.) 337.92 mm (13.3 in.) 0.264 mm (.010 in.) (V) 100 - 240 V ac, 60/...60° C (-4° to manually install the monitor driver, troubleshooting information, and service information. Chapter 3. Monitor specifications Table 3-1. Reference information This section contains monitor specifications, instructions to 140° F) © Copyright Lenovo 2007 , 2008 3-1 Monitor specifications for type-model 9227-Ax1 Dimensions Height Depth...
... 173 mm (PSWG) 366.8 mm; 371 mm -4°/+30° 100 mm (3.94 in.) (PSWG) Radial arm sold separately. 431.80 mm (17.0 in.) 270.34 mm (10.6 in.) 337.92 mm (13.3 in.) 0.264 mm (.010 in.) (V) 100 - 240 V ac, 60/...60° C (-4° to manually install the monitor driver, troubleshooting information, and service information. Chapter 3. Monitor specifications Table 3-1. Reference information This section contains monitor specifications, instructions to 140° F) © Copyright Lenovo 2007 , 2008 3-1 Monitor specifications for type-model 9227-Ax1 Dimensions Height Depth...
User Guide
Page 21
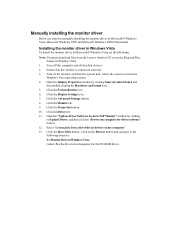
... by clicking Start Control Panel, and then double-clicking the Hardware and Sound icon. 5. Turn on Update Driver. Select "Let me pick from the Lenovo Monitor CD to use the Plug and Play feature in Windows Vista. 1. Click on my computer" . 13. Allow the system to the following : Note: You ...must download files from a list of device drivers on the Browse button and navigate to boot into Windows Vista operating system. ...
... by clicking Start Control Panel, and then double-clicking the Hardware and Sound icon. 5. Turn on Update Driver. Select "Let me pick from the Lenovo Monitor CD to use the Plug and Play feature in Windows Vista. 1. Click on my computer" . 13. Allow the system to the following : Note: You ...must download files from a list of device drivers on the Browse button and navigate to boot into Windows Vista operating system. ...
User Guide
Page 22
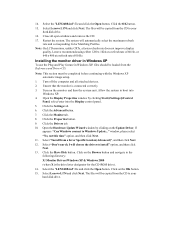
...Windows connect to your hard disk drive. 16. Open the Display Properties window by clicking on the monitor and then the system unit. Click the Drivers tab. 10. Select Lenovo L174 and click Next. and then click Next. 11. Select the "LEN240B.inf" file and click ...remove the CD. 17. Click the Settings tab. 6. Select the "LEN240B.inf" file and click the Open button. Close all attached devices. 2. The system will choose the driver to the following directory: X:\Monitor Drivers\Windows XP & Windows 2000 (where X is connected correctly. 3. Note: On LCD monitors, unlike CRTs,...
...Windows connect to your hard disk drive. 16. Open the Display Properties window by clicking on the monitor and then the system unit. Click the Drivers tab. 10. Select Lenovo L174 and click Next. and then click Next. 11. Select the "LEN240B.inf" file and click ...remove the CD. 17. Click the Settings tab. 6. Select the "LEN240B.inf" file and click the Open button. Close all attached devices. 2. The system will choose the driver to the following directory: X:\Monitor Drivers\Windows XP & Windows 2000 (where X is connected correctly. 3. Note: On LCD monitors, unlike CRTs,...
User Guide
Page 23
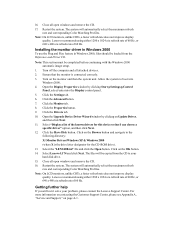
...Driver Wizard window by clicking Start Settings Control Panel, select/enter into Windows 2000. 4. Close all open windows and remove the CD. 17. Note: On LCD monitors, unlike CRTs, a faster refresh rate does not improve display quality. Restart the system. Click the Settings tab. 6. Click the Properties button. 9. Lenovo...Disk button. Click on the Browse button and navigate to boot into the Display control panel. 5. Select Lenovo L174 and click Next. Installing the monitor driver in Windows 2000 To use the Plug and Play feature in Windows 2000, files should be completed before ...
...Driver Wizard window by clicking Start Settings Control Panel, select/enter into Windows 2000. 4. Close all open windows and remove the CD. 17. Note: On LCD monitors, unlike CRTs, a faster refresh rate does not improve display quality. Restart the system. Click the Settings tab. 6. Click the Properties button. 9. Lenovo...Disk button. Click on the Browse button and navigate to boot into the Display control panel. 5. Select Lenovo L174 and click Next. Installing the monitor driver in Windows 2000 To use the Plug and Play feature in Windows 2000, files should be completed before ...


