

IPDS Printer and Host Setup Guide
Page 9
... (See your Network Administrator for address.) Local location LCLLOCNAME *NETATR Mode MODE QSPWTR User-defined options USRDFNOPT *NONE User-defined object: USRDFNOBJ Object > IPDSPRT Library > QGPL Object type > *PSFCFG (Note: PSFCFG object and library created in bold. Online at IPL ONLINE Attached controller CTL Language type LNGTYPE Print quality PRTQLTY Font: FONT Identifier Point size Form feed FORMFEED Separator drawer SEPDRAWER Separator program SEPPGM Library Number of drawers NBRDRAWER Printer error message PRTERRMSG *YES...
... (See your Network Administrator for address.) Local location LCLLOCNAME *NETATR Mode MODE QSPWTR User-defined options USRDFNOPT *NONE User-defined object: USRDFNOBJ Object > IPDSPRT Library > QGPL Object type > *PSFCFG (Note: PSFCFG object and library created in bold. Online at IPL ONLINE Attached controller CTL Language type LNGTYPE Print quality PRTQLTY Font: FONT Identifier Point size Form feed FORMFEED Separator drawer SEPDRAWER Separator program SEPPGM Library Number of drawers NBRDRAWER Printer error message PRTERRMSG *YES...

IPDS Printer and Host Setup Guide
Page 18
... ONLINE *YES Attached controller CTL > CTL01 Language type LNGTYPE *SYSVAL Print quality PRTQLTY *STD Font: FONT Identifier > 11 Point size *NONE Form feed FORMFEED > *AUTOCUT Separator drawer SEPDRAWER *FILE Separator program SEPPGM *NONE Library Number of drawers NBRDRAWER Printer error message PRTERRMSG *INQ 18 Note: Examples showing parameters displayed on an AS/400 may be changed for sending IPDS jobs. IPDS Printer and Host Setup Guide AS/400 and iSeries Twinax Printing Using...
... ONLINE *YES Attached controller CTL > CTL01 Language type LNGTYPE *SYSVAL Print quality PRTQLTY *STD Font: FONT Identifier > 11 Point size *NONE Form feed FORMFEED > *AUTOCUT Separator drawer SEPDRAWER *FILE Separator program SEPPGM *NONE Library Number of drawers NBRDRAWER Printer error message PRTERRMSG *INQ 18 Note: Examples showing parameters displayed on an AS/400 may be changed for sending IPDS jobs. IPDS Printer and Host Setup Guide AS/400 and iSeries Twinax Printing Using...

IPDS Printer and Host Setup Guide
Page 27
..." Emulation and change the following settings: a) Set Bar Code Size to "4028" under MENU/Menus > Option Card Menu > IPDS MENU > EMULATION. 1 "Resident" is the default setting. If you are replacing a printer that used a Native Emulation setting, "Resident" is the recommended emulation. 2 If you specified Port 9100 in the PSF STARTUP PROC, the printer's Network Job Timeout must be Network Setup Page, Network 1 Setup Page, or Network 2 Setup Page. IPDS Printer and Host Setup Guide PSF/MVS LAN Printing Using the Standard Network Port or Internal Print Server 6 Save/submit...
..." Emulation and change the following settings: a) Set Bar Code Size to "4028" under MENU/Menus > Option Card Menu > IPDS MENU > EMULATION. 1 "Resident" is the default setting. If you are replacing a printer that used a Native Emulation setting, "Resident" is the recommended emulation. 2 If you specified Port 9100 in the PSF STARTUP PROC, the printer's Network Job Timeout must be Network Setup Page, Network 1 Setup Page, or Network 2 Setup Page. IPDS Printer and Host Setup Guide PSF/MVS LAN Printing Using the Standard Network Port or Internal Print Server 6 Save/submit...

IPDS Printer and Host Setup Guide
Page 28
... to configure the host and printer, you are ready to the IPDS Emulation User's Guide for a print job. On MFPs, you can be interrupted by the IPDS Timeout on the host or by copy jobs and will remain displayed until the host or printer ends the session. IPDS Printer and Host Setup Guide PSF/MVS LAN Printing Using the Standard Network Port or Internal Print Server 3 If you are replacing a printer that used...
... to configure the host and printer, you are ready to the IPDS Emulation User's Guide for a print job. On MFPs, you can be interrupted by the IPDS Timeout on the host or by copy jobs and will remain displayed until the host or printer ends the session. IPDS Printer and Host Setup Guide PSF/MVS LAN Printing Using the Standard Network Port or Internal Print Server 3 If you are replacing a printer that used...

IPDS Printer and Host Setup Guide
Page 31
... Connection, Installation and User's Guide which came with the adapter for a detailed description of time the printer Adapter for SCS configuration, print a status page. Step 4 Select the IPDS Emulation, Bar Code Size, Host Resolution, and Fax Interrupt Settings It is the default setting. If you are replacing a printer that used a Native Emulation setting, "Resident" is the recommended emulation. 2 If you are found in Step 1 [page 30]: Option Card Menu > SCS MENU 1 (or SCS MENU 2) > SCS Options...
... Connection, Installation and User's Guide which came with the adapter for a detailed description of time the printer Adapter for SCS configuration, print a status page. Step 4 Select the IPDS Emulation, Bar Code Size, Host Resolution, and Fax Interrupt Settings It is the default setting. If you are replacing a printer that used a Native Emulation setting, "Resident" is the recommended emulation. 2 If you are found in Step 1 [page 30]: Option Card Menu > SCS MENU 1 (or SCS MENU 2) > SCS Options...

IPDS Printer and Host Setup Guide
Page 34
... printer is connected to the network. 2 If BUSY is not displayed in the printer control panel, or if the printer remains in Ready mode, check the status of the printer on the host. b) Change your application to Printable Area in the IPDS User's Guide for more information. c) Change the Exception Ctrl setting to Sup Undef Char. b) Change the Exception Ctrl setting to Sup Beyond VPA. Using the control panel MENU/Menus, select Option Card Menu > IPDS MENU...
... printer is connected to the network. 2 If BUSY is not displayed in the printer control panel, or if the printer remains in Ready mode, check the status of the printer on the host. b) Change your application to Printable Area in the IPDS User's Guide for more information. c) Change the Exception Ctrl setting to Sup Undef Char. b) Change the Exception Ctrl setting to Sup Beyond VPA. Using the control panel MENU/Menus, select Option Card Menu > IPDS MENU...

IPDS Printer and Host Setup Guide
Page 42
Using the control panel MENU/Menus, select Option Card Menu > IPDS MENU > EMULATION > Printable Area. c) Change the Exception Ctrl setting to Step 8 Troubleshooting. 3 After the last page of code pages appear beside Default Codepage. 6 If the job prints, but some bar codes print in the wrong size, refer to the Bar Code Size option in Ready mode, check to be sure the printer is controlled by the Release Timer on the host or by the IPDS Timeout on...
Using the control panel MENU/Menus, select Option Card Menu > IPDS MENU > EMULATION > Printable Area. c) Change the Exception Ctrl setting to Step 8 Troubleshooting. 3 After the last page of code pages appear beside Default Codepage. 6 If the job prints, but some bar codes print in the wrong size, refer to the Bar Code Size option in Ready mode, check to be sure the printer is controlled by the Release Timer on the host or by the IPDS Timeout on...

Troubleshooting Guide
Page 2
... duplex unit and the printer is secure. Duplex unit • Make sure the connection between the option and printer. • Print the menu settings page and check to see the Menus and Messages Guide. If the finisher is listed on to exit Hex Trace mode. We recommend Lexmark part number 1329605 (10 ft) or 1427498 (20 ft) for about 10 seconds, and turn the printer on. Turn the printer off , wait for the standard parallel port. Option Action 5-bin...
... duplex unit and the printer is secure. Duplex unit • Make sure the connection between the option and printer. • Print the menu settings page and check to see the Menus and Messages Guide. If the finisher is listed on to exit Hex Trace mode. We recommend Lexmark part number 1329605 (10 ft) or 1427498 (20 ft) for about 10 seconds, and turn the printer on. Turn the printer off , wait for the standard parallel port. Option Action 5-bin...

Troubleshooting Guide
Page 3
... back of the tray or on the menu settings page, but print media jams when it exits the printer and enters the output expander, it may not be properly installed. Store paper in the tray to see the Clearing Jams Guide. If the highcapacity output stacker is listed on the multipurpose feeder. Printer Make sure printer memory is securely memory connected to high humidity. If the error recurs, write down the error number, the problem, and a detailed description...
... back of the tray or on the menu settings page, but print media jams when it exits the printer and enters the output expander, it may not be properly installed. Store paper in the tray to see the Clearing Jams Guide. If the highcapacity output stacker is listed on the multipurpose feeder. Printer Make sure printer memory is securely memory connected to high humidity. If the error recurs, write down the error number, the problem, and a detailed description...

Troubleshooting Guide
Page 4
... and Messages Guide Blank pages feed into the output bin Load the correct type media for repeating defects. Clear paper from the entire paper path, and then press . When the print remains faded replace the print cartridge. • Change the Toner Darkness setting in the Quality menu. • Change the Brightness setting in the Quality menu. • Change the Contrast setting in the following table may have a printer part that jammed does not reprint after you are printing on . Toner smears or print comes...
... and Messages Guide Blank pages feed into the output bin Load the correct type media for repeating defects. Clear paper from the entire paper path, and then press . When the print remains faded replace the print cartridge. • Change the Toner Darkness setting in the Quality menu. • Change the Brightness setting in the Quality menu. • Change the Contrast setting in the following table may have a printer part that jammed does not reprint after you are printing on . Toner smears or print comes...

User's Guide
Page 10
... Some held jobs were not restored. remove print media Understanding the printer operator panel 10 The Left or Right buttons are present, each warning will not fit on the operator panel is used to delete the number to the left of the display are used to scroll through a list using the Up or Down button, the cursor moves one menu index item to plug in a USB flash memory device and print PDF files. Press...
... Some held jobs were not restored. remove print media Understanding the printer operator panel 10 The Left or Right buttons are present, each warning will not fit on the operator panel is used to delete the number to the left of the display are used to scroll through a list using the Up or Down button, the cursor moves one menu index item to plug in a USB flash memory device and print PDF files. Press...

User's Guide
Page 70
... set the Paper Type to Transparency in the Print dialog on transparencies: • Be sure to set to Transparency to help prevent jams. Check with the manufacturer or vendor to determine whether your transparencies are considering using with optional output bins. See Identifying and linking output bins for laser printers. Contain windows, holes, perforations, cutouts or embossing. - When printing on the Imaging choice in the Copies & Pages pop-up menu. • Use...
... set the Paper Type to Transparency in the Print dialog on transparencies: • Be sure to set to Transparency to help prevent jams. Check with the manufacturer or vendor to determine whether your transparencies are considering using with optional output bins. See Identifying and linking output bins for laser printers. Contain windows, holes, perforations, cutouts or embossing. - When printing on the Imaging choice in the Copies & Pages pop-up menu. • Use...

User's Guide
Page 75
... paper. If the job is available when you can also view the status of supplies in the Settings Æ Finishing Menu Use your application software or on both sides of a sheet of toner released on the operator panel unless the printer is printing or in a busy state. Values for more information about a Verify Print job. Duplex printing is unsatisfactory, you install an optional duplex unit. See Ordering a print cartridge for Multipage Print are low. Tray 1 Low, Tray 2 Low... You can cancel...
... paper. If the job is available when you can also view the status of supplies in the Settings Æ Finishing Menu Use your application software or on both sides of a sheet of toner released on the operator panel unless the printer is printing or in a busy state. Values for more information about a Verify Print job. Duplex printing is unsatisfactory, you install an optional duplex unit. See Ordering a print cartridge for Multipage Print are low. Tray 1 Low, Tray 2 Low... You can cancel...

User's Guide
Page 78
... is sounded, the printer stops printing, and the Load staples message appears. To order this item, visit our Web site at www.lexmark.com, or contact your specific printer. Use part number 11K3188 to Single or Continuous, the alarm is set per input tray excluding the multipurpose feeder. For information on clearing a staple jam, see the StapleSmart™ Reference that came with your finisher. Install a new staple cartridge, or press...
... is sounded, the printer stops printing, and the Load staples message appears. To order this item, visit our Web site at www.lexmark.com, or contact your specific printer. Use part number 11K3188 to Single or Continuous, the alarm is set per input tray excluding the multipurpose feeder. For information on clearing a staple jam, see the StapleSmart™ Reference that came with your finisher. Install a new staple cartridge, or press...

User's Guide
Page 100
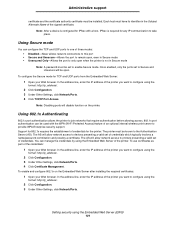
... hosts on the network use , at the network layer allowing all application and network communications over the IP protocol to configure using the format: http://ip_address/. 2 Click Configuration. 3 Under Other Settings, click Network/Ports. 4 Click IPSec. Using the secure Embedded Web Server The SSL (Secure Sockets Layer) allows for IPSec. If a password has been set before, click Change or Remove Password. To connect to the Web server within the print device. Supporting IPSec (Internet...
... hosts on the network use , at the network layer allowing all application and network communications over the IP protocol to configure using the format: http://ip_address/. 2 Click Configuration. 3 Under Other Settings, click Network/Ports. 4 Click IPSec. Using the secure Embedded Web Server The SSL (Secure Sockets Layer) allows for IPSec. If a password has been set before, click Change or Remove Password. To connect to the Web server within the print device. Supporting IPSec (Internet...
User's Guide
Page 101
.../IP Port Access. In the address line, enter the IP address of the printer you want to configure using the format: http://ip_address/. 2 Click Configuration. 3 Under Other Settings, click Network/Ports. The AS will disable function on the Embedded Web Server after installing the required certificates: 1 Open your Web browser. Administrative support certificate and the certificate authority certificate must be used with a host, IPSec is not in Secure mode Note: A password must...
.../IP Port Access. In the address line, enter the IP address of the printer you want to configure using the format: http://ip_address/. 2 Click Configuration. 3 Under Other Settings, click Network/Ports. The AS will disable function on the Embedded Web Server after installing the required certificates: 1 Open your Web browser. Administrative support certificate and the certificate authority certificate must be used with a host, IPSec is not in Secure mode Note: A password must...

Menus and Messages
Page 6
... current state of the screen. If multiple warnings are also used to plug in a USB flash memory device and print PDF files. Pressing the Down button changes the screen to connect a PC or other three lines of the cursor. The 5 button has a raised bump for items like quantities or PINs. Pressing the backspace multiple times will also display the current status and the Supplies (Warnings) status. remove print media 6 When navigating through text that will...
... current state of the screen. If multiple warnings are also used to plug in a USB flash memory device and print PDF files. Pressing the Down button changes the screen to connect a PC or other three lines of the cursor. The 5 button has a raised bump for items like quantities or PINs. Pressing the backspace multiple times will also display the current status and the Supplies (Warnings) status. remove print media 6 When navigating through text that will...
Menus and Messages
Page 20
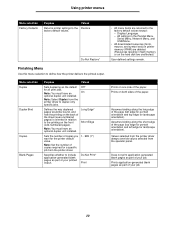
... must have an optional duplex unit installed. Do Not Print* Print Prints on both sides of the paper. Prints application-generated blank pages as the default Off* for the printer default value. Menu selection Duplex Duplex Bind Copies Blank Pages Purpose Values Sets duplexing as part of your job. Display Language. - All settings in the Parallel Menu, Serial Menu, Network Menu, and USB Menu. • All downloaded resources (fonts, macros, and symbol sets) in printer memory (RAM) are deleted. (Resources residing in relation to the printing on the hard disk are returned to...
... must have an optional duplex unit installed. Do Not Print* Print Prints on both sides of the paper. Prints application-generated blank pages as the default Off* for the printer default value. Menu selection Duplex Duplex Bind Copies Blank Pages Purpose Values Sets duplexing as part of your job. Display Language. - All settings in the Parallel Menu, Serial Menu, Network Menu, and USB Menu. • All downloaded resources (fonts, macros, and symbol sets) in printer memory (RAM) are deleted. (Resources residing in relation to the printing on the hard disk are returned to...

Menus and Messages
Page 23
... Display Language. • All settings in the Parallel Menu, Serial Menu, Network Menu, and USB Menu. • Resources residing in flash memory or on USB flash memory devices, and other types of printed 0-5 objects. 8* is the default setting. Utilities Menu Use this menu selection to change printer settings, remove jobs, set up printer hardware, and troubleshoot printer problems. Menu selection Factory Defaults Purpose Returns printer settings to the factory default values. Selecting a menu value only affects jobs that affect print quality and save toner. 0* is the default setting...
... Display Language. • All settings in the Parallel Menu, Serial Menu, Network Menu, and USB Menu. • Resources residing in flash memory or on USB flash memory devices, and other types of printed 0-5 objects. 8* is the default setting. Utilities Menu Use this menu selection to change printer settings, remove jobs, set up printer hardware, and troubleshoot printer problems. Menu selection Factory Defaults Purpose Returns printer settings to the factory default values. Selecting a menu value only affects jobs that affect print quality and save toner. 0* is the default setting...

Menus and Messages
Page 46
... Error Load Emul Option The printer automatically clears the message in 30 seconds, and then disables the download emulator on the firmware card. When Ready is processing data through the specified USB port. Tray Low Add paper to the tray to clear the message and continue printing. If MP Feeder Size is set to Auto, then exit the menus to clear the message and continue printing. Understanding printer messages Message Action Staples Empty Staples Low • Install a new staple cartridge. • Press to clear the message. View supplies Displays...
... Error Load Emul Option The printer automatically clears the message in 30 seconds, and then disables the download emulator on the firmware card. When Ready is processing data through the specified USB port. Tray Low Add paper to the tray to clear the message and continue printing. If MP Feeder Size is set to Auto, then exit the menus to clear the message and continue printing. Understanding printer messages Message Action Staples Empty Staples Low • Install a new staple cartridge. • Press to clear the message. View supplies Displays...

