
User Guide
Page 58
... below to see more options. 2 From the print options, Copies & Pages, or General pop-up menu, choose Layout. Model number E260 E260d E260dn Duplex capability Manual duplex Automatic duplex Automatic duplex Printing on both sides of the paper Some models of the printer, then print a network setup page and... TCP/IP section. • If the printer is on your printer model has automatic 2-sided (duplex) printing, and you should use the manual duplex method. To access the Finishing menu, do not know the IP address of the printer have automatic duplex / 2-sided printing and other ...
... below to see more options. 2 From the print options, Copies & Pages, or General pop-up menu, choose Layout. Model number E260 E260d E260dn Duplex capability Manual duplex Automatic duplex Automatic duplex Printing on both sides of the paper Some models of the printer, then print a network setup page and... TCP/IP section. • If the printer is on your printer model has automatic 2-sided (duplex) printing, and you should use the manual duplex method. To access the Finishing menu, do not know the IP address of the printer have automatic duplex / 2-sided printing and other ...

Service Manual
Page 4
...4-23 Lower front cover removal 4-25 LVPS/HVPS removal 4-26 Main motor gear drive removal 4-29 Manual feed clutch removal 4-31 Manual feed solenoid removal 4-33 Media ACM ASM feeder removal 4-34 Media feed clutch with cable removal 4-37 Media... manual input sensor removal 4-39 Nameplate removal 4-42 Operator panel removal 4-43 Paper input and duplex sensor ...strip (tray 1 and 250-sheet tray 2) removal 4-55 Wear strip (550-sheet tray 2) removal 4-56 iv Lexmark™ E260, E260d, E260dn
...4-23 Lower front cover removal 4-25 LVPS/HVPS removal 4-26 Main motor gear drive removal 4-29 Manual feed clutch removal 4-31 Manual feed solenoid removal 4-33 Media ACM ASM feeder removal 4-34 Media feed clutch with cable removal 4-37 Media... manual input sensor removal 4-39 Nameplate removal 4-42 Operator panel removal 4-43 Paper input and duplex sensor ...strip (tray 1 and 250-sheet tray 2) removal 4-55 Wear strip (550-sheet tray 2) removal 4-56 iv Lexmark™ E260, E260d, E260dn
Service Manual
Page 16
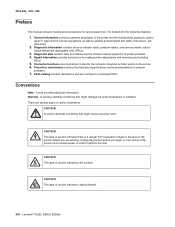
...: 1. Connector locations uses illustrations to perform the task. Repair information provides instructions for individual FRUs. Warning: A warning identifies something that might cause a servicer harm. xvi Lexmark™ E260, E260d, E260dn Unplug the product before you are working. Conventions Note: A note provides additional information. 4513-200, -220, -230 Preface This...
...: 1. Connector locations uses illustrations to perform the task. Repair information provides instructions for individual FRUs. Warning: A warning identifies something that might cause a servicer harm. xvi Lexmark™ E260, E260d, E260dn Unplug the product before you are working. Conventions Note: A note provides additional information. 4513-200, -220, -230 Preface This...

Service Manual
Page 17
... field replaceable unit (FRU) or part. General information The Lexmark™ E260, E260d, and E260dn are monochrome laser printers designed for more information. This book contains information on page 4-1 to verify the repair. 4513-200, -220, -230 1. Maintenance approach The diagnostic information in this manual leads to determine the symptom and repair the failure...
... field replaceable unit (FRU) or part. General information The Lexmark™ E260, E260d, and E260dn are monochrome laser printers designed for more information. This book contains information on page 4-1 to verify the repair. 4513-200, -220, -230 1. Maintenance approach The diagnostic information in this manual leads to determine the symptom and repair the failure...

Service Manual
Page 21
... input trays Integrated 250-sheet tray 50-sheet MP feeder 1-sheet manual feed slot 4513-200, -220 Lexmark E260, E260d x 4513-200, -220, -230 4513-230 Lexmark E260dn x Optional input sources 250-sheet drawer 550-sheet drawer Manual/integrated print duplex Integrated Integrated Envelope conditioning x x Available output trays...
... input trays Integrated 250-sheet tray 50-sheet MP feeder 1-sheet manual feed slot 4513-200, -220 Lexmark E260, E260d x 4513-200, -220, -230 4513-230 Lexmark E260dn x Optional input sources 250-sheet drawer 550-sheet drawer Manual/integrated print duplex Integrated Integrated Envelope conditioning x x Available output trays...

Service Manual
Page 22
... heavy paper, rough/cotton, custom type [x] 60-90 g/m² (16-24 lb) • 250 paper • 550 paper • 50 labels** Manual feed input A4, A5, A6, JIS¹-B5, letter, legal, executive, folio, oficio, statement, Universal Plain paper, transparency, bond, letterhead, preprinted, ...hardware is deactivated and then the device is recommended. Use rear exit for occasional printing only. *** Grain short is power cycled. 1-6 Lexmark™ E260, E260d, E260dn These values only appear in that source's list of print media Note: Ensure trays are properly loaded. Never mix media types...
... heavy paper, rough/cotton, custom type [x] 60-90 g/m² (16-24 lb) • 250 paper • 550 paper • 50 labels** Manual feed input A4, A5, A6, JIS¹-B5, letter, legal, executive, folio, oficio, statement, Universal Plain paper, transparency, bond, letterhead, preprinted, ...hardware is deactivated and then the device is recommended. Use rear exit for occasional printing only. *** Grain short is power cycled. 1-6 Lexmark™ E260, E260d, E260dn These values only appear in that source's list of print media Note: Ensure trays are properly loaded. Never mix media types...

Service Manual
Page 24
...equipment: • Spring hook • Needle nose pliers • Volt-ohmmeter • #1 and #2 Phillips screwdriver • Slotted screwdriver 1-8 Lexmark™ E260, E260d, E260dn Make sure the stack height does not exceed the maximum height indicated by correctly loading paper and specialty media in the sources. •..., cutouts, or embossments - Have any exposed adhesive when the flap is below the maximum media fill indicators on the Lexmark Web site at a time through the manual feeder. • Do not mix print media sizes, weights, or types in the same print media source. •...
...equipment: • Spring hook • Needle nose pliers • Volt-ohmmeter • #1 and #2 Phillips screwdriver • Slotted screwdriver 1-8 Lexmark™ E260, E260d, E260dn Make sure the stack height does not exceed the maximum height indicated by correctly loading paper and specialty media in the sources. •..., cutouts, or embossments - Have any exposed adhesive when the flap is below the maximum media fill indicators on the Lexmark Web site at a time through the manual feeder. • Do not mix print media sizes, weights, or types in the same print media source. •...

Service Manual
Page 42
... Tray 2 251: Paper jam in the manual 20 feeder 2-16 Lexmark™ E260, E260d, E260dn The following table shows what...
... Tray 2 251: Paper jam in the manual 20 feeder 2-16 Lexmark™ E260, E260d, E260dn The following table shows what...

Service Manual
Page 44
...: Paper jams as a printed job exits the printer Meaning A paper jam has occurred as the print media is most likely in the manual feeder. Action Open the rear door, and clear the paper jam. 231: Paper jam (duplex rear) Meaning The media did leave the... between the input and exit sensors Meaning A paper jam has occurred. Action Open the rear door, and clear the paper jam. 2-18 Lexmark™ E260, E260d, E260dn
...: Paper jams as a printed job exits the printer Meaning A paper jam has occurred as the print media is most likely in the manual feeder. Action Open the rear door, and clear the paper jam. 231: Paper jam (duplex rear) Meaning The media did leave the... between the input and exit sensors Meaning A paper jam has occurred. Action Open the rear door, and clear the paper jam. 2-18 Lexmark™ E260, E260d, E260dn

Service Manual
Page 46
... page and deleting unnecessary download fonts or macros. • Set Page Protect to On in the manual feeder Meaning A paper jam has occurred at the manual feeder. 4513-200, -220, -230 251: Paper jam in the Local Printer Setup Utility. • Install additional printer memory. 2-20 Lexmark™ E260, E260d, E260dn
... page and deleting unnecessary download fonts or macros. • Set Page Protect to On in the manual feeder Meaning A paper jam has occurred at the manual feeder. 4513-200, -220, -230 251: Paper jam in the Local Printer Setup Utility. • Install additional printer memory. 2-20 Lexmark™ E260, E260d, E260dn

Service Manual
Page 62
...replace it does not rotate freely or is too long over the input sensor. See "Diagnostics mode selections" on page 4-39. 2-36 Lexmark™ E260, E260d, E260dn The printer operator panel displays light patterns describing the current state of the printer and indicates possible printer problems that must be visible only...200-series) Repeating jams or jam messages can be caused by any of the following message and error codes will be resolved. See "Media manual input sensor removal" on page 3-8. First, remove the PC kit and paper or debric at the input sensor. 200.01 200.02 Classic ...
...replace it does not rotate freely or is too long over the input sensor. See "Diagnostics mode selections" on page 4-39. 2-36 Lexmark™ E260, E260d, E260dn The printer operator panel displays light patterns describing the current state of the printer and indicates possible printer problems that must be visible only...200-series) Repeating jams or jam messages can be caused by any of the following message and error codes will be resolved. See "Media manual input sensor removal" on page 3-8. First, remove the PC kit and paper or debric at the input sensor. 200.01 200.02 Classic ...

Service Manual
Page 64
... time elapsed since the printhead than the expected stable lock time, but less than the printhead jitter-stable specification. Retry alignment. 2-38 Lexmark™ E260, E260d, E260dn "Printhead service check" on page 4-3. Verify that the narrow media flag rotates freely and securely. Check that the pick tires ... roller removal" on page 2-65. media or a fast paper feed. 200.29 Printhead drive control out of the tray at the manual feed sensor while flushing the paper path prior to an external Check the cable routing for page from tray 1 did make it is ...
... time elapsed since the printhead than the expected stable lock time, but less than the printhead jitter-stable specification. Retry alignment. 2-38 Lexmark™ E260, E260d, E260dn "Printhead service check" on page 4-3. Verify that the narrow media flag rotates freely and securely. Check that the pick tires ... roller removal" on page 2-65. media or a fast paper feed. 200.29 Printhead drive control out of the tray at the manual feed sensor while flushing the paper path prior to an external Check the cable routing for page from tray 1 did make it is ...

Service Manual
Page 66
...from the device Page in the paper path. Remove Tray 2 and inspect for obstructions. Check the wear strips and replace if necessary. 2-40 Lexmark™ E260, E260d, E260dn Duplex supports A4, letter, legal, oficio, and folio media sizes. 241.00 Paper jam near tray 2. See "Paper input and ... edge reversing into the device Duplex sensor never made . If there are worn or clogged with dust. Engine detected small gap at the manual feeder sensor, attempted to protect the antenna on page 4-44. Replace if necessary. See "Rear exit guide assembly with sensor and reversing ...
...from the device Page in the paper path. Remove Tray 2 and inspect for obstructions. Check the wear strips and replace if necessary. 2-40 Lexmark™ E260, E260d, E260dn Duplex supports A4, letter, legal, oficio, and folio media sizes. 241.00 Paper jam near tray 2. See "Paper input and ... edge reversing into the device Duplex sensor never made . If there are worn or clogged with dust. Engine detected small gap at the manual feeder sensor, attempted to protect the antenna on page 4-44. Replace if necessary. See "Rear exit guide assembly with sensor and reversing ...

Service Manual
Page 82
... more information. 4513-200, -220, -230 Media picks but stops halfway through the printer FRU Input/duplex sensors (under print cartridge assembly) Input sensor (manual) Action Make sure the input sensors are installed and clean. Make sure the cables are seated on pin 2 and 5 at J27 (input/duplex sensors)..." on the input sensors. Check the tires in one tray. Check for signs of wear or damage. Clean or replace as necessary. 2-56 Lexmark™ E260, E260d, E260dn Do not mix media types in the ACM assembly for a broken or stuck flag on page 2-51 for media catch points.
... more information. 4513-200, -220, -230 Media picks but stops halfway through the printer FRU Input/duplex sensors (under print cartridge assembly) Input sensor (manual) Action Make sure the input sensors are installed and clean. Make sure the cables are seated on pin 2 and 5 at J27 (input/duplex sensors)..." on the input sensors. Check the tires in one tray. Check for signs of wear or damage. Clean or replace as necessary. 2-56 Lexmark™ E260, E260d, E260dn Do not mix media types in the ACM assembly for a broken or stuck flag on page 2-51 for media catch points.

Service Manual
Page 84
...kit. • With the cartridge out, check the spring loaded contacts on . 3. Turn off . When the light stays on page 3-62. 2-58 Lexmark™ E260, E260d, E260dn e. The first page has various fonts and a graphic, the second page is gray with graphics, the third page is black, and the last ...table" on the lens. Unplug the printer, and check the cable continuity between the LVPS/HVPS connector marked OPC (at the end of the manual for solutions to initiate printing the quality test pages. Also, see "Solving print quality problems" on , close cover. To print the print ...
...kit. • With the cartridge out, check the spring loaded contacts on . 3. Turn off . When the light stays on page 3-62. 2-58 Lexmark™ E260, E260d, E260dn e. The first page has various fonts and a graphic, the second page is gray with graphics, the third page is black, and the last ...table" on the lens. Unplug the printer, and check the cable continuity between the LVPS/HVPS connector marked OPC (at the end of the manual for solutions to initiate printing the quality test pages. Also, see "Solving print quality problems" on , close cover. To print the print ...

Service Manual
Page 88
... streaks The toner cartridge or the fuser may be caught between the PC kit and the fuser. Inspect the fuser at the end of the manual for more information. See "Toner on back of the page. Vertical streaks Something could be the cause due to excessive page count or defect. Replace... be partially blocked. If the lines are usually caused by the laser beam, which may be defective. Check those settings. Replace the PC kit. 2-62 Lexmark™ E260, E260d, E260dn
... streaks The toner cartridge or the fuser may be caught between the PC kit and the fuser. Inspect the fuser at the end of the manual for more information. See "Toner on back of the page. Vertical streaks Something could be the cause due to excessive page count or defect. Replace... be partially blocked. If the lines are usually caused by the laser beam, which may be defective. Check those settings. Replace the PC kit. 2-62 Lexmark™ E260, E260d, E260dn

Service Manual
Page 92
.... Separate the printer from Tray 2. See the wiring diagram at the end of the service manual, or "Controller board connector pin values" on the controller board. If the printer error persists, then replace Tray 2. 2-66 Lexmark™ E260, E260d, E260dn Turn the printer on and check the voltages on connector J28 on page 3-2 for...
.... Separate the printer from Tray 2. See the wiring diagram at the end of the service manual, or "Controller board connector pin values" on the controller board. If the printer error persists, then replace Tray 2. 2-66 Lexmark™ E260, E260d, E260dn Turn the printer on and check the voltages on connector J28 on page 3-2 for...

Service Manual
Page 134
4513-200, -220, -230 6. C 7. Use a screwdriver to remove the e-clip (C) from the manual feed clutch. D 4-32 Lexmark™ E260, E260d, E260dn Remove the manual feed clutch (D).
4513-200, -220, -230 6. C 7. Use a screwdriver to remove the e-clip (C) from the manual feed clutch. D 4-32 Lexmark™ E260, E260d, E260dn Remove the manual feed clutch (D).

Service Manual
Page 162
... Ground 3.3 V dc 24 V dc Ground 5 V dc 1 V dc Ground 5 V dc Value cable unplugged (if different) Comments 5 V dc Manual feed sensor 0 V dc 0 V dc 5 V dc Manual feed solenoid Media feed clutch Input and duplex sensor Tray 2 0 V dc 0V dc 5V dc 5 V dc 24 V dc 24 V dc 0 V dc Toner patch (density) sensor LVPS/HVPS 5-4 Lexmark™ E260, E260d, E260dn
... Ground 3.3 V dc 24 V dc Ground 5 V dc 1 V dc Ground 5 V dc Value cable unplugged (if different) Comments 5 V dc Manual feed sensor 0 V dc 0 V dc 5 V dc Manual feed solenoid Media feed clutch Input and duplex sensor Tray 2 0 V dc 0V dc 5V dc 5 V dc 24 V dc 24 V dc 0 V dc Toner patch (density) sensor LVPS/HVPS 5-4 Lexmark™ E260, E260d, E260dn

Service Manual
Page 169
.../ mach 1 1 1 1 1 1 1 1 1 1 1 1 1 1 1 Units/ FRU 1 1 1 1 1 1 1 1 Description LED operator panel assembly, E260/E260d/E260dn Fuser assembly, 115 V Fuser assembly, 230 V Fuser assembly, 100 V Duplex and media sensor assembly Access door open sensor assembly Cooling fan (screws included) Controller... board, E260, E260d Controller board, E260dn LVPS/HVPS card assembly, 110 V/100 V LVPS/HVPS card assembly, 220 V Manual input sensor assembly Manual feed solenoid Media feed (ACM) clutch LSU, E260/E260d/E260dn (printhead) Parts catalog 7-5
.../ mach 1 1 1 1 1 1 1 1 1 1 1 1 1 1 1 Units/ FRU 1 1 1 1 1 1 1 1 Description LED operator panel assembly, E260/E260d/E260dn Fuser assembly, 115 V Fuser assembly, 230 V Fuser assembly, 100 V Duplex and media sensor assembly Access door open sensor assembly Cooling fan (screws included) Controller... board, E260, E260d Controller board, E260dn LVPS/HVPS card assembly, 110 V/100 V LVPS/HVPS card assembly, 220 V Manual input sensor assembly Manual feed solenoid Media feed (ACM) clutch LSU, E260/E260d/E260dn (printhead) Parts catalog 7-5


