
User Manual
Page 1
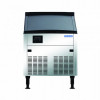
NORPOLE Commercial Undercounter Ice Maker User's Manual Models: NPCIM90B, NPCIM120H, NPCIM160H, NPCIM210, NPCIM280 READ THIS MANUAL CAREFULLY BEFORE USING YOUR COMMERCIAL ICE MAKER AND KEEP IT FOR FUTURE REFERENCE.
NORPOLE Commercial Undercounter Ice Maker User's Manual Models: NPCIM90B, NPCIM120H, NPCIM160H, NPCIM210, NPCIM280 READ THIS MANUAL CAREFULLY BEFORE USING YOUR COMMERCIAL ICE MAKER AND KEEP IT FOR FUTURE REFERENCE.

User Manual
Page 2
Registering your product will allow for purchasing a Norpole Commercial product. NORPOLE PRODUCT REGISTRATION Thank you for more efficient warranty service processing when warranty service is to complete the product registration on our website: https://mcappliance.com/product-registration. Registering your product could act as your product include the following: 1. ... is required. 3. The benefits of registering your proof of purchase in the event of insurance loss. Once again, thank you regarding a safety notification or product update. 2.
Registering your product will allow for purchasing a Norpole Commercial product. NORPOLE PRODUCT REGISTRATION Thank you for more efficient warranty service processing when warranty service is to complete the product registration on our website: https://mcappliance.com/product-registration. Registering your product could act as your product include the following: 1. ... is required. 3. The benefits of registering your proof of purchase in the event of insurance loss. Once again, thank you regarding a safety notification or product update. 2.

User Manual
Page 3
TABLE OF CONTENTS REGISTRATION ...2 IMPORTANT INFORMATION ...4 IMPORANT SAFETY INSTRUCTIONS ...5 SPECIFICATIONS...7 INSTALLATION INSTRUCTIONS...8 OPERATION INSTRUCTIONS...10 CARE AND MAINTENANCE...12 TROUBLESHOOTING ...14 WARRANTY ...16 3
TABLE OF CONTENTS REGISTRATION ...2 IMPORTANT INFORMATION ...4 IMPORANT SAFETY INSTRUCTIONS ...5 SPECIFICATIONS...7 INSTALLATION INSTRUCTIONS...8 OPERATION INSTRUCTIONS...10 CARE AND MAINTENANCE...12 TROUBLESHOOTING ...14 WARRANTY ...16 3

User Manual
Page 4
..." used . Instruction of serious mechanical injury. The label indicates a flammable foaming agent "Cyclopentane" used . Warning sign, special attention is required, and operation is a risk of fire. The label indicates a hazardous voltage. Important Information Please pay attention to the following warning labels on the ice maker: The label indicates a hazardous voltage. The label indicates rotating components...
..." used . Instruction of serious mechanical injury. The label indicates a flammable foaming agent "Cyclopentane" used . Warning sign, special attention is required, and operation is a risk of fire. The label indicates a hazardous voltage. Important Information Please pay attention to the following warning labels on the ice maker: The label indicates a hazardous voltage. The label indicates rotating components...

User Manual
Page 5
... data specific to protect against shock hazards. ALWAYS make sure the unit is not being used for electrical and other cord or plug. ALWAYS unplug the unit and remove all instructions before cleaning, repair, or maintenance. 23. DO NOT install the ice machine in or near the unit. 15. DO NOT use any way, immediately turn off and disconnect the power, and...
... data specific to protect against shock hazards. ALWAYS make sure the unit is not being used for electrical and other cord or plug. ALWAYS unplug the unit and remove all instructions before cleaning, repair, or maintenance. 23. DO NOT install the ice machine in or near the unit. 15. DO NOT use any way, immediately turn off and disconnect the power, and...

User Manual
Page 6
... NOT PUNCTURE REFRIGERANT TUBING. • CAUTION - FLAMMABLE REFRIGERANT USED. • CAUTION - The ice machine is generally used at home. 6 RISK OF FIRE OR EXPLOSION. DISPOSE OF PROPERLY IN ACCORDANCE WITH FEDERAL OR LOCAL REGULATIONS. TO BE REPAIRED ONLY BY TRAINED SERVICE PERSONNEL. With proper installation and connection to potable water and power source, the ice making will automatically stop. For the ice maker with flammable refrigerant R290: •...
... NOT PUNCTURE REFRIGERANT TUBING. • CAUTION - FLAMMABLE REFRIGERANT USED. • CAUTION - The ice machine is generally used at home. 6 RISK OF FIRE OR EXPLOSION. DISPOSE OF PROPERLY IN ACCORDANCE WITH FEDERAL OR LOCAL REGULATIONS. TO BE REPAIRED ONLY BY TRAINED SERVICE PERSONNEL. With proper installation and connection to potable water and power source, the ice making will automatically stop. For the ice maker with flammable refrigerant R290: •...

User Manual
Page 7
..., NPCIM280 Model NPCIM90B NPCIM120H NPCIM160H NPCIM210 NPCIM280 Dimensions (LxWxH) Inches (mm) 14.8" x 22.6" x 30.0" (375 × 575 × 762 mm) 19.7" x 23.2" x 33.5" (500 x 590 x 850 mm) 26.0" x 27.0" x 38.2" (660 x 685 x 970 mm) 26.0" x 27.0" x 38.2" (660 x 685 x 970 mm) 26.0" x 27.0" x 38.2" (660 x 685 x 970 mm) Ice Making Capacity 90 lbs. (41 kg)/ 24 hr Bin...
..., NPCIM280 Model NPCIM90B NPCIM120H NPCIM160H NPCIM210 NPCIM280 Dimensions (LxWxH) Inches (mm) 14.8" x 22.6" x 30.0" (375 × 575 × 762 mm) 19.7" x 23.2" x 33.5" (500 x 590 x 850 mm) 26.0" x 27.0" x 38.2" (660 x 685 x 970 mm) 26.0" x 27.0" x 38.2" (660 x 685 x 970 mm) 26.0" x 27.0" x 38.2" (660 x 685 x 970 mm) Ice Making Capacity 90 lbs. (41 kg)/ 24 hr Bin...

User Manual
Page 8
... 5.5 Bar; INSTALLATION SCHEMATIC 8 For optimal ice making performance, operate in ambient temperatures between 45°F - 55°F (7°C - 13°C) • The ice machine should be kept away from heat sources, and should be placed on the ratings label and that has appropriate overcurrent protection. INSTALLATION CAUTION: Read all instructions before installing INSTALLATION LOCATION The ice maker should not be used in an...
... 5.5 Bar; INSTALLATION SCHEMATIC 8 For optimal ice making performance, operate in ambient temperatures between 45°F - 55°F (7°C - 13°C) • The ice machine should be kept away from heat sources, and should be placed on the ratings label and that has appropriate overcurrent protection. INSTALLATION CAUTION: Read all instructions before installing INSTALLATION LOCATION The ice maker should not be used in an...

User Manual
Page 9
... needed. Confirm that the unit is equipped with this machine) on the ratings label are installed in .(20-30cm). 6. Check the model and serial number on a leveled floor. The compressor and condenser are met, and that all parts and accessories are used as to install a water valve (not supplied with adjustable legs for reference. 2. The bottom of the ice machine is connected to the schematic diagram...
... needed. Confirm that the unit is equipped with this machine) on the ratings label are installed in .(20-30cm). 6. Check the model and serial number on a leveled floor. The compressor and condenser are met, and that all parts and accessories are used as to install a water valve (not supplied with adjustable legs for reference. 2. The bottom of the ice machine is connected to the schematic diagram...

User Manual
Page 10
... extends or shortens the ice making process. f. Ice Cube Thickness adjustment: During the ice making mode. ON/OFF: When the unit is in the Troubleshooting section for a long period. OPERATION After installation, connect the water source and turn on the power supply, and the machine will come on and start the cleaning process. When the cleaning process is a problem with the ice making cycle or errors. ● INIT: Self...
... extends or shortens the ice making process. f. Ice Cube Thickness adjustment: During the ice making mode. ON/OFF: When the unit is in the Troubleshooting section for a long period. OPERATION After installation, connect the water source and turn on the power supply, and the machine will come on and start the cleaning process. When the cleaning process is a problem with the ice making cycle or errors. ● INIT: Self...

User Manual
Page 11
... is securely connected and the valve is open and the water trough will stop until the ice has either melted enough to the power supply outlet and the unit's power switch is dropping. When the ice bin is clear, the ice making will run a self check and pump any water out of the water. When you turn the power switch 'On', the unit will take...
... is securely connected and the valve is open and the water trough will stop until the ice has either melted enough to the power supply outlet and the unit's power switch is dropping. When the ice bin is clear, the ice making will run a self check and pump any water out of the water. When you turn the power switch 'On', the unit will take...

User Manual
Page 12
... the ice maker clean, and that nothing is blocking the vents. WARNING: Before maintenance or cleaning can be performed, the water supply should be shut off the water and disconnect from the water trough, inlet pipe, and drain pipe. 12 If necessary, use a commercial stainless steel cleaner or polish. INLET WATER FILTER The filter should be done by a qualified service technician. Models: NPCIM120H, NPCIM160H, NPCIM210, NPCIM280 Push...
... the ice maker clean, and that nothing is blocking the vents. WARNING: Before maintenance or cleaning can be performed, the water supply should be shut off the water and disconnect from the water trough, inlet pipe, and drain pipe. 12 If necessary, use a commercial stainless steel cleaner or polish. INLET WATER FILTER The filter should be done by a qualified service technician. Models: NPCIM120H, NPCIM160H, NPCIM210, NPCIM280 Push...

User Manual
Page 13
... the outlet 13 Put cleaner in the unit malfunctioning. NOTE: ALWAYS clean and sterilize the ice bin, ice sliding board, water distribution pipe, water supply pipe, and water pump, then rinse completely. • Turn on the evaporator before running to ensure complete sterilization. NOTE: Be sure to use a sterilization solution specifically meant for about 5 minutes. Be sure to spray some solution...
... the outlet 13 Put cleaner in the unit malfunctioning. NOTE: ALWAYS clean and sterilize the ice bin, ice sliding board, water distribution pipe, water supply pipe, and water pump, then rinse completely. • Turn on the evaporator before running to ensure complete sterilization. NOTE: Be sure to use a sterilization solution specifically meant for about 5 minutes. Be sure to spray some solution...

User Manual
Page 14
... that the outlet is good, and the plug is properly connected. ice cubes too thin or incomplete Water temperature too high Water inlet valve does not work Water leaking Water inlet filter has not been replaced for solutions to common problems. If a service call is needed Replace the filter Clean the condenser and filter or replace filter Make sure the unit is installed somewhere with an ambient temperature of 41-104°F (5-40...
... that the outlet is good, and the plug is properly connected. ice cubes too thin or incomplete Water temperature too high Water inlet valve does not work Water leaking Water inlet filter has not been replaced for solutions to common problems. If a service call is needed Replace the filter Clean the condenser and filter or replace filter Make sure the unit is installed somewhere with an ambient temperature of 41-104°F (5-40...

User Manual
Page 15
CODE E01 E03 E04 E05 E06 E07 E08 CAUSE Water Curtain or Ice Full Switch Fault Ice Harvest Overtime MODE Sleep mode. Sleep Mode High Temperature Fault Water Shortage Fault Sleep Mode Sleep Mode. Unit will recover after water curtain is reset. Over-Pressure Fault Sleep Mode Condenser Temperature Sensor Open Circuit Fault Condenser Temperature Sensor Short Circuit Fault Keep Working Keep Working 15 DISPLAY ERROR CODES If the display shows any of these codes, check the unit before calling for customer service. Unit will retry every 30 minutes.
CODE E01 E03 E04 E05 E06 E07 E08 CAUSE Water Curtain or Ice Full Switch Fault Ice Harvest Overtime MODE Sleep mode. Sleep Mode High Temperature Fault Water Shortage Fault Sleep Mode Sleep Mode. Unit will recover after water curtain is reset. Over-Pressure Fault Sleep Mode Condenser Temperature Sensor Open Circuit Fault Condenser Temperature Sensor Short Circuit Fault Keep Working Keep Working 15 DISPLAY ERROR CODES If the display shows any of these codes, check the unit before calling for customer service. Unit will retry every 30 minutes.

User Manual
Page 16
... with published installation instructions. ● Refunds for non-repairable products are limited to furnish a new part(s) (at the company's option) for us on implied warranties. warrants the compressor (parts only) to receiving a replacement unit or refund. A refund or replacement will be free from defects in material and workmanship and agrees to remedy any such defect or to the price paid...
... with published installation instructions. ● Refunds for non-repairable products are limited to furnish a new part(s) (at the company's option) for us on implied warranties. warrants the compressor (parts only) to receiving a replacement unit or refund. A refund or replacement will be free from defects in material and workmanship and agrees to remedy any such defect or to the price paid...

