
Owners Manual
Page 1
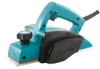
www.makitatools.com SAVE THESE INSTRUCTIONS FOR FUTURE REFERENCE. Power Planer MODEL 1902 DOUBLE INSULATION 002543 INSTRUCTION MANUAL WARNING: For your personal safety, READ and UNDERSTAND before using.
www.makitatools.com SAVE THESE INSTRUCTIONS FOR FUTURE REFERENCE. Power Planer MODEL 1902 DOUBLE INSULATION 002543 INSTRUCTION MANUAL WARNING: For your personal safety, READ and UNDERSTAND before using.

Owners Manual
Page 4
... or incorrectly, you use the next heavier gage. SERVICE 23. When servicing a tool, use depending on another tool. Use of unauthorized parts or failure to planer safety rules. Table 1 shows the correct size to carry the current your extension cord is in doubt, use this manual. Table 1: Minimum gage for one...
... or incorrectly, you use the next heavier gage. SERVICE 23. When servicing a tool, use depending on another tool. Use of unauthorized parts or failure to planer safety rules. Table 1 shows the correct size to carry the current your extension cord is in doubt, use this manual. Table 1: Minimum gage for one...

Owners Manual
Page 5
Always switch off and set it with a stick. 13. Do not leave the tool running. When leaving the planer, switch off and wait for the blades to come to a complete stop before putting the tool aside. 17. Wait for tool. Take caution to follow ...the safety rules stated in this instruction manual may cause serious personal injury. Chute may be toxic. Use only Makita blades specified in this manual. 18. Follow material supplier safety data. Keep at least 200 mm (8") away from the tool at all times. 11. V volts...
Always switch off and set it with a stick. 13. Do not leave the tool running. When leaving the planer, switch off and wait for the blades to come to a complete stop before putting the tool aside. 17. Wait for tool. Take caution to follow ...the safety rules stated in this instruction manual may cause serious personal injury. Chute may be toxic. Use only Makita blades specified in this manual. 18. Follow material supplier safety data. Keep at least 200 mm (8") away from the tool at all times. 11. V volts...

Owners Manual
Page 6
... be dangerous. Use gloves or rags to stop the tool from the locked position, pull the switch trigger fully, then release it. Removing or installing planer blades CAUTION: • Tighten the blade installation bolts carefully when attaching the blades to the "OFF" position when released. Knob 1.
... be dangerous. Use gloves or rags to stop the tool from the locked position, pull the switch trigger fully, then release it. Removing or installing planer blades CAUTION: • Tighten the blade installation bolts carefully when attaching the blades to the "OFF" position when released. Knob 1.

Owners Manual
Page 7
...plate 4. Drum • Use only the Makita wrench provided to ensure uniform cutting. 5. To install the blades, loosely attach the adjusting plate to the set plate with the pan head screws and set plate rest in the mini planer blade groove, then press in the heel... plate is perfectly flush with the blades. 2. 002564 1 2 1. Socket wrench 2. Bolt 002565 1 2 5 3 6 7 4 8 9 10 1. Heel of gauge base 10.Mini planer blade 002566 1 6 5 4 3 2 1. Inside flank of the gauge base. Hex. flange head bolt 5. Drum plate 6. To remove the blades on the other. 8. The blade...
...plate 4. Drum • Use only the Makita wrench provided to ensure uniform cutting. 5. To install the blades, loosely attach the adjusting plate to the set plate with the pan head screws and set plate rest in the mini planer blade groove, then press in the heel... plate is perfectly flush with the blades. 2. 002564 1 2 1. Socket wrench 2. Bolt 002565 1 2 5 3 6 7 4 8 9 10 1. Heel of gauge base 10.Mini planer blade 002566 1 6 5 4 3 2 1. Inside flank of the gauge base. Hex. flange head bolt 5. Drum plate 6. To remove the blades on the other. 8. The blade...

Owners Manual
Page 8
For the correct planer blade setting Your planing surface will minimize chip scatter, making for a cleaner work area. 1 1. Cause: One or both blade edges (A) (B) fails to protrude enough in ...
For the correct planer blade setting Your planing surface will minimize chip scatter, making for a cleaner work area. 1 1. Cause: One or both blade edges (A) (B) fails to protrude enough in ...

Owners Manual
Page 9
... full speed. Use the chip cover screws to fasten it into the rear cover hole. Then move the tool gently forward. Chip cover 3. The power planer keeps cutting at the end of planing, and at the back at a speed that you should reduce the depth of finish. Switch on the tool...
... full speed. Use the chip cover screws to fasten it into the rear cover hole. Then move the tool gently forward. Chip cover 3. The power planer keeps cutting at the end of planing, and at the back at a speed that you should reduce the depth of finish. Switch on the tool...

Owners Manual
Page 12
.... Screwdriver 002598 1 2 Use a screwdriver to persons. The use with your local Makita service center. • High-speed steel Planer blade • Tungsten-carbide Planer blade (For longer blade life) • Mini planer blade • Sharpening holder assembly • Blade gauge • Set plate set ...; Socket wrench 12 To maintain product SAFETY and RELIABILITY, repairs, any assistance for more details regarding these accessories, ask your Makita tool specified in this manual. Brush holder cap 2. If you need any other accessories or attachments might present a risk of...
.... Screwdriver 002598 1 2 Use a screwdriver to persons. The use with your local Makita service center. • High-speed steel Planer blade • Tungsten-carbide Planer blade (For longer blade life) • Mini planer blade • Sharpening holder assembly • Blade gauge • Set plate set ...; Socket wrench 12 To maintain product SAFETY and RELIABILITY, repairs, any assistance for more details regarding these accessories, ask your Makita tool specified in this manual. Brush holder cap 2. If you need any other accessories or attachments might present a risk of...
