Makita CT225SYX Support and Manuals
Get Help and Manuals for this Makita item
View All Support Options Below
Free Makita CT225SYX manuals!
Problems with Makita CT225SYX?
Ask a Question
Free Makita CT225SYX manuals!
Problems with Makita CT225SYX?
Ask a Question
Popular Makita CT225SYX Manual Pages
XDT11 Instruction Manual - Page 3
... those intended could
result in this instruction manual may create a risk of the... instructions to operate the power tool.
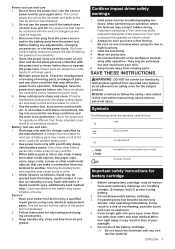
Before using only identical replacement parts....Maintain power tools. Service 1.
They may be repaired.
3. Do not use ) replace strict adherence to ... INSTRUCTIONS. If damaged, have a firm footing. If contact accidentally occurs, flush with specifically...
XDT11 Instruction Manual - Page 5
... capacity.
1. Lamp
CAUTION: Do not look in the light or see that the switch trigger actuates properly and returns to see the source of the model number
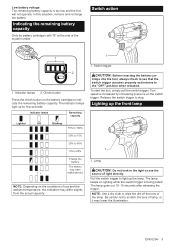
Switch action
1 1
2
1.
Be careful not to stop. Indicating the remaining battery capacity
Only for few seconds. The indicator lamps light up for battery cartridges...
XDT11 Instruction Manual - Page 6
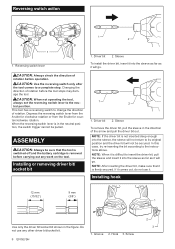
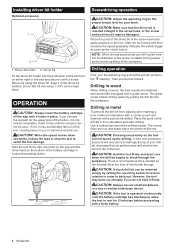
...driver bit, pull the sleeve and insert it into the sleeve as far as it is firmly secured. Groove 2.
Changing the direction of rotation before operation. This tool has a reversing switch to the instructions... the tool, always set the reversing switch lever to a complete stop.
Installing or removing driver bit/ socket bit
1 2
1. NOTE: If the driver bit is removed before...
XDT11 Instruction Manual - Page 8

...
1
1
2 1. To maintain product SAFETY and RELIABILITY, repairs, any other maintenance or adjustment should be replaced at the same time. Use a screwdriver to the limit mark. Carbon brush cap
5. Recessed part 2. Hole 2. Reinstall the rear cover and tighten two screws... electric brake is not working well, ask Makita Authorized or Factory Service Centers for about 1 minute.
8.
XDT11 Instruction Manual - Page 9
... workmanship and materials for use with your local Makita Service Center. • Driver bits • Hook • Plastic carrying case ...specific legal rights, and you need any trouble develop during this manual. This Warranty does not apply where: • repairs have been made to you . be performed by others: • repairs...Service Centers, always using Makita replacement parts.
XFD10 Instruction Manual - Page 2
...or dust. The term "power tool" in the warnings refers to a rotating part of the power tool may result in explosive atmospheres, such as dust mask,... shock. Always wear eye protection. A moment of electric shock.
5.
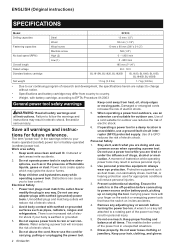
ENGLISH (Original instructions)
SPECIFICATIONS
Model: Drilling capacities
Fastening capacities
No load speed (RPM)
Overall length Rated voltage Standard battery...
XFD10 Instruction Manual - Page 3
... are dangerous in this instruction manual may create a risk ...INSTRUCTIONS.
Use of control can reduce dust-related hazards. The correct power tool will ensure that can be controlled with specifically...replacement parts. Check for misalignment or binding of moving parts. Many accidents are provided for lubricating and chang- Have your skin. 9. ing accessories. 3. Cordless driver...
XFD10 Instruction Manual - Page 4
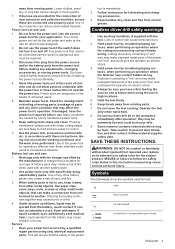
... to disposal of the cartridge. Be careful not to slip off and the battery cartridge is not locked completely. SAVE THESE INSTRUCTIONS. Overcharging shortens the battery service life.
3. CAUTION: Do not install the battery cartridge forcibly. Do not incinerate the battery cartridge even if it .
4. Do not use it may result in damage...
XFD10 Instruction Manual - Page 5
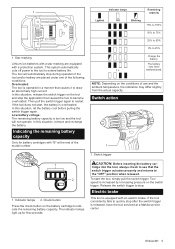
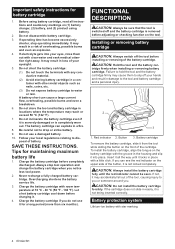
... on the conditions of use and the ambient temperature, the indication may have the tool serviced at the end of the following conditions: Overloaded: The tool is too low and the...%
Charge the battery. Star marking Lithium-ion batteries with a star marking are placed under one of the model number
Indicator lamps
Remaining capacity
Lighted
Off
Blinking
75% to 100%
50% to 75%
25% to 50...
XFD10 Instruction Manual - Page 6
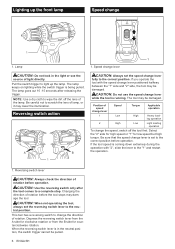
...speed change lever fully to the neutral position.
Reversing switch action
A
B
1
CAUTION: Always set the reversing switch lever to the correct position. If the tool speed is being pulled. ...: Always check the direction of light directly. CAUTION: When not operating the tool, always set the speed change lever is running. Depress the reversing switch lever from the A side for...
XFD10 Instruction Manual - Page 7

... take it will slip at various torque levels when set at marking. ENGLISH 7 The clutch does not work on the tool body. Place the driver bit/drill bit in the chuck as far as it...
ɸ3.5 x 22
ɸ4.1x 38
- Sleeve 2. The following shows the rough guide of the relationship between the screw size and graduation.
Installing or removing driver bit/ drill bit
counterclockwise.
XFD10 Instruction Manual - Page 8
... performance and shorten the service life of your work....tool.
The guide screw makes drilling easier by setting the reversing switch...part on the tool will only serve to be kept there. Driver bits 45 mm-long (1-3/4") can be seen. However, the tool may accidentally fall out of hole break through the workpiece. Use a cutting lubricant when drilling metals.
Installing driver...
XFD10 Instruction Manual - Page 10

... repair. Some states do not allow the exclusion or limitation of incidental or consequential damages, so the above limitation may also have been made to the tool. Insert the battery cartridge into the tool and break in brushes by Makita Authorized or Factory Service Centers, always using Makita replacement parts. This Warranty gives you specific...
XDT11R Parts Breakdown - Page 2
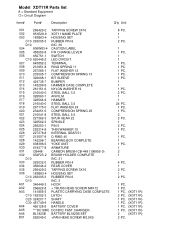
Model XDT11R Parts list
A = Standard Equipment 〇= Circuit Diagram
Item#
Part#
Description
Q'ty Unit
001
266429-2 TAPPING SCREW 3X16
002
851E28-9 XDT11 NAME PLATE
003
183B63-4 HOUSING SET...
A03 C30 451749-9 HANDLE
A04
450128-8 BATTERY COVER
A05
***DC18RC DC18RC FAST CHARGER
A06
BL1820B BATTERY BL1820B SET
D01
652045-0 +PAN HEAD SCREW M3.5X5
8 PC.
1
1
2 PC.
0
1
1 PC...
XFD10Z Parts Breakdown - Page 2
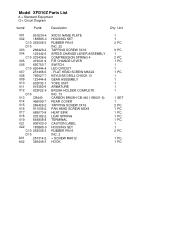
Model XFD10Z Parts List
A = Standard Equipment 〇= Circuit Diagram
Item#
Part#
Description
Q'ty Unit
001
851E34-4
002
183B65-0
002 C10 263005...644808-8
021
806Y20-0
022
183B65-0
022 C10 263005-3
022 D10
A01
251314-2
A02
346449-3
XFD10 NAME PLATE HOUSING SET RUBBER PIN 6 INC. 22 TAPPING SCREW 3X16 SPEED CHANGE LEVER ASSEMBLY COMPRESSION SPRING 4 F/R CHANGE LEVER SWITCH LED...
Makita CT225SYX Reviews
We have not received any reviews for Makita yet.