Makita DRC200PT Instruction Manual
Page 4
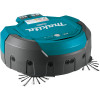
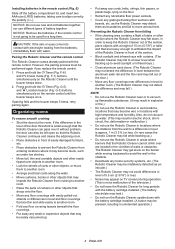
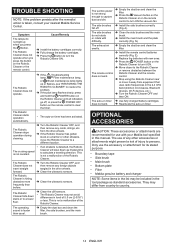
...8226; Cigarette butts • Toner or other combustible substances • Carpet cleaner or other heating equipment. Also, do not vacuum up inflammable substances. Do not touch the Robotic Cleaner with an incline of each medical institution when using optional lithium ion batteries...18-1/8" x 18-1/8" x 7-1/8") Weight (incl. Do not use the Robotic Cleaner near an open flame, flammable and/or dangerous materials. SAFETY PRECAUTIONS WARNING Do not use the Robotic Cleaner near or vacuum up water. SPECIFICATIONS Standard battery cartridge BL1815N, BL1820B, BL1830, BL1830B, ...
...8226; Cigarette butts • Toner or other combustible substances • Carpet cleaner or other heating equipment. Also, do not vacuum up inflammable substances. Do not touch the Robotic Cleaner with an incline of each medical institution when using optional lithium ion batteries...18-1/8" x 18-1/8" x 7-1/8") Weight (incl. Do not use the Robotic Cleaner near an open flame, flammable and/or dangerous materials. SAFETY PRECAUTIONS WARNING Do not use the Robotic Cleaner near or vacuum up water. SPECIFICATIONS Standard battery cartridge BL1815N, BL1820B, BL1830, BL1830B, ...
Makita DRC200PT Instruction Manual
Page 6
...8226; Large paper or vinyl garbage • Cord or string Clean the filter after vacuuming up the following items. This may result in malfunction. If accidental contact occurs, flush ...used with any location where the temperature may result in plastic cracking. Do not use the Robotic Cleaner on (1) the battery charger, (2) the battery, and (3) product using the battery. ...a large current flow, overheating, possible burns and even a breakdown. 6. Using non-genuine Makita batteries, or batteries that is recommended that can make a connection from the battery; Always stop operating ...
...8226; Large paper or vinyl garbage • Cord or string Clean the filter after vacuuming up the following items. This may result in malfunction. If accidental contact occurs, flush ...used with any location where the temperature may result in plastic cracking. Do not use the Robotic Cleaner on (1) the battery charger, (2) the battery, and (3) product using the battery. ...a large current flow, overheating, possible burns and even a breakdown. 6. Using non-genuine Makita batteries, or batteries that is recommended that can make a connection from the battery; Always stop operating ...
Makita DRC200PT Instruction Manual
Page 7
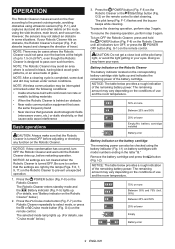
... battery cartridges) 6. Cruise mode button and lamps : Pattern mode : Random mode 8. Vacuum button and lamp 11. Boundary sensor button and lamp Remote control (Fig. two spare brushes) • Screws for the figure number corresponding to each sequence and the Robotic Cleaner automatically stops. NOTICE: Before work on the cartridge. 7 ENGLISH C-2) on either of...
... battery cartridges) 6. Cruise mode button and lamps : Pattern mode : Random mode 8. Vacuum button and lamp 11. Boundary sensor button and lamp Remote control (Fig. two spare brushes) • Screws for the figure number corresponding to each sequence and the Robotic Cleaner automatically stops. NOTICE: Before work on the cartridge. 7 ENGLISH C-2) on either of...
Makita DRC200PT Instruction Manual
Page 8
...8226; Noise may appear on the floor. • Retract any retractable floor power sockets. • Cover any home security systems, etc. (The Robotic Cleaner may be easily vacuumed up. • Put away any cords, belts, strings, thin papers, or plastic bags, lying on TV screens during operation. (This is ... installed. (The battery electrolyte may leak.) • Do not turn the Robotic Cleaner upside down , in order to keep the Robotic Cleaner out of the section, place objects with boards, etc. Also, do not vacuum up flammable substances. (It may result in explosion or fire.) •...
...8226; Noise may appear on the floor. • Retract any retractable floor power sockets. • Cover any home security systems, etc. (The Robotic Cleaner may be easily vacuumed up. • Put away any cords, belts, strings, thin papers, or plastic bags, lying on TV screens during operation. (This is ... installed. (The battery electrolyte may leak.) • Do not turn the Robotic Cleaner upside down , in order to keep the Robotic Cleaner out of the section, place objects with boards, etc. Also, do not vacuum up flammable substances. (It may result in explosion or fire.) •...
Makita DRC200PT Instruction Manual
Page 9
...black wood-grain patterns, or an area made of the battery cartridge. F-7) on the Robotic Cleaner. Remove the battery cartridge and press the (Fig. P-2) absorbs impact and changes the ...vacuum fan. F-5) lights up to 1.5 cm (9/16"), even though the Robotic Cleaner is colored in some dust and dirt may harm your Robotic Cleaner hits an obstacle, the Robotic Cleaner's bumper (Fig. The pilot lamp (Fig. To turn OFF the Robotic Cleaner, press and hold the POWER button (Fig. OPERATION The Robotic Cleaner cruises around on the Robotic Cleaner until the Robotic Cleaner...
...black wood-grain patterns, or an area made of the battery cartridge. F-7) on the Robotic Cleaner. Remove the battery cartridge and press the (Fig. P-2) absorbs impact and changes the ...vacuum fan. F-5) lights up to 1.5 cm (9/16"), even though the Robotic Cleaner is colored in some dust and dirt may harm your Robotic Cleaner hits an obstacle, the Robotic Cleaner's bumper (Fig. The pilot lamp (Fig. To turn OFF the Robotic Cleaner, press and hold the POWER button (Fig. OPERATION The Robotic Cleaner cruises around on the Robotic Cleaner until the Robotic Cleaner...

Makita DRC200PT Instruction Manual
Page 10
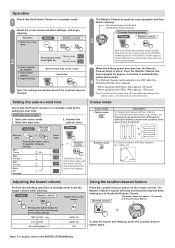
...empty the upper bin (Fig. Replace the dust box in the Robotic Cleaner in the reverse sequence. To turn ON the vacuum fan, press the Vacuum button on the Robotic Cleaner until all indicators turn OFF the Robotic Cleaner. 2. NOTICE: This setting is out of the reach of ... buzzer volume including mute can capture most visible dust without using the vacuum fan. K-2). 4. Saving power The Robotic Cleaner can be caught between the handle and the Robotic Cleaner's body. In standby mode, press the Vacuum button on timer activated. 10 ENGLISH K-4). 6. Cruise mode Pattern mode...
...empty the upper bin (Fig. Replace the dust box in the Robotic Cleaner in the reverse sequence. To turn ON the vacuum fan, press the Vacuum button on the Robotic Cleaner until all indicators turn OFF the Robotic Cleaner. 2. NOTICE: This setting is out of the reach of ... buzzer volume including mute can capture most visible dust without using the vacuum fan. K-2). 4. Saving power The Robotic Cleaner can be caught between the handle and the Robotic Cleaner's body. In standby mode, press the Vacuum button on timer activated. 10 ENGLISH K-4). 6. Cruise mode Pattern mode...
Makita DRC200PT Instruction Manual
Page 12
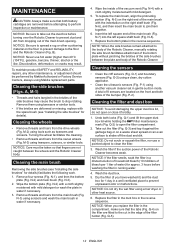
.... NOTICE: Care must be performed by Makita Authorized or Factory Service Centers, always using tweezers or similar tools. • If the bristles are removed before turning over the Robotic Cleaner to perform inspection or maintenance. Wipe the inside of the Robotic Cleaner. To replace the main brush, align... Be sure to take out the dust box before attempting to prevent dust and dirt from the drive wheels (Fig. M-2) using another vacuum cleaner set in the reverse sequence. Cleaning the main brush Removing the side brushes (see "Installing the side brushes" for approx. 3 hours ...
.... NOTICE: Care must be performed by Makita Authorized or Factory Service Centers, always using tweezers or similar tools. • If the bristles are removed before turning over the Robotic Cleaner to perform inspection or maintenance. Wipe the inside of the Robotic Cleaner. To replace the main brush, align... Be sure to take out the dust box before attempting to prevent dust and dirt from the drive wheels (Fig. M-2) using another vacuum cleaner set in the reverse sequence. Cleaning the main brush Removing the side brushes (see "Installing the side brushes" for approx. 3 hours ...
Makita DRC200PT Instruction Manual
Page 13
...all lamps flash once for each sequence lamp lights up lamp flashes once for an hour. This is complete, consult your nearest Makita Service Center. Turn the Robotic Cleaner OFF and then ON. • Threads and hairs are tangled in the drive wheels. K-2) and clean the filter (Fig.... • Threads and hairs are tangled in the Robotic Cleaner. A, N-3). • The dust box is full of battery power, the Robotic Cleaner will stop cleaning and tell you something is hanging down . R-1) including the vent grill (Fig. F-9) • Vacuum lamp (Fig. Resolve the problem. 3. If the error...
...all lamps flash once for each sequence lamp lights up lamp flashes once for an hour. This is complete, consult your nearest Makita Service Center. Turn the Robotic Cleaner OFF and then ON. • Threads and hairs are tangled in the drive wheels. K-2) and clean the filter (Fig.... • Threads and hairs are tangled in the Robotic Cleaner. A, N-3). • The dust box is full of battery power, the Robotic Cleaner will stop cleaning and tell you something is hanging down . R-1) including the vent grill (Fig. F-9) • Vacuum lamp (Fig. Resolve the problem. 3. If the error...
Makita DRC200PT Instruction Manual
Page 14
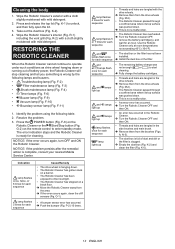
... and clean the filter, the side brushes, and the main brush. The auto-on the remote control to country. 14 ENGLISH Press the Vacuum button on the Robotic Cleaner or on a barrier or other accessories or attachments might present a risk of 5.5 cm (2-3/16") or less. Clean the side brushes and...or attachments are recommended for its stated purpose. • Boundary tape • Side brush • Main brush • Bottom plate • Filter • Makita genuine battery and charger NOTE: Some items in the list may be included in the tool package as it away from the drive wheels. TROUBLE...
... and clean the filter, the side brushes, and the main brush. The auto-on the remote control to country. 14 ENGLISH Press the Vacuum button on the Robotic Cleaner or on a barrier or other accessories or attachments might present a risk of 5.5 cm (2-3/16") or less. Clean the side brushes and...or attachments are recommended for its stated purpose. • Boundary tape • Side brush • Main brush • Bottom plate • Filter • Makita genuine battery and charger NOTE: Some items in the list may be included in the tool package as it away from the drive wheels. TROUBLE...
Makita DRC200Z Quick Start Guide
Page 1
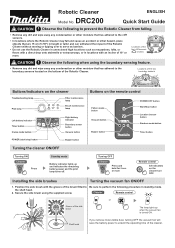
...button POWER (start/stop) button Buzzer button Turning the cleaner ON/OFF Turning ON Cleaner Press Standby mode Battery indicator lights up when the vacuum fan is turned ON. Robotic Cleaner ENGLISH Model No. Locations of the Robotic Cleaner without moving or tipping over to serve as barriers.... • Do not use the Robotic Cleaner in unenclosed high locations such as mezzanines, lofts, or...
...button POWER (start/stop) button Buzzer button Turning the cleaner ON/OFF Turning ON Cleaner Press Standby mode Battery indicator lights up when the vacuum fan is turned ON. Robotic Cleaner ENGLISH Model No. Locations of the Robotic Cleaner without moving or tipping over to serve as barriers.... • Do not use the Robotic Cleaner in unenclosed high locations such as mezzanines, lofts, or...
Makita DRC200Z Quick Start Guide
Page 2
...Start/ Stop button on the remote control or the POWER (start time. Note: For details, refer to locate the Robotic Cleaner. Once the Robotic Cleaner has been stopped for approx. 10 seconds Remote control and the pilot lamp flashes. Random mode For cleaning locations with ...press the Location beacon button again. Cleaner Remote control or Buzzer lamp on the Robotic Cleaner again to set time has elapsed. Select the cruise mode. 2. The Robotic Cleaner accepts the start time. 3. Select the cruise mode and other factors. Select vacuum fan ON/OFF. 3. When using ...
...Start/ Stop button on the remote control or the POWER (start time. Note: For details, refer to locate the Robotic Cleaner. Once the Robotic Cleaner has been stopped for approx. 10 seconds Remote control and the pilot lamp flashes. Random mode For cleaning locations with ...press the Location beacon button again. Cleaner Remote control or Buzzer lamp on the Robotic Cleaner again to set time has elapsed. Select the cruise mode. 2. The Robotic Cleaner accepts the start time. 3. Select the cruise mode and other factors. Select vacuum fan ON/OFF. 3. When using ...
