Makita GLC02Z Support and Manuals
Get Help and Manuals for this Makita item
View All Support Options Below
Free Makita GLC02Z manuals!
Problems with Makita GLC02Z?
Ask a Question
Free Makita GLC02Z manuals!
Problems with Makita GLC02Z?
Ask a Question
Popular Makita GLC02Z Manual Pages
Instruction Manual - Page 2
...Original instructions)
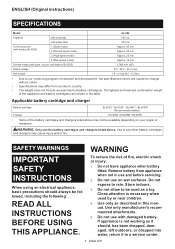
SPECIFICATIONS
Model:
...INSTRUCTIONS BEFORE USING THIS APPLIANCE. Remove battery from country to rain.
Store indoors.
3. The lightest and heaviest combination weight of the appliance and battery cartridge(s) are subject to change without notice.
• Specifications may differ from appliance when not in this manual. Do not use and before servicing...
Instruction Manual - Page 3
...is maintained.
25. Recharge only with the charger specified by a qualified repair person using only identical replacement parts. A charger that is damaged or modified. Under abusive conditions, liquid may.... When battery pack is burning or smoking, such as indicated in the instructions. Have servicing performed by the manufacturer. Do not modify or attempt to pick up flammable...
Instruction Manual - Page 4
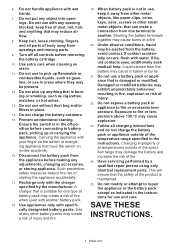
Read this instruction manual and the charger instruction manual carefully before operation. 5.
To reduce your eyesight.
4 ENGLISH Do not block the intake hole or vent holes.
Do not disassemble or tamper the battery cartridge. Before using battery cartridge, read all instructions and cautionary markings on (1) battery charger, (2) battery, and (3) product using battery.
2. If ...
Instruction Manual - Page 5
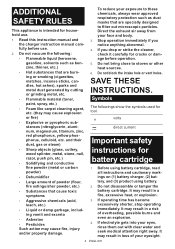
...terminal of electrolyte.
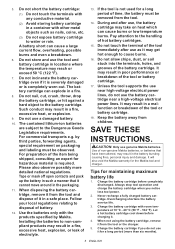
13. SAVE THESE INSTRUCTIONS. Tips for the Makita tool and...176;F).
7. For commercial transports e.g. by Makita. Installing the batteries to water or rain. It may ... it in a fire.
8. Unless the tool supports the use near high-voltage electrical power lines,...that it .
4.
Overcharging shortens the battery service life.
3. Charge the battery cartridge with ...
Instruction Manual - Page 6
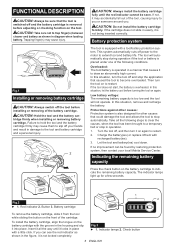
...install the battery cartridge forcibly.
Overloaded: The tool/battery is too low and the tool will automatically stop automatically. In this situation, turn the tool off your local Makita Service Center. Charge the battery(ies) or replace... cartridge and a personal injury.
2
3
1
1
CAUTION: Always install the battery cartridge fully until it may cause them with a little click...
Instruction Manual - Page 7
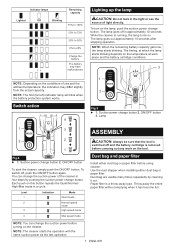
...To start the cleaner, simply push the ON/OFF button. Use the dust stopper when installing either dust bag or paper filter before turning on this button repeats the Quiet/Normal/ ... indicator lamp will blink when the battery protection system works. ON/OFF button
3. Dust bag and paper filter
Install either dust bag or paper filter. Switch action
4
1
2
Fig.5 ► 1 .
The battery may...
Instruction Manual - Page 8
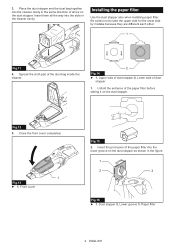
... cover does not close completely.
1. Otherwise the motor may insert its opening when installing the paper filter. NOTICE: Do not fold the cardboard at its protrusion of either...smokes or ignition. Using other .
1
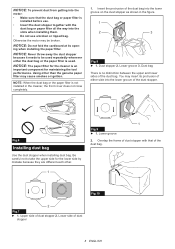
1 Fig.9 ► 1 . Lower groove
2.
Dust bag
There is not installed in the figure.
1
2
3
Fig.8 ► 1 .
NOTICE: To prevent dust from getting into the motor: ...
Instruction Manual - Page 9
...the cleaner cavity in the cleaner cavity. Spread the cloth part of dust
stopper
1. Lower side of the dust bag ...installing paper filter. Close the front cover completely.
1 Fig.13 ► 1 . Paper filter
9 ENGLISH Be careful not to take the upper side for the lower side by mistake because they are different each other.
1
Fig.11
4. Upper side of the paper filter before setting...
Instruction Manual - Page 11
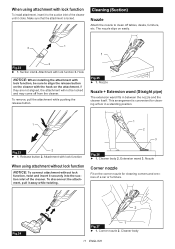
... using attachment with lock function, be locked and may come off tables, desks, furniture, etc. Cleaner body
11 ENGLISH Hook
NOTICE: When installing the attachment with lock function
To install attachment, insert it to the suction inlet of the cleaner until it clicks. Fig.25 ► 1 . Make sure that the attachment is...
Instruction Manual - Page 13
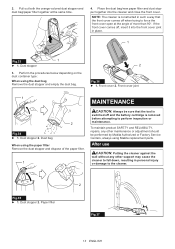
...support may cause the cleaner to fall down, resulting in place.
1
Fig.33
1
► 1 . Perform the procedures below depending on the dust container type:
When using Makita replacement parts...be performed by Makita Authorized or Factory Service Centers, always using the dust bag ...1 . To maintain product SAFETY and RELIABILITY, repairs, any other maintenance or adjustment should be sure ...
Instruction Manual - Page 14
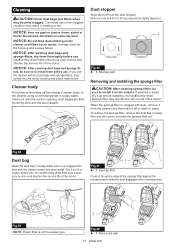
...sponge filter out. Dry it up before use in the clogged condition may shorten the service life of the motor.
Dust stopper
Wipe dust off the outside (cleaner body) ... blow dust sticking on the sponge part by air duster. Sponge part
Removing and installing the sponge filter
CAUTION: After cleaning sponge filter, be sure to re-install them thoroughly before use . Cleaning
...
Instruction Manual - Page 15
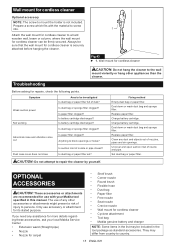
... for repairs, check the following points. Troubleshooting
Before ...Set dust bag or paper filter. Anything to repair the cleaner by yourself. Replace paper filter. CAUTION: Do not attempt to block openings or holes? The use accessory or attachment for cordless cleaner • Cyclone attachment • Tool bag • Makita genuine battery and charger
NOTE: Some items in this manual...
Instruction Manual - Page 16
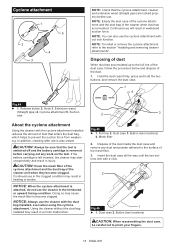
... 3. Suction inlet
About the cyclone attachment
Using the cleaner with the cyclone attachment installed reduces the amount of dust that the cyclone attachment, cleaner, and extension wand ...so may result in weakened suction force. Continued use the cyclone attachment without the dust bag installed may cause the mesh filter to become clogged. CAUTION: Clean the mesh filter of the ...
Instruction Manual - Page 17
When the dust case becomes dirty or the mesh filter is installed securely.
2
3
1 Fig.49 ► 1 . Make sure that the mesh filter is clogged, remove....
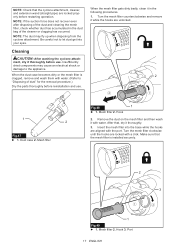
Mesh filter 2. After that, dry it in the dust bag of dust" for the removal procedure.)
Dry the parts thoroughly before reinstallation and use . Turn the mesh filter clockwise until the hooks are locked with water. When the mesh...
Instruction Manual - Page 18
If annexed warranty sheet is not available, refer to the warranty details set forth at below website for the most current warranty terms applicable to the annexed warranty sheet for your respective country. United States of America: www.makitatools.com Canada: www.makita.ca Other countries: www.makita.com
18 ENGLISH MAKITA LIMITED WARRANTY
Please refer to this product.
Makita GLC02Z Reviews
We have not received any reviews for Makita yet.