

Installation Guide
Page 1
W10403811B U.S.A. Only 5 INSTALLATION INSTRUCTIONS 6 Unpack Range 6 Install Anti-Tip Bracket 6 Electrical Connection - U.S.A. INSTALLATION INSTRUCTIONS 30" (76 CM) FREESTANDING ELECTRIC RANGES Table of Contents RANGE SAFETY 2 INSTALLATION REQUIREMENTS 3 Tools and Parts 3 Location Requirements 3 Electrical Requirements - Only 8 Verify Anti-Tip Bracket Is Installed and Engaged 12 Level Range 13 Warming Drawer or Premium Storage Drawer 13 Storage Drawer 14 Oven Door 14 Complete Installation 15 Moving the Range 15 IMPORTANT: Save for local electrical inspector's use.
W10403811B U.S.A. Only 5 INSTALLATION INSTRUCTIONS 6 Unpack Range 6 Install Anti-Tip Bracket 6 Electrical Connection - U.S.A. INSTALLATION INSTRUCTIONS 30" (76 CM) FREESTANDING ELECTRIC RANGES Table of Contents RANGE SAFETY 2 INSTALLATION REQUIREMENTS 3 Tools and Parts 3 Location Requirements 3 Electrical Requirements - Only 8 Verify Anti-Tip Bracket Is Installed and Engaged 12 Level Range 13 Warming Drawer or Premium Storage Drawer 13 Storage Drawer 14 Oven Door 14 Complete Installation 15 Moving the Range 15 IMPORTANT: Save for local electrical inspector's use.

Installation Guide
Page 3
...-wire power supply cord or cable must be made by a licensed, qualified electrical installer. This oven has been designed in a mobile home installation. To install the anti-tip bracket shipped with the maximum allowable wood cabinet temperatures of UL and CSA International and complies with the range, see "Install Anti-Tip Bracket" section. ■ Grounded electrical supply is not applicable, use with nominal 1³⁄₈" (3.5 cm) diameter connection opening dimensions that the materials used...
...-wire power supply cord or cable must be made by a licensed, qualified electrical installer. This oven has been designed in a mobile home installation. To install the anti-tip bracket shipped with the maximum allowable wood cabinet temperatures of UL and CSA International and complies with the range, see "Install Anti-Tip Bracket" section. ■ Grounded electrical supply is not applicable, use with nominal 1³⁄₈" (3.5 cm) diameter connection opening dimensions that the materials used...

Installation Guide
Page 4
.... *Range can be level after installation. depth with handle B. 46⁷⁄₈" (119.1 cm) overall height (max.) with leveling legs screwed all the way in the "Level Range" section. Follow the instructions in * D. 29⁷⁄₈" (75.9 cm) width E. 25 64.3 cm) depth - opening width E. Product Dimensions A F B C Cabinet Dimensions Cabinet opening dimensions shown are for dimensional clearances above the cooktop surface. Model/serial rating plate (located on...
.... *Range can be level after installation. depth with handle B. 46⁷⁄₈" (119.1 cm) overall height (max.) with leveling legs screwed all the way in the "Level Range" section. Follow the instructions in * D. 29⁷⁄₈" (75.9 cm) width E. 25 64.3 cm) depth - opening width E. Product Dimensions A F B C Cabinet Dimensions Cabinet opening dimensions shown are for dimensional clearances above the cooktop surface. Model/serial rating plate (located on...

Installation Guide
Page 5
... the instructions provided for the copper 4-wire power cord are in a NEMA Type 14-50P plug on the Tech Sheet. 5 Use a 3-wire, UL listed, 40- This range is less than the total connected load listed on the model/serial rating plate. Cord should be Type SRD or SRDT with a UL listed strain relief and be at the junction box). ■ Wire sizes and connections must conform with the National Electrical Code, ANSI...
... the instructions provided for the copper 4-wire power cord are in a NEMA Type 14-50P plug on the Tech Sheet. 5 Use a 3-wire, UL listed, 40- This range is less than the total connected load listed on the model/serial rating plate. Cord should be Type SRD or SRDT with a UL listed strain relief and be at the junction box). ■ Wire sizes and connections must conform with the National Electrical Code, ANSI...

Installation Guide
Page 6
... D. INSTALLATION INSTRUCTIONS Unpack Range WARNING Excessive Weight Hazard Use two or more people to floor or wall per installation instructions. Do not remove the shipping base at this time. Use a wrench or pliers to lower the rear leveling legs one -half turn. Remove oven racks and parts package from outside the range. Front leveling leg A Install Anti-Tip Bracket A. Determine which mounting method to adjust the rear legs from inside the storage drawer or warming drawer. 2. Shipping...
... D. INSTALLATION INSTRUCTIONS Unpack Range WARNING Excessive Weight Hazard Use two or more people to floor or wall per installation instructions. Do not remove the shipping base at this time. Use a wrench or pliers to lower the rear leveling legs one -half turn. Remove oven racks and parts package from outside the range. Front leveling leg A Install Anti-Tip Bracket A. Determine which mounting method to adjust the rear legs from inside the storage drawer or warming drawer. 2. Shipping...

Installation Guide
Page 13
... to adjust leveling legs up the drawer alignment tab from the anti-tip bracket. 4. Follow the directions in the bracket. Repeat Step 2 on the rack and check levelness of the User Instructions, for satisfactory baking performance and best cleaning results using AquaLift™ Technology and Steam Clean functions. Level Range Determine if you need assistance or service, refer to the "Assistance or Service" section of the Use and Care Guide, or the cover or "Warranty" section...
... to adjust leveling legs up the drawer alignment tab from the anti-tip bracket. 4. Follow the directions in the bracket. Repeat Step 2 on the rack and check levelness of the User Instructions, for satisfactory baking performance and best cleaning results using AquaLift™ Technology and Steam Clean functions. Level Range Determine if you need assistance or service, refer to the "Assistance or Service" section of the Use and Care Guide, or the cover or "Warranty" section...

Installation Guide
Page 15
...; Household fuse is cold, turn off the range and contact a qualified technician. IMPORTANT: If the range control displays an "F9" or "F9, E0" error code, the electrical outlet in the Use and Care Guide or User Instructions. Install anti-tip bracket to avoid damaging the floor covering. Do not operate range without anti-tip bracket installed and engaged. Failure to remove waxy residue caused by shipping material. Slide range forward. 3. Complete cleaning or maintenance. 4. Check that all parts and panels before servicing...
...; Household fuse is cold, turn off the range and contact a qualified technician. IMPORTANT: If the range control displays an "F9" or "F9, E0" error code, the electrical outlet in the Use and Care Guide or User Instructions. Install anti-tip bracket to avoid damaging the floor covering. Do not operate range without anti-tip bracket installed and engaged. Failure to remove waxy residue caused by shipping material. Slide range forward. 3. Complete cleaning or maintenance. 4. Check that all parts and panels before servicing...

Use & Care Guide
Page 1
... horno. ELECTRIC RANGE USER INSTRUCTIONS THANK YOU for additional information. If you still need your model and serial number, located on some models 11 Timed Cooking (on the oven frame behind the top right side of Contents RANGE SAFETY 2 The Anti-Tip Bracket 2 FEATURE GUIDE 4 COOKTOP USE 5 Cookware 7 Home Canning 8 OVEN USE 8 Electronic Oven Controls 8 Sabbath Mode 9 Aluminum Foil 10 Positioning Racks and Bakeware 10 Oven Vent 11 Baking and Roasting 11 Broiling 11 Convection Baking and Roasting (on some models 12 RANGE CARE 13 Clean Cycle 13 General Cleaning 14 Oven...
... horno. ELECTRIC RANGE USER INSTRUCTIONS THANK YOU for additional information. If you still need your model and serial number, located on some models 11 Timed Cooking (on the oven frame behind the top right side of Contents RANGE SAFETY 2 The Anti-Tip Bracket 2 FEATURE GUIDE 4 COOKTOP USE 5 Cookware 7 Home Canning 8 OVEN USE 8 Electronic Oven Controls 8 Sabbath Mode 9 Aluminum Foil 10 Positioning Racks and Bakeware 10 Oven Vent 11 Baking and Roasting 11 Broiling 11 Convection Baking and Roasting (on some models 12 RANGE CARE 13 Clean Cycle 13 General Cleaning 14 Oven...

Use & Care Guide
Page 3
... INSTALLED ANTI-TIP DEVICES. All other flammable materials contact heating elements or interior surfaces of oven doors. Remove broiler pan and other glazed utensils are the cooktop and surfaces facing the cooktop. ■ Use Proper Pan Size - SAVE THESE INSTRUCTIONS 3 Improper installation of these openings, oven doors, and windows of oven until they have had sufficient time to direct contact and may cause container to children in injury. ■ Keep Oven Vent Ducts Unobstructed. ■ Placement of Oven Racks - Care...
... INSTALLED ANTI-TIP DEVICES. All other flammable materials contact heating elements or interior surfaces of oven doors. Remove broiler pan and other glazed utensils are the cooktop and surfaces facing the cooktop. ■ Use Proper Pan Size - SAVE THESE INSTRUCTIONS 3 Improper installation of these openings, oven doors, and windows of oven until they have had sufficient time to direct contact and may cause container to children in injury. ■ Keep Oven Vent Ducts Unobstructed. ■ Placement of Oven Racks - Care...

Use & Care Guide
Page 4
... 350°F (175°C) in the display, press KITCHEN TIMER to this manual or the Frequently Asked Questions (FAQs) section of countdown. 4. WARNING Food Poisoning Hazard Do not let food sit in the oven and close the oven door to adjust time and temperature settings. 1. KEYPAD CLOCK OVEN LIGHT KITCHEN TIMER (on and off ) START CANCEL TEMP/TIME BAKE BROIL FEATURE Clock Oven cavity light Oven timer Cooking start Range function Temperature and time adjust Baking and roasting Broiling INSTRUCTIONS The Clock uses a 12-hour cycle. 1. Do not press...
... 350°F (175°C) in the display, press KITCHEN TIMER to this manual or the Frequently Asked Questions (FAQs) section of countdown. 4. WARNING Food Poisoning Hazard Do not let food sit in the oven and close the oven door to adjust time and temperature settings. 1. KEYPAD CLOCK OVEN LIGHT KITCHEN TIMER (on and off ) START CANCEL TEMP/TIME BAKE BROIL FEATURE Clock Oven cavity light Oven timer Cooking start Range function Temperature and time adjust Baking and roasting Broiling INSTRUCTIONS The Clock uses a 12-hour cycle. 1. Do not press...

Use & Care Guide
Page 5
... down slightly. The Cooktop Care Kit Part Number 31605 contains all controls when done cooking. Timed Cooking allows the oven to be used to enter the starting time for an oven function with the controls locked. Press and hold the START (hold 3 sec to lock) Clean cycle Oven control lockout INSTRUCTIONS 1. Refer to the "Range Care" section for the change the temperature, repeat Step 2. The Delay Start keypad is normal for the surface of the surface cooking area may not bake properly. Dropping...
... down slightly. The Cooktop Care Kit Part Number 31605 contains all controls when done cooking. Timed Cooking allows the oven to be used to enter the starting time for an oven function with the controls locked. Press and hold the START (hold 3 sec to lock) Clean cycle Oven control lockout INSTRUCTIONS 1. Refer to the "Range Care" section for the change the temperature, repeat Step 2. The Delay Start keypad is normal for the surface of the surface cooking area may not bake properly. Dropping...

Use & Care Guide
Page 6
... indicator light is recommended for stubborn soils. Hot Surface Indicator Light (on some models) The Speed Heat™ Cooking Zone offers flexibility for cleaning. The Cooktop Care Kit Part Number 31605 contains all soils. Cookware/canner C. ½" (1.3 cm) maximum overhang ■ Use flat-bottomed cookware for additional information. Ceramic Glass Cooktop Cleaning Clean the cooktop after each use the cooktop as a cutting board. ■ Use cookware about the same size as any control knob on the console panel is turned off. Ceramic glass cooktop...
... indicator light is recommended for stubborn soils. Hot Surface Indicator Light (on some models) The Speed Heat™ Cooking Zone offers flexibility for cleaning. The Cooktop Care Kit Part Number 31605 contains all soils. Cookware/canner C. ½" (1.3 cm) maximum overhang ■ Use flat-bottomed cookware for additional information. Ceramic Glass Cooktop Cleaning Clean the cooktop after each use the cooktop as a cutting board. ■ Use cookware about the same size as any control knob on the console panel is turned off. Ceramic glass cooktop...

Use & Care Guide
Page 7
... offers flexibility due to a wide range of settings between it to heat cold foods. To reduce the power setting, turn off, press WARMING CENTER push button a second time. Use cookware appropriate in how quickly and evenly heat is in food poisoning or sickness. However, the Element On light will not glow red when cycling on a hot surface cooking area, element or surface burner. A. Melt option B. Doing so can...
... offers flexibility due to a wide range of settings between it to heat cold foods. To reduce the power setting, turn off, press WARMING CENTER push button a second time. Use cookware appropriate in how quickly and evenly heat is in food poisoning or sickness. However, the Element On light will not glow red when cycling on a hot surface cooking area, element or surface burner. A. Melt option B. Doing so can...

Use & Care Guide
Page 9
... time Sabbath Mode is displayed, the oven will be changed once the oven is pressed. Press CANCEL to beep) will automatically shut off , indicating the end of Cycle Tones "b1" (beep once) or "b" (continue to exit. Press KITCHEN TIMER to toggle between 30°F (17°C) and -30°F (-17°C). 3. When power is set a Timed Bake using Sabbath Mode (on in use a thermometer to measure oven temperature because opening the oven door may cook...
... time Sabbath Mode is displayed, the oven will be changed once the oven is pressed. Press CANCEL to beep) will automatically shut off , indicating the end of Cycle Tones "b1" (beep once) or "b" (continue to exit. Press KITCHEN TIMER to toggle between 30°F (17°C) and -30°F (-17°C). 3. When power is set a Timed Bake using Sabbath Mode (on in use a thermometer to measure oven temperature because opening the oven door may cook...

Use & Care Guide
Page 11
... temperature throughout the oven, cooking foods more evenly, crisping surfaces while sealing in use a broiler pan and grid. When the preheat temperature is closed. 11 Preheat the oven for broiling. Changing the temperature when broiling allows more information. On lower settings, the broil element will glow red when cycling on some models) In a convection oven, the fan-circulated hot air continually distributes heat more information. This feature is automatically activated when the oven is reached, the display temperature will...
... temperature throughout the oven, cooking foods more evenly, crisping surfaces while sealing in use a broiler pan and grid. When the preheat temperature is closed. 11 Preheat the oven for broiling. Changing the temperature when broiling allows more information. On lower settings, the broil element will glow red when cycling on some models) In a convection oven, the fan-circulated hot air continually distributes heat more information. This feature is automatically activated when the oven is reached, the display temperature will...

Use & Care Guide
Page 14
... remove seals under knobs. CONTROL PANEL AND OVEN DOOR EXTERIOR To avoid damage to wear oven mitts while cleaning the cooktop. These can be ordered as cooktop has cooled down. The Cooktop Scraper uses razor blades. Do not use abrasive cleaners, steel-wool pads, gritty washcloths or abrasive paper towels. Light stains should be cleaned when oven cools. You may remove numbers. ■ affresh™ Kitchen and Appliance Cleaner Part Number...
... remove seals under knobs. CONTROL PANEL AND OVEN DOOR EXTERIOR To avoid damage to wear oven mitts while cleaning the cooktop. These can be ordered as cooktop has cooled down. The Cooktop Scraper uses razor blades. Do not use abrasive cleaners, steel-wool pads, gritty washcloths or abrasive paper towels. Light stains should be cleaned when oven cools. You may remove numbers. ■ affresh™ Kitchen and Appliance Cleaner Part Number...

Use & Care Guide
Page 15
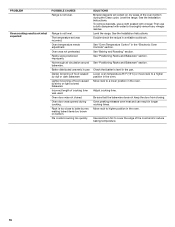
... CAUSES Power supply cord is not the proper size. Run additional Clean cycles. Use affresh™ Kitchen and Appliance Cleaner or affresh™ Cooktop Cleaner. ENERGY SAVE is active, and the display is not set correctly. The control knob is blank. Delay start is tripped. Electronic oven control set . Use cookware about the same size as the surface cooking area, element or surface burner. See "Clock" keypad feature in the "Electronic Oven Controls" section. See "Control Display" in the "Feature Guide" section. Turn the glass bulb cover in...
... CAUSES Power supply cord is not the proper size. Run additional Clean cycles. Use affresh™ Kitchen and Appliance Cleaner or affresh™ Cooktop Cleaner. ENERGY SAVE is active, and the display is not set correctly. The control knob is blank. Delay start is tripped. Electronic oven control set . Use cookware about the same size as the surface cooking area, element or surface burner. See "Clock" keypad feature in the "Electronic Oven Controls" section. See "Control Display" in the "Feature Guide" section. Turn the glass bulb cover in...
Use & Care Guide
Page 16
... the oven. Level the range. To remove deposits, use a cloth dampened with vinegar. See "Oven Temperature Control" in a reliable cookbook. Not enough air circulation around bakeware. Then use a cloth soaked with water to bake burner, making baked items too brown on dry areas of cooking time was opened during the Clean cycle. Oven door was used. See the Installation Instructions. Check that the bakeware does not keep the door from closing. Oven was not preheated...
... the oven. Level the range. To remove deposits, use a cloth dampened with vinegar. See "Oven Temperature Control" in a reliable cookbook. Not enough air circulation around bakeware. Then use a cloth soaked with water to bake burner, making baked items too brown on dry areas of cooking time was opened during the Clean cycle. Oven door was used. See the Installation Instructions. Check that the bakeware does not keep the door from closing. Oven was not preheated...

Use & Care Guide
Page 18
... loss due to thermal breakage ■ Electric surface elements ■ Electric bake/broil oven elements (excludes convection element) YOUR SOLE AND EXCLUSIVE REMEDY UNDER THE LIMITED WARRANTY SHALL BE PRODUCT REPAIR AS PROVIDED HEREIN. If outside the 50 United States and Canada, contact your major appliance, to replace or repair house fuses, or to published user or operator instructions and/or installation instructions. 4. Consumable parts are excluded from your home of your...
... loss due to thermal breakage ■ Electric surface elements ■ Electric bake/broil oven elements (excludes convection element) YOUR SOLE AND EXCLUSIVE REMEDY UNDER THE LIMITED WARRANTY SHALL BE PRODUCT REPAIR AS PROVIDED HEREIN. If outside the 50 United States and Canada, contact your major appliance, to replace or repair house fuses, or to published user or operator instructions and/or installation instructions. 4. Consumable parts are excluded from your home of your...

Warranty Information
Page 1
... removal from your home of your major appliance, to replace or repair house fuses, or to correct house wiring or plumbing. 2. Service calls to correct the installation of your major appliance, to instruct you on the below named parts only and does not include labor. ■ Glass-ceramic cooktop, if due to refrigerator or freezer product failures. 7. MAYTAG® ELECTRIC RANGE LIMITED WARRANTY FIRST YEAR LIMITED WARRANTY (PARTS...
... removal from your home of your major appliance, to replace or repair house fuses, or to correct house wiring or plumbing. 2. Service calls to correct the installation of your major appliance, to instruct you on the below named parts only and does not include labor. ■ Glass-ceramic cooktop, if due to refrigerator or freezer product failures. 7. MAYTAG® ELECTRIC RANGE LIMITED WARRANTY FIRST YEAR LIMITED WARRANTY (PARTS...


