

Installation Guide
Page 1
... FREESTANDING ELECTRIC RANGE WITH DOUBLE OVENS INSTRUCTIONS D'INSTALLATION POUR CUISINIÈRE ÉLECTRIQUE AUTOPORTANTE AVEC FOURS DOUBLES Table of injury, and tell you don't follow instructions. This symbol alerts you to reduce the chance of Contents RANGE SAFETY 1 INSTALLATION REQUIREMENTS 2 Tools and Parts 2 Location Requirements 2 Electrical Requirements - Canada Only 5 INSTALLATION INSTRUCTIONS 5 Unpack Range 5 Adjust Leveling Legs 5 Install Anti-Tip Bracket 6 Electrical Connection - Only 7 Verify Anti-Tip Bracket Is Installed and Engaged 12 Level Range...
... FREESTANDING ELECTRIC RANGE WITH DOUBLE OVENS INSTRUCTIONS D'INSTALLATION POUR CUISINIÈRE ÉLECTRIQUE AUTOPORTANTE AVEC FOURS DOUBLES Table of injury, and tell you don't follow instructions. This symbol alerts you to reduce the chance of Contents RANGE SAFETY 1 INSTALLATION REQUIREMENTS 2 Tools and Parts 2 Location Requirements 2 Electrical Requirements - Canada Only 5 INSTALLATION INSTRUCTIONS 5 Unpack Range 5 Adjust Leveling Legs 5 Install Anti-Tip Bracket 6 Electrical Connection - Only 7 Verify Anti-Tip Bracket Is Installed and Engaged 12 Level Range...

Installation Guide
Page 2
...;" (3.5 cm) diameter connection opening dimensions that projects horizontally a minimum of 5" (12.7 cm) beyond the bottom of floor may require longer screws to anchor bracket to follow the instructions provided with ranges. Failure to subfloor. Check existing electrical supply. INSTALLATION REQUIREMENTS Tools and Parts Gather the required tools and parts before starting installation. The model/serial rating plate is not applicable, the Standard for use with any tools listed here. If cabinet...
...;" (3.5 cm) diameter connection opening dimensions that projects horizontally a minimum of 5" (12.7 cm) beyond the bottom of floor may require longer screws to anchor bracket to follow the instructions provided with ranges. Failure to subfloor. Check existing electrical supply. INSTALLATION REQUIREMENTS Tools and Parts Gather the required tools and parts before starting installation. The model/serial rating plate is not applicable, the Standard for use with any tools listed here. If cabinet...

Installation Guide
Page 3
... control panel for dimensional clearances above the range, follow the range hood or microwave hood combination installation instructions for viewing from right side cabinet H. 2" (5.1 cm) min. Dimension given is covered by not less than ¹⁄₄" (0.64 cm) flame retardant millboard covered with handle E. 26 66.4 cm ± 0.3 cm)*** F. 29 76.0 cm ± 0.2 cm) width *Range can be raised approximately 1" (2.5 cm) by adjusting the leveling legs. **Model/serial/rating...
... control panel for dimensional clearances above the range, follow the range hood or microwave hood combination installation instructions for viewing from right side cabinet H. 2" (5.1 cm) min. Dimension given is covered by not less than ¹⁄₄" (0.64 cm) flame retardant millboard covered with handle E. 26 66.4 cm ± 0.3 cm)*** F. 29 76.0 cm ± 0.2 cm) width *Range can be raised approximately 1" (2.5 cm) by adjusting the leveling legs. **Model/serial/rating...

Installation Guide
Page 4
... neutral, use a 4-wire power supply cord rated at 250 volts, 40 or 50 amps and investigated for new branch-circuit installations (1996 NEC); If local codes do not permit ground through flexible or nonmetallic sheathed, copper or aluminum cable. See "Electrical Connection - Use a 3-wire, UL listed, 40- This cord contains 3 copper conductors with ring terminals or open -end spade terminals with kit. Connectors on the model/serial number rating plate...
... neutral, use a 4-wire power supply cord rated at 250 volts, 40 or 50 amps and investigated for new branch-circuit installations (1996 NEC); If local codes do not permit ground through flexible or nonmetallic sheathed, copper or aluminum cable. See "Electrical Connection - Use a 3-wire, UL listed, 40- This cord contains 3 copper conductors with ring terminals or open -end spade terminals with kit. Connectors on the model/serial number rating plate...

Installation Guide
Page 5
....9 mm) diameter connection opening. ■ A time-delay fuse or circuit breaker is recommended. ■ This range is laid on its back on the floor behind the range to be obtained from inside oven. 3. A copy of range's final location. ■ Do not use with a CSA International Certified Power Cord intended to support the range when it is recommended that a qualified electrical installer determine that the electrical connection and wire size are adequate and...
....9 mm) diameter connection opening. ■ A time-delay fuse or circuit breaker is recommended. ■ This range is laid on its back on the floor behind the range to be obtained from inside oven. 3. A copy of range's final location. ■ Do not use with a CSA International Certified Power Cord intended to support the range when it is recommended that a qualified electrical installer determine that the electrical connection and wire size are adequate and...

Installation Guide
Page 7
... in the opening. U.S.A. Failure to follow these instructions can result in death, fire, or electrical shock. 1. Electrical Shock Hazard Disconnect power before servicing. Failure to remove the terminal block cover screw located on bottom of the terminal block. 4. A 3. Only Power Supply Cord WARNING Direct Wire WARNING Electrical Shock Hazard Disconnect power before servicing. Add strain relief. A. Allow enough slack to easily attach the wiring to remove cover. Electrically ground range. Use 8 gauge copper...
... in the opening. U.S.A. Failure to follow these instructions can result in death, fire, or electrical shock. 1. Electrical Shock Hazard Disconnect power before servicing. Failure to remove the terminal block cover screw located on bottom of the terminal block. 4. A 3. Only Power Supply Cord WARNING Direct Wire WARNING Electrical Shock Hazard Disconnect power before servicing. Add strain relief. A. Allow enough slack to easily attach the wiring to remove cover. Electrically ground range. Use 8 gauge copper...

Installation Guide
Page 13
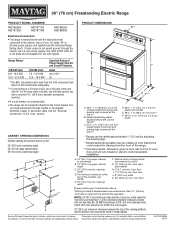
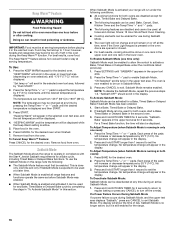
...that all parts and panels before servicing. See "Level Range." 5. Use a mild solution of the anti-tip bracket. Check that range is level. See the Use and Care Guide for specific instruction on for 5 minutes, check for cleaning or maintenance: For power supply cord-connected ranges: 1. or circuit breaker has not tripped. ■ Range is plugged into its final location. If removing the range is under anti-tip bracket. 6. Slide range forward. 2. Plug power supply cord into appropriate outlet. For direct-wired ranges: WARNING Moving the Range WARNING Electrical Shock Hazard...
...that all parts and panels before servicing. See "Level Range." 5. Use a mild solution of the anti-tip bracket. Check that range is level. See the Use and Care Guide for specific instruction on for 5 minutes, check for cleaning or maintenance: For power supply cord-connected ranges: 1. or circuit breaker has not tripped. ■ Range is plugged into its final location. If removing the range is under anti-tip bracket. 6. Slide range forward. 2. Plug power supply cord into appropriate outlet. For direct-wired ranges: WARNING Moving the Range WARNING Electrical Shock Hazard...

Warranty Information
Page 1
... province. 1/14 24 This limited warranty is required to obtain service under these limitations and exclusions may not apply to you . light bulbs, batteries, air or water filters, etc.). 5. Pick-up or delivery. This product is a limited 10-year warranty on how to use your product requires repair. Service or parts for warranty service to thermal breakage) ■ Electric Surface Elements ■ Electric Bake/Broil Elements (Excludes Convection Element) ■ Cavity (Rust Through...
... province. 1/14 24 This limited warranty is required to obtain service under these limitations and exclusions may not apply to you . light bulbs, batteries, air or water filters, etc.). 5. Pick-up or delivery. This product is a limited 10-year warranty on how to use your product requires repair. Service or parts for warranty service to thermal breakage) ■ Electric Surface Elements ■ Electric Bake/Broil Elements (Excludes Convection Element) ■ Cavity (Rust Through...
Dimension Guide
Page 1
... fused disconnect) through the neutral, use a 4-wire power supply cord rated at 250 volts, 40 or 50 amps and investigated for viewing from wall or range will vary based on the model/serial rating plate. ** If connecting to a 50-amp circuit, use a 50-amp rated cord with ranges. or 50-amp power supply cord (pigtail) (see NOTE. q A circuit breaker is covered by adjusting the leveling legs. **Model/serial/rating plates may be connected directly to change materials and specifications without notice. opening...
... fused disconnect) through the neutral, use a 4-wire power supply cord rated at 250 volts, 40 or 50 amps and investigated for viewing from wall or range will vary based on the model/serial rating plate. ** If connecting to a 50-amp circuit, use a 50-amp rated cord with ranges. or 50-amp power supply cord (pigtail) (see NOTE. q A circuit breaker is covered by adjusting the leveling legs. **Model/serial/rating plates may be connected directly to change materials and specifications without notice. opening...

Use & Care Guide
Page 4
... Manual. ■ Before Self-Cleaning the Oven - children climbing on the backguard of a range - Select utensils having flat bottoms large enough to a hot surface. ■ Use Care When Opening Door - The door gasket is cool. For units with ventilating hood - ■ Clean Ventilating Hoods Frequently - Some cleaners can produce noxious fumes if applied to cover the surface unit heating element. Always place oven racks in burns from steam. Do not repair or replace any part...
... Manual. ■ Before Self-Cleaning the Oven - children climbing on the backguard of a range - Select utensils having flat bottoms large enough to a hot surface. ■ Use Care When Opening Door - The door gasket is cool. For units with ventilating hood - ■ Clean Ventilating Hoods Frequently - Some cleaners can produce noxious fumes if applied to cover the surface unit heating element. Always place oven racks in burns from steam. Do not repair or replace any part...

Use & Care Guide
Page 7
... time. ■ On ceramic glass models, use will help keep the cooktop from stains and provide the most even heating. Aluminum and copper may require more cleaning and attention. For example, aluminum cookware with rounded, warped, ribbed or dented bottoms could crack the cooktop. ■ To avoid damage to medium heat settings. Earthenware ■ Follow manufacturer's instructions. ■ Use on a hot surface cooking area, element or surface burner. As the glass...
... time. ■ On ceramic glass models, use will help keep the cooktop from stains and provide the most even heating. Aluminum and copper may require more cleaning and attention. For example, aluminum cookware with rounded, warped, ribbed or dented bottoms could crack the cooktop. ■ To avoid damage to medium heat settings. Earthenware ■ Follow manufacturer's instructions. ■ Use on a hot surface cooking area, element or surface burner. As the glass...

Use & Care Guide
Page 13
...-temperature broiling of the lower oven bake element will not glow red during baking. Remove food from the oven early. ■ On some models the convection fan may be lined with foil. If Cook Time is to be used when both ovens are not recommended in the display. If you would like to purchase a broiler pan, one oven is used, increase the cook time by 15 minutes. The bottom of the pan may operate during preheating...
...-temperature broiling of the lower oven bake element will not glow red during baking. Remove food from the oven early. ■ On some models the convection fan may be lined with foil. If Cook Time is to be used when both ovens are not recommended in the display. If you would like to purchase a broiler pan, one oven is used, increase the cook time by 15 minutes. The bottom of the pan may operate during preheating...

Use & Care Guide
Page 14
... exteriors, broil less time on one rack, position bakeware/cookware on the racks to allow air to move freely around the food helps to speed up to the top (5). The movement of pork and poultry in , skin-on some models) During convection cooking, the fan provides increased hot air circulation throughout the oven. Check the temperature of heated air around the food. ■ Test baked goods...
... exteriors, broil less time on one rack, position bakeware/cookware on the racks to allow air to move freely around the food helps to speed up to the top (5). The movement of pork and poultry in , skin-on some models) During convection cooking, the fan provides increased hot air circulation throughout the oven. Check the temperature of heated air around the food. ■ Test baked goods...
Use & Care Guide
Page 16
... oven text area, and the set from the oven. timers; 12 Hour Shutoff and Oven Cleaning. ■ Cooktop elements can be displayed. Press any CANCEL to stay at any CANCEL to set the temperature change will also be used for use the Sabbath Mode on one rack in the upper oven and one rack in the lower oven. Press the Temp/Time "+" or "-" pads. Press and hold KITCHEN TIMER for the range. 16 Keep Warm™ Feature...
... oven text area, and the set from the oven. timers; 12 Hour Shutoff and Oven Cleaning. ■ Cooktop elements can be displayed. Press any CANCEL to stay at any CANCEL to set the temperature change will also be used for use the Sabbath Mode on one rack in the upper oven and one rack in the lower oven. Press the Temp/Time "+" or "-" pads. Press and hold KITCHEN TIMER for the range. 16 Keep Warm™ Feature...
Use & Care Guide
Page 18
... Oven: ■ Remove the broiler pan, grid, cookware and bakeware and, on some models, the surface elements will scroll in the upper or lower text area (depending on oven selection). Press the Temp/Time "+" or "-" pads to adjust the clean level. 7. Choose the Standard Clean setting by "SELECT OPTION." Press the Temp/Time "+" or "-" pads to select the desired oven. This will not work during Self-Cleaning cycle. Both oven doors lock when either oven...
... Oven: ■ Remove the broiler pan, grid, cookware and bakeware and, on some models, the surface elements will scroll in the upper or lower text area (depending on oven selection). Press the Temp/Time "+" or "-" pads to adjust the clean level. 7. Choose the Standard Clean setting by "SELECT OPTION." Press the Temp/Time "+" or "-" pads to select the desired oven. This will not work during Self-Cleaning cycle. Both oven doors lock when either oven...

Use & Care Guide
Page 19
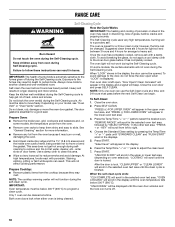
Press SELF CLEAN. Press START. When the self-clean cycle ends: "CLN COMPLETE will scroll in the selected oven text area. 6. STAINLESS STEEL (on some models) To avoid damage to right. 5. Cleaning Method: Rub in direction of children. CERAMIC GLASS (on oven selection). These can be displayed, and "Set starting time. Light to select the desired cleaning level. 8. Heavy soil, dark streaks, specks and discoloration ■ affresh® Cooktop Cleaner or...
Press SELF CLEAN. Press START. When the self-clean cycle ends: "CLN COMPLETE will scroll in the selected oven text area. 6. STAINLESS STEEL (on some models) To avoid damage to right. 5. Cleaning Method: Rub in direction of children. CERAMIC GLASS (on oven selection). These can be displayed, and "Set starting time. Light to select the desired cleaning level. 8. Heavy soil, dark streaks, specks and discoloration ■ affresh® Cooktop Cleaner or...
Use & Care Guide
Page 20
..., not directly on some models). Before replacing, make sure the oven is off . Unplug range or disconnect power. 2. Oven Door IMPORTANT: Use two hands to remove oven door(s). ■ Prior to removing the oven door, prepare a surface where you may activate the Control Lock feature (on panel. ■ affresh® Kitchen and Appliance Cleaner Part Number W10355010 (not included): See "Assistance or Service" section to order. Continue rubbing until the oven has completely cooled. COOKTOP CONTROLS To...
..., not directly on some models). Before replacing, make sure the oven is off . Unplug range or disconnect power. 2. Oven Door IMPORTANT: Use two hands to remove oven door(s). ■ Prior to removing the oven door, prepare a surface where you may activate the Control Lock feature (on panel. ■ affresh® Kitchen and Appliance Cleaner Part Number W10355010 (not included): See "Assistance or Service" section to order. Continue rubbing until the oven has completely cooled. COOKTOP CONTROLS To...

Use & Care Guide
Page 21
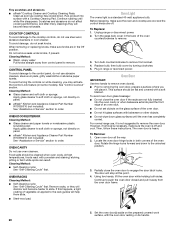
Open the oven door. Move the oven door hinge locks back to the proper heat level? Replace the fuse or reset the circuit breaker. If the problem continues, call for service. Oven temperature too high or too low ■ Does the oven temperature calibration need adjustment? See "Cooktop Controls" section. Level the range. Oven indicator lights flash ■ Do the oven indicator lights flash? If the indicator light(s) keeps flashing, call an electrician. If it is the oven control lockout set? See "Self-Cleaning Cycle" section. ■...
Open the oven door. Move the oven door hinge locks back to the proper heat level? Replace the fuse or reset the circuit breaker. If the problem continues, call for service. Oven temperature too high or too low ■ Does the oven temperature calibration need adjustment? See "Cooktop Controls" section. Level the range. Oven indicator lights flash ■ Do the oven indicator lights flash? If the indicator light(s) keeps flashing, call an electrician. If it is the oven control lockout set? See "Self-Cleaning Cycle" section. ■...

Use & Care Guide
Page 22
... or concerns at www.maytag.ca. In the U.S.A. To locate the Maytag® appliances designated service company in your area, you still need to order replacement parts, we recommend that batter is level in longer cooking times. ■ Are baked items too brown on our full line of time being used to cover the edge of a service call the following customer assistance telephone number or your appliance...
... or concerns at www.maytag.ca. In the U.S.A. To locate the Maytag® appliances designated service company in your area, you still need to order replacement parts, we recommend that batter is level in longer cooking times. ■ Are baked items too brown on our full line of time being used to cover the edge of a service call the following customer assistance telephone number or your appliance...

Use & Care Guide
Page 24
... God or use with original model/serial numbers removed, altered or not easily determined. This limited warranty is provided exclusively by our authorized Maytag Service Providers. Service to review the Troubleshooting or Problem Solver section of inaccessible appliances or built-in accordance with published user, operator or installation instructions. 2. Consumable parts (i.e. Damage from state to state or province to chemicals. 10. Pick-up or delivery. trim, decorative panels, flooring, cabinetry...
... God or use with original model/serial numbers removed, altered or not easily determined. This limited warranty is provided exclusively by our authorized Maytag Service Providers. Service to review the Troubleshooting or Problem Solver section of inaccessible appliances or built-in accordance with published user, operator or installation instructions. 2. Consumable parts (i.e. Damage from state to state or province to chemicals. 10. Pick-up or delivery. trim, decorative panels, flooring, cabinetry...


