
Installation Guide
Page 2
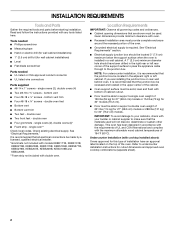
... See "Electrical Requirements" section. ■ Electrical supply junction box should have an approval label located on rear wall behind oven, it is recommended that the materials used . IMPORTANT: To avoid damage to your cabinets, check with your ...■ Hand or electric drill (for wall cabinet installations) ■ 1" (2.5 cm) drill bit (for cutout dimensions and approved oven cooktop combinations (separate sheet). 2 single oven** Check local codes. Given dimensions provide minimum clearance with cooktop installed above): Ovens approved for this type of cabinet cutout. ...
... See "Electrical Requirements" section. ■ Electrical supply junction box should have an approval label located on rear wall behind oven, it is recommended that the materials used . IMPORTANT: To avoid damage to your cabinets, check with your ...■ Hand or electric drill (for wall cabinet installations) ■ 1" (2.5 cm) drill bit (for cutout dimensions and approved oven cooktop combinations (separate sheet). 2 single oven** Check local codes. Given dimensions provide minimum clearance with cooktop installed above): Ovens approved for this type of cabinet cutout. ...

Installation Guide
Page 12
...long side of the foot facing toward the top of the oven, the oven vent is taped to the side of the oven front frame when pushing the oven into the cabinet until the back surface of the front frame touches the front wall of the vent tab (B), fasten the vent securely to grip.... Mounting rail hole C. A B D C A. Using 2 or more people, lift the oven partially into the cabinet cutout. Push against the outside edges. 4. Do not overtighten screws. 6. Insert ...
...long side of the foot facing toward the top of the oven, the oven vent is taped to the side of the oven front frame when pushing the oven into the cabinet until the back surface of the front frame touches the front wall of the vent tab (B), fasten the vent securely to grip.... Mounting rail hole C. A B D C A. Using 2 or more people, lift the oven partially into the cabinet cutout. Push against the outside edges. 4. Do not overtighten screws. 6. Insert ...
Use & Care Guide
Page 9
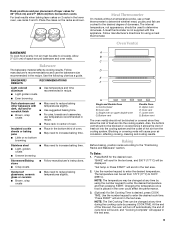
... material affects cooking results. Use the following chart as shown. Insulated cookie sheets or baking pans ■ Place in center of oven. Oven vent F. Baking Before baking, position racks according to enter the desired temperature. Press BAKE for using the number keypad to 550... recommended in recipe. ■ Place rack in the bottom third of space around bakeware and oven walls. A meat thermometer is desired, press COOK TIME. Bottom vent Double Oven D. Bottom vent The oven vent(s) should not be displayed. To Bake: 1. Use the number keypad to circulate. BAKEWARE...
... material affects cooking results. Use the following chart as shown. Insulated cookie sheets or baking pans ■ Place in center of oven. Oven vent F. Baking Before baking, position racks according to enter the desired temperature. Press BAKE for using the number keypad to 550... recommended in recipe. ■ Place rack in the bottom third of space around bakeware and oven walls. A meat thermometer is desired, press COOK TIME. Bottom vent Double Oven D. Bottom vent The oven vent(s) should not be displayed. To Bake: 1. Use the number keypad to circulate. BAKEWARE...


