
Installation Instructions
Page 1
... messages will follow the safety alert symbol and either the word "DANGER" or "WARNING." These installation instructions cover different models. Table of Contents MICROWAVE HOOD COMBINATION SAFETY 1 INSTALLATION REQUIREMENTS 2 Tools and Parts 2 Remove Cardboard Template 2 Location Requirements 2 Product Dimensions 3 Electrical Requirements 3 INSTALLATION INSTRUCTIONS 4 Remove Mounting Plate 4 Rotate Blower Motor 4 Locate Wall Stud(s 6 Mark Rear...
... messages will follow the safety alert symbol and either the word "DANGER" or "WARNING." These installation instructions cover different models. Table of Contents MICROWAVE HOOD COMBINATION SAFETY 1 INSTALLATION REQUIREMENTS 2 Tools and Parts 2 Remove Cardboard Template 2 Location Requirements 2 Product Dimensions 3 Electrical Requirements 3 INSTALLATION INSTRUCTIONS 4 Remove Mounting Plate 4 Rotate Blower Motor 4 Locate Wall Stud(s 6 Mark Rear...

Installation Instructions
Page 2
...listed here are using a rectangular to round transition piece, the 3" (7.6 cm) clearance needs to exist above the microwave oven so that the vent fits properly, and the damper blade opens freely and fully. See "Venting Design Specifications"...filter may not be included. Set the cardboard template to the side and refer to back of microwave oven) Cardboard template (part of the cardboard packaging. 2. Check with any obstructions so that the damper blade can open ...3 Phillips screwdriver for 1/4" x 2" lag screws ■ 1½" (3.8 cm) diam. The location must be combined.
...listed here are using a rectangular to round transition piece, the 3" (7.6 cm) clearance needs to exist above the microwave oven so that the vent fits properly, and the damper blade opens freely and fully. See "Venting Design Specifications"...filter may not be included. Set the cardboard template to the side and refer to back of microwave oven) Cardboard template (part of the cardboard packaging. 2. Check with any obstructions so that the damper blade can open ...3 Phillips screwdriver for 1/4" x 2" lag screws ■ 1½" (3.8 cm) diam. The location must be combined.

Installation Instructions
Page 8
...tile backsplash), be against drywall. The template has trim lines to the thickest part of "Mark Rear Wall." Drywall 5. If installing on a second wall stud, insert a lag screw into the other hole marked in Step 2 of the microwave oven. Drill 3/16" (5 mm) holes into the upper cabinet align with ...Figures 1 & 2) NOTE: The mounting plate must be sure the "Rear Wall" arrows align to use as guides. ■ If the wall behind the microwave oven (as at both end holes drilled into the wall stud at One End Hole (Figure 3) 1. Refer to Figure 3 in "Possible Wall Stud Configurations" ...
...tile backsplash), be against drywall. The template has trim lines to the thickest part of "Mark Rear Wall." Drywall 5. If installing on a second wall stud, insert a lag screw into the other hole marked in Step 2 of the microwave oven. Drill 3/16" (5 mm) holes into the upper cabinet align with ...Figures 1 & 2) NOTE: The mounting plate must be sure the "Rear Wall" arrows align to use as guides. ■ If the wall behind the microwave oven (as at both end holes drilled into the wall stud at One End Hole (Figure 3) 1. Refer to Figure 3 in "Possible Wall Stud Configurations" ...

Installation Instructions
Page 12
... W10344702B SP PN W10345004B © 2010. To calculate the length of the microwave oven opening . Both numbers can be found on the model and serial number plate, which is a list of the microwave oven. Replacement Parts If any of the installation hardware needs to be installed to round transition piece... must not exceed the equivalent of 140 ft (42.7 m) for either type of each vent piece used in the User...
... W10344702B SP PN W10345004B © 2010. To calculate the length of the microwave oven opening . Both numbers can be found on the model and serial number plate, which is a list of the microwave oven. Replacement Parts If any of the installation hardware needs to be installed to round transition piece... must not exceed the equivalent of 140 ft (42.7 m) for either type of each vent piece used in the User...
Owners Manual
Page 1
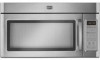
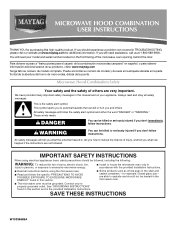
You will follow instructions. All safety messages will need assistance, call us at www.maytag.com for additional information. IMPORTANT SAFETY INSTRUCTIONS When using the microwave oven. ■ Read and follow instructions. See "GROUNDING INSTRUCTIONS" found in this section. ■ Some products ... etiqueta ubicada en la parte frontal de la abertura del horno de microondas, detrás de la puerta. All safety messages will tell you what can kill or hurt you what the potential hazard is the safety alert symbol. MICROWAVE HOOD COMBINATION USER INSTRUCTIONS THANK YOU ...
You will follow instructions. All safety messages will need assistance, call us at www.maytag.com for additional information. IMPORTANT SAFETY INSTRUCTIONS When using the microwave oven. ■ Read and follow instructions. See "GROUNDING INSTRUCTIONS" found in this section. ■ Some products ... etiqueta ubicada en la parte frontal de la abertura del horno de microondas, detrás de la puerta. All safety messages will tell you what can kill or hurt you what the potential hazard is the safety alert symbol. MICROWAVE HOOD COMBINATION USER INSTRUCTIONS THANK YOU ...

Owners Manual
Page 2
... operate this oven when not in use. ■ Do not store anything directly on the microwave oven. ■ Do not store this manual. THIS COULD RESULT IN VERY HOT LIQUIDS SUDDENLY... care when cleaning the vent-hood filter. It is operated in convection, combination, grill or "PAN BROWN" mode (on models with such features). ■ Do not store any materials, other part of table or counter. &#... under the hood, turn oven off, and disconnect the power cord, or shut off the pad and touch electrical parts involving a risk of electric shock. ■ Suitable for use above ranges with maximum ...
... operate this oven when not in use. ■ Do not store anything directly on the microwave oven. ■ Do not store this manual. THIS COULD RESULT IN VERY HOT LIQUIDS SUDDENLY... care when cleaning the vent-hood filter. It is operated in convection, combination, grill or "PAN BROWN" mode (on models with such features). ■ Do not store any materials, other part of table or counter. &#... under the hood, turn oven off, and disconnect the power cord, or shut off the pad and touch electrical parts involving a risk of electric shock. ■ Suitable for use above ranges with maximum ...

Owners Manual
Page 3
... shock. Vent Timer (on some models). Touch Options or Setup control to practice using the Vent Fan control. See "Microwave Oven Care" section. Do not remove ground prong. Do not use an extension cord. Observe all tones (including end...then touch CLOCK or the Start control. Touch and hold the Cancel control for 2-level cooking. Vent Fan Various speeds, ranging from side to reach the "Sound On/Off" submenu, and turn on . Comes on some models) functions. 3 ...display. This is a 12-hour (12:00-11:59) clock, with Part 18 of the grounding plug can be grounded.
... shock. Vent Timer (on some models). Touch Options or Setup control to practice using the Vent Fan control. See "Microwave Oven Care" section. Do not remove ground prong. Do not use an extension cord. Observe all tones (including end...then touch CLOCK or the Start control. Touch and hold the Cancel control for 2-level cooking. Vent Fan Various speeds, ranging from side to reach the "Sound On/Off" submenu, and turn on . Comes on some models) functions. 3 ...display. This is a 12-hour (12:00-11:59) clock, with Part 18 of the grounding plug can be grounded.

Owners Manual
Page 5
...Call for service. ■ Door Firmly close door. The microwave oven's cooling fan (on cavity walls, microwave inlet cover, cooking rack supports, and area where the door touches the frame can cause arcing. www.maytag.com Microwave oven will not operate Check the following : ■ Soil... still does not operate, call an electrician. ■ Magnetron Try to avoid unintended starting of the microwave oven, under the bulb cover, and is replaceable. Replacement Parts Cleaning Supplies ■ Glide tray ■ Glide tray support ■ Cooking rack ■ Rack clip ■ Rack ...
...Call for service. ■ Door Firmly close door. The microwave oven's cooling fan (on cavity walls, microwave inlet cover, cooking rack supports, and area where the door touches the frame can cause arcing. www.maytag.com Microwave oven will not operate Check the following : ■ Soil... still does not operate, call an electrician. ■ Magnetron Try to avoid unintended starting of the microwave oven, under the bulb cover, and is replaceable. Replacement Parts Cleaning Supplies ■ Glide tray ■ Glide tray support ■ Cooking rack ■ Rack clip ■ Rack ...

Owners Manual
Page 6
...instructions attached to or furnished with the product, Maytag will pay for other damage to the finish of your major appliance, unless such damage results from defects in this part that prevent function of the microwave range hood and that have been removed, altered or ... warranty applies. 6/10 For additional product information or to province. W10336688A SP PN W10336689A © 2010. MAYTAG® MICROWAVE-RANGE HOOD COMBINATION LIMITED WARRANTY FIRST YEAR LIMITED WARRANTY (PARTS AND LABOR) For one year from the date of purchase, when this major appliance is covered by this warranty...
...instructions attached to or furnished with the product, Maytag will pay for other damage to the finish of your major appliance, unless such damage results from defects in this part that prevent function of the microwave range hood and that have been removed, altered or ... warranty applies. 6/10 For additional product information or to province. W10336688A SP PN W10336689A © 2010. MAYTAG® MICROWAVE-RANGE HOOD COMBINATION LIMITED WARRANTY FIRST YEAR LIMITED WARRANTY (PARTS AND LABOR) For one year from the date of purchase, when this major appliance is covered by this warranty...


