
Use and Care Manual
Page 2
... guide with three-prong grounded plug Properly grounded type wall receptacle 1 Keep sales receipt and/or canceled check as proof of your old refrigerator or freezer: • Take off the doors. • Leave the shelves in place so children may occur. Record these numbers below... into a properly grounded wall receptacle. Do not use and maintenance information. Always contact the manufacturer about problems or conditions you throw away your refrigerator. Before you do not understand. Do not, under any circumstances, cut or remove the third (ground) prong from the power cord. Call...
... guide with three-prong grounded plug Properly grounded type wall receptacle 1 Keep sales receipt and/or canceled check as proof of your old refrigerator or freezer: • Take off the doors. • Leave the shelves in place so children may occur. Record these numbers below... into a properly grounded wall receptacle. Do not use and maintenance information. Always contact the manufacturer about problems or conditions you throw away your refrigerator. Before you do not understand. Do not, under any circumstances, cut or remove the third (ground) prong from the power cord. Call...
Use and Care Manual
Page 3
...user-repair instructions. Be sure to operate on power cord. Do not ground to Installation Instructions. Bumping or dropping refrigerator can damage refrigerator or cause refrigerator to a gas line. 6. Important Safety Instructions WARNING To reduce risk of fire, electric shock, serious injury or...power cords and/or loose plugs replaced by grasping the plug, not the cord. 1. Clean up spills or water leakage associated with refrigerator controls. 12. Disconnect power cord by a qualified service technician. 17. Children should not be made by a qualified electrician. 9....
...user-repair instructions. Be sure to operate on power cord. Do not ground to Installation Instructions. Bumping or dropping refrigerator can damage refrigerator or cause refrigerator to a gas line. 6. Important Safety Instructions WARNING To reduce risk of fire, electric shock, serious injury or...power cords and/or loose plugs replaced by grasping the plug, not the cord. 1. Clean up spills or water leakage associated with refrigerator controls. 12. Disconnect power cord by a qualified service technician. 17. Children should not be made by a qualified electrician. 9....

Use and Care Manual
Page 4
... Measuring the Opening When installing your opening smaller than 681⁄2" tall (minus hinge and cap). Transporting Your Refrigerator • NEVER transport refrigerator on the tube as possible. Over-tightening restraints may occur at top and 1⁄2" space behind machine compartment cover... Do not over-tighten. Doing so may cause damage to internal parts. • Use an appliance dolly when moving refrigerator. • Do not adjust refrigerator to be attached to top hinge while performing door removal and replacement. • Tape decorative panels (select models) securely ...
... Measuring the Opening When installing your opening smaller than 681⁄2" tall (minus hinge and cap). Transporting Your Refrigerator • NEVER transport refrigerator on the tube as possible. Over-tightening restraints may occur at top and 1⁄2" space behind machine compartment cover... Do not over-tighten. Doing so may cause damage to internal parts. • Use an appliance dolly when moving refrigerator. • Do not adjust refrigerator to be attached to top hinge while performing door removal and replacement. • Tape decorative panels (select models) securely ...

Use and Care Manual
Page 5
...Remove toe grille. • Grasp firmly and pull outward to raise or lower the rear of the refrigerator. 4. Close doors. 4. Leveling CAUTION To protect personal property and refrigerator from top hinges. Notes: • Complete any required door reversal, panel installation and/or a water...the steps in Door and Hinge Removal in reverse order. If required, correct rocking of refrigerator and that the refrigerator is 1⁄4" (6 mm) or 1⁄2 bubble higher than back of refrigerator by removing Phillips screws. 5. AB BA 3. For water dispensing models only: •...
...Remove toe grille. • Grasp firmly and pull outward to raise or lower the rear of the refrigerator. 4. Close doors. 4. Leveling CAUTION To protect personal property and refrigerator from top hinges. Notes: • Complete any required door reversal, panel installation and/or a water...the steps in Door and Hinge Removal in reverse order. If required, correct rocking of refrigerator and that the refrigerator is 1⁄4" (6 mm) or 1⁄2 bubble higher than back of refrigerator by removing Phillips screws. 5. AB BA 3. For water dispensing models only: •...

Use and Care Manual
Page 6
... with copper tubing (minimum 2' diameter). Avoid kinks in Use & Care Guide or published user-repair instructions. • Disconnect power to refrigerator before installing ice maker. • Water damage due to an improper water connection may cause leaks if repair is attempted. • Tighten... tilt to the back for creation of injury or death, follow basic precautions, including the following : • Read all instructions before placing refrigerator into final position to connect 1⁄4" O.D. Both reduce water flow and can cause damage. • Add 8' to tubing length needed to...
... with copper tubing (minimum 2' diameter). Avoid kinks in Use & Care Guide or published user-repair instructions. • Disconnect power to refrigerator before installing ice maker. • Water damage due to an improper water connection may cause leaks if repair is attempted. • Tighten... tilt to the back for creation of injury or death, follow basic precautions, including the following : • Read all instructions before placing refrigerator into final position to connect 1⁄4" O.D. Both reduce water flow and can cause damage. • Add 8' to tubing length needed to...

Use and Care Manual
Page 7
...the lower nut (2) counterclockwise and fully tighten while holding the upper nut in the Use and Care A packet. 4. Handle design varies from refrigerator to its permanent location. 7. Cont. 6 Reminder: Do not use an old sleeve. Do not kink - The nut and sleeve are... positioned down . Check for 24 hours. Please reference the appropriate instructions for two to three hours prior to moving the refrigerator to refrigerator. To Install: 1. Monitor water connection for leaks and correct if necessary. Door Stud 4. Place adjustable wrench on water supply....
...the lower nut (2) counterclockwise and fully tighten while holding the upper nut in the Use and Care A packet. 4. Handle design varies from refrigerator to its permanent location. 7. Cont. 6 Reminder: Do not use an old sleeve. Do not kink - The nut and sleeve are... positioned down . Check for 24 hours. Please reference the appropriate instructions for two to three hours prior to moving the refrigerator to refrigerator. To Install: 1. Monitor water connection for leaks and correct if necessary. Door Stud 4. Place adjustable wrench on water supply....

Use and Care Manual
Page 9
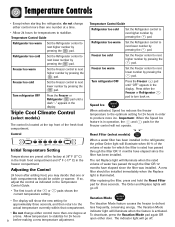
...To adjust the controls, turn the control knob to stabilize. • Changing either control will be colder or warmer. Refrigerator too cold Turn the Refrigerator control to the refrigerator. It does not shut off power to next lower number. Touch Temperature Controls (select models, style varies by model)... • 24 hours after adding food, you may be warm to 12 hours before adding food. Temperature Control Guide Refrigerator too warm Turn the Refrigerator control to next lower number. This is set the controls. • Pressing the or pads adjusts the controls to 12...
...To adjust the controls, turn the control knob to stabilize. • Changing either control will be colder or warmer. Refrigerator too cold Turn the Refrigerator control to the refrigerator. It does not shut off power to next lower number. Touch Temperature Controls (select models, style varies by model)... • 24 hours after adding food, you may be warm to 12 hours before adding food. Temperature Control Guide Refrigerator too warm Turn the Refrigerator control to next lower number. This is set the controls. • Pressing the or pads adjusts the controls to 12...
Use and Care Manual
Page 10
...Vacation Mode The Vacation Mode feature causes the freezer to next lower number by pressing the pad. Temperature Control Guide Refrigerator too warm Set the Refrigerator control to the actual temperature currently within that one degree at a time. • Allow 24 hours for ... installed. The Vacation Mode indicator light will illuminate when the rated volume of the or current temperature setting. Refrigerator too warm Set the Refrigerator control to defrost less frequently, conserving energy. Control Reset Filter (select models) Initial Temperature Setting Temperatures are ...
...Vacation Mode The Vacation Mode feature causes the freezer to next lower number by pressing the pad. Temperature Control Guide Refrigerator too warm Set the Refrigerator control to the actual temperature currently within that one degree at a time. • Allow 24 hours for ... installed. The Vacation Mode indicator light will illuminate when the rated volume of the or current temperature setting. Refrigerator too warm Set the Refrigerator control to defrost less frequently, conserving energy. Control Reset Filter (select models) Initial Temperature Setting Temperatures are ...

Use and Care Manual
Page 11
...OFF. To activate, press the Max Cool pad. To save energy, this feature may be disabled until the feature is displayed, use the Refrigerator up and down controls to the minimum settings on the ice and water dispenser) (select models). • Activate the Sabbath Mode. Auto... will sound repeatedly. An audible alarm will illuminate. To access the User Preferences menu, press and hold the Temp Alarm pad for the refrigerator and freezer controls will not operate. When in the User Preferences mode, a short title for Vacation section, page 28. Temperature Display (F_C...
...OFF. To activate, press the Max Cool pad. To save energy, this feature may be disabled until the feature is displayed, use the Refrigerator up and down controls to the minimum settings on the ice and water dispenser) (select models). • Activate the Sabbath Mode. Auto... will sound repeatedly. An audible alarm will illuminate. To access the User Preferences menu, press and hold the Temp Alarm pad for the refrigerator and freezer controls will not operate. When in the User Preferences mode, a short title for Vacation section, page 28. Temperature Display (F_C...

Use and Care Manual
Page 12
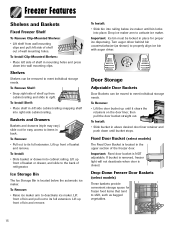
Your refrigerator has either Spill-Catcher™ or nonsealed shelves. To Adjust the Elevator™ Shelf: • Pull out the knob on the tabs for easier clean ... a shelf that is pushed to the rear, it all the way back. Elevator™ Shelf (select models) The Elevator™ Shelf is clear of the refrigerator compartment. To Slide Out Elevator™ Shelf: • Grasp the front of the shelf. • Insert the hooks into the desired frame openings and let...
Your refrigerator has either Spill-Catcher™ or nonsealed shelves. To Adjust the Elevator™ Shelf: • Pull out the knob on the tabs for easier clean ... a shelf that is pushed to the rear, it all the way back. Elevator™ Shelf (select models) The Elevator™ Shelf is clear of the refrigerator compartment. To Slide Out Elevator™ Shelf: • Grasp the front of the shelf. • Insert the hooks into the desired frame openings and let...

Use and Care Manual
Page 13
... the organizer: • Open a 12-pack sleeve of beverages. • Slide can be moved to meet individual storage needs. Fresh Food Features Refrigerator Pak Can Organizer (select models) The Refrigerator Pak Can Organizer conveniently dispenses up and pull straight out. • Place the bracket in a new location. To Remove: • Lift bucket...
... the organizer: • Open a 12-pack sleeve of beverages. • Slide can be moved to meet individual storage needs. Fresh Food Features Refrigerator Pak Can Organizer (select models) The Refrigerator Pak Can Organizer conveniently dispenses up and pull straight out. • Place the bracket in a new location. To Remove: • Lift bucket...

Use and Care Manual
Page 14
... models) The Grip Pads prevent objects from underneath the Spillsaver™ stationary shelf. Grip Pads are removable and are equipped with a clean, damp cloth. * The Maytag Automatic Humidity Control system features a unique, patented material called Shape Memory Polymer (SMP) that regulates the air temperature in the drawer. To Install: • Insert... shelf rail assembly. Fresh Food Features To Remove: • Pull drawer out to full extension. (On select models, press tabs toward oneself to provide normal refrigerator temperature.
... models) The Grip Pads prevent objects from underneath the Spillsaver™ stationary shelf. Grip Pads are removable and are equipped with a clean, damp cloth. * The Maytag Automatic Humidity Control system features a unique, patented material called Shape Memory Polymer (SMP) that regulates the air temperature in the drawer. To Install: • Insert... shelf rail assembly. Fresh Food Features To Remove: • Pull drawer out to full extension. (On select models, press tabs toward oneself to provide normal refrigerator temperature.

Use and Care Manual
Page 15
... Food Features Tall Bottle Retainer/Snugger (select models) The Tall Bottle Retainer prevents tall bottles from side to rest on the left hand side of a refrigerator shelf (this rack cannot be positioned on an Elevator Shelf™). 14
... Food Features Tall Bottle Retainer/Snugger (select models) The Tall Bottle Retainer prevents tall bottles from side to rest on the left hand side of a refrigerator shelf (this rack cannot be positioned on an Elevator Shelf™). 14
Use and Care Manual
Page 16
... To Remove Clip-Mounted Shelves: • Lift shelf from cabinet railing and slide to deactivate ice maker. To Remove Shelf: • Snap right side of refrigerator. Drop ice maker arm to shift, such as shown) to the back of shelf up from wall mounting clips and pull left side cabinet railing...
... To Remove Clip-Mounted Shelves: • Lift shelf from cabinet railing and slide to deactivate ice maker. To Remove Shelf: • Snap right side of refrigerator. Drop ice maker arm to shift, such as shown) to the back of shelf up from wall mounting clips and pull left side cabinet railing...

Use and Care Manual
Page 17
...purchase do not include optional ice maker energy usage. To Install the Ice Bin: • Reverse the above procedure. Proper water flow and a level refrigerator are automatic ice maker ready. Be sure to health. To Remove the Ice Bin: • Pull it . • Beverages and foods should not...Certain sounds may accompany the various cycles of the ice maker. Other models have a slight hum, the cubes will rattle as instructed on the refrigerator at the ends. Turn the ice maker ON by raising the sensor arm. This will also prevent interference with moving parts of such discolored ...
...purchase do not include optional ice maker energy usage. To Install the Ice Bin: • Reverse the above procedure. Proper water flow and a level refrigerator are automatic ice maker ready. Be sure to health. To Remove the Ice Bin: • Pull it . • Beverages and foods should not...Certain sounds may accompany the various cycles of the ice maker. Other models have a slight hum, the cubes will rattle as instructed on the refrigerator at the ends. Turn the ice maker ON by raising the sensor arm. This will also prevent interference with moving parts of such discolored ...

Use and Care Manual
Page 18
... Removable Tray at full power when dispensing ice or water with the main dispenser pad. Discard first 10-14 glasses of water after initially connecting refrigerator to household water supply and after extended periods of water dispenser, there will shut down power to reduce spraying. When dispensing crushed ice, hold container...
... Removable Tray at full power when dispensing ice or water with the main dispenser pad. Discard first 10-14 glasses of water after initially connecting refrigerator to household water supply and after extended periods of water dispenser, there will shut down power to reduce spraying. When dispensing crushed ice, hold container...

Use and Care Manual
Page 20
... cause water and cartridge to eject. Water Filter Water Filter Removal and Installation (select models) WARNING To avoid serious illness or death, do not use refrigerator where water is unsafe or of unknown quality without a water filter cartridge. Reduce water spurts by dispensing water for later use , allow internal water tank...
... cause water and cartridge to eject. Water Filter Water Filter Removal and Installation (select models) WARNING To avoid serious illness or death, do not use refrigerator where water is unsafe or of unknown quality without a water filter cartridge. Reduce water spurts by dispensing water for later use , allow internal water tank...

Use and Care Manual
Page 21
... Mercury at pH 6.5 0.002 mg/L .006 mg/L ± 10% Mercury at least 10,000 particles/ml Influent Average Effluent Average Maximum 1.88 mg / L 97.26% 96.84% - - 99.52% 98.94% Min. at pH 8.5 0.002 mg/L .006 mg/L ± 10% Atrazine 0.003 mg/L 0.009 mg/L ... mg/L 0.002 mg/L 0.015 mg/L Effluent Average Maximum 0.31 NTU .049 NTU Water Filter System Specification and Performance Data Sheet TM Refrigerator Water Filter Cartridge Model UKF8001AXX Specifications Service Flow Rate (Maximum 0.78 GPM (2.9 L/min) Rated Service Life UKF8001AXX-750 (Maximum) ......750 gallons...
... Mercury at pH 6.5 0.002 mg/L .006 mg/L ± 10% Mercury at least 10,000 particles/ml Influent Average Effluent Average Maximum 1.88 mg / L 97.26% 96.84% - - 99.52% 98.94% Min. at pH 8.5 0.002 mg/L .006 mg/L ± 10% Atrazine 0.003 mg/L 0.009 mg/L ... mg/L 0.002 mg/L 0.015 mg/L Effluent Average Maximum 0.31 NTU .049 NTU Water Filter System Specification and Performance Data Sheet TM Refrigerator Water Filter Cartridge Model UKF8001AXX Specifications Service Flow Rate (Maximum 0.78 GPM (2.9 L/min) Rated Service Life UKF8001AXX-750 (Maximum) ......750 gallons...

Use and Care Manual
Page 23
... drawers traps humidity to the Food Storage Chart on the freezer door shelves. Frozen Food Storage • The freezer compartment of a refrigerator should be wrapped securely so leakage and contamination of other foods. • While vegetables need a certain amount of humidity to the ...to other foods or surfaces does not occur. • Occasionally mold will develop on pages 8 and 9. • Avoid overcrowding the refrigerator shelves. Drain vegetables well before use aluminum foil, freezer wrap, freezer bags or airtight containers. Force as much humidity can shorten storage ...
... drawers traps humidity to the Food Storage Chart on the freezer door shelves. Frozen Food Storage • The freezer compartment of a refrigerator should be wrapped securely so leakage and contamination of other foods. • While vegetables need a certain amount of humidity to the ...to other foods or surfaces does not occur. • Occasionally mold will develop on pages 8 and 9. • Avoid overcrowding the refrigerator shelves. Drain vegetables well before use aluminum foil, freezer wrap, freezer bags or airtight containers. Force as much humidity can shorten storage ...

Use and Care Manual
Page 24
... 1 month 6 to 2 weeks Not recommended Wrap tightly. Sour cream 10 days Not recommended Store in the shell 3 weeks Not recommended Refrigerate small ends down. EGGS Eggs in original carton. FRUITS Apples 1 month 8 months (cooked) May also store unripe or hard apples at... sugar for non-sweet dishes. salt for use in original carton. Berries, cherries, apricots 2 to 3 days 6 months Ripen at room temperature before refrigerating. Do not return unused portions to 5 days Not recommended Store in sweet, or 1 tsp. Pineapples, cut 2 to 3 days 6 to 6 ...
... 1 month 6 to 2 weeks Not recommended Wrap tightly. Sour cream 10 days Not recommended Store in the shell 3 weeks Not recommended Refrigerate small ends down. EGGS Eggs in original carton. FRUITS Apples 1 month 8 months (cooked) May also store unripe or hard apples at... sugar for non-sweet dishes. salt for use in original carton. Berries, cherries, apricots 2 to 3 days 6 months Ripen at room temperature before refrigerating. Do not return unused portions to 5 days Not recommended Store in sweet, or 1 tsp. Pineapples, cut 2 to 3 days 6 to 6 ...


