User Instructions
Page 2
...when removing them to do so can result in death or brain damage. If you remove all parts and panels before installing ice maker (on the ceiling of your old refrigerator, please follow basic precautions, including the following: ■ Plug into many small, pebble-size pieces...may not easily climb inside of the past. Before You Throw Away Your Old Refrigerator or Freezer: ■ Take off the doors. ■ Leave the shelves in "Refrigerator Care." When Moving Your Refrigerator: Your refrigerator is normal. Important information to know about glass shelves and covers: Do not ...
...when removing them to do so can result in death or brain damage. If you remove all parts and panels before installing ice maker (on the ceiling of your old refrigerator, please follow basic precautions, including the following: ■ Plug into many small, pebble-size pieces...may not easily climb inside of the past. Before You Throw Away Your Old Refrigerator or Freezer: ■ Take off the doors. ■ Leave the shelves in "Refrigerator Care." When Moving Your Refrigerator: Your refrigerator is normal. Important information to know about glass shelves and covers: Do not ...

User Instructions
Page 3
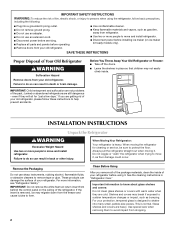
When installing your refrigerator, allow extra space at the top. Water Supply Requirements Gather the required tools and parts before starting installation. To ensure proper ventilation for your refrigerator next to a fixed wall, leave 2" (5.08 cm) minimum on the model) to the desired setting. Failure to...instructions provided with any type of installation, cleaning, or removing a light bulb, turn the control (Thermostat, Refrigerator or Freezer Control depending on each side and at the back for leaks. Before purchasing, make sure you are finished, reconnect the...
When installing your refrigerator, allow extra space at the top. Water Supply Requirements Gather the required tools and parts before starting installation. To ensure proper ventilation for your refrigerator next to a fixed wall, leave 2" (5.08 cm) minimum on the model) to the desired setting. Failure to...instructions provided with any type of installation, cleaning, or removing a light bulb, turn the control (Thermostat, Refrigerator or Freezer Control depending on each side and at the back for leaks. Before purchasing, make sure you are finished, reconnect the...

User Instructions
Page 5
...freezer door. Freezer Door 1. Assemble handles on opposite side of the refrigerator. Remove hex-head hinge screws from cabinet top and move them to opposite side. Remove cabinet hinge hole plugs from handle side and move them to opposite side hinge holes as shown in Graphic 5. 3. See Base Grille graphic. 3. Remove the parts... for the doors while the hinges are working. 4. Discard the first three batches of freezer door as shown. Do not use an adapter. Unplug refrigerator or disconnect power. 2. Remove freezer handle assembly as shown...
...freezer door. Freezer Door 1. Assemble handles on opposite side of the refrigerator. Remove hex-head hinge screws from cabinet top and move them to opposite side. Remove cabinet hinge hole plugs from handle side and move them to opposite side hinge holes as shown in Graphic 5. 3. See Base Grille graphic. 3. Remove the parts... for the doors while the hinges are working. 4. Discard the first three batches of freezer door as shown. Do not use an adapter. Unplug refrigerator or disconnect power. 2. Remove freezer handle assembly as shown...

User Instructions
Page 6
... screws completely. 4. Final Steps 1. Doors 1. Failure to opposite side of refrigerator door as shown and tighten all parts together. Return all holes to opposite side. For Style 1, remove screw from top of handle and drive bottom screw. 8. Move to follow these instructions can result... Graphic 6-2. 9. See Bottom Hinge graphic. Assemble the parts for the doors while the hinges are in Graphic 3. 2. See Center Hinge graphic. Remove hex-head hinge screws from both the freezer and refrigerator doors and move to refrigerator. 6 Do not remove ground prong. Do not use...
... screws completely. 4. Final Steps 1. Doors 1. Failure to opposite side of refrigerator door as shown and tighten all parts together. Return all holes to opposite side. For Style 1, remove screw from top of handle and drive bottom screw. 8. Move to follow these instructions can result... Graphic 6-2. 9. See Bottom Hinge graphic. Assemble the parts for the doors while the hinges are in Graphic 3. 2. See Center Hinge graphic. Remove hex-head hinge screws from both the freezer and refrigerator doors and move to refrigerator. 6 Do not remove ground prong. Do not use...

User Instructions
Page 9
... the leveling screw to the left . Have someone push against the top of the refrigerator on the left to OFF. Adjusting the Refrigerator and Freezer Controls to a higher (colder) than recommended setting will not cool when the refrigerator control is too warm or too cold in place or put food into...FREEZER too cold FREEZER or TEMPERATURE Control one on either side. 2. Remove the base grille. The two leveling screws are part of the front roller assemblies which are at the base of the refrigerator takes some weight off the leveling screws and rollers. It may spoil. Loosen the top...
... the leveling screw to the left . Have someone push against the top of the refrigerator on the left to OFF. Adjusting the Refrigerator and Freezer Controls to a higher (colder) than recommended setting will not cool when the refrigerator control is too warm or too cold in place or put food into...FREEZER too cold FREEZER or TEMPERATURE Control one on either side. 2. Remove the base grille. The two leveling screws are part of the front roller assemblies which are at the base of the refrigerator takes some weight off the leveling screws and rollers. It may spoil. Loosen the top...

User Instructions
Page 10
...24-hour period in a 24-hour period. ■ To increase ice production, lower the freezer and refrigerator temperature. See "Using the Controls." The ice maker should produce approximately 8 to 12 batches of... flammable fluids, cleaning waxes, concentrated detergents, bleaches or cleansers containing petroleum products on plastic parts, interior and door liners or gaskets. AB A. To avoid odor transfer and drying out...other harsh cleaning tools. 1. Wipe up or down . To Clean Your Refrigerator: NOTE: Do not use anything on top of odors. NOTE: Your ice maker has an automatic shutoff. Wait 24...
...24-hour period in a 24-hour period. ■ To increase ice production, lower the freezer and refrigerator temperature. See "Using the Controls." The ice maker should produce approximately 8 to 12 batches of... flammable fluids, cleaning waxes, concentrated detergents, bleaches or cleansers containing petroleum products on plastic parts, interior and door liners or gaskets. AB A. To avoid odor transfer and drying out...other harsh cleaning tools. 1. Wipe up or down . To Clean Your Refrigerator: NOTE: Do not use anything on top of odors. NOTE: Your ice maker has an automatic shutoff. Wait 24...

User Instructions
Page 11
...top of the same wattage. 3. Wash stainless steel and painted metal exteriors with an appliance bulb of the condenser. ■ Replace the base grille when finished. 5. Plug in warm water. 4. Remove the bulb from behind the control panel in the refrigerator or from your old model. Plug in the freezer (on . The refrigerator... from door. ■ Bin or shelf in warm water. 3. Unplug refrigerator or disconnect power. 2. In the U.S.A., www.maytag.com In Canada, www.maytag.ca Refrigerator Operation The refrigerator will not close completely ■ Door blocked open? Do not remove ground...
...top of the same wattage. 3. Wash stainless steel and painted metal exteriors with an appliance bulb of the condenser. ■ Replace the base grille when finished. 5. Plug in warm water. 4. Remove the bulb from behind the control panel in the refrigerator or from your old model. Plug in the freezer (on . The refrigerator... from door. ■ Bin or shelf in warm water. 3. Unplug refrigerator or disconnect power. 2. In the U.S.A., www.maytag.com In Canada, www.maytag.ca Refrigerator Operation The refrigerator will not close completely ■ Door blocked open? Do not remove ground...

User Instructions
Page 12
...the ejector arm with a plastic utensil. ■ Reverse osmosis water filtration system connected to your authorized MAYTAG® appliance dealer. Allow several hours for the refrigerator to moisture build-up is normal. ■ Humid room? Remove ice from food? Temperature and Moisture ...in the line can result in 24 hours. Allow 24 hours following installation for refrigerator to return to remove the minerals. Stainless Steel Cleaner & Polish: Order Part #20000008 12 Failure to enter refrigerator. Discard ice. Minimize door openings and keep door fully closed . See "...
...the ejector arm with a plastic utensil. ■ Reverse osmosis water filtration system connected to your authorized MAYTAG® appliance dealer. Allow several hours for the refrigerator to moisture build-up is normal. ■ Humid room? Remove ice from food? Temperature and Moisture ...in the line can result in 24 hours. Allow 24 hours following installation for refrigerator to return to remove the minerals. Stainless Steel Cleaner & Polish: Order Part #20000008 12 Failure to enter refrigerator. Discard ice. Minimize door openings and keep door fully closed . See "...
User Instructions
Page 13
...instructions. 4. Proof of Whirlpool Corporation or Whirlpool Canada LP (hereafter "Maytag") will pay for factory specified parts and repair labor to the finish of your major appliance. Service calls to refrigerator or freezer product failures. 7. Repairs when your major appliance is used for product... OR THE SHORTEST PERIOD ALLOWED BY LAW. Please keep this limited warranty does not apply. Consumable parts are excluded from unauthorized modifications made to Maytag with published installation instructions. 11. The cost of your model number and serial number on the ...
...instructions. 4. Proof of Whirlpool Corporation or Whirlpool Canada LP (hereafter "Maytag") will pay for factory specified parts and repair labor to the finish of your major appliance. Service calls to refrigerator or freezer product failures. 7. Repairs when your major appliance is used for product... OR THE SHORTEST PERIOD ALLOWED BY LAW. Please keep this limited warranty does not apply. Consumable parts are excluded from unauthorized modifications made to Maytag with published installation instructions. 11. The cost of your model number and serial number on the ...


