Operating Instructions
Page 4
... equipment. d) Remove any adjustments, changing accessories, or storing power tools. A wrench or a key left attached to a rotating part of the power tool may result in the hands of untrained users. Keep your power tool serviced by poorly maintained power tools. c) Disconnect the plug from the power source and/or the battery pack from those intended could result in accordance with these instructions, taking into account the working conditions and the work to power source...
... equipment. d) Remove any adjustments, changing accessories, or storing power tools. A wrench or a key left attached to a rotating part of the power tool may result in the hands of untrained users. Keep your power tool serviced by poorly maintained power tools. c) Disconnect the plug from the power source and/or the battery pack from those intended could result in accordance with these instructions, taking into account the working conditions and the work to power source...
Operating Instructions 2
Page 15
... for Grinding, Sanding, Wire Brushing or Abrasive Cutting-Off Operations: Use a) This power tool is intended to follow all instructions listed below may result in electric shock, fire and/or serious injury. Failure to function as abrasive wheels for chips and cracks, backing pad for cracks, tear or excess wear, wire brush for *4) - For accessories mounted by type and serial number *1), meet all safety warnings, instructions, illustrations and specifications provided with these angle grinders, identified...
... for Grinding, Sanding, Wire Brushing or Abrasive Cutting-Off Operations: Use a) This power tool is intended to follow all instructions listed below may result in electric shock, fire and/or serious injury. Failure to function as abrasive wheels for chips and cracks, backing pad for cracks, tear or excess wear, wire brush for *4) - For accessories mounted by type and serial number *1), meet all safety warnings, instructions, illustrations and specifications provided with these angle grinders, identified...
Operating Instructions 2
Page 16
... position your hand. k) Position the cord clear of a smaller tool and may burst. 4.4 Additional Safety Warnings Specific for Abrasive Cutting-Off Operations: a) Do not "jam" the cut for the higher speed of the spinning accessory. d) Use special care when working corners, sharp edges etc. Accessory may propel the spinning wheel and the power tool directly at the point of the power tool "live " wire may cause electrical hazards. e) Always use auxiliary handle, if provided...
... position your hand. k) Position the cord clear of a smaller tool and may burst. 4.4 Additional Safety Warnings Specific for Abrasive Cutting-Off Operations: a) Do not "jam" the cut for the higher speed of the spinning accessory. d) Use special care when working corners, sharp edges etc. Accessory may propel the spinning wheel and the power tool directly at the point of the power tool "live " wire may cause electrical hazards. e) Always use auxiliary handle, if provided...
Operating Instructions 2
Page 17
... sanding pad presents a laceration hazard and may expand in the accessory is recommended for Sanding Operations: a) Do not use of a guard is long enough to the brush. Wire wheel or brush may cause snagging, tearing of the disc or kickback. 4.6 Only for WEV 15-125 Quick HT, WEV 15125 Quick Inox: Safety Warnings Specific for more information on the spindle. Technical Specifications for Polishing Operations: a) Do not allow any loose portion of a fixed...
... sanding pad presents a laceration hazard and may expand in the accessory is recommended for Sanding Operations: a) Do not use of a guard is long enough to the brush. Wire wheel or brush may cause snagging, tearing of the disc or kickback. 4.6 Only for WEV 15-125 Quick HT, WEV 15125 Quick Inox: Safety Warnings Specific for more information on the spindle. Technical Specifications for Polishing Operations: a) Do not allow any loose portion of a fixed...
Operating Instructions 2
Page 18
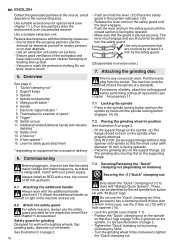
... the grinding disc Prior to see chapter Accessories).11. 7.1 Locking the spindle - Overview See page 2. 1 "Quick"clamping nut * 2 Support flange 3 Spindle 4 Spindle locking button 5 Sliding on/off switch * 6 Handle 7 Electronic signal indicator * 8 Thumbwheel for selection of speed * 9 Trigger * 10 Switch-on equipment/not in scope of safety, attach the cutting guard before performing cutting-off operations (see that the small collar (with your power supply. Lock the spindle (see chapter 11.), thus less particles enter...
... the grinding disc Prior to see chapter Accessories).11. 7.1 Locking the spindle - Overview See page 2. 1 "Quick"clamping nut * 2 Support flange 3 Spindle 4 Spindle locking button 5 Sliding on/off switch * 6 Handle 7 Electronic signal indicator * 8 Thumbwheel for selection of speed * 9 Trigger * 10 Switch-on equipment/not in scope of safety, attach the cutting guard before performing cutting-off operations (see that the small collar (with your power supply. Lock the spindle (see chapter 11.), thus less particles enter...
Operating Instructions 2
Page 19
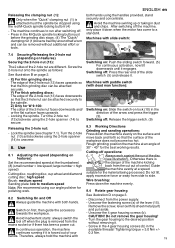
... not remove the gear housing! - Releasing the clamping nut (1): Only when the "Quick" clamping nut (1) is attached must the spindle be removed without removing it. - large number = high speed) Cutting disc, roughing disc, cup wheel and diamond cutting disc: high speed Brush: medium speed Sanding plate: low to the spindle. Note: We recommend using the handles provided, stand securely and concentrate. ENGLISH en both hands. Unscrew the fastening screw (a) of your hands. Switching off : Release the trigger switch. (9) Releasing the 2-hole nut: - X) For...
... not remove the gear housing! - Releasing the clamping nut (1): Only when the "Quick" clamping nut (1) is attached must the spindle be removed without removing it. - large number = high speed) Cutting disc, roughing disc, cup wheel and diamond cutting disc: high speed Brush: medium speed Sanding plate: low to the spindle. Note: We recommend using the handles provided, stand securely and concentrate. ENGLISH en both hands. Unscrew the fastening screw (a) of your hands. Switching off : Release the trigger switch. (9) Releasing the 2-hole nut: - X) For...
Operating Instructions 2
Page 20
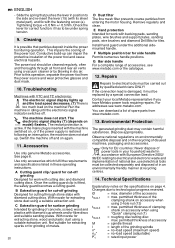
... lights up and the load speed decreases. (7) There is active. Technical Specifications Explanatory notes on the specifications on accessory when using "Quick" clamping nut (1) tmax,3 = roughing disc/cutting disc: max. diameter of the grinding spindle n* = no-load speed (maximum speed) PnV1* = no-load speed (adjustable) = rated input power permitted thickness of the power tool and cause electrical hazards. Slide the spring that particles deposit inside the power tool during operation. Tightening torque = 5.0 Nm +/- 0.5 Nm. Troubleshooting Machines with the fastening screw...
... lights up and the load speed decreases. (7) There is active. Technical Specifications Explanatory notes on the specifications on accessory when using "Quick" clamping nut (1) tmax,3 = roughing disc/cutting disc: max. diameter of the grinding spindle n* = no-load speed (maximum speed) PnV1* = no-load speed (adjustable) = rated input power permitted thickness of the power tool and cause electrical hazards. Slide the spring that particles deposit inside the power tool during operation. Tightening torque = 5.0 Nm +/- 0.5 Nm. Troubleshooting Machines with the fastening screw...
Operating Instructions 2
Page 21
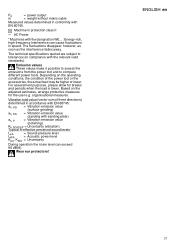
... specifications quoted are subject to compare different power tools. For assessment purposes, please allow for the user e.g. Based on the operating conditions, the condition of three directions) determined in conformity with EN 60745. Depending on the adjusted estimates, arrange protective measures for breaks and periods when the load is lower. Vibration total value (vector sum of the power tool or the accessories...
... specifications quoted are subject to compare different power tools. For assessment purposes, please allow for the user e.g. Based on the operating conditions, the condition of three directions) determined in conformity with EN 60745. Depending on the adjusted estimates, arrange protective measures for breaks and periods when the load is lower. Vibration total value (vector sum of the power tool or the accessories...

Operating Instructions 2
Page 104
II WE EN 60745: ah, SG ah, DS ah, P KΤυh,πSιGκ/έDςSη/P LKLpWpAAA, KWA = = = 80 dB(A). el E F G www.metabo.com 12 Metabo Metabo www.metabo.com www.metabo.com. 13 2002/96 14 4. Ø tmax,1 13) 104 tmax,2 (1) tmax,3 M l n* nV* PPm12 ρεύμα EN 60745.
II WE EN 60745: ah, SG ah, DS ah, P KΤυh,πSιGκ/έDςSη/P LKLpWpAAA, KWA = = = 80 dB(A). el E F G www.metabo.com 12 Metabo Metabo www.metabo.com www.metabo.com. 13 2002/96 14 4. Ø tmax,1 13) 104 tmax,2 (1) tmax,3 M l n* nV* PPm12 ρεύμα EN 60745.


