Operating Instructions
Page 6
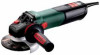
WE 19-125 Q M-Brush *1) 13105.. tmax3 mm (in) M / l n nV - / mm (in ) VTC 125 (5) tmax1; WEV 17-125 Quick Inox RT *1) 01092.. WEV 17-125 Quick RT *1) 01089.. WEV 17-125 Quick Inox *1) 00517.. 6 14. tmax2; WEV 17-125 Quick *1) 00516.. WE 19-180 Quich RT *1) 01088.. M-Quick Electronic Ø mm (in ) min-1 (rpm) min-1 (rpm) 8000 20008000 P1 P2 m ah,SG/Kh,SG ah,DS/Kh,DS ah,P/Kh,P LpA/KpA LWA/KWA W W kg (lbs) m/s2 m/s2 m/s2 dB(A) dB(A) 1700 1040 2,5 (5.5) 4,7/1,5 2,5/1,5 WEV 19-125 Q M-Brush *1) 13108..
WE 19-125 Q M-Brush *1) 13105.. tmax3 mm (in) M / l n nV - / mm (in ) VTC 125 (5) tmax1; WEV 17-125 Quick Inox RT *1) 01092.. WEV 17-125 Quick RT *1) 01089.. WEV 17-125 Quick Inox *1) 00517.. 6 14. tmax2; WEV 17-125 Quick *1) 00516.. WE 19-180 Quich RT *1) 01088.. M-Quick Electronic Ø mm (in ) min-1 (rpm) min-1 (rpm) 8000 20008000 P1 P2 m ah,SG/Kh,SG ah,DS/Kh,DS ah,P/Kh,P LpA/KpA LWA/KWA W W kg (lbs) m/s2 m/s2 m/s2 dB(A) dB(A) 1700 1040 2,5 (5.5) 4,7/1,5 2,5/1,5 WEV 19-125 Q M-Brush *1) 13108..
Operating Instructions
Page 16
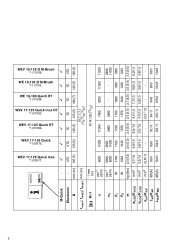
... all parts of the text that these angle grinders, identified by type and serial number *1) on application, use a damaged accessory. Keep all safety warnings and instructions may cause loss of your accessory must be adequately guarded or controlled. Pass on the power tool. WEV 15-125 Quick HT, WEV 17-125 Quick Inox, WEV 17-125 Quick Inox RT can be attached to your power tool only together with original Metabo accessories, are not recommended to thumbwheel for loose or cracked wires. b) Operations...
... all parts of the text that these angle grinders, identified by type and serial number *1) on application, use a damaged accessory. Keep all safety warnings and instructions may cause loss of your accessory must be adequately guarded or controlled. Pass on the power tool. WEV 15-125 Quick HT, WEV 17-125 Quick Inox, WEV 17-125 Quick Inox RT can be attached to your power tool only together with original Metabo accessories, are not recommended to thumbwheel for loose or cracked wires. b) Operations...
Operating Instructions
Page 17
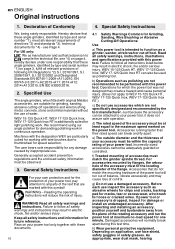
... used only for Grinding and Abrasive Cutting-Off Operations: a) Use only wheel types that projects through the plane of the guard lip. The operator can be adequately guarded and are taken. Such blades create frequent kickback and loss of control. 4.3 Safety Warnings Specific for recommended applications. If you lose control, the cord may either jump toward or away from the operator, depending on the power tool...
... used only for Grinding and Abrasive Cutting-Off Operations: a) Use only wheel types that projects through the plane of the guard lip. The operator can be adequately guarded and are taken. Such blades create frequent kickback and loss of control. 4.3 Safety Warnings Specific for recommended applications. If you lose control, the cord may either jump toward or away from the operator, depending on the power tool...
Operating Instructions
Page 18
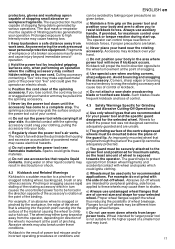
... Quick Inox, WEV 17-125 Quick Inox RT: Safety Warnings Specific for any adjustments, converting or servicing the machine. The protruding wheel may propel the spinning wheel and the power tool directly at the point of kickback or wheel breakage. Always operate with the grinding media and if required. Use elastic cushioning layers if they have been supplied with two hands. Grinding discs must lay flat and be stored and handled...
... Quick Inox, WEV 17-125 Quick Inox RT: Safety Warnings Specific for any adjustments, converting or servicing the machine. The protruding wheel may propel the spinning wheel and the power tool directly at the point of kickback or wheel breakage. Always operate with the grinding media and if required. Use elastic cushioning layers if they have been supplied with two hands. Grinding discs must lay flat and be stored and handled...
Operating Instructions
Page 19
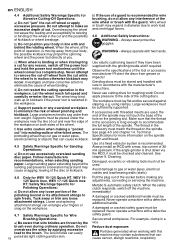
... the spindle locking button engages. (4) (3) 9 Trigger switch* 10 Switch-on lock 11 Additional handle/Additional handle with vibration damping * 12 Safety cover 13 2-hole nut * 14 2-hole spanner * 15 Lever for safety guard attachment 7.2 Placing the grinding wheel in position See illustration A on for wood treatment (chromate, wood preservatives), some wood types (such as oak or beech dust), metals, asbestos. Securing the (1)"Quick" clamping nut: 19 Do the following measures: - Use...
... the spindle locking button engages. (4) (3) 9 Trigger switch* 10 Switch-on lock 11 Additional handle/Additional handle with vibration damping * 12 Safety cover 13 2-hole nut * 14 2-hole spanner * 15 Lever for safety guard attachment 7.2 Placing the grinding wheel in position See illustration A on for wood treatment (chromate, wood preservatives), some wood types (such as oak or beech dust), metals, asbestos. Securing the (1)"Quick" clamping nut: 19 Do the following measures: - Use...
Operating Instructions
Page 20
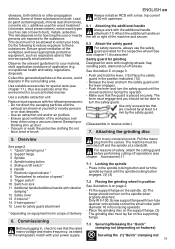
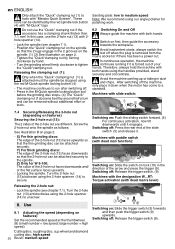
...the red M-Quick spindle locking button! (4) - Screw the 2-hole nut onto the spindle as follows: See illustration B on page 2. - Use 8.1 Adjusting the speed (depending on : Slide the trigger switch (9) forwards and then push the trigger switch (9) upwards. large number = high speed) Cutting disc, roughing disc, cup wheel and diamond cutting disc: high speed 20 Brush: medium speed Switching on features) Set the recommended speed at the thumbwheel. (8) (small number = low speed; Switching off : Release the trigger switch. (9) Machines with the designation W...RT: Torque...
...the red M-Quick spindle locking button! (4) - Screw the 2-hole nut onto the spindle as follows: See illustration B on page 2. - Use 8.1 Adjusting the speed (depending on : Slide the trigger switch (9) forwards and then push the trigger switch (9) upwards. large number = high speed) Cutting disc, roughing disc, cup wheel and diamond cutting disc: high speed 20 Brush: medium speed Switching on features) Set the recommended speed at the thumbwheel. (8) (small number = low speed; Switching off : Release the trigger switch. (9) Machines with the designation W...RT: Torque...
Operating Instructions
Page 21
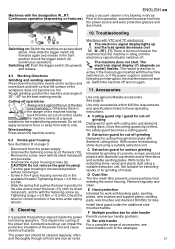
... at a speed suitable for tiles. Remove the screw, lever (with its sheet metal part), and fix with the fastening screw (a). Do not remove the gear housing! - Tightening torque = 5.0 Nm +/- 0.5 Nm. Use only accessories which fulfil the requirements and specifications listed in the available threads! B Extraction guard for cut out of the power tool and cause electrical hazards. 0 Machines with VTC and TC electronics: The electronic signal display lights up and the load speed decreases...
... at a speed suitable for tiles. Remove the screw, lever (with its sheet metal part), and fix with the fastening screw (a). Do not remove the gear housing! - Tightening torque = 5.0 Nm +/- 0.5 Nm. Use only accessories which fulfil the requirements and specifications listed in the available threads! B Extraction guard for cut out of the power tool and cause electrical hazards. 0 Machines with VTC and TC electronics: The electronic signal display lights up and the load speed decreases...
Operating Instructions
Page 22
... the recycling of the clamping shank on accessory when using "Quick" clamping nut (1) tmax,3 = roughing disc/cutting disc: max. Technical Specifications Explanatory notes on the specifications on the operating conditions, the condition of in speed. Contact your household waste! Vibration total value (vector sum of spare parts from the power tool and to electrical and electronic waste and implementation of national law, used electrical tools must be higher...
... the recycling of the clamping shank on accessory when using "Quick" clamping nut (1) tmax,3 = roughing disc/cutting disc: max. Technical Specifications Explanatory notes on the specifications on the operating conditions, the condition of in speed. Contact your household waste! Vibration total value (vector sum of spare parts from the power tool and to electrical and electronic waste and implementation of national law, used electrical tools must be higher...


