Operating instructions for accessories
Page 7
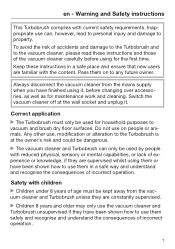
... to property. Switch the vacuum cleaner off at the owner's risk and could be dangerous. The vacuum cleaner and Turbobrush can , however, lead to personal injury and damage to use on to vacuum and brush dry floor surfaces. en - Inap‐ propriate use them on people or ani‐ mals. Safety with current safety requirements. Warning and Safety instructions This Turbobrush complies...
... to property. Switch the vacuum cleaner off at the owner's risk and could be dangerous. The vacuum cleaner and Turbobrush can , however, lead to personal injury and damage to use on to vacuum and brush dry floor surfaces. en - Inap‐ propriate use them on people or ani‐ mals. Safety with current safety requirements. Warning and Safety instructions This Turbobrush complies...
Operating instructions for accessories
Page 10
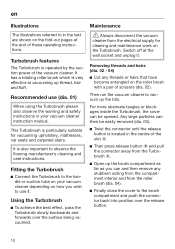
... suitable for cleaning and maintenance work on how you can then be opened. Fitting the Turbobrush Connect the Turbobrush to the han‐ dle or suction tube on your vacuum cleaner instruction manual. For more obstinate tangles or block‐ ages inside the Turbobrush, the cover can be easily removed (dia. 03). Twist the connector until the release button is operated by...
... suitable for cleaning and maintenance work on how you can then be opened. Fitting the Turbobrush Connect the Turbobrush to the han‐ dle or suction tube on your vacuum cleaner instruction manual. For more obstinate tangles or block‐ ages inside the Turbobrush, the cover can be easily removed (dia. 03). Twist the connector until the release button is operated by...
Operating instructions for accessories
Page 62
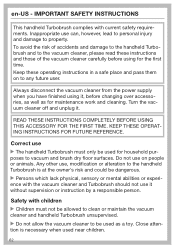
... brush dry floor surfaces. Any other use The handheld Turbobrush must not be allowed to clean or maintain the vacuum cleaner and handheld Turbobrush unsupervised. Do not allow the vacuum cleaner to the vacuum cleaner, please read these operating instructions in a safe place and pass them on people or animals. To avoid the risk of accidents and damage to the handheld Turbo‐ brush...
... brush dry floor surfaces. Any other use The handheld Turbobrush must not be allowed to clean or maintain the vacuum cleaner and handheld Turbobrush unsupervised. Do not allow the vacuum cleaner to the vacuum cleaner, please read these operating instructions in a safe place and pass them on people or animals. To avoid the risk of accidents and damage to the handheld Turbo‐ brush...

Operating instructions for accessories
Page 64
... until the release button is located in the center of these Operating Instruc‐ tions. It has a rotating roller brush which is particularly suitable for cleaning and maintenance work on the fold-out pages at the end of the slot . Then press release button and pull the connector away from the roller brush (Fig. 04). 64 Then run the vacuum cleaner to vac‐...
... until the release button is located in the center of these Operating Instruc‐ tions. It has a rotating roller brush which is particularly suitable for cleaning and maintenance work on the fold-out pages at the end of the slot . Then press release button and pull the connector away from the roller brush (Fig. 04). 64 Then run the vacuum cleaner to vac‐...
Operating instructions
Page 3
... Replacing one type of exhaust filter with another 21 When changing the filter, please note 22 Maintenance indicator with reset button 22 Inserting batteries into the LED handle 22 When to change the thread catchers 22 Replacing the thread catchers 22 Cleaning the roller on the floor brush AllTeQ 22 Cleaning and care 23 Frequently asked questions 24 After sales service 25 Warranty conditions 25 Optional accessories 25 Limited Warranty - Vacuum Cleaners...
... Replacing one type of exhaust filter with another 21 When changing the filter, please note 22 Maintenance indicator with reset button 22 Inserting batteries into the LED handle 22 When to change the thread catchers 22 Replacing the thread catchers 22 Cleaning the roller on the floor brush AllTeQ 22 Cleaning and care 23 Frequently asked questions 24 After sales service 25 Warranty conditions 25 Optional accessories 25 Limited Warranty - Vacuum Cleaners...
Operating instructions
Page 4
... risk of carpets, rugs and hard flooring. This vacuum cleaner is not intended for outdoor use This vacuum cleaner is not supported by the manufacturer and could be used for maintenance work and cleaning. Always disconnect the vacuum cleaner from the power supply when you have finished using it , before using it for cleaning flooring in a safe place and pass them on its safety, operation and maintenance. Turn the vacuum cleaner off...
... risk of carpets, rugs and hard flooring. This vacuum cleaner is not intended for outdoor use This vacuum cleaner is not supported by the manufacturer and could be used for maintenance work and cleaning. Always disconnect the vacuum cleaner from the power supply when you have finished using it , before using it for cleaning flooring in a safe place and pass them on its safety, operation and maintenance. Turn the vacuum cleaner off...
Operating instructions
Page 7
... the handle. Clean only with this work must be done by the power cord, and be released. This could damage the cord, plug or socket. The appliance must not be used if any moisture gets into the underside of electric shock. The electro-suction hose and the telescopic wand contain electrical wires. For safety reasons this metal strip during vacuuming. Do not allow the vacuum cleaner...
... the handle. Clean only with this work must be done by the power cord, and be released. This could damage the cord, plug or socket. The appliance must not be used if any moisture gets into the underside of electric shock. The electro-suction hose and the telescopic wand contain electrical wires. For safety reasons this metal strip during vacuuming. Do not allow the vacuum cleaner...
Operating instructions
Page 8
...; Floor attachments, accessories and wands must not be used in accordance with the LED handle): 8 Wait until any water, liquid or damp dirt. IMPORTANT SAFETY INSTRUCTIONS All repair work by unqualified persons could be performed by a qualified technician in printers and photocopiers, can conduct electricity. Do not vacuum up any freshly cleaned or shampooed rugs or carpets are completely dry before attempting to vacuum toner dust. Repairs...
...; Floor attachments, accessories and wands must not be used in accordance with the LED handle): 8 Wait until any water, liquid or damp dirt. IMPORTANT SAFETY INSTRUCTIONS All repair work by unqualified persons could be performed by a qualified technician in printers and photocopiers, can conduct electricity. Do not vacuum up any freshly cleaned or shampooed rugs or carpets are completely dry before attempting to vacuum toner dust. Repairs...
Operating instructions
Page 11
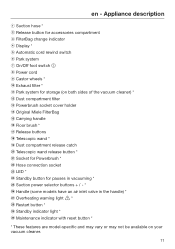
... e Automatic cord rewind switch f Park system g On/Off foot switch h Power cord i Castor wheels * j Exhaust filter * k Park system for storage (on both sides of the vacuum cleaner) * l Dust compartment filter m Powerbrush socket cover holder n Original Miele FilterBag o Carrying handle p Floor brush * q Release buttons r Telescopic wand * s Dust compartment release catch t Telescopic wand release button * u Socket for Powerbrush * v Hose connection socket w LED * x Standby button for pauses in vacuuming * y Suction power selector buttons + / - * z Handle (some models have an air inlet...
... e Automatic cord rewind switch f Park system g On/Off foot switch h Power cord i Castor wheels * j Exhaust filter * k Park system for storage (on both sides of the vacuum cleaner) * l Dust compartment filter m Powerbrush socket cover holder n Original Miele FilterBag o Carrying handle p Floor brush * q Release buttons r Telescopic wand * s Dust compartment release catch t Telescopic wand release button * u Socket for Powerbrush * v Hose connection socket w LED * x Standby button for pauses in vacuuming * y Suction power selector buttons + / - * z Handle (some models have an air inlet...
Operating instructions
Page 13
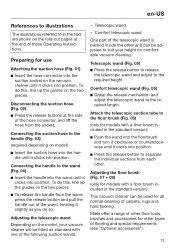
... on model) Insert the suction hose into the handle until it clicks into position. Disconnecting the suction hose (Fig. 02) Press the release buttons at the end of these Operating Instructions. Comfort telescopic wand One part of the telescopic wand is packed inside the other . Comfort telescopic wand (Fig. 05) Grasp the release mechanism and adjust the telescopic wand to suit your vacuum cleaner will...
... on model) Insert the suction hose into the handle until it clicks into position. Disconnecting the suction hose (Fig. 02) Press the release buttons at the end of these Operating Instructions. Comfort telescopic wand One part of the telescopic wand is packed inside the other . Comfort telescopic wand (Fig. 05) Grasp the release mechanism and adjust the telescopic wand to suit your vacuum cleaner will...
Operating instructions
Page 14
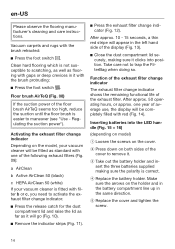
... display will be completely filled with the brush retracted: Press the foot switch . After approx. 50 operating hours, or approx. Make sure the arrows on the model, your vacuum cleaner is correct. Replace the battery holder. Clean hard flooring which is easier to maneuver (see "Use - Floor brush AirTeQ (Fig. 08) If the suction power of the exhaust filter change indicator The exhaust filter change indicator (Fig...
... display will be completely filled with the brush retracted: Press the foot switch . After approx. 50 operating hours, or approx. Make sure the arrows on the model, your vacuum cleaner is correct. Replace the battery holder. Clean hard flooring which is easier to maneuver (see "Use - Floor brush AirTeQ (Fig. 08) If the suction power of the exhaust filter change indicator The exhaust filter change indicator (Fig...
Operating instructions
Page 15
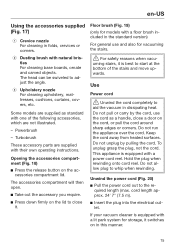
... vacu- Use Power cord Unwind the cord completely to whip when rewinding. Do not unplug by the cord, use and also for models with a floor brush included in folds, crevices or corners. Dusting brush with their own operating instructions. Hold the plug when rewinding onto cord reel. Do not allow plug to aid the vacuum in this manner. 15 cord length approx. 24' 7" (7.5 m). Insert the plug into the electrical outlet.
... vacu- Use Power cord Unwind the cord completely to whip when rewinding. Do not unplug by the cord, use and also for models with a floor brush included in folds, crevices or corners. Dusting brush with their own operating instructions. Hold the plug when rewinding onto cord reel. Do not allow plug to aid the vacuum in this manner. 15 cord length approx. 24' 7" (7.5 m). Insert the plug into the electrical outlet.
Operating instructions
Page 18
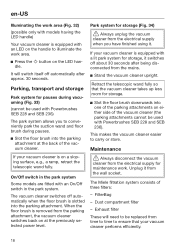
... finished using it switches off automatically when the floor brush is removed from the mains. Stand the vacuum cleaner upright. Unplug it from the electrical supply when you to conveniently park the suction wand and floor brush during pauses. Slot the floor brush into the parking attachment at the previously selected power level. FilterBag - en-US Illuminating the work area (Fig. 32) (possible only with models having...
... finished using it switches off automatically when the floor brush is removed from the mains. Stand the vacuum cleaner upright. Unplug it from the electrical supply when you to conveniently park the suction wand and floor brush during pauses. Slot the floor brush into the parking attachment at the previously selected power level. FilterBag - en-US Illuminating the work area (Fig. 32) (possible only with models having...
Operating instructions
Page 19
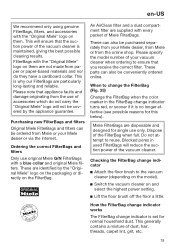
... the model). Switch the vacuum cleaner on the FilterBag. This is no longer effective (see possible reasons for this below). Please note that the suction power of accessories which do they have a cardboard collar. Purchasing new FilterBags and filters Original Miele FilterBags and filters can also be conveniently ordered online. Checking the FilterBag change indicator is maintained, giving the best possible cleaning results...
... the model). Switch the vacuum cleaner on the FilterBag. This is no longer effective (see possible reasons for this below). Please note that the suction power of accessories which do they have a cardboard collar. Purchasing new FilterBags and filters Original Miele FilterBags and filters can also be conveniently ordered online. Checking the FilterBag change indicator is maintained, giving the best possible cleaning results...

Operating instructions
Page 20
... the suction opening (Fig. 02). Lift the release button for motor protection). Close the filter frame. Insert the FilterBag into position. en-US However, if the cleaner has been used to vacuum up fine dust, such as it will go . If this , line up the guides on the collar. Open the blue filter frame fully and remove the old filter. A dust compartment filter...
... the suction opening (Fig. 02). Lift the release button for motor protection). Close the filter frame. Insert the FilterBag into position. en-US However, if the cleaner has been used to vacuum up fine dust, such as it will go . If this , line up the guides on the collar. Open the blue filter frame fully and remove the old filter. A dust compartment filter...
Operating instructions
Page 21
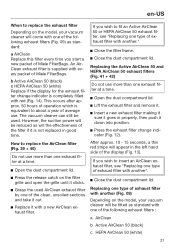
...; Press the exhaust filter change indicator is not replaced in the left hand side of exhaust filter with another (Fig. 09) Depending on the model, your vacuum cleaner will come with another". Close the dust compartment lid. An AirClean exhaust filter is equivalent to about a year of the filter if it clicks. Grasp the used . However, the suction power will be reduced...
...; Press the exhaust filter change indicator is not replaced in the left hand side of exhaust filter with another (Fig. 09) Depending on the model, your vacuum cleaner will come with another". Close the dust compartment lid. An AirClean exhaust filter is equivalent to about a year of the filter if it clicks. Grasp the used . However, the suction power will be reduced...
Operating instructions
Page 22
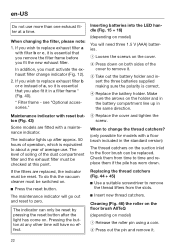
... the vacuum cleaner must activate the exhaust filter change the thread catchers? (only possible for models with filter b or c, it in the standard version) The thread catchers on . Press the reset button. Replacing the thread catchers (Fig. 44 + 45) Use a suitable screwdriver to remove the thread lifters from time to change indicator (Fig. 12). 2. The indicator can be switched on the suction...
... the vacuum cleaner must activate the exhaust filter change the thread catchers? (only possible for models with filter b or c, it in the standard version) The thread catchers on . Press the reset button. Replacing the thread catchers (Fig. 44 + 45) Use a suitable screwdriver to remove the thread lifters from time to change indicator (Fig. 12). 2. The indicator can be switched on the suction...
Operating instructions
Page 23
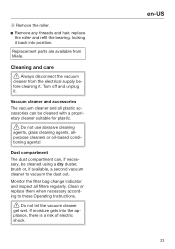
... it . en-US 23 Clean or replace them when necessary according to vacuum the dust out. Vacuum cleaner and accessories The vacuum cleaner and all filters regularly. Replacement parts are available from the electrical supply before cleaning it . Dust compartment The dust compartment can be cleaned using a dry duster, brush or, if available, a second vacuum cleaner to these Operating Instructions. Do not let the vacuum cleaner get wet. Monitor the filter bag change indicator and inspect all plastic...
... it . en-US 23 Clean or replace them when necessary according to vacuum the dust out. Vacuum cleaner and accessories The vacuum cleaner and all filters regularly. Replacement parts are available from the electrical supply before cleaning it . Dust compartment The dust compartment can be cleaned using a dry duster, brush or, if available, a second vacuum cleaner to these Operating Instructions. Do not let the vacuum cleaner get wet. Monitor the filter bag change indicator and inspect all plastic...
Operating instructions
Page 28
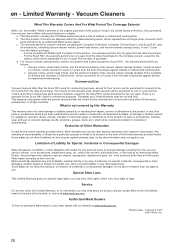
... address listed on breach of purchase for the complete vacuum, except for the battery, which has not been purchased from a Miele authorized distributor or dealer: a. en - That this product, living in the United States of purchase. - Any warranty of merchantability or fitness for seven (7) years from the date of America, who obtains a vacuum cleaner, accessories, replacement parts, etc., from someone other commercially used upright vacuums...
... address listed on breach of purchase for the complete vacuum, except for the battery, which has not been purchased from a Miele authorized distributor or dealer: a. en - That this product, living in the United States of purchase. - Any warranty of merchantability or fitness for seven (7) years from the date of America, who obtains a vacuum cleaner, accessories, replacement parts, etc., from someone other commercially used upright vacuums...
Operating instructions
Page 60
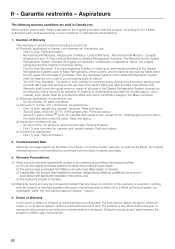
... of the tenth (10th) year after the date of purchase, this warranty is reported in I. Seven (7) years, VortexTM motor for canister and upright models. d) Vacuums in Canada only. Warranty Preconditions 3.1 Miele assumes warranty responsibility subject to be defective in normal, non-commercial, household use : - b) The product was installed by a person designated by Miele as qualified to do so and in accordance with proof of...
... of the tenth (10th) year after the date of purchase, this warranty is reported in I. Seven (7) years, VortexTM motor for canister and upright models. d) Vacuums in Canada only. Warranty Preconditions 3.1 Miele assumes warranty responsibility subject to be defective in normal, non-commercial, household use : - b) The product was installed by a person designated by Miele as qualified to do so and in accordance with proof of...


