Specs
Page 2
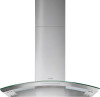
....com DA 5196 W Page 2 of the installation manual Available in brushed stainless steel or RAL colors 120 V, 60 Hz, 15 Amps Molded plug 2.5 ft (0.75m) NEMA 5-15 362 W (Blower: 350 W; communication between hood and cooktop • Four fan speeds (incl. Recirculating Chimney Dimensions Minimum distance above cooktop Color Electrical Electrical Requirements Power Cord Electrical Rating Optional Accessories Recirculating Kit OdorFree Charcoal Filter Reducing Collar (air flow max. 400 CFM) Shipping Shipping Weight Support Call 20/20 625 CFM setting 351/4" (895mm) W x 39/16" (91mm...
....com DA 5196 W Page 2 of the installation manual Available in brushed stainless steel or RAL colors 120 V, 60 Hz, 15 Amps Molded plug 2.5 ft (0.75m) NEMA 5-15 362 W (Blower: 350 W; communication between hood and cooktop • Four fan speeds (incl. Recirculating Chimney Dimensions Minimum distance above cooktop Color Electrical Electrical Requirements Power Cord Electrical Rating Optional Accessories Recirculating Kit OdorFree Charcoal Filter Reducing Collar (air flow max. 400 CFM) Shipping Shipping Weight Support Call 20/20 625 CFM setting 351/4" (895mm) W x 39/16" (91mm...
Product Manual
Page 2
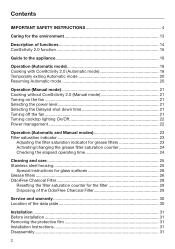
... down time 21 Turning off the fan 21 Turning cooktop lighting On/Off 22 Power management 22 Operation (Automatic and Manual modes 23 Filter saturation indicator 23 Adjusting the filter saturation indicator for grease filters 23 Activating/changing the grease filter saturation counter 24 Checking the elapsed operating time 24 Cleaning and care 25 Stainless steel housing 25 Special instructions for glass surfaces 26 Grease filters ...26 OdorFree Charcoal Filter 28 Resetting the filter saturation counter for...
... down time 21 Turning off the fan 21 Turning cooktop lighting On/Off 22 Power management 22 Operation (Automatic and Manual modes 23 Filter saturation indicator 23 Adjusting the filter saturation indicator for grease filters 23 Activating/changing the grease filter saturation counter 24 Checking the elapsed operating time 24 Cleaning and care 25 Stainless steel housing 25 Special instructions for glass surfaces 26 Grease filters ...26 OdorFree Charcoal Filter 28 Resetting the filter saturation counter for...
Product Manual
Page 3
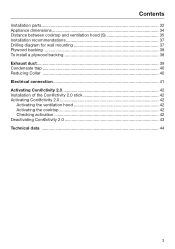
Contents Installation parts...32 Appliance dimensions 34 Distance between cooktop and ventilation hood (S 35 Installation recommendations 37 Drilling diagram for wall mounting 37 Plywood backing 38 To install a plywood backing 38 Exhaust duct...39 Condensate trap ...40 Reducing Collar ...40 Electrical connection 41 Activating Con@ctivity 2.0 42 Installation of the Con@ctivity 2.0 stick 42 Activating Con@ctivity 2.0 42 Activating the ventilation hood 42 Activating the cooktop 42 Checking activation 42 Deactivating Con@ctivity 2.0 43 Technical data ...44 3
Contents Installation parts...32 Appliance dimensions 34 Distance between cooktop and ventilation hood (S 35 Installation recommendations 37 Drilling diagram for wall mounting 37 Plywood backing 38 To install a plywood backing 38 Exhaust duct...39 Condensate trap ...40 Reducing Collar ...40 Electrical connection 41 Activating Con@ctivity 2.0 42 Installation of the Con@ctivity 2.0 stick 42 Activating Con@ctivity 2.0 42 Activating the ventilation hood 42 Activating the cooktop 42 Checking activation 42 Deactivating Con@ctivity 2.0 43 Technical data ...44 3
Product Manual
Page 4
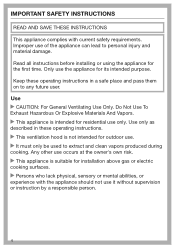
... future user. Read all instructions before installing or using the appliance for residential use of the appliance can lead to extract and clean vapors produced during cooking. Only use . It must only be used to personal injury and material damage. Improper use only. Keep these operating instructions in these operating instructions. This ventilation hood is not intended for outdoor use the appliance for installation above gas or electric cooking...
... future user. Read all instructions before installing or using the appliance for residential use of the appliance can lead to extract and clean vapors produced during cooking. Only use . It must only be used to personal injury and material damage. Improper use only. Keep these operating instructions in these operating instructions. This ventilation hood is not intended for outdoor use the appliance for installation above gas or electric cooking...
Product Manual
Page 5
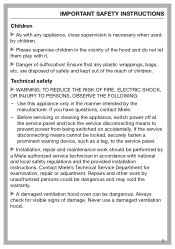
... them play with national and local safety regulations and the provided installation instructions. Before servicing or cleaning the appliance, switch power off at the service panel and lock the service disconnecting means to the service panel. Installation, repair and maintenance work by unauthorized persons could be dangerous and may void the warranty. A damaged ventilation hood oven can be locked, securely fasten a prominent warning device, such as...
... them play with national and local safety regulations and the provided installation instructions. Before servicing or cleaning the appliance, switch power off at the service panel and lock the service disconnecting means to the service panel. Installation, repair and maintenance work by unauthorized persons could be dangerous and may void the warranty. A damaged ventilation hood oven can be locked, securely fasten a prominent warning device, such as...
Product Manual
Page 6
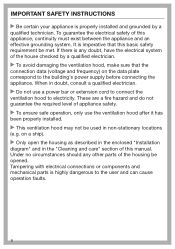
IMPORTANT SAFETY INSTRUCTIONS Be certain your appliance is highly dangerous to the user and can cause operation faults. 6 Under no circumstances should any doubt, have the electrical system of the house checked by a qualified technician. When in the "Cleaning and care" section of appliance safety. To ensure safe operation, only use a power bar or extension cord to connect the ventilation hood to the building...
IMPORTANT SAFETY INSTRUCTIONS Be certain your appliance is highly dangerous to the user and can cause operation faults. 6 Under no circumstances should any doubt, have the electrical system of the house checked by a qualified technician. When in the "Cleaning and care" section of appliance safety. To ensure safe operation, only use a power bar or extension cord to connect the ventilation hood to the building...
Product Manual
Page 7
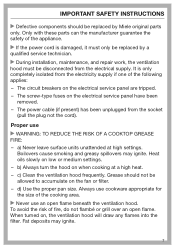
... flames into the filter. The power cable (if present) has been unplugged from the electricity supply if one of the cooking area. Never use WARNING: TO REDUCE THE RISK OF A COOKTOP GREASE FIRE: - IMPORTANT SAFETY INSTRUCTIONS Defective components should not be replaced by Miele original parts only. Grease should be replaced by a qualified service technician. During installation, maintenance, and repair work, the ventilation hood must only...
... flames into the filter. The power cable (if present) has been unplugged from the electricity supply if one of the cooking area. Never use WARNING: TO REDUCE THE RISK OF A COOKTOP GREASE FIRE: - IMPORTANT SAFETY INSTRUCTIONS Defective components should not be replaced by Miele original parts only. Grease should be replaced by a qualified service technician. During installation, maintenance, and repair work, the ventilation hood must only...
Product Manual
Page 9
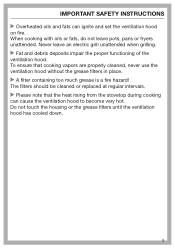
... leave an electric grill unattended when grilling. Fat and debris deposits impair the proper functioning of the ventilation hood. Do not touch the housing or the grease filters until the ventilation hood has cooled down. 9 The filters should be cleaned or replaced at regular intervals. Please note that cooking vapors are properly cleaned, never use the ventilation hood without the grease filters in place. A filter containing too...
... leave an electric grill unattended when grilling. Fat and debris deposits impair the proper functioning of the ventilation hood. Do not touch the housing or the grease filters until the ventilation hood has cooled down. 9 The filters should be cleaned or replaced at regular intervals. Please note that cooking vapors are properly cleaned, never use the ventilation hood without the grease filters in place. A filter containing too...
Product Manual
Page 10
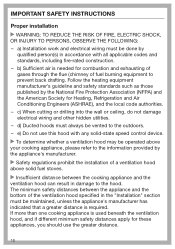
...) and the American Society for combustion and exhausting of gases through the flue (chimney of a ventilation hood above your cooking appliance, please refer to the outdoors. - e) Do not use the greater distance. 10 If more than one cooking appliance is needed for Heating, Refrigeration and Air Conditioning Engineers (ASHRAE), and the local code authorities. - d) Ducted hoods must be maintained, unless the appliance's manufacturer...
...) and the American Society for combustion and exhausting of gases through the flue (chimney of a ventilation hood above your cooking appliance, please refer to the outdoors. - e) Do not use the greater distance. 10 If more than one cooking appliance is needed for Heating, Refrigeration and Air Conditioning Engineers (ASHRAE), and the local code authorities. - d) Ducted hoods must be maintained, unless the appliance's manufacturer...
Product Manual
Page 12
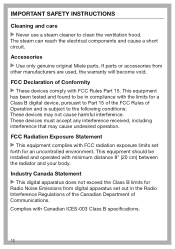
... SAFETY INSTRUCTIONS Cleaning and care Never use a steam cleaner to be installed and operated with Canadian ICES-003 Class B specifications. 12 Industry Canada Statement This digital apparatus does not exceed the Class B limits for a Class B digital device, pursuant to the following conditions: These devices may cause undesired operation. The steam can reach the electrical components and cause a short circuit. FCC...
... SAFETY INSTRUCTIONS Cleaning and care Never use a steam cleaner to be installed and operated with Canadian ICES-003 Class B specifications. 12 Industry Canada Statement This digital apparatus does not exceed the Class B limits for a Class B digital device, pursuant to the following conditions: These devices may cause undesired operation. The steam can reach the electrical components and cause a short circuit. FCC...
Product Manual
Page 14
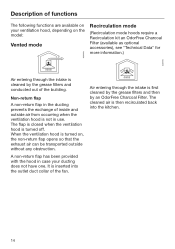
... outlet duct collar of the fan. Non-return flap A non-return flap in the ducting prevents the exchange of inside and outside without any obstruction. The flap is closed when the ventilation hood is cleaned by an OdorFree Charcoal Filter. Description of functions The following functions are available on the model: Vented mode Recirculation mode (Recirculation mode hoods require a Recirculation kit an OdorFree Charcoal Filter (available as optional accessories), see...
... outlet duct collar of the fan. Non-return flap A non-return flap in the ducting prevents the exchange of inside and outside without any obstruction. The flap is closed when the ventilation hood is cleaned by an OdorFree Charcoal Filter. Description of functions The following functions are available on the model: Vented mode Recirculation mode (Recirculation mode hoods require a Recirculation kit an OdorFree Charcoal Filter (available as optional accessories), see...

Product Manual
Page 15
... automatic control of the hood based on the operational status of burners in operation and their power levels. - When a burner is possible. Once you to use the Con@ctivity 2.0 function (see "Activating Con@ctivity 2.0"). During cooking, the hood automatically selects the fan level based on the number of a Miele cooktop. Please refer to the installation instructions for you have turned off the cooktop, the fan and the lighting will turn off...
... automatic control of the hood based on the operational status of burners in operation and their power levels. - When a burner is possible. Once you to use the Con@ctivity 2.0 function (see "Activating Con@ctivity 2.0"). During cooking, the hood automatically selects the fan level based on the number of a Miele cooktop. Please refer to the installation instructions for you have turned off the cooktop, the fan and the lighting will turn off...
Product Manual
Page 21
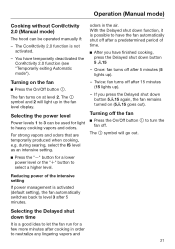
Operation (Manual mode) Cooking without Con@ctivity 2.0 (Manual mode) The hood can be operated manually if: - The fan turns on the fan Press the On/Off button . Selecting the power level Power levels 1 to let the fan run for a few more minutes after 15 minutes (15 lights up). - For strong vapors and odors that are temporarily produced when cooking, e.g. odors in the fan level display. If you have finished...
Operation (Manual mode) Cooking without Con@ctivity 2.0 (Manual mode) The hood can be operated manually if: - The fan turns on the fan Press the On/Off button . Selecting the power level Power levels 1 to let the fan run for a few more minutes after 15 minutes (15 lights up). - For strong vapors and odors that are temporarily produced when cooking, e.g. odors in the fan level display. If you have finished...
Product Manual
Page 25
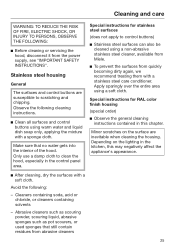
...: Before cleaning or servicing the hood, disconnect it from the power supply, see "IMPORTANT SAFETY INSTRUCTIONS". Minor scratches on the lighting in the control panel area. Depending on the surface are susceptible to clean the hood, especially in the kitchen, this chapter. Special instructions for stainless steel surfaces (does not apply to control buttons) Stainless steel surfaces can also be cleaned using a non-abrasive stainless steel cleaner, available from Miele. ...
...: Before cleaning or servicing the hood, disconnect it from the power supply, see "IMPORTANT SAFETY INSTRUCTIONS". Minor scratches on the lighting in the control panel area. Depending on the surface are susceptible to clean the hood, especially in the kitchen, this chapter. Special instructions for stainless steel surfaces (does not apply to control buttons) Stainless steel surfaces can also be cleaned using a non-abrasive stainless steel cleaner, available from Miele. ...
Product Manual
Page 28
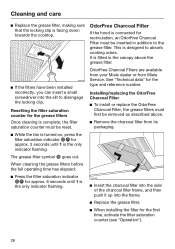
... cleaning is complete, the filter saturation counter must be inserted in the canopy above . Remove the charcoal filter from Miele Service. Installing/replacing the OdorFree Charcoal Filter To install or replace the OdorFree Charcoal Filter, the grease filters must be reset. While the fan is turned on, press the filter saturation indicator for approx. 3 seconds until 1 is fitted in addition to absorb cooking odors. When cleaning the grease filters before the full operating...
... cleaning is complete, the filter saturation counter must be inserted in the canopy above . Remove the charcoal filter from Miele Service. Installing/replacing the OdorFree Charcoal Filter To install or replace the OdorFree Charcoal Filter, the grease filters must be reset. While the fan is turned on, press the filter saturation indicator for approx. 3 seconds until 1 is fitted in addition to absorb cooking odors. When cleaning the grease filters before the full operating...
Product Manual
Page 33
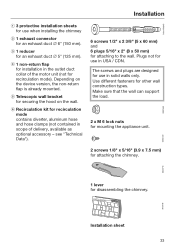
... hood on the device version, the non-return flap is already mounted. f Recirculation kit for recirculation mode contains diverter, aluminum hose and hose clamps (not contained in USA / CDN. Plugs not for use when installing the chimney b 1 exhaust connector for an exhaust duct 6" (150 mm). Use different fasteners for disassembling the chimney. Make sure that the wall can support the load. 2 x M 6 lock nuts for mounting the appliance unit. 2 screws...
... hood on the device version, the non-return flap is already mounted. f Recirculation kit for recirculation mode contains diverter, aluminum hose and hose clamps (not contained in USA / CDN. Plugs not for use when installing the chimney b 1 exhaust connector for an exhaust duct 6" (150 mm). Use different fasteners for disassembling the chimney. Make sure that the wall can support the load. 2 x M 6 lock nuts for mounting the appliance unit. 2 screws...
Product Manual
Page 37
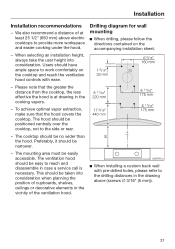
... installation sheet. When installing a custom back wall with ease. - Please note that the hood covers the cooktop. Preferably, it should be narrower. - This should be taken into consideration. Drilling diagram for wall mounting When drilling, please follow the directions contained on the cooktop and reach the ventilation hood controls with pre-drilled holes, please refer to reach and disassemble in the vicinity of the ventilation hood. Users...
... installation sheet. When installing a custom back wall with ease. - Please note that the hood covers the cooktop. Preferably, it should be narrower. - This should be taken into consideration. Drilling diagram for wall mounting When drilling, please follow the directions contained on the cooktop and reach the ventilation hood controls with pre-drilled holes, please refer to reach and disassemble in the vicinity of the ventilation hood. Users...
Product Manual
Page 38
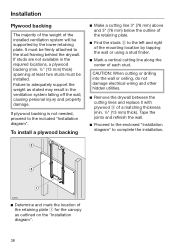
... the weight of the installed ventilation system will be supported by tapping the wall or using a stud finder. Mark a vertical cutting line along the center of each stud. CAUTION: When cutting or drilling into the wall or ceiling, do not damage electrical wiring and other hidden utilities. Remove the drywall between the cutting lines and replace it with plywood of the mounting location...
... the weight of the installed ventilation system will be supported by tapping the wall or using a stud finder. Mark a vertical cutting line along the center of each stud. CAUTION: When cutting or drilling into the wall or ceiling, do not damage electrical wiring and other hidden utilities. Remove the drywall between the cutting lines and replace it with plywood of the mounting location...
Product Manual
Page 39
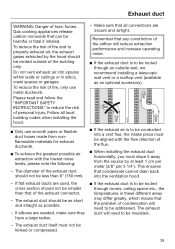
... problem of the exhaust connector. - Make sure that of condensation will need to be smaller than 6" (150 mm). - The diameter of personal injury. Remember that condensate cannot drain back into a vent flue, the intake piece must not be as short and straight as an optional accessory). If the exhaust air is to be conducted into the ventilation hood. If the exhaust duct...
... problem of the exhaust connector. - Make sure that of condensation will need to be smaller than 6" (150 mm). - The diameter of personal injury. Remember that condensate cannot drain back into a vent flue, the intake piece must not be as short and straight as an optional accessory). If the exhaust air is to be conducted into the ventilation hood. If the exhaust duct...
Product Manual
Page 41
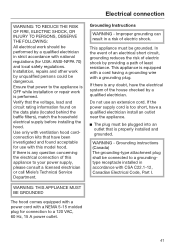
... circuit rating information found acceptable for use an extension cord. This appliance is equipped with a cord having a grounding wire with CSA C22.1-12, Canadian Electrical Code, Part I. Electrical connection WARNING: TO REDUCE THE RISK OF FIRE, ELECTRIC SHOCK, OR INJURY TO PERSONS, OBSERVE THE FOLLOWING: All electrical work is performed. This appliance must be connected to your power supply, please consult a licensed electrician or call Miele's Technical Service Department. Installation, repairs...
... circuit rating information found acceptable for use an extension cord. This appliance is equipped with a cord having a grounding wire with CSA C22.1-12, Canadian Electrical Code, Part I. Electrical connection WARNING: TO REDUCE THE RISK OF FIRE, ELECTRIC SHOCK, OR INJURY TO PERSONS, OBSERVE THE FOLLOWING: All electrical work is performed. This appliance must be connected to your power supply, please consult a licensed electrician or call Miele's Technical Service Department. Installation, repairs...


