

Specs
Page 2
... DGC 4086 XL FEATURES Cooking Modes: 100% Convection Oven 100% Steam Oven 100% Combination Steam Oven Moisture combined with Convection Plus, Surround and Broil XL PerfectClean cavity Lift-up Control Panel conceals water and condensate container Over 100 MasterChef programs 5 MasterChef Gourmet programs 20 Favorites CleanGlass door Classic Handle DS 4041 Straight Handle DS 4044 DS 4045 DS 4043 INCLUDED ACCESSORIES 1 Universal tray 1 PerfectClean wire rack 1 XL perforated stainless steel pan (DGGL 12) 1 half-sized XL...
... DGC 4086 XL FEATURES Cooking Modes: 100% Convection Oven 100% Steam Oven 100% Combination Steam Oven Moisture combined with Convection Plus, Surround and Broil XL PerfectClean cavity Lift-up Control Panel conceals water and condensate container Over 100 MasterChef programs 5 MasterChef Gourmet programs 20 Favorites CleanGlass door Classic Handle DS 4041 Straight Handle DS 4044 DS 4045 DS 4043 INCLUDED ACCESSORIES 1 Universal tray 1 PerfectClean wire rack 1 XL perforated stainless steel pan (DGGL 12) 1 half-sized XL...

Specs
Page 3
Item 23408432USA DGC 4086 XL (Europa) - cm Electrical Electrical Requirements 240V, AC, 60Hz, 20 Amps Power Cord Pigtail hard wired 240V power cord 5' or 1.5m Cut Out for Power Cord Electrical Rating Total Amps Shipping Shipping Weight Shipping Dimensions Support Call 20/20 Min. 3" square 3.4 kW (240V) 16 Amps on 240V 65 lbs 267/32" W x 215/8" H x 231/16" L 800.843.7231 82020technologies.com TRIM KIT: Classic EBA 5470 for 70cm width (Item #22996178USA) EBA 5476...
Item 23408432USA DGC 4086 XL (Europa) - cm Electrical Electrical Requirements 240V, AC, 60Hz, 20 Amps Power Cord Pigtail hard wired 240V power cord 5' or 1.5m Cut Out for Power Cord Electrical Rating Total Amps Shipping Shipping Weight Shipping Dimensions Support Call 20/20 Min. 3" square 3.4 kW (240V) 16 Amps on 240V 65 lbs 267/32" W x 215/8" H x 231/16" L 800.843.7231 82020technologies.com TRIM KIT: Classic EBA 5470 for 70cm width (Item #22996178USA) EBA 5476...

Specs
Page 6
Can be placed at top/bottom of rear of cabinet Electrical Connection DGC 4084 XL / DGC 4086 XL Page 6 of 7 Can be placed at top/ bottom of rear of cabinet Wall Mount Stacked Installation 195⁄8"x 15⁄8" (500mm x 40mm) cut -out required for ventilation of unit. Combi-Steam Oven DGC 4084 XL / DGC 4086 XL INSTALLATION SPECIFICATIONS Wall Cabinet Installation FOREVER BETTER Electrical Connection 195⁄8"x 15⁄8" (500mm x 40mm) cut -out required for ventilation of unit.
Can be placed at top/bottom of rear of cabinet Electrical Connection DGC 4084 XL / DGC 4086 XL Page 6 of 7 Can be placed at top/ bottom of rear of cabinet Wall Mount Stacked Installation 195⁄8"x 15⁄8" (500mm x 40mm) cut -out required for ventilation of unit. Combi-Steam Oven DGC 4084 XL / DGC 4086 XL INSTALLATION SPECIFICATIONS Wall Cabinet Installation FOREVER BETTER Electrical Connection 195⁄8"x 15⁄8" (500mm x 40mm) cut -out required for ventilation of unit.

Specs
Page 7
Can be placed at top/bottom of rear of cabinet DGC 4084 XL / DGC 4086 XL Page 7 of 7 Can be placed at top/bottom of rear of cabinet Box indicates Electrical Connection 195⁄8"x 15⁄8" (500mm x 40mm) cut -out required for ventilation of unit. Combi-Steam Oven DGC 4084 XL / DGC 4086 XL INSTALLATION SPECIFICATIONS Undercounter Installation FOREVER BETTER Undercounter Side-by-Side Installation Electrical Connection 195⁄8"x 15⁄8" (500mm x 40mm) cut -out required for ventilation of unit.
Can be placed at top/bottom of rear of cabinet DGC 4084 XL / DGC 4086 XL Page 7 of 7 Can be placed at top/bottom of rear of cabinet Box indicates Electrical Connection 195⁄8"x 15⁄8" (500mm x 40mm) cut -out required for ventilation of unit. Combi-Steam Oven DGC 4084 XL / DGC 4086 XL INSTALLATION SPECIFICATIONS Undercounter Installation FOREVER BETTER Undercounter Side-by-Side Installation Electrical Connection 195⁄8"x 15⁄8" (500mm x 40mm) cut -out required for ventilation of unit.

Product Manual
Page 2
... Display 11 Included accessories 12 Before using for the first time 13 Cleaning for the first time 15 Setting the correct boiling point for water 16 Heating the appliance 16 Description of the functions 17 Control panel 17 Water container 17 Condensate container 17 Grease filter 17 Temperature 18 Cooking duration (time 18 Moisture level 18 Noises 18 Preheating phase 19 Steam reduction 19 Keep warm 19 Interior lighting...
... Display 11 Included accessories 12 Before using for the first time 13 Cleaning for the first time 15 Setting the correct boiling point for water 16 Heating the appliance 16 Description of the functions 17 Control panel 17 Water container 17 Condensate container 17 Grease filter 17 Temperature 18 Cooking duration (time 18 Moisture level 18 Noises 18 Preheating phase 19 Steam reduction 19 Keep warm 19 Interior lighting...

Product Manual
Page 3
... lock 39 Settings 40 Language J 40 Time 40 Lighting 41 Change main menu 41 Preheating phase 41 Start 41 Steam reduction 41 Keep warm 42 Automatic rinse 42 Default temperatures 42 Water hardness 42 Display 42 Volume 42 Safety 43 Units of measurement 43 Factory default 43 Cleaning and Care 44 Appliance front 45 Accessories 46 Oven interior 48 PerfectClean 50 Maintenance 51 Removing the runners 54 Oven door...
... lock 39 Settings 40 Language J 40 Time 40 Lighting 41 Change main menu 41 Preheating phase 41 Start 41 Steam reduction 41 Keep warm 42 Automatic rinse 42 Default temperatures 42 Water hardness 42 Display 42 Volume 42 Safety 43 Units of measurement 43 Factory default 43 Cleaning and Care 44 Appliance front 45 Accessories 46 Oven interior 48 PerfectClean 50 Maintenance 51 Removing the runners 54 Oven door...

Product Manual
Page 5
... safety ~ Before installing the combi-steam oven, check for children. IMPORTANT SAFETY INSTRUCTIONS Children ~ Use the Child Safety Lock to prevent children from the main power supply and contact the Miele Technical Service Department. Keep children away from the appliance until it from turning on the appliance or changing its settings. ~ Close supervision is necessary when the combi-steam oven is used near children. ~ To...
... safety ~ Before installing the combi-steam oven, check for children. IMPORTANT SAFETY INSTRUCTIONS Children ~ Use the Child Safety Lock to prevent children from the main power supply and contact the Miele Technical Service Department. Keep children away from the appliance until it from turning on the appliance or changing its settings. ~ Close supervision is necessary when the combi-steam oven is used near children. ~ To...

Product Manual
Page 6
... Miele original spare parts only. for example, by a Miele authorized service technician. Contact Miele's Technical Service Department. ~ Defective components should only be performed by unqualified persons could cause machine damage. ~ Installation, repair and maintenance work should be replaced by either hot steam or the hot oven walls. Danger of the appliance. Work by an authorized service technician. Moist or damp potholders used on the hot heating elements. ~ When handling cooking...
... Miele original spare parts only. for example, by a Miele authorized service technician. Contact Miele's Technical Service Department. ~ Defective components should only be performed by unqualified persons could cause machine damage. ~ Installation, repair and maintenance work should be replaced by either hot steam or the hot oven walls. Danger of the appliance. Work by an authorized service technician. Moist or damp potholders used on the hot heating elements. ~ When handling cooking...

Product Manual
Page 7
... THESE INSTRUCTIONS AND REVIEW THEM PERIODICALLY 7 They affect the cooking and baking performance significantly and block the steam inlet. ~ Do not use the appliance without the lamp cover in place, steam can clog the drain and pump. ~ Containers must be heat resistant up causing an explosion that the power cords of small appliances do not come into contact with the cabinet door open door of...
... THESE INSTRUCTIONS AND REVIEW THEM PERIODICALLY 7 They affect the cooking and baking performance significantly and block the steam inlet. ~ Do not use the appliance without the lamp cover in place, steam can clog the drain and pump. ~ Containers must be heat resistant up causing an explosion that the power cords of small appliances do not come into contact with the cabinet door open door of...
Product Manual
Page 20
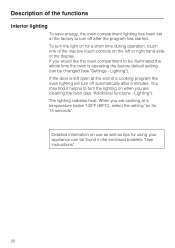
... using your appliance can be found in the enclosed booklets "User instructions". 20 To turn the light on the left open at the end of a cooking program the oven lighting will turn off after 5 minutes. If the door is operating the factory default setting can be changed (see "Additional functions - When you are cleaning the oven (see "Settings - Description of the functions Interior lighting To save energy, the oven compartment lighting...
... using your appliance can be found in the enclosed booklets "User instructions". 20 To turn the light on the left open at the end of a cooking program the oven lighting will turn off after 5 minutes. If the door is operating the factory default setting can be changed (see "Additional functions - When you are cleaning the oven (see "Settings - Description of the functions Interior lighting To save energy, the oven compartment lighting...

Product Manual
Page 21
... well as tips for using your appliance can be cooked to be found in the enclosed booklets "User instructions". Program / Function Default temperature Combination steam G ConvectionPlus For roasting and baking Surround For roasting and baking Broil 2 Steam Cooking Universal Cooking of all types of food, preserving, extracting juice, special modes Menu cooking Various foods can be ready at the same time U ConvectionPlus For baking on several levels V Surround...
... well as tips for using your appliance can be cooked to be found in the enclosed booklets "User instructions". Program / Function Default temperature Combination steam G ConvectionPlus For roasting and baking Surround For roasting and baking Broil 2 Steam Cooking Universal Cooking of all types of food, preserving, extracting juice, special modes Menu cooking Various foods can be ready at the same time U ConvectionPlus For baking on several levels V Surround...
Product Manual
Page 24
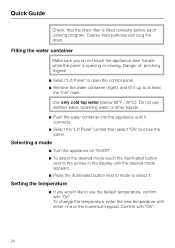
... appliance door handle while the panel is fitted correctly before each cooking program. Confirm with "OK". Filling the water container Make sure you would like to select it. To change the temperature, enter the new temperature with either - / + or the numerical keypad. Do not use the default temperature, confirm with "OK". 24 Quick Guide Check that the drain filter is opening or...
... appliance door handle while the panel is fitted correctly before each cooking program. Confirm with "OK". Filling the water container Make sure you would like to select it. To change the temperature, enter the new temperature with either - / + or the numerical keypad. Do not use the default temperature, confirm with "OK". 24 Quick Guide Check that the drain filter is opening or...
Product Manual
Page 27
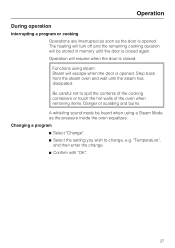
... when using steam: Steam will resume when the door is opened . Functions using a Steam Mode as the door is closed again. Operation will escape when the door is closed . "Temperature", and then enter the change , e.g. Be careful not to change . ^ Confirm with "OK". 27 Changing a program ^ Select "Change". ^ Select the setting you wish to spill the contents of the cooking containers or touch the hot walls of the oven when removing items...
... when using steam: Steam will resume when the door is opened . Functions using a Steam Mode as the door is closed again. Operation will escape when the door is closed . "Temperature", and then enter the change , e.g. Be careful not to change . ^ Confirm with "OK". 27 Changing a program ^ Select "Change". ^ Select the setting you wish to spill the contents of the cooking containers or touch the hot walls of the oven when removing items...

Product Manual
Page 30
... being roasted on using the "On/Off" button. ^ Place the meat in the order the individual stages were entered. Operation Combination steam Combination steam works by combining heat and steam. Cooking stage 1 ^ Set the temperature and confirm with "Continue". ^ Set the moisture level and confirm with "Continue". ^ Set the duration and confirm with 3 cooking stages. ^ Fill the water container and place it the appliance. ^ Turn the appliance...
... being roasted on using the "On/Off" button. ^ Place the meat in the order the individual stages were entered. Operation Combination steam Combination steam works by combining heat and steam. Cooking stage 1 ^ Set the temperature and confirm with "Continue". ^ Set the moisture level and confirm with "Continue". ^ Set the duration and confirm with 3 cooking stages. ^ Fill the water container and place it the appliance. ^ Turn the appliance...

Product Manual
Page 31
... to add any more cooking stages, confirm with "Continue". Cooking stage 3 ^ Select the desired mode. ^ Set the temperature and confirm with "Continue". ^ Set the moisture level and confirm with "Continue". ^ Set the duration and confirm with "Continue". ^ Confirm "Complete the cooking stages" with "Continue". ^ Start the cooking program. Operation Cooking stage 2 ^ Select the desired mode. ^ Set the temperature and confirm with "Continue". ^ Set the moisture level...
... to add any more cooking stages, confirm with "Continue". Cooking stage 3 ^ Select the desired mode. ^ Set the temperature and confirm with "Continue". ^ Set the moisture level and confirm with "Continue". ^ Set the duration and confirm with "Continue". ^ Confirm "Complete the cooking stages" with "Continue". ^ Start the cooking program. Operation Cooking stage 2 ^ Select the desired mode. ^ Set the temperature and confirm with "Continue". ^ Set the moisture level...

Product Manual
Page 32
... need to operate automatically after the pre-set temperature has been confirmed. You can inject a burst of steam). OK - If desired an end or start time can be removed for baking. Release a burst of steam. ^ Remove the grease filter on the back wall, if installed. ^ Turn the appliance on using the "On/Off" button. ^ Select the desired mode. ^ Confirm the preset temperature or enter the desired temperature. ^ Set the duration. If a cooking...
... need to operate automatically after the pre-set temperature has been confirmed. You can inject a burst of steam). OK - If desired an end or start time can be removed for baking. Release a burst of steam. ^ Remove the grease filter on the back wall, if installed. ^ Turn the appliance on using the "On/Off" button. ^ Select the desired mode. ^ Confirm the preset temperature or enter the desired temperature. ^ Set the duration. If a cooking...
Product Manual
Page 48
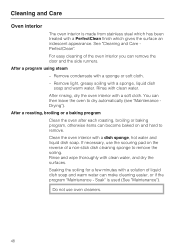
Cleaning and Care Oven interior The oven interior is used (See "Maintenance"). See "Cleaning and Care PerfectClean". After a roasting, broiling or a baking program Clean the oven after each roasting, broiling or baking program, otherwise items can then leave the oven to dry automatically (see "Maintenance Drying"). Rinse and wipe thoroughly with clean water. Do not use the scouring pad on and hard to remove the soiling. Rinse with clean water, and dry the...
Cleaning and Care Oven interior The oven interior is used (See "Maintenance"). See "Cleaning and Care PerfectClean". After a roasting, broiling or a baking program Clean the oven after each roasting, broiling or baking program, otherwise items can then leave the oven to dry automatically (see "Maintenance Drying"). Rinse and wipe thoroughly with clean water. Do not use the scouring pad on and hard to remove the soiling. Rinse with clean water, and dry the...

Product Manual
Page 60
... door gasket is damaged, Replace the gasket. The appliance is fitted evenly. automatically despite The finger pinch protection Open/close the panel repeatedly pressing is very sensitive, so it is equipped The fan automatically turns with a fan that asked questions Problem Possible fault Solution The fan can hear a noise Water is pumped in altitude from parts of water has changed because the new installation location...
... door gasket is damaged, Replace the gasket. The appliance is fitted evenly. automatically despite The finger pinch protection Open/close the panel repeatedly pressing is very sensitive, so it is equipped The fan automatically turns with a fan that asked questions Problem Possible fault Solution The fan can hear a noise Water is pumped in altitude from parts of water has changed because the new installation location...

Product Manual
Page 61
The oven lighting does not work. program. Baking takes longer if this is in the back panel. The grease filter on the display. More than two levels were used for baking. 61 Possible fault Solution When the door is burned out Contact Miele Technical Service to equalize, which can cause a whistling sound. The lighting is closed, the None pressure has to replace the lighting. The grease filter is...
The oven lighting does not work. program. Baking takes longer if this is in the back panel. The grease filter on the display. More than two levels were used for baking. 61 Possible fault Solution When the door is burned out Contact Miele Technical Service to equalize, which can cause a whistling sound. The lighting is closed, the None pressure has to replace the lighting. The grease filter is...

Product Manual
Page 70
...). Repairs and service by either removing the fuse, shutting off the main power or manually "tripping" the circuit breaker. Only operate the appliance after it has been installed. Installer: Please leave these instructions with all -pole contact gap of an approved junction box. There must correspond to the power supply, make sure that the voltage and frequency listed on the rating label correspond with the household electrical supply...
...). Repairs and service by either removing the fuse, shutting off the main power or manually "tripping" the circuit breaker. Only operate the appliance after it has been installed. Installer: Please leave these instructions with all -pole contact gap of an approved junction box. There must correspond to the power supply, make sure that the voltage and frequency listed on the rating label correspond with the household electrical supply...


