
Product Manual
Page 3
... SAFETY INSTRUCTIONS 8 Guide to the appliance 14 Front view 14 Included accessories 16 Functional description 18 Control panel 18 Sensor buttons 18 Touch display 19 Control panel 21 Water container 21 Condensate container 21 Grease filter 21 Roast probe 22 Temperature / Core Temperature 22 Cooking duration 22 Moisture 22 Noise 23 Preheating phase 24 Steam reduction 24 Keeping warm 24 Interior lighting 25 Before using for the first time 26 Basic settings 26 Cleaning for...
... SAFETY INSTRUCTIONS 8 Guide to the appliance 14 Front view 14 Included accessories 16 Functional description 18 Control panel 18 Sensor buttons 18 Touch display 19 Control panel 21 Water container 21 Condensate container 21 Grease filter 21 Roast probe 22 Temperature / Core Temperature 22 Cooking duration 22 Moisture 22 Noise 23 Preheating phase 24 Steam reduction 24 Keeping warm 24 Interior lighting 25 Before using for the first time 26 Basic settings 26 Cleaning for...
Product Manual
Page 6
... Sabbath Program 98 Roast probe 99 Roast 102 Baking 109 Broiling 115 Using the MasterChef programs 117 Miele MasterChef Gourmet 119 Gourmet cooking programs 119 Miele MasterChef Gourmet Recipes 120 Gourmet Chicken 120 Gourmet Turkey 120 Gourmet Baby Back Ribs 121 Gourmet Beef Tenderloin 121 Gourmet Salmon 121 Settings 122 Cleaning and Care 125 Appliance front 126 Accessories 127 Universal Tray, Wire Oven Rack, Shelf Runners 127 Cooking pans...
... Sabbath Program 98 Roast probe 99 Roast 102 Baking 109 Broiling 115 Using the MasterChef programs 117 Miele MasterChef Gourmet 119 Gourmet cooking programs 119 Miele MasterChef Gourmet Recipes 120 Gourmet Chicken 120 Gourmet Turkey 120 Gourmet Baby Back Ribs 121 Gourmet Beef Tenderloin 121 Gourmet Salmon 121 Settings 122 Cleaning and Care 125 Appliance front 126 Accessories 127 Universal Tray, Wire Oven Rack, Shelf Runners 127 Cooking pans...
Product Manual
Page 10
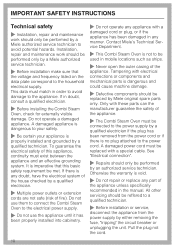
... power supply by either removing the fuse, "tripping" the circuit breaker or unplugging the unit. See "Electrical connection". ~ Repairs should only be reffered to a qualified technician. ~ Before installation or service, disconnect the appliance from the power cord or if there is no plug attached to avoid potential hazards. All other servicing should be performed by an authorized service technician. IMPORTANT SAFETY INSTRUCTIONS Technical safety ~ Installation, repair and maintenance work...
... power supply by either removing the fuse, "tripping" the circuit breaker or unplugging the unit. See "Electrical connection". ~ Repairs should only be reffered to a qualified technician. ~ Before installation or service, disconnect the appliance from the power cord or if there is no plug attached to avoid potential hazards. All other servicing should be performed by an authorized service technician. IMPORTANT SAFETY INSTRUCTIONS Technical safety ~ Installation, repair and maintenance work...
Product Manual
Page 11
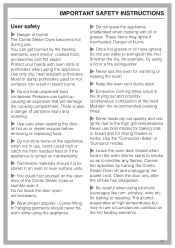
... potholders used on the open unnecessarily. ~ Wear proper apparel - Items could hurt yourself on hot surfaces can get burned by turning the Combi Steam Oven off and unplugging the power cord. Do not leave the door open door of burns. ~ Once hot grease or oil have ignited, do not use the oven for baking or roasting. Cancel the operation by the heating elements, oven interior, cooked food, accessories and hot steam.
... potholders used on the open unnecessarily. ~ Wear proper apparel - Items could hurt yourself on hot surfaces can get burned by turning the Combi Steam Oven off and unplugging the power cord. Do not leave the door open door of burns. ~ Once hot grease or oil have ignited, do not use the oven for baking or roasting. Cancel the operation by the heating elements, oven interior, cooked food, accessories and hot steam.
Product Manual
Page 12
... not keep the roast probe in the oven interior, it . This could lead to the corrosion of small appliances do not let the potholders contact hot heating elements in place, steam can clog the drain and the pump. Do not use silicone baking pans in the Combi Steam/Convection Bake, they are not steam-resistant. ~ Do not place pots, pans, baking sheets or cooking pans directly on it could be...
... not keep the roast probe in the oven interior, it . This could lead to the corrosion of small appliances do not let the potholders contact hot heating elements in place, steam can clog the drain and the pump. Do not use silicone baking pans in the Combi Steam/Convection Bake, they are not steam-resistant. ~ Do not place pots, pans, baking sheets or cooking pans directly on it could be...

Product Manual
Page 13
... replaced, it from your Miele dealer or from Miele Customer Service. If the roast probe needs to clean the Combi Steam Oven. SAVE THESE INSTRUCTIONS AND REVIEW THEM PERIODICALLY 13 IMPORTANT SAFETY INSTRUCTIONS Cleaning and Care ~ Do not use the Combi Steam Oven without the side runners racks installed. The steam could reach the electrical components and cause a short circuit. ~ Scratches on the glass of the door. ~ The side runners can be by an original Miele roast probe...
... replaced, it from your Miele dealer or from Miele Customer Service. If the roast probe needs to clean the Combi Steam Oven. SAVE THESE INSTRUCTIONS AND REVIEW THEM PERIODICALLY 13 IMPORTANT SAFETY INSTRUCTIONS Cleaning and Care ~ Do not use the Combi Steam Oven without the side runners racks installed. The steam could reach the electrical components and cause a short circuit. ~ Scratches on the glass of the door. ~ The side runners can be by an original Miele roast probe...
Product Manual
Page 36
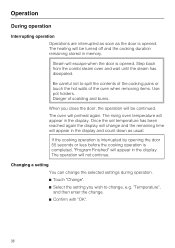
... be continued. Be careful not to change and the remaining time will appear in memory. Danger of the oven when removing items. Use pot holders. The heating will appear in the display and count down as the door is opened . Once the set temperature has been reached again the display will change , e.g. Changing a setting You can change . ^ Confirm with "OK". 36 Operation During operation Interrupting operation Operations are interrupted as soon...
... be continued. Be careful not to change and the remaining time will appear in memory. Danger of the oven when removing items. Use pot holders. The heating will appear in the display and count down as the door is opened . Once the set temperature has been reached again the display will change , e.g. Changing a setting You can change . ^ Confirm with "OK". 36 Operation During operation Interrupting operation Operations are interrupted as soon...
Product Manual
Page 39
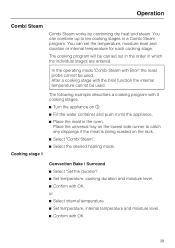
... the operating mode "Combi Steam with Broil" the roast probe cannot be used . Cooking stage 1 The following example describes a cooking program with the broil function the internal temperature cannot be used . After a cooking stage with 3 cooking stages. ^ Turn the appliance on the rack. ^ Select "Combi Steam". ^ Select the desired heating mode. Place the universal tray on the lowest side runner to ten cooking stages in a Combi Steam program. Convection Bake / Surround ^ Select "Set the duration". ^ Set temperature, cooking...
... the operating mode "Combi Steam with Broil" the roast probe cannot be used . Cooking stage 1 The following example describes a cooking program with the broil function the internal temperature cannot be used . After a cooking stage with 3 cooking stages. ^ Turn the appliance on the rack. ^ Select "Combi Steam". ^ Select the desired heating mode. Place the universal tray on the lowest side runner to ten cooking stages in a Combi Steam program. Convection Bake / Surround ^ Select "Set the duration". ^ Set temperature, cooking...
Product Manual
Page 53
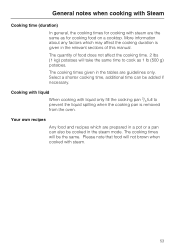
... cooking times will not brown when cooked with liquid only fill the cooking pan 2/3 full to cook as for cooking food on a cooktop. The quantity of this manual. Cooking with liquid When cooking with steam. 53 Please note that food will be added if necessary. Your own recipes Any food and recipes which may affect the cooking duration is removed from the oven. The cooking times given...
... cooking times will not brown when cooked with liquid only fill the cooking pan 2/3 full to cook as for cooking food on a cooktop. The quantity of this manual. Cooking with liquid When cooking with steam. 53 Please note that food will be added if necessary. Your own recipes Any food and recipes which may affect the cooking duration is removed from the oven. The cooking times given...
Product Manual
Page 90
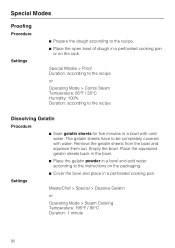
... recipe Dissolving Gelatin Procedure ^ Soak gelatin sheets for five minutes in a bowl with water. Remove the gelatin sheets from the bowl and squeeze them out. Settings MasterChef > Special > Dissolve Gelatin or Operating Mode > Steam Cooking Temperature: 195°F / 90°C Duration: 1 minute 90 Empty the bowl. The gelatin sheets have to be completely covered with cold water. Place the squeezed gelatin...
... recipe Dissolving Gelatin Procedure ^ Soak gelatin sheets for five minutes in a bowl with water. Remove the gelatin sheets from the bowl and squeeze them out. Settings MasterChef > Special > Dissolve Gelatin or Operating Mode > Steam Cooking Temperature: 195°F / 90°C Duration: 1 minute 90 Empty the bowl. The gelatin sheets have to be completely covered with cold water. Place the squeezed gelatin...
Product Manual
Page 92
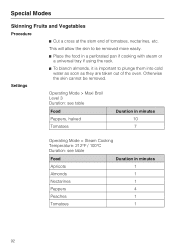
... skin cannot be removed more easily. ^ Place the food in minutes 1 1 1 4 1 1 92 Operating Mode > Maxi Broil Level 3 Duration: see table Food Duration in minutes Peppers, halved 10 Tomatoes 7 Operating Mode > Steam Cooking Temperature: 212°F / 100°C Duration: see table Food Apricots Almonds Nectarines Peppers Peaches Tomatoes Duration in a perforated pan if cooking with steam or a universal tray if using the rack. ^ To blanch almonds...
... skin cannot be removed more easily. ^ Place the food in minutes 1 1 1 4 1 1 92 Operating Mode > Maxi Broil Level 3 Duration: see table Food Duration in minutes Peppers, halved 10 Tomatoes 7 Operating Mode > Steam Cooking Temperature: 212°F / 100°C Duration: see table Food Apricots Almonds Nectarines Peppers Peaches Tomatoes Duration in a perforated pan if cooking with steam or a universal tray if using the rack. ^ To blanch almonds...
Product Manual
Page 109
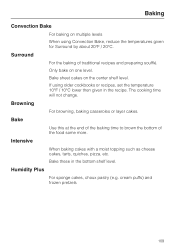
... puffs) and frozen pretzels 109 Bake Use this at the end of the baking time to brown the bottom of traditional recipes and preparing soufflé. Baking Convection Bake For baking on multiple levels When using older cookbooks or recipes, set the temperature 10°F / 10°C lower then given in the bottom shelf level. Bake sheet cakes on one level. Intensive When...
... puffs) and frozen pretzels 109 Bake Use this at the end of the baking time to brown the bottom of traditional recipes and preparing soufflé. Baking Convection Bake For baking on multiple levels When using older cookbooks or recipes, set the temperature 10°F / 10°C lower then given in the bottom shelf level. Bake sheet cakes on one level. Intensive When...
Product Manual
Page 111
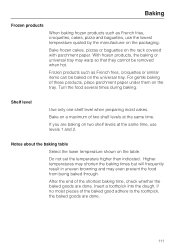
... temperature shown on the rack covered with parchment paper. Higher temperatures may shorten the baking times but will frequently result in uneven browning and may warp so that they cannot be baked on two shelf levels at the same time. Turn the food several times during baking. If you are baking on the universal tray. Do not set the temperature higher than indicated. Shelf level Use...
... temperature shown on the rack covered with parchment paper. Higher temperatures may shorten the baking times but will frequently result in uneven browning and may warp so that they cannot be baked on two shelf levels at the same time. Turn the food several times during baking. If you are baking on the universal tray. Do not set the temperature higher than indicated. Shelf level Use...

Product Manual
Page 137
... be turned on . If this is not the case, disconnect the appliance from the oven interior to run for 1 minute. The fan automatically turns off after the appliance has been turned off . If it has tripped. be heard after some time. 137 Frequently asked questions ,Repairs should only be a technical fault. ^ Reset the circuit breaker if it still does not heat, contact Miele Technical Service.
... be turned on . If this is not the case, disconnect the appliance from the oven interior to run for 1 minute. The fan automatically turns off after the appliance has been turned off . If it has tripped. be heard after some time. 137 Frequently asked questions ,Repairs should only be a technical fault. ^ Reset the circuit breaker if it still does not heat, contact Miele Technical Service.

Product Manual
Page 150
... the installer: Please leave these instructions with the consumer of the appliance for the local building inspectors use of the cooking pan on the data plate correspond with a damaged cord or plug or if the appliance has been damaged in doubt. ~ Installation, repair and maintenance work should be dangerous and may void the warranty. ~ Do not operate any appliance with the household electrical supply...
... the installer: Please leave these instructions with the consumer of the appliance for the local building inspectors use of the cooking pan on the data plate correspond with a damaged cord or plug or if the appliance has been damaged in doubt. ~ Installation, repair and maintenance work should be dangerous and may void the warranty. ~ Do not operate any appliance with the household electrical supply...

Product Manual
Page 162
... Miele's Technical Service Department. Further installation details are on the rating label correspond with the consumer. Only operate the appliance after it has been installed. Electrical connection ,CAUTION: Before installation or servicing, disconnect the power supply by unqualified persons could be dangerous. Before connecting the appliance to a 240 V, 20 A, 60 Hz power supply. Repairs and service by either removing the fuse, shutting off the main power or manually "tripping" the circuit breaker...
... Miele's Technical Service Department. Further installation details are on the rating label correspond with the consumer. Only operate the appliance after it has been installed. Electrical connection ,CAUTION: Before installation or servicing, disconnect the power supply by unqualified persons could be dangerous. Before connecting the appliance to a 240 V, 20 A, 60 Hz power supply. Repairs and service by either removing the fuse, shutting off the main power or manually "tripping" the circuit breaker...
Specs
Page 3
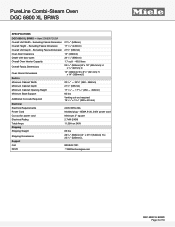
.../8"(549mm) H x 231/16" (535mm) L 800.843.7231 82020technologies.com FOREVER BETTER DGC 6800 XL BRWS Page 3 of 10 Excluding Fascia Dimension Overall Unit Depth - Excluding Fascia Dimension Oven Door Clearance Depth with door open Overall Oven Interior Capacity Overall Fascia Dimensions Oven Interior Dimensions Built-In Minimum Cabinet Width Minimum Cabinet Depth Minimum Cabinet Opening Height Minimum Base Support Additional Cut-outs Required Electrical Electrical Requirements Power Cord Cut out for power cord Electrical Rating 219/16" (548mm) 1711/16" (449mm) 215/8" (550mm) 13" (330mm...
.../8"(549mm) H x 231/16" (535mm) L 800.843.7231 82020technologies.com FOREVER BETTER DGC 6800 XL BRWS Page 3 of 10 Excluding Fascia Dimension Overall Unit Depth - Excluding Fascia Dimension Oven Door Clearance Depth with door open Overall Oven Interior Capacity Overall Fascia Dimensions Oven Interior Dimensions Built-In Minimum Cabinet Width Minimum Cabinet Depth Minimum Cabinet Opening Height Minimum Base Support Additional Cut-outs Required Electrical Electrical Requirements Power Cord Cut out for power cord Electrical Rating 219/16" (548mm) 1711/16" (449mm) 215/8" (550mm) 13" (330mm...

Specs
Page 7
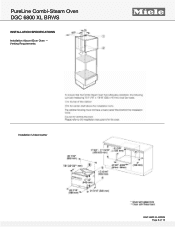
PureLine Combi-Steam Oven DGC 6800 XL BRWS INSTALLATION SPECIFICATIONS Tall Cabinet Installation - Venting Requirements FOREVER BETTER Installation Above 60cm Oven DGC 6800 XL BRWS Page 7 of 10
PureLine Combi-Steam Oven DGC 6800 XL BRWS INSTALLATION SPECIFICATIONS Tall Cabinet Installation - Venting Requirements FOREVER BETTER Installation Above 60cm Oven DGC 6800 XL BRWS Page 7 of 10
Specs
Page 8
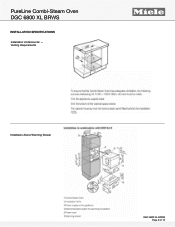
PureLine Combi-Steam Oven DGC 6800 XL BRWS INSTALLATION SPECIFICATIONS Installation Above 60cm Oven - Venting Requirements FOREVER BETTER Installation Undercounter DGC 6800 XL BRWS Page 8 of 10
PureLine Combi-Steam Oven DGC 6800 XL BRWS INSTALLATION SPECIFICATIONS Installation Above 60cm Oven - Venting Requirements FOREVER BETTER Installation Undercounter DGC 6800 XL BRWS Page 8 of 10
Specs
Page 9
PureLine Combi-Steam Oven DGC 6800 XL BRWS INSTALLATION SPECIFICATIONS Installation Undercounter - Venting Requirements FOREVER BETTER Installation Above Warming Drawer DGC 6800 XL BRWS Page 9 of 10
PureLine Combi-Steam Oven DGC 6800 XL BRWS INSTALLATION SPECIFICATIONS Installation Undercounter - Venting Requirements FOREVER BETTER Installation Above Warming Drawer DGC 6800 XL BRWS Page 9 of 10


