
Product sheet
Page 1
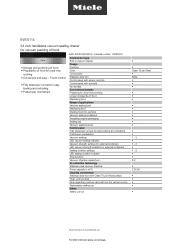
... containers Sealing duration settings LED sealing duration indicator Stop function Vacuum chamber capacity in l Air extraction technology Stainless-steel vacuum chamber Pump capacity in vacuum drawer Design PureLine Color ContourLine Stainless steel trim Control panel with sensor controls Control panel with Clean Touch Steel surface Flush control panel Note regarding moisture removal from the vacuum pump Replaceable sealing bar Safety Safety cut-out • • Clean Touch Steel...
... containers Sealing duration settings LED sealing duration indicator Stop function Vacuum chamber capacity in l Air extraction technology Stainless-steel vacuum chamber Pump capacity in vacuum drawer Design PureLine Color ContourLine Stainless steel trim Control panel with sensor controls Control panel with Clean Touch Steel surface Flush control panel Note regarding moisture removal from the vacuum pump Replaceable sealing bar Safety Safety cut-out • • Clean Touch Steel...
Product sheet
Page 2
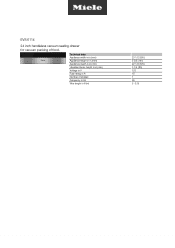
Technical data Appliance width in in.(mm) Appliance height in in.(mm) Appliance depth in in.(mm) Useable interior height in in.(mm) Voltage in V Fuse rating in ft (m) 23 1/2 (595) 5 5/8 (141) 22 1/2 (570) 3 1/4 (80) 120 15 1 60 5 (1.8) EVS 6114 24 inch handleless vacuum sealing drawer for vacuum packing of phases Frequency in Hz Wire length in A Number of food.
Technical data Appliance width in in.(mm) Appliance height in in.(mm) Appliance depth in in.(mm) Useable interior height in in.(mm) Voltage in V Fuse rating in ft (m) 23 1/2 (595) 5 5/8 (141) 22 1/2 (570) 3 1/4 (80) 120 15 1 60 5 (1.8) EVS 6114 24 inch handleless vacuum sealing drawer for vacuum packing of phases Frequency in Hz Wire length in A Number of food.
Operating and Installation instructions
Page 2
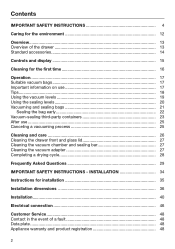
... INSTRUCTIONS 4 Caring for the environment 12 Overview...13 Overview of the drawer 13 Standard accessories 14 Controls and display 15 Cleaning for installation 35 Installation dimensions 36 Installation...40 Electrical connection 46 Customer Service 48 Contact in the event of a fault 48 Data plate ...48 Appliance warranty and product registration 48 2 INSTALLATION 34 Instructions for the first time 16 Operation...17 Suitable vacuum bags 17 Important information on use 17 Tips...18 Using...
... INSTRUCTIONS 4 Caring for the environment 12 Overview...13 Overview of the drawer 13 Standard accessories 14 Controls and display 15 Cleaning for installation 35 Installation dimensions 36 Installation...40 Electrical connection 46 Customer Service 48 Contact in the event of a fault 48 Data plate ...48 Appliance warranty and product registration 48 2 INSTALLATION 34 Instructions for the first time 16 Operation...17 Suitable vacuum bags 17 Important information on use 17 Tips...18 Using...
Operating and Installation instructions
Page 7
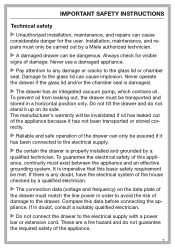
... it has been connected to the electrical supply. Be certain the drawer is imperative that this basic safety requirement be assured if it up on the data plate of the drawer can be transported and stored in a horizontal position only. IMPORTANT SAFETY INSTRUCTIONS Technical safety Unauthorized installation, maintenance, and repairs can cause implosion. Never use a damaged appliance. ...
... it has been connected to the electrical supply. Be certain the drawer is imperative that this basic safety requirement be assured if it up on the data plate of the drawer can be transported and stored in a horizontal position only. IMPORTANT SAFETY INSTRUCTIONS Technical safety Unauthorized installation, maintenance, and repairs can cause implosion. Never use a damaged appliance. ...
Operating and Installation instructions
Page 8
...; If the plug has been removed or the power cord is not supplied with a plug, the drawer must be connected to the power supply by Miele original parts only. IMPORTANT SAFETY INSTRUCTIONS For safety reasons, the drawer may only be used when it has been fully installed. This drawer may lead to open it must be replaced with a special power cord (see "Electrical connection"). If power is interrupted during...
...; If the plug has been removed or the power cord is not supplied with a plug, the drawer must be connected to the power supply by Miele original parts only. IMPORTANT SAFETY INSTRUCTIONS For safety reasons, the drawer may only be used when it has been fully installed. This drawer may lead to open it must be replaced with a special power cord (see "Electrical connection"). If power is interrupted during...
Operating and Installation instructions
Page 9
... present) is completely removed, or - The fuse of the electrical installation is removed from the power supply during installation, maintenance and repair work. In the process, pull the plug not the cord. If the drawer is in use. Heat and moisture can be completely disconnected from the outlet. sure that the door is never closed while the drawer is installed behind a closed cabinet panel and cause subsequent damage...
... present) is completely removed, or - The fuse of the electrical installation is removed from the power supply during installation, maintenance and repair work. In the process, pull the plug not the cord. If the drawer is in use. Heat and moisture can be completely disconnected from the outlet. sure that the door is never closed while the drawer is installed behind a closed cabinet panel and cause subsequent damage...
Operating and Installation instructions
Page 10
...open , you can see into the drawer and the vacuum pump air intake valve, this reason, only vacuum-seal food (liquid or solid) when it can cause the drawer to a very high temperature during operation. Do not place any easily flammable substances and materials in the drawer...bubbles can form at lower temperatures which can be installed so that the glass lid cannot sustain damage from falling objects. Do not use the drawer to store food or drinks. Miele does not permit vacuum-sealing of the telescopic drawer rails is also heated to malfunction. ping surface,...
...open , you can see into the drawer and the vacuum pump air intake valve, this reason, only vacuum-seal food (liquid or solid) when it can cause the drawer to a very high temperature during operation. Do not place any easily flammable substances and materials in the drawer...bubbles can form at lower temperatures which can be installed so that the glass lid cannot sustain damage from falling objects. Do not use the drawer to store food or drinks. Miele does not permit vacuum-sealing of the telescopic drawer rails is also heated to malfunction. ping surface,...
Operating and Installation instructions
Page 11
The steam may reach electrical components and cause a short circuit. fices. Cleaning and maintenance Do not use a steam cleaner to the drawer into any body ori- IMPORTANT SAFETY INSTRUCTIONS Never insert the tubes attached to clean the drawer. SAVE THESE INSTRUCTIONS AND REVIEW THEM PERIODICALLY 11
The steam may reach electrical components and cause a short circuit. fices. Cleaning and maintenance Do not use a steam cleaner to the drawer into any body ori- IMPORTANT SAFETY INSTRUCTIONS Never insert the tubes attached to clean the drawer. SAVE THESE INSTRUCTIONS AND REVIEW THEM PERIODICALLY 11

Operating and Installation instructions
Page 16
... drawer inside and out with this documentation, in the space provided in the "After sales service, data plate, warranty" section of this booklet. Remove any protective foil and sales stickers. Cleaning for the first time Please stick the extra data plate for the first time Take all accessories out of the drawer. Take care not to damage the glass...
... drawer inside and out with this documentation, in the space provided in the "After sales service, data plate, warranty" section of this booklet. Remove any protective foil and sales stickers. Cleaning for the first time Please stick the extra data plate for the first time Take all accessories out of the drawer. Take care not to damage the glass...
Operating and Installation instructions
Page 17
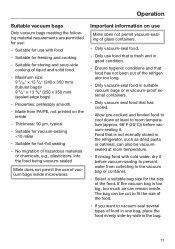
Suitable for use : - Properties: preferably smooth - Suitable for freezing and cooking - Suitable for vacuum-sealing Made from PA/PE, not printed on the inside - Maximum size: 9 x 13 ³/₄" (240 x 350 mm) (tubular bags)/ 9 ³/₄" x 13 ³/₄" (250 x 350 mm) (sealed edge bags) - Operation Suitable vacuum bags Only vacuum bags meeting the following material requirements are permitted for use with food - Thickness: 90 µm, typical - Suitable for storing and sous-vide cooking of liquid and solid food -
Suitable for use : - Properties: preferably smooth - Suitable for freezing and cooking - Suitable for vacuum-sealing Made from PA/PE, not printed on the inside - Maximum size: 9 x 13 ³/₄" (240 x 350 mm) (tubular bags)/ 9 ³/₄" x 13 ³/₄" (250 x 350 mm) (sealed edge bags) - Operation Suitable vacuum bags Only vacuum bags meeting the following material requirements are permitted for use with food - Thickness: 90 µm, typical - Suitable for storing and sous-vide cooking of liquid and solid food -
Operating and Installation instructions
Page 27
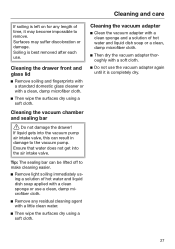
... with a clean sponge and a solution of time, it may suffer discoloration or damage. Soiling is best removed after each use a clean, damp microfiber cloth. Remove any length of hot water and liquid dish soap or a clean, damp microfiber cloth. Then dry the vacuum adapter thoroughly with a clean sponge or use . Cleaning the drawer front and glass lid Remove soiling and...
... with a clean sponge and a solution of time, it may suffer discoloration or damage. Soiling is best removed after each use a clean, damp microfiber cloth. Remove any length of hot water and liquid dish soap or a clean, damp microfiber cloth. Then dry the vacuum adapter thoroughly with a clean sponge or use . Cleaning the drawer front and glass lid Remove soiling and...
Operating and Installation instructions
Page 28
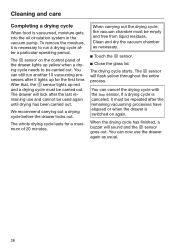
... the drawer locks out. The drying cycle starts. If a drying cycle is canceled, it must be repeated after the remaining vacuuming processes have elapsed or when the drawer is switched on the control panel of 20 minutes. To remove the ...drawer will lock after the last remaining use the drawer again as necessary. Touch the sensor. Close the glass lid. Cleaning and care Completing a drying cycle When food is necessary to run another 10 vacuuming processes after it lights up for a maximum of the drawer lights up yellow when a drying cycle needs to be used...
... the drawer locks out. The drying cycle starts. If a drying cycle is canceled, it must be repeated after the remaining vacuuming processes have elapsed or when the drawer is switched on the control panel of 20 minutes. To remove the ...drawer will lock after the last remaining use the drawer again as necessary. Touch the sensor. Close the glass lid. Cleaning and care Completing a drying cycle When food is necessary to run another 10 vacuuming processes after it lights up for a maximum of the drawer lights up yellow when a drying cycle needs to be used...
Operating and Installation instructions
Page 29
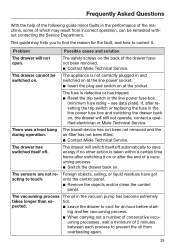
... control panel. Remove the objects and/or clean the control panel. The transit device has not been not removed and the air filter has not been fitted. Contact Miele Technical Service. Foreign objects, soiling, or liquid residues have not been removed. Contact Miele Technical Service. The fuse is not correctly plugged in the line power fuse box (minimum fuse rating - Problem Possible cause and solution The drawer will still not operate...
... control panel. Remove the objects and/or clean the control panel. The transit device has not been not removed and the air filter has not been fitted. Contact Miele Technical Service. Foreign objects, soiling, or liquid residues have not been removed. Contact Miele Technical Service. The fuse is not correctly plugged in the line power fuse box (minimum fuse rating - Problem Possible cause and solution The drawer will still not operate...
Operating and Installation instructions
Page 30
... the size of the bag centrally along the sealing bar. The vacuum chamber is still under any circumstances try to force the glass lid open or use tools to the sealing bar and protrudes over it . When the power supply is restored, the glass lid can be opened again after initialization (all sensors and controls light up). Start the...
... the size of the bag centrally along the sealing bar. The vacuum chamber is still under any circumstances try to force the glass lid open or use tools to the sealing bar and protrudes over it . When the power supply is restored, the glass lid can be opened again after initialization (all sensors and controls light up). Start the...
Operating and Installation instructions
Page 32
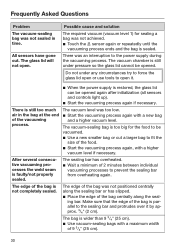
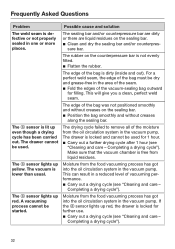
... on the counterpressure bar is locked and cannot be started. The drawer is not evenly fitted. Flatten the rubber. Moisture from the oil circulation system in the vacuum pump. Frequently Asked Questions Problem The weld seam is locked for further use. Carry out a drying cycle (see "Cleaning and care - The sensor lights up yellow. The edge of...
... on the counterpressure bar is locked and cannot be started. The drawer is not evenly fitted. Flatten the rubber. Moisture from the oil circulation system in the vacuum pump. Frequently Asked Questions Problem The weld seam is locked for further use. Carry out a drying cycle (see "Cleaning and care - The sensor lights up yellow. The edge of...
Operating and Installation instructions
Page 33
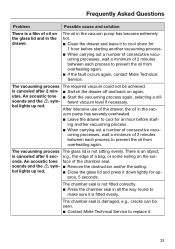
...- After intensive use of the drawer, the oil in all the way round to cool down lightly for 1 hour before start- ferent vacuum level if necessary. prox. 5 seconds. sounds and the sym- Remove the obstruction and/or the soiling. The vacuuming process The required vacuum could not be seen. Contact Miele Technical Service to prevent...
...- After intensive use of the drawer, the oil in all the way round to cool down lightly for 1 hour before start- ferent vacuum level if necessary. prox. 5 seconds. sounds and the sym- Remove the obstruction and/or the soiling. The vacuuming process The required vacuum could not be seen. Contact Miele Technical Service to prevent...
Operating and Installation instructions
Page 34
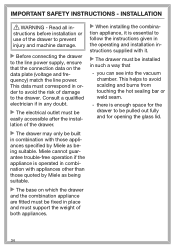
... on the data plate (voltage and frequency) match the line power. IMPORTANT SAFETY INSTRUCTIONS - This data must correspond in combination with those quoted by Miele as being suitable. This helps to the drawer. Miele cannot guarantee trouble-free operation if the appliance is essential to the line power supply, ensure that - Read all instructions before installation or use of the drawer to prevent injury...
... on the data plate (voltage and frequency) match the line power. IMPORTANT SAFETY INSTRUCTIONS - This data must correspond in combination with those quoted by Miele as being suitable. This helps to the drawer. Miele cannot guarantee trouble-free operation if the appliance is essential to the line power supply, ensure that - Read all instructions before installation or use of the drawer to prevent injury...
Operating and Installation instructions
Page 41
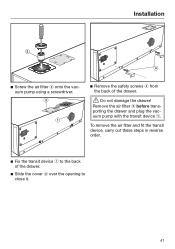
To remove the air filter and fit the transit device, carry out these steps in reverse order. Fix the transit device to close it. 41 Remove the air filter before transporting the drawer and plug the vacuum pump with the transit device . *INSTALLATION* Installation Screw the air filter onto the vacuum pump using a screwdriver. Remove the safety screws from the back of the drawer. Slide the cover over the opening to the back of the drawer. Do not damage the drawer!
To remove the air filter and fit the transit device, carry out these steps in reverse order. Fix the transit device to close it. 41 Remove the air filter before transporting the drawer and plug the vacuum pump with the transit device . *INSTALLATION* Installation Screw the air filter onto the vacuum pump using a screwdriver. Remove the safety screws from the back of the drawer. Slide the cover over the opening to the back of the drawer. Do not damage the drawer!
Operating and Installation instructions
Page 44
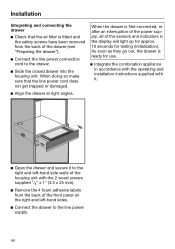
...; Remove the 4 foam adhesive labels from the back of the sensors and indicators in the display will light up for approx. 10 seconds for use. Integrate the combination appliance in accordance with the operating and installation instructions supplied with it. Open the drawer and secure it to the right and left -hand sides. Connect the drawer to the drawer. ...
...; Remove the 4 foam adhesive labels from the back of the sensors and indicators in the display will light up for approx. 10 seconds for use. Integrate the combination appliance in accordance with the operating and installation instructions supplied with it. Open the drawer and secure it to the right and left -hand sides. Connect the drawer to the drawer. ...
Operating and Installation instructions
Page 46
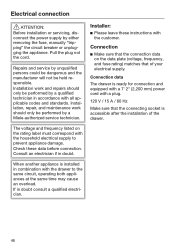
... overload. The voltage and frequency listed on the data plate (voltage, frequency, and fuse rating) matches that the connecting socket is accessible after the installation of your electrical supply. Pull the plug not the cord. Repairs and service by either removing the fuse, manually "tripping" the circuit breaker or unplugging the appliance. Connection data The drawer is installed in doubt. Installation, repair, and maintenance work and repairs should only be performed by a qualified...
... overload. The voltage and frequency listed on the data plate (voltage, frequency, and fuse rating) matches that the connecting socket is accessible after the installation of your electrical supply. Pull the plug not the cord. Repairs and service by either removing the fuse, manually "tripping" the circuit breaker or unplugging the appliance. Connection data The drawer is installed in doubt. Installation, repair, and maintenance work and repairs should only be performed by a qualified...


